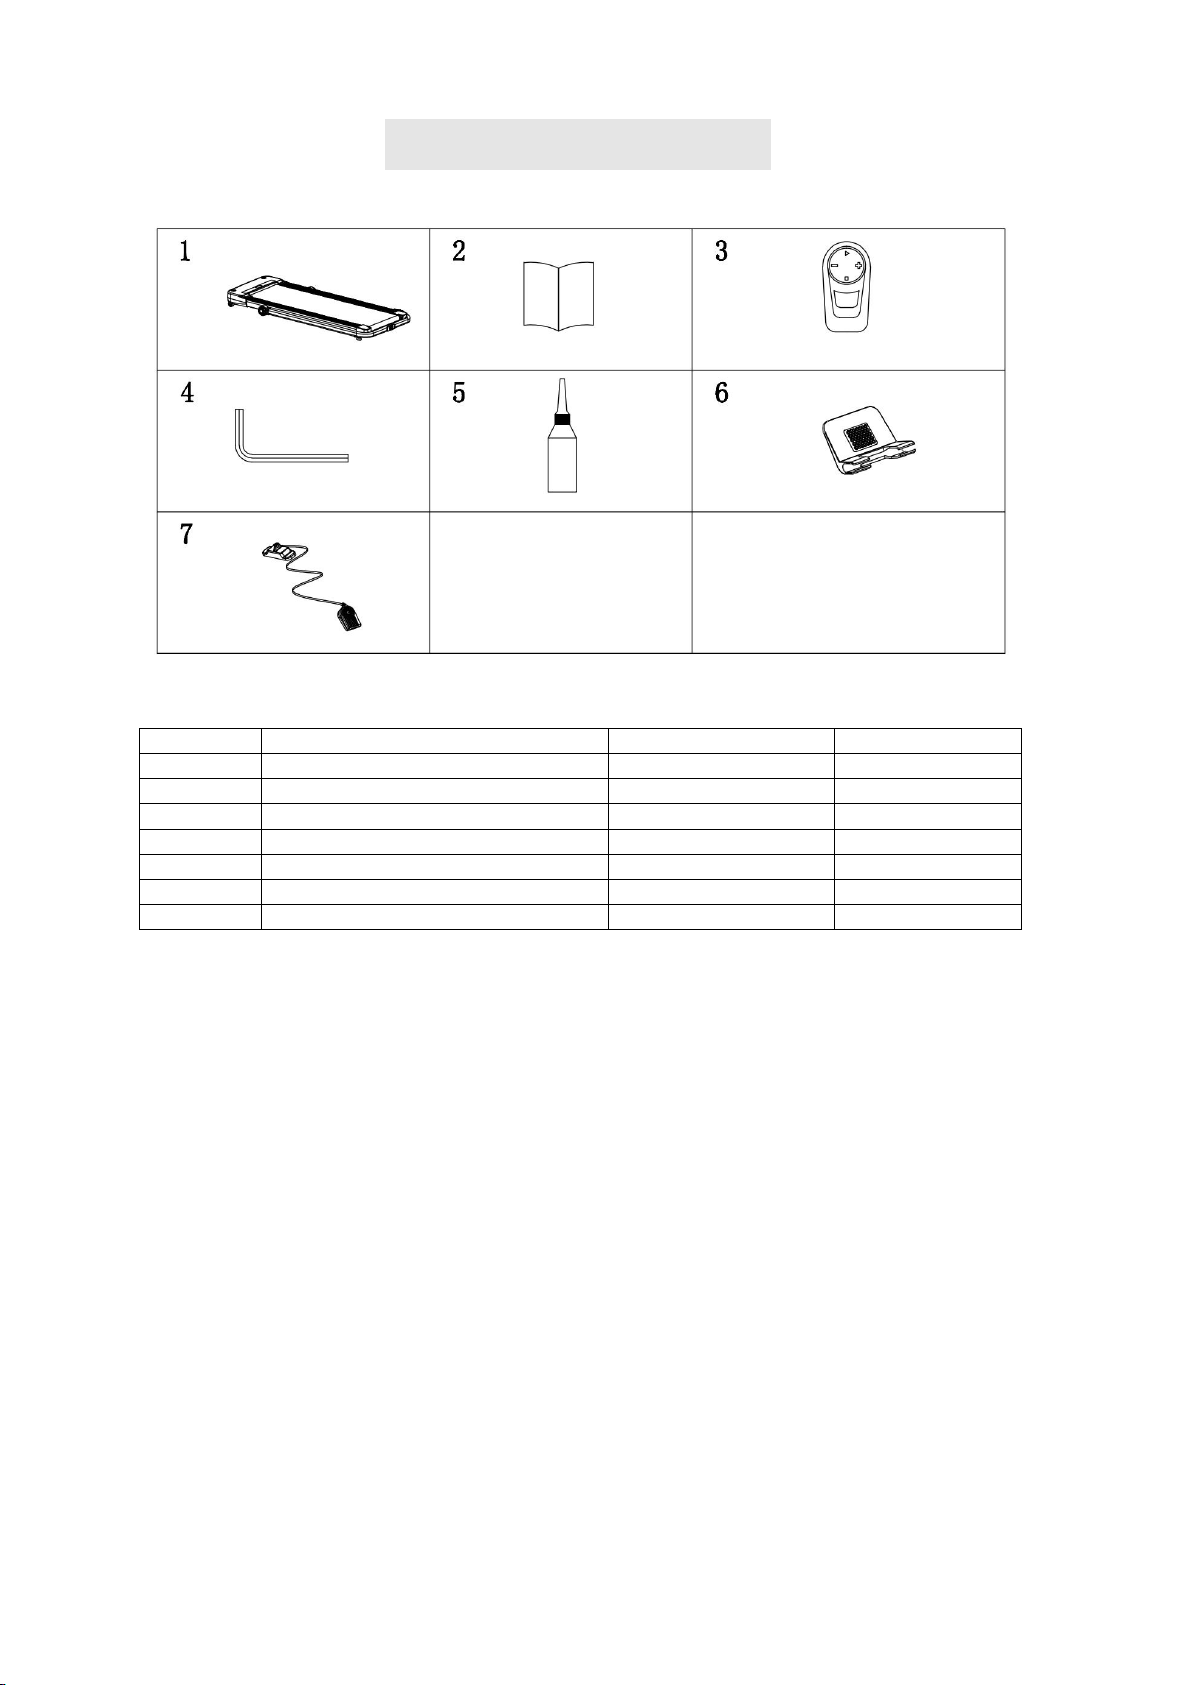
HouseFit SMART 420 User manual

Stay Healthy﹐Stay Fit

1
IMPORTANT SAFETY PRECAUTIONS
1. Plug the power cord into a surge protector (not Included) then plug the surge protector into a grounded
circuit. No other appliances should be on the same circuit.
2. Position the treadmill on a clear level surface. Do not place the treadmill on thick carpet as it may
interfere with proper ventilation. Always place treadmill indoors and never place treadmill near water.
3. Position treadmill so that the wall plug is visible and accessible.
4. Start the treadmill while you are standing on the side rails. Adjust speed in small increments to avoid
sudden jumps in speed. Always hold the hand rails while using the treadmill.
5. Wear appropriate clothing when exercising on the treadmill. Do not wear long loose fitting clothing that
could become caught in the treadmill. Always wear running or aerobic shoes with rubber soles. Never use
the treadmill with bare feet, wearing only stockings or sandals.
6. Always unplug the power cord before removing the treadmill motor cover.
7. Keep children and pets away from the treadmill during operation.
8. Always hold onto the handrails before getting off the treadmill. Then step on the side rails.
9. Always attach the safety key cord to your clothing when using the treadmill. If the treadmill should
suddenly increase in speed due to an electronics failure or the speed being inadvertently increased, the
treadmill will come to a sudden stop when the safety key is pulled from the console. Always use safety key
while using the treadmill.
10. Always unplug and remove the safety key with the treadmill is not in use.
11. Before starting any exercise program, consult with your physician or health professional. He or she can
help to establish the exercise frequency, intensity (target heart zone) and time appropriate to your particular
age and physical condition. If you have any pain or tightness in your chest, an irregular heartbeat,
shortness of breath, feel faint or have any discomfort while you exercise, STOP IMMEDIATELY! Consult
your physician before continuing.
12. The power cord and plug must always be in perfect condition. Otherwise, do not attempt to repair on
your own. Servicing other than the procedures in this manual, should always be performed by an
authorized service representative only.
13. This treadmill is designed only for home-using.
14. Spacing behind the treadmill and any other object should be no less than 2000MMX1000MM (6.5 ft x 3
ft)
15. This treadmill can also be served as a "walking machine." To adjust the height of the handlebar, must
turn off the power beforehand.

2
PARTS INCLUDED
△
!CAUTION:
1. Before finishing assembly, please do not connect the power cord to the power port or to the household
power supply.
2. Do not attempt to assemble the treadmill until the assembly instructions are read. Failure to follow can
result in damage to the treadmill.
3. Due to the heaviness of the treadmill, make sure to take the appropriate precautions when handling it.
4. Keep children and pets away from the treadmill at all times.
Parts#
Description
Remarks
Qty.
1
The machine assembly
1 SET
2
User manual
1 PC
3
Wireless remote control
1 PC
4
Socket head wrench
S5
1 PC
5
Silicone oil
30 ml
1 PC
6
IP holder
1 PC
7
Safety key
Color red
1 PC

3
ASSEMBLY INSTRUCTION
1. Open the packing box and take out all the above parts from the box.
P.S. Do not dispose of the packaging until assembly is completed.
2. Set the treadmill in a clear&horizontal area and remove all packaging materials beforehand.
3. The two wheels and two foot pads of the treadmill must be close to the ground. If there is any part not
close to the ground, it will make noise&influence the running experience.
※The instruction for adjusting foot pads:
(1) Please follow the diagram below. To adjust the uneven foot pad, rotate the rear adjustable pad of the
treadmill until it is close to the ground. (Counterclockwise rotation will elongate the pad; clockwise rotation
will shorten the pad)
(2) After adjusting the foot pad, please tighten the nut above the foot pad as the diagram shows.

4
※The instruction for adjusting the height of the handlebar:
Uplift the handlebar as the diagram shows, look at the internal opening part of the side cover, align the fixed
position, tighten the handrail with the knob in the clockwise direction, lock another part in the same
procedure. Make sure that the handrail does not sway before using the treadmill.

5
Clamp the IP holder (1) into the upward side of the handrail (2) in correct direction as the diagram shows.
Make sure that the IP holder does not touch the safety key part.
TREADMILL BUILT UP SIZE
52×27.6×43.3INCH
TREADMILL SPEED RANGE
0.5—7.5MPH
WALKPAD BUILT UP SIZE
57.1x27.6X5.9INCH
WALKPAD SPEED RANGE
0.5—4MPH
RUNNING AREA (INCH)
42.5×16.5INCH
MOTOR POWER
DC 2.25HP
POWER VOLTAGE SUPPLY
110V
RATED FREQUENCY
50-60HZ
NET WEIGHT
59.5LBS
USER WEIGHT
240LBS
LED DISPLAY
SPEED, DISTANCE, TIME, STEP
DIMENSIONS AND PARAMETERS

6
GROUNDING METHODS
This product must be grounded. If it should malfunction or breakdown, grounding provides a path of least
resistance for electric current to reduce the risk of electric shock. This product is equipped with a cord
having an equipment-grounding conductor and a grounding plug. The plug must be plugged into an
appropriate outlet that is properly installed and grounded in accordance with all local codes and ordinances.
DANGER – Improper connection of the equipment-grounding conductor can result in a risk of electric
shock. Check with a qualified electrician or serviceman if you are in doubt as to whether the product is
properly grounded. Do not modify the plug provided with the product – if it will not fit the outlet, have a
proper outlet installed by a qualified electrician.
This product is for use on a nominal 110-volt circuit and has a grounding plug that looks like the plug
illustrated in sketch A in following figure. Make that the product is connected to an outlet having the same
configuration as the plug. No adapter should be used with this product.

7
WARM UP STAGE
Before exercise, it is better Warm muscles stretch more easily, so the first
of 5 ~ 10 minutes to warm up. Then in accordance with the following
methods to stop and do stretching exercises - do five times, each leg
every time 10 seconds or more time to do it again after the end of the
exercise.
1. Down the stretch: knees slightly curved, the body bent forward slowly,
so that the back and shoulders relaxed, hands try to touch your toes.
Maintain 10 to 15 seconds, and then relax. Repeat three times to do
(see Figure l).
2. Hamstring stretch: sitting on the clean seat, put one leg straight.
Inward close to the other leg to make it close to the inside leg straight.
Hands try to touch the toes. Maintain 10 to 15 seconds, and then relax.
Repeat for each leg do three times (see Figure 2).
3. Legs and feet tendon stretch: two on the Rotary wall or tree stand, one
foot in the post. Keep legs straight and heel to tilt the direction of the
wall or tree. Maintain 10 to 15 seconds, and then relax. Repeat for
each leg do three times (see Figure 3).
4. Quadricones stretch: the left hand wall or table Cu master balance,
and then stretched his right hand back to seize the right foot to the
buttocks with slowly pull until you feel the front thigh muscles tense.
Maintain 10 to 15 seconds, then relax. Repeat for each leg to do three
times (see Figure 4).
5. Sartorius muscle (inner thigh muscles) stretch: Foot In contrast, the
knee outward to sit down. The hands grasp the feet to the groin pull.
Maintain 10 to 15 seconds, and then relax. Repeat three times (see
Figure 4)

8
EXERCISE INSTRUCTIONS
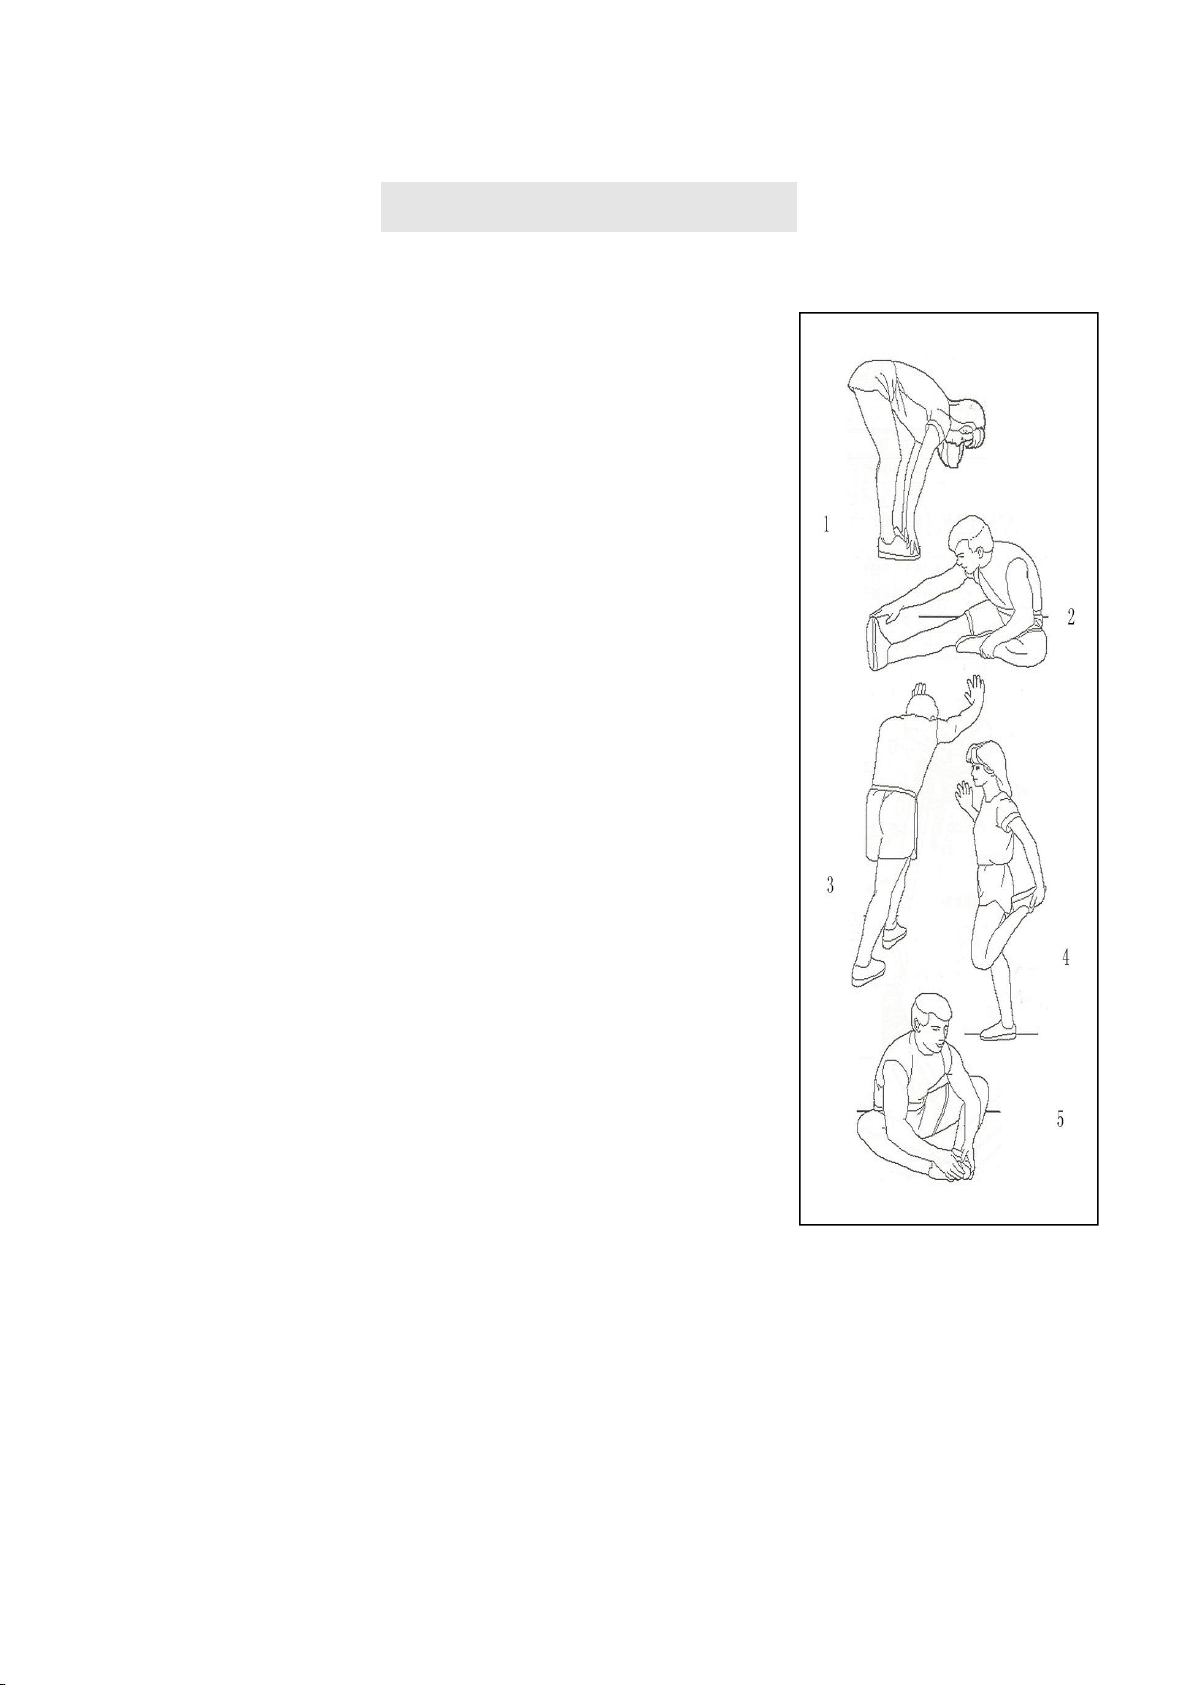
Warm up stage:
If you are over 35 years old, or not very healthy, also it’s your first time exercise, please consult with your
doctor or professional person.
Before you use the motorized treadmill, please learn how to control the machine, know well how to start,
stop, adjust the speed and so on; don’t stand on the machine at this time. After that, you can use the
machine. Stand on anti-slip pad both sides and handle the handle bar with your both hands. Keep the
machine at the low speed about 1.0~2.0MPH, then test the running machine by one foot, after get used to
the speed, then you can run on the machine and you can add the speed between 2MPH and 4MPH. Keep
the speed about 10 minutes, then stop the machine.
Exercise stage:
Learn how to adjust the speed and incline before using. Walk about 0.62M at stable velocity and write down
the time, it will take you about 15-25 minutes. If walk at 4MPH, it will take you about 12 minutes in 0.62M. If
you feel comfortable at the stable velocity, you can add the speed and incline, after 30 Minutes, you can
have good exercise. At this stage, you cannot add the speed or incline too much at one time, it can keep
you feel comfortable.
Exercise intensity:
Warm up at the speed 4MPH in 2 minutes, then add the speed to 4.0MPH and keep walking in 2 Minutes,
then add to 5MPH and walk in 2 minutes. After that, add up 0.1MPHin each 2 minutes, until rapid breath but
not feel comfortable
Calorie burning---the best effective way
Warm-up for 5mints by the velocity:3.5-4MPH, then slowly increase the speed by 0.1MPH/2minutes, until
up to the stable speed which you feel is comfortable for 45 minutes. For improving the intensity of
movement, you can maintain the speed during 1H of TV program, then increase the speed by 0.1MPH
each advertisement interval time, after that return to the original speed . You can acquaint the best
efficiency of workout for calorie burning during the advertisement time and subsequent heart frequency
increasing time. Finally, you should slow down the speed step by step for 4 minutes.
Exercise frequency:
The cycle time: 3-5times/Week, 15-60minutes/Times. Make up the schedule of workout scientific, not only
for your hobby.
You can control the running intensity through adjusting the velocity and incline of treadmill. We suggest that
you don’t set the incline at first; improve the incline is the effective way to strengthen the exercise’s
intensity.
Consult with your physician or health professional before starting your workout. The professional
people can help you make up the suitable exercise time-chart according to your age and health
condition; determine the velocity of movement, the intensity of exercise. Please stop at once, if you
feel chest tightness, chest pain, irregular heartbeat, breath difficulty, dizziness or other discomfort
during exercise. You should consult with your physician or health professional as keep going. You
can choose the normal walking speed or the jogging speed, if you always take workout with
treadmill. If you don’t have enough experiences or confirm the testing velocity, you can follow the
instruction:

9
Speed 0.5-2.0MPH warm up
Speed 2.5-3.0MPH less movement and workout
Speed 3.5-4.0MPH normal walking
Speed 4.5-5.0MPH fast walking
Speed 5.5-6.0MPH Jogging
Speed 6.0-7.5MPH intermediate speed walking
Attention: For walker, it is better to keep the speed at ≤4MPH. For runner, it is better to keep the speed at
≥5MPH
MAINTANCE INSTRUCTION
WARNING: Always unplug the treadmill before cleaning or maintance.
General cleaning will greatly prolong the treadmill.
Keep treadmill clean by dusting regularly. Be sure to clean the exposed part of the deck on either side of
the walking belt and also the side rails. Keep the running shoes clean to avoid foreign material underneath
the walking belt.
WARNING: Always unplug the treadmill before removing motor cover.
Make sure to removing the motor cover and clean the motor one time per year.
Running belt and deck lubrication oil
This treadmill is equipped with a pre-lubricated, low maintenance deck system. The belt/ deck friction may
play a major role in the function and life of your treadmill, thus requiring periodic lubrication. We
recommend a periodic inspection of the deck. You need contact with our service center if you find the
damage of the deck.
We recommend lubrication of the deck according to the following timetable:
Light user (less than 3 hours/ week) - Annually
Medium user (3-5 hours/ week) - Every six months
Heavy user (more than 5 hours/ week) - every three months
We recommend that you buy the lubrication from our distributor or directly from us.
WARNING: Any repair needs the professional technician.

10
BELT ADJUSTMENT
We suggest that you should cut off the power for 10 minutes after keep running 1.5hours to maintain the
treadmill.
The belt would slip if too loose during using;if the belt is too tight, it would affect the performance of motor
and increase the abrasion of roller and belt. The belt can be lift away from the deck for around 50 — 75mm
if the degree of tightness is just well.
Center the running belt
1. Place treadmill on a level surface. Run Treadmill at
approximately 3.5-4.5MPH, checking the running
condition. If the belt has drifted to the right, pull out
of the save clock and switch, and turn the right
adjusting bolt 1/4 clockwise, then start running to
see if centered or not. Keep adjusting until
centering the belt. PICTURE – A
2. If the belt has drifted to the left ,pull out of the safety
clock and switch, turn the left adjusting bolt 1/4 turn
clockwise, then start running to see if centered or
not. Keep adjusting until centering the belt.
PICTURE – B
3. Adjust the belt after a period of using time. Pull out
of the safety clock and switch , turn the left and
right adjusting bolt 1/4 clockwise, then re-start
running to check the belt-tightness until the belt is
in right tightness. PICTURE - C

11
OPERATION GUIDE
CONSOLE DISPLAYS, FEATURES AND FUNCTIONS.
The LED window shows: SPEED, DISTANCE, TIME and STEP.
1. Speed Range of folded handrail: 0.5~4MPH. Speed Range of stand handrail: 0.5~7.5MPH.
2. Time Range: 0:00~99:59.
3. Distance range: 0.00~99.9.
4. Step range:0000-9999
5. CAL.:0000-9999
REMOTE CONTROL OPERATION.
The button function of the remote control is as shown below.
1. START
Press the button to start the treadmill. In standby mode, the treadmill will start moving at the minimum
speed. TIME, SPEED, DISTANCE and STEP will begin to count up.
2. STOP
Press the button to stop the treadmill. In running mode, the treadmill will stop gradually.
3. SPEED (+) or (-)
a. Press the speed button until the desired speed show on the display.
b. Increase or Decrease speed as desired while running by pressing the Speed (+) or (-). Speed will
increase or decrease 0.1MPH increments.

12
MODE OPERATION
After the console fully displays, it enters the standby mode. Then press "START" button to enter the
operation of manual mode.
The treadmill will start from the speed of 0.5MPH
The windows of TIME and DISTANCE will count up from 0.
Pressing the Speed (+) or (-) to adjust speed value.
The system will not stop automatically if the exercise time exceeds 100 minutes.
SLEEP MODE
When the treadmill stops running, if there is no operation for more than 10 minutes, it will enter the sleep
mode. The indicator light of each LED window will turn off and no more display.
Press the power button to wake up the console display. It will re-enter the initial standby mode after full
display.
Attention △
!When several remote controls work with several treadmills and the first time use, the
remote controls and treadmills must be matched codes with each other before use. After matching codes
successfully, no need to repeat this step again.
Code operation process: Before the treadmill is powered on, press the START button of the remote
control . And then turn on the power of the treadmill. When the buzzer beeps by several times, it represents
the success of code checking. Finally release the START button.
TROUBLESHOOTING GUIDE
PROBLEM
CAUSE
CHECKING
CORRECTION
E01
Abnormal communication
between the lower controller
and the console after
powering on.
1. The console cables
are not connected
well.
Connect the console cables
properly.
2. No signal output from
the console.
Change the console.
3. No signal output from
the lower controller.
Change the lower controller.
E02
Lower controller can’t detect
the voltage of motor.
1. The motor cables are
not connected well.
Connect the motor cables properly.
2. No voltage output or
abnormal voltage
output from the lower
control to the motor.
Change the lower controller.
3. Motor is out of order.
Change the motor.

13
E03
Lower control can’t detect
speed signal.
PWM drive circuit failure
of lower control
Change the lower controller.
E04
Overvoltage protection.
1. The load of the
treadmill exceeds the
rated working voltage
of the motor.
The load on the treadmill must be
within the rated operational
voltage.
2. The treadmill motor
works abnormally.
Change the motor.
3. Detecting failure from
the lower controller
to the motor
overvoltage.
Change the lower controller.
E05
Overcurrent protection
1. The load of the
treadmill exceeds the
rated working current
of the motor.
The load on the treadmill must be
within the rated operational current.
2. Wrong assembly of
the motor causes the
resistance or blocking
of the motor.
Check if the assembly of motor is
correct.
3. Failure of lower
control limiting
current system.
Change the lower controller.
E06
Driving power supply
voltage is too low.
Voltage output is too low.
Check the power supply line is
normal.
The lower controller can
not detects the signal of
the circuit.
Change the lower controller.
Table of contents
Other HouseFit Treadmill manuals