2
2
ENEN
Section 1Section 1
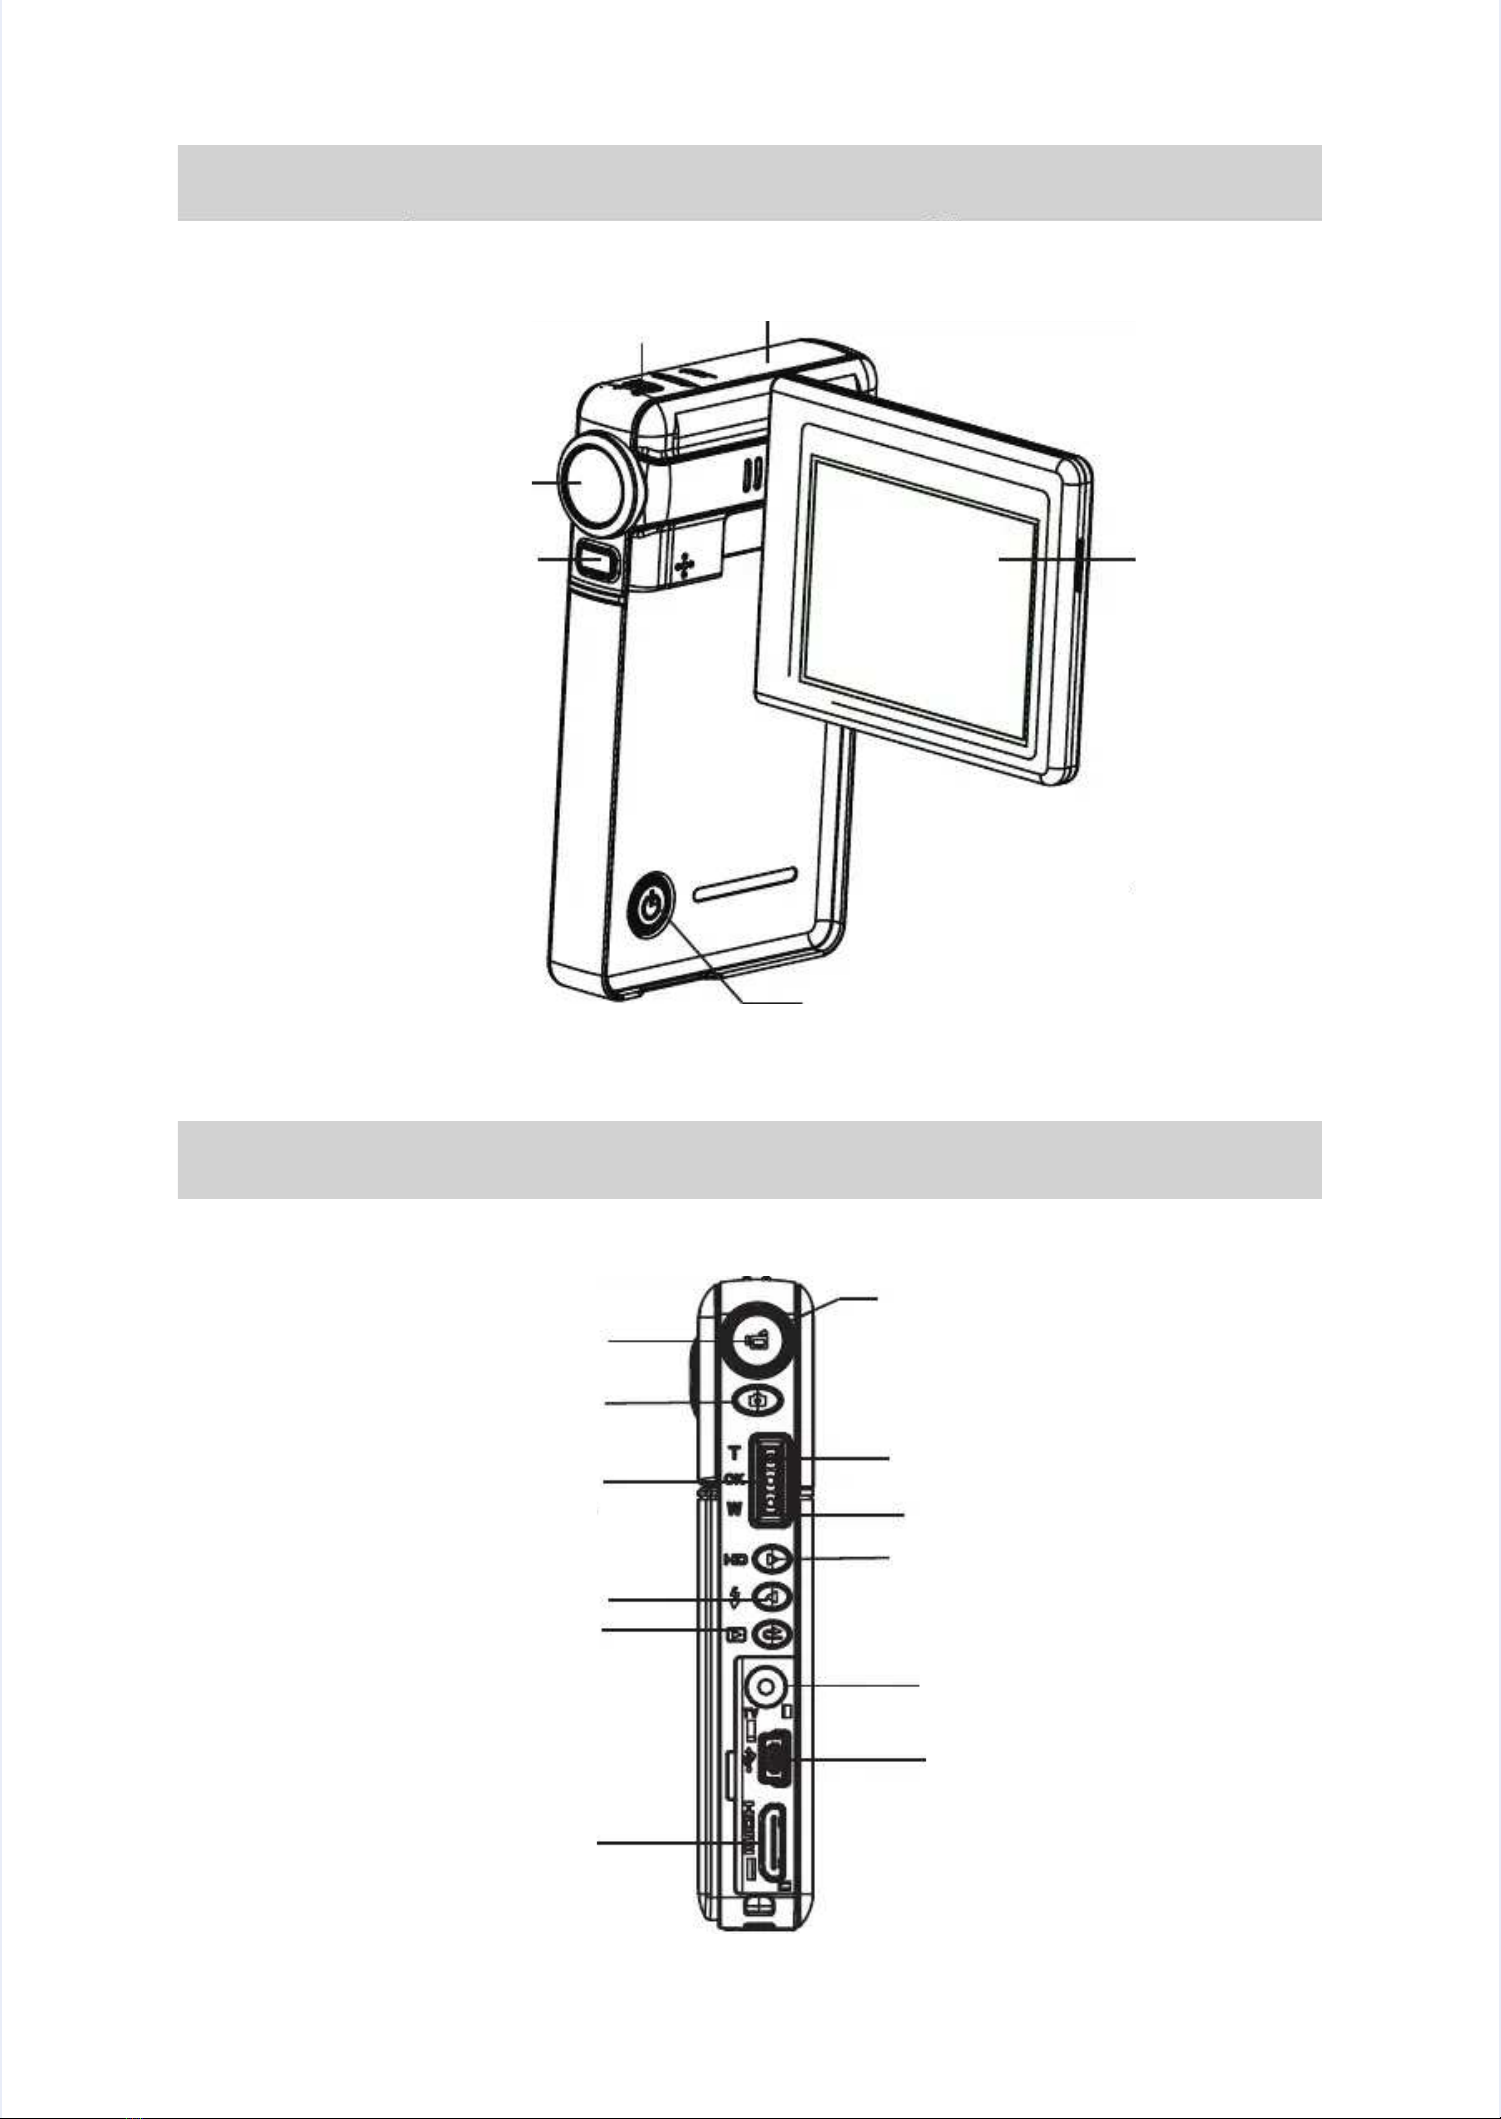
Getting to Know Your Digital CamcorderGetting to Know Your Digital Camcorder
OverviewOverview
About this Manual:About this Manual: This manual is designed to assist you in using your new digital camcorder. AllThis manual is designed to assist you in using your new digital camcorder. All
information presented is as accurate as possible but is subject to change without notice.information presented is as accurate as possible but is subject to change without notice.
For the latest For the latest revision, please visit HYPERLINK http://www.hp.comrevision, please visit HYPERLINK http://www.hp.com/support ./support .
This digital camcorder contains a 5 Mega Pixel sensor that produces H.264 video les. By way of usingThis digital camcorder contains a 5 Mega Pixel sensor that produces H.264 video les. By way of using
H.264 technology, more videos can be taken within certain amount of memory. High quality images withH.264 technology, more videos can be taken within certain amount of memory. High quality images with
up to 12 mega-pixels can also be delivered smoothly. With a color LCD monitor, users can composeup to 12 mega-pixels can also be delivered smoothly. With a color LCD monitor, users can compose
images and examine them easily.images and examine them easily.
This digital camcorder also features video recording at HD resolution of 1440x1080. You can alsoThis digital camcorder also features video recording at HD resolution of 1440x1080. You can also
connect it to an HDTV via HDMI cable, and easily playback recorded high-denition videos on theconnect it to an HDTV via HDMI cable, and easily playback recorded high-denition videos on the
screen HDTV.screen HDTV.
Moreover, the digital camcorder has an advanced uploading feature. With the exclusive built-in YouTubeMoreover, the digital camcorder has an advanced uploading feature. With the exclusive built-in YouTube
Direct application, you can upload the videos captured by the digital camcorder to YouTube moreDirect application, you can upload the videos captured by the digital camcorder to YouTube more
effortlessly.effortlessly.
ISO speed and color balance can either be adjusted automatically or allowed to be changed manually.ISO speed and color balance can either be adjusted automatically or allowed to be changed manually.
A 4x dA 4x digitaligital zoom increases you control over the movies and pictures you take.zoom increases you control over the movies and pictures you take.
The built-in memory allows you to take pictures and video without memory card. However, it is stronglyThe built-in memory allows you to take pictures and video without memory card. However, it is strongly
recommended to use a SD or SDHC memory card to fully enjoy the capabilities of this video camcorder.recommended to use a SD or SDHC memory card to fully enjoy the capabilities of this video camcorder.
The SD/SDHC memory card slot located on the top of the digital camcorder easily allows you to expandThe SD/SDHC memory card slot located on the top of the digital camcorder easily allows you to expand
the storage capacity.the storage capacity.
Note Note
Some of the built-in memory is used for Firmware code.Some of the built-in memory is used for Firmware code.
Standard AccessoriesStandard Accessories
Unpack the package and make sure all standard accessories listed are included:Unpack the package and make sure all standard accessories listed are included:
HP V5040u Digital CamcorderHP V5040u Digital Camcorder••
AC AdAC Adapterapter••
Lithiun-ion Rechargeable Battery (NP60)Lithiun-ion Rechargeable Battery (NP60)••
USB CableUSB Cable••
AAV CableV Cable••
HDMI CableHDMI Cable••
CD-ROM ( Software and User’s Manual)CD-ROM ( Software and User’s Manual)••
Quick Start GuideQuick Start Guide••
Warranty CardWarranty Card••
Declaration of Conformity cardDeclaration of Conformity card••
StrapStrap••
PouchPouch••
Cleaning clothCleaning cloth••