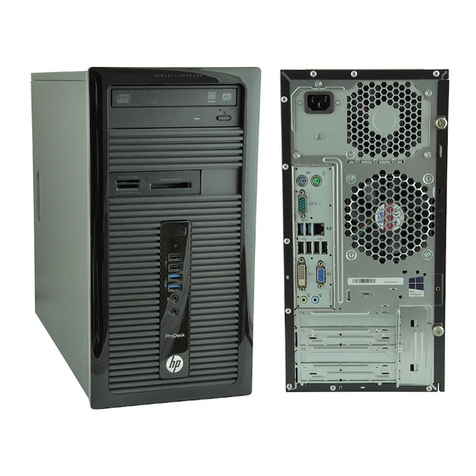
HP ZX2000 Instruction Manual

installing Linux®
January 2004
start here
hp enablement kit
on hp Itanium®
2-based servers
for Linux®
and workstations

2
Notices
The information in this document is subject to change without notice.
Hewlett-Packard makes no warranty of any kind with regard to this manual, including, but not limited to, the
implied warranties of merchantability and fitness for a particular purpose. Hewlett-Packard shall not be held
liable for errors contained herein or direct, indirect, special, incidental or consequential damages in connection
with the furnishing, performance, or use of this material.
Warranty. A copy of the specific warranty terms applicable to your Hewlett-Packard product and replacement
parts can be obtained from your local Sales and Service Office.
Restricted Rights Legend. Use, duplication, or disclosure by the U.S. Government Department is subject to
restrictions as set forth in subparagraph (c) (1) (ii) of the Rights in Technical Data and Computer Software clause
at DFARS 252.227-7013 for DOD agencies, and subparagraphs (c) (1) and (c) (2) of the Commercial Computer
Software Restricted Rights clause at FAR 52.227-19 for other agencies.
HEWLETT-PACKARD COMPANY
3000 Hanover Street
Palo Alto, California 94304 U.S.A.
Copyright Notice. 2002, 2003, 2004 Hewlett-Packard Development Company, L.P., all rights reserved.
Reproduction, adaptation, or translation of this document without prior written permission is prohibited, except
as allowed under the copyright laws.
Trademark Notices.
Debianis a registered trademark of Software in the Public Interest, Inc.
Linuxis a registered trademark of Linus Torvalds.
Itaniumis a registered trademark of Intel.
SystemImageris a trademark of Brian Finley.

3
Contents
Overview............................................................................ 4
Configuring Your Console.................................................. 6
Getting Started With The HP Enablement Kit for Linux.... 12
Information to Know Before You Select a Menu Option 16
Enablement Kit Menu Options ..........................................
Executing a Menu Option.............................................................
18
23
HP Enablement Kit for Linux CD Contents....................... 25
Frequently Asked Questions/Troubleshooting................... 26
Appendix A - Using Smart Array with Linux on
Itanium® 2-based Servers.................................................. 34
Web Resources................................................................... 38

4
Overview
Use the HP Enablement Kit for Linux® CD with your Itanium® 2-
based system to facilitate installation or recovery of your Linux
operating system, install a golden image on one or more systems,
use tools to evaluate and repair your system, and access the Debian
GNU/Linux Installer.
Note If Linux was pre-installed on your Itanium 2-based
system, power on your machine and configure as
prompted. The functionality provided by the
installation kit has already been applied.
The enablement kit automates the following processes:
• Hardware discovery
• Disk partitioning
• Configuration of storage controllers
• Linux installation from distributor media (e.g. CD-ROM)
• Recovery of a pre-installed operating system.

5
This booklet provides:
• Instructions for configuring your console and getting started
with the enablement kit
• An explanation of the enablement kit’s menu options
•HP Enablement Kit for Linux CD content list
• An appendix with directions for using Smart Array with Linux
on Itanium 2-based servers
• Answers to frequently asked questions
• Web resources for Linux.
Note For latest updates to this document, please see
http://www.docs.hp.com/linux.

6
Configuring Your Console
The default console configuration for the Itanium 2-based system is
a local graphics display using a USB keyboard and requires no
setup.
The display screen can also be a remote serial console connected
through a serial port or through a terminal attached to a serial port.
Examples include a management processor’s serial port or a net-
work connection through a management processor that the system
treats like a serial port. If you plan to use a serial console, configure
it using the directions in this section before using the HP Enable-
ment Kit for Linux.
Note The management processor is part of the management
card. It monitors system status and can control aspects
of system operation such as power, resets,
software/firmware upgrades, and cooling.
See http://h20000.www2.hp.com/bizsupport
for documentation about the management processor.
Select manuals from the support services link on the

7
right side of the page. Select workstations under the
personal computing link or Itanium®-based servers
under the servers link to access the appropriate
manual.
Configuring Serial Console
Before Linux boots, all console interaction is through firmware. To
modify the default local graphics display to a serial console path,
configure a single serial port (UART) for both Console In and
Console Out in the boot manager interface. When the Linux
kernel boots, it interprets the UART as ttyS0 and sends the com-
puter output to the chosen display screen.
To begin:
1. When your system boots, select the Boot option
maintenance menu from the EFI Boot Manager
screen and press Enter.
2. From the menu, highlight Select Active Console
Output Devices and press Enter.

8
3. The resulting screen displays a list of UARTs and PCI devices
available for console input/output.
• UART identifiers of PNP0501 describe modes available for the
"Serial A" or "Serial 1" built-in UART.
• UART identifiers of HWP0002 describe modes available for
the "Console" UART on the management processor.
Highlight a UART and press Enter. On the same screen,
highlight Save Settings to NVRAM and press Enter. The
system prompts you to save NVRAM if you omit this step.
4. Highlight Select Active Console Input Device
from the main menu and press Enter.
5. From the list on the resulting screen, highlight the same UART
you selected as your output device and press Enter. Next
highlight Save Settings to NVRAM and press Enter.
6. To apply the changes you have selected, highlight Cold Reset
from the main menu and press Enter.

9
7. Select Reboot the System and OK. The firmware and serial
console are configured after reboot.
8. Complete the steps listed in the “Getting Started with the HP
Enablement Kit for Linux” section of this booklet to make a
selection from the enablement kit main menu.
Note Though the enablement kit software works with serial
as well as keyboard and VGA consoles, use a VGA
font with serial consoles for optimal screen rendering
and consistent arrow key function.
For information on Linux UART discovery order and specifying a
serial console to the Linux kernel, please see the “Frequently Asked
Questions/Troubleshooting” section in this booklet.
Reverting to VGA from Serial Console
If you’re on serial console and want to revert to VGA:
1. Login to the system
a. Bring up the elilo.conf file to edit.
b. In the append line, remove console=ttyS0 parameters in any
stanza in which you want to use VGA only and save your

10
changes.
Note If you are using a Debian operating system, the file is
/etc/elilo.conf. Once this file is saved, type
/usr/sbin/elilo at the prompt and press Enter.
2. Edit /etc/securetty.
a. Ensure you have an entry with tty1 for VGA functionality
before completing Step 3.
b. (Optional. Perform only if you want to remove the login
prompt from the serial port.) From the list of terminals on
which root is allowed to login, remove ttyS0 and and save.
3. Bring up the /etc/inittab file:
a. Ensure you have a getty with tty1 for VGA functionality.
b. (Optional. Perform only if you want to remove the login
prompt from the serial port.) Delete the getty that runs on the
serial port in ttyS0.
4. (Optional) If you want your system to start up X instead of text

11
mode, edit /etc/inittab and change the init default token from
“3” to “5”, save, and reboot to return to a VGA display.
To revert to serial console from VGA, follow the directions
under “Configuring Serial Console” in this booklet.

12
Getting Started with the HP Enablement Kit
for Linux
Use one of the two following options to boot the HP Enablement
Kit for Linux CD. Option 1 is recommended. Once the enablement
kit main menu is up, proceed to instructions under “Enablement Kit
Menu Options.”
Note To use a serial console as your display screen,
configure it prior to using the enablement kit for Linux.
See “Configuring Your Console” in this booklet for
more information.
Boot Option 1
1. Insert the HP Enablement Kit for Linux CD in the drive and
reboot the machine. The EFI boot manager loads.
2. At the Please Select a Boot Option prompt, use
your arrow keys to highlight Boot Option Maintenance
Menu and press Enter.
3. At the Select an operation prompt, Boot from a

13
file is highlighted. Press Enter.
4. Under Boot From a File. Select a Volume, use
your arrow keys to highlight Removable Media Boot and
press Enter to bring up the HP Enablement Kit for Linux main
menu. Now see the information in the “Enablement Kit Menu
Options” section in this booklet.
5. If Removable Media Boot is not listed as an option in
Step 4, follow the directions for Boot Option 2 below.
Boot Option 2:
If the preceding instructions did not list Removable Media
Boot as an option in the EFI boot manager, follow these direc-
tions to use the elilo bootloader to boot the HP Enablement Kit for
Linux.
Note In Step 2, select the EFI Shell [Built-in] boot
option within five seconds to avoid booting a default
option. For example, if your machine already has an
operating system installed, the EFI boot manager boots
that as the default.

14
1. Insert the HP Enablement Kit for Linux CD in the drive and
power on your system.
Note To use a serial console as your display screen,
configure it prior to using the enablement kit for Linux.
See “Configuring Your Console” in this booklet for
more information.
2. Within five seconds, use your arrow keys to select EFI Shell
[Built-in] from the list of boot options presented and press
Enter.
If the machine boots an operating system before you make a
selection, reboot it to redisplay the list of boot options. Or if the
boot manager’s default is to run an EFI application such as
offline diagnostics, exit to return to the EFI shell.
3. A list of mapping table choices is displayed which may not fit on
one screen if many disks are attached to the system. If necessary,
type map-b at the EFI shell prompt to see the list screen by
screen.
a. Locate the list entry with the fs prefix that contains the

15
text, CDROM.
b. At the shell prompt, input this list entry followed by a colon.
For example, if fs0 contains the text CDROM:
1. Type fs0:
2. Press Enter.
4. To execute the elilo bootloader and bring up the HP Enablement
Kit for Linux Main Menu:
a. Type elilo at the fs0:\> prompt
b. Press Enter and proceed to the information in the “Enablement
Kit Menu Options” section.

16
Information to Know Before You Select a Menu
Option
Hardware discovery
When you select an enablement kit menu option, the bootloader
loads a Linux kernel and RAM-based root filesystem. The kernel
performs hardware discovery, looking for bootable devices, chip
sets, ethernet cards, disk drives, and storage system controllers to
work with.
Linux for Itanium 2-based systems can be installed directly on
disks attached to SCSI or IDE/ATAPI storage system controllers, or
on a volume configured on a Smart Array controller.
Note When you select a menu option on an Itanium 2-based
server, the enablement kit searches for a Smart Array
controller and reminds you to configure it if it finds
one. See “Appendix A - Using Smart Array with Linux
on Itanium 2-based Servers” at the end of this booklet
for more information.
The enablement kit Linux kernel also includes a driver for a Fibre
Channel Host Bus Adapter (HBA). For information on configuring

17
a Fibre Channel Storage array for Linux, see documentation at
http://h18006.www1.hp.com/storage/arraysystems.html.
Partitioning Before installing the operating system, the system
storage disk must be partitioned. The enablement kit automates par-
titioning after you select the target disk in some instances, such as
when recovering a pre-configured image with Menu Option 1.
When using Menu Option 2 to install Linux from distributor media,
the enablement kit sets up two EFI partitions that are standardized
across all supported operating systems for HP Itanium 2-based
products.
Note Selecting the default partitions in your Linux
distributor’s installer (e.g. Red Hat’s Anaconda) may
overwrite the HP partitions created by the enablement
kit. Create custom partitions when using your Linux
distributor’s installer to keep the HP partitions intact
when installing your operating system.
The first partition is 100 megabytes and holds a FAT-16 filesystem
for a boot partition. The second partition is 400 megabytes and
holds a FAT-32 filesystem for optional installation of the offline
diagnostics and utilities that shipped on CD with your hardware.

18
Enablement Kit Menu Options
Note Read the instructions in “Executing a Menu Option” in
this section for important information before making a
selection and using the instructions provided here.
1. Recover factory pre-configured image
Select this option to recover a factory pre-configured operating sys-
tem image. To complete recovery, use the image on the System
Recovery CD that came as part of the Linux media with your pur-
chase from HP.
After selecting this option, insert the CD with the preconfigured
image into the drive, choose the disk you want to install to from the
displayed list, and select Ok. Any data on the disk you select will be
destroyed and overwritten by the system image. Click Ok when sys-
tem image recovery is complete and reboot the system at the
prompt. To exit without recovering, select Cancel: .
2. Install Linux from distributor media
Choose this option to install Linux yourself. Before operating sys-
tem installation, the enablement kit prompts you to prepare respec-

19
tive boot and service partitions, allocating 500MB of storage from
your disk for them. The boot partition is left empty. The service
partition is reserved for optional diagnostics and utilities should
you choose to install them from CD.
When the partitions have been created and system preparation is
complete, the enablement kit prompts you to insert Linux distribu-
tion media (e.g. CDs). Select “Reboot System” and complete the
steps in “Getting Started with the HP Enablement Kit for Linux” to
boot the Linux distributor’s CD, then follow the installation instruc-
tions provided by your operating system distributor.
3. Install golden image from network
This option, based on SystemImager software, allows you to pull a
customized operating system image, also known as a golden image,
from a SystemImager server and deploy it to similar systems in
your environment. You must configure your network in order to
execute this option. The enablement kit allows you to do so manu-
ally or automatically via a DHCP or BOOTP server.
Note If you are on a serial console, set the boot parameter on
the main menu to console=ttyS0.

20
Although installing a golden image over the network requires more
initial configuration than recovering a factory pre-installed image,
it provides more flexibility, allowing you to do things such as vary
disk partitioning schemes. For more information on creating and
deploying a golden image, see the SystemImager manual in the
/doc directory on the HP Enablement Kit for Linux CD. The man-
ual is also available at http://www.docs.hp.com/linux.
Note The enablement kit does not automatically place the
HP service partition on the disk with this menu option.
Include the service partition in your golden image if
desired. See the SystemImager 3.0 manual for more
information.
Note The enablement kit contains SystemImager software
for the server as well as the client, which must both run
the same version.
a. After selecting Install golden image from network, you see the
following prompt:
Do you want the network to be configured
automatically using DHCP/BOOTP?
Other manuals for ZX2000
12
This manual suits for next models
1
Table of contents
Other HP Desktop manuals

HP
HP Workstation xw6000 User manual

HP
HP Deskjet 3320 User manual

HP
HP Pavilion a400 - Desktop PC User manual

HP
HP Pavilion Elite m9150f How to use

HP
HP VH677UA#ABA - Pavilion Dv6-1244sb... Specification sheet

HP
HP Compaq Presario Installation instructions

HP
HP m9160f - Pavilion - Elite User manual

HP
HP Compaq t1010 User manual

HP
HP C8000 - Workstation - 0 MB RAM User instructions

HP
HP 512n - Pavilion - 128 MB RAM User manual