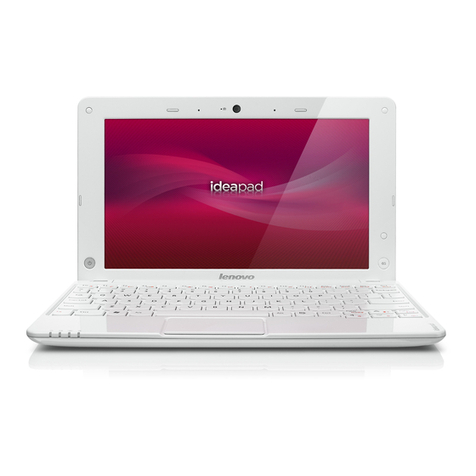
HP Mini 1151NR User manual

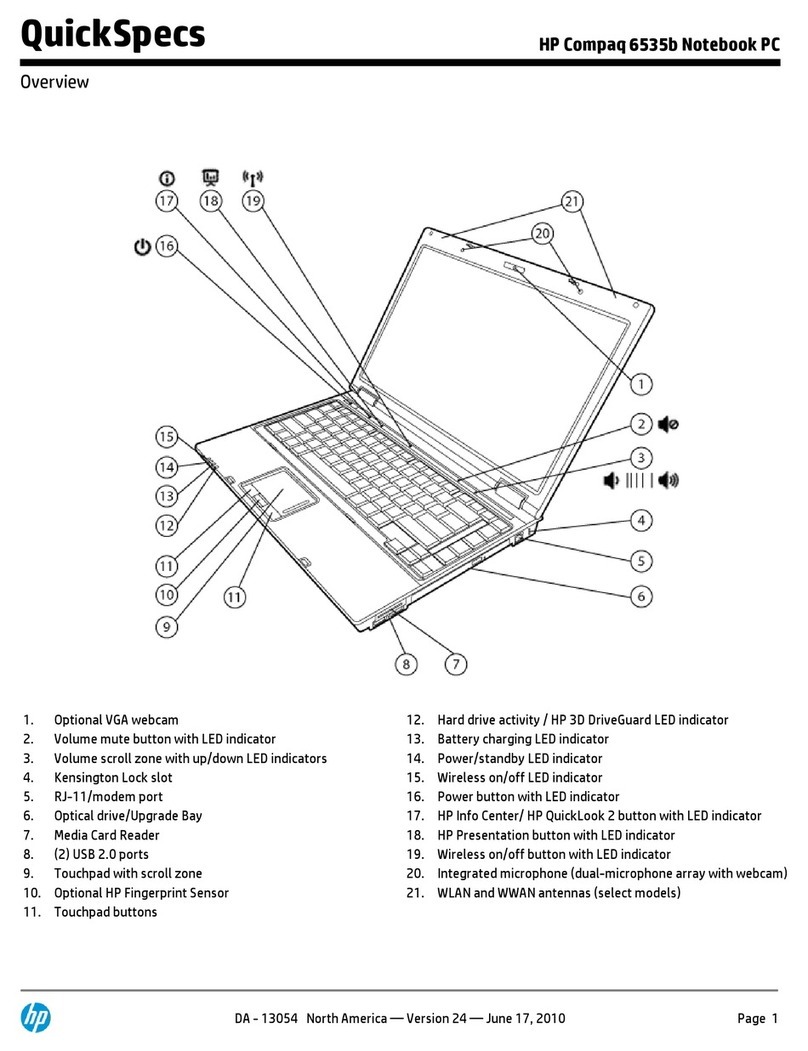
Notebook Essentials iii
Contents
Chapter 1: What’s next
Getting to know your device . . . . . . . . . . . . . . . . . . . . . . . . . . . . . . . . . . . . . . . . . . . . . . . 1
Connecting to the Internet. . . . . . . . . . . . . . . . . . . . . . . . . . . . . . . . . . . . . . . . . . . . . . . . . 2
Protecting your device from viruses . . . . . . . . . . . . . . . . . . . . . . . . . . . . . . . . . . . . . . . . . 2
Locating the electronic manuals . . . . . . . . . . . . . . . . . . . . . . . . . . . . . . . . . . . . . . . . . . . . 2
Finding more information . . . . . . . . . . . . . . . . . . . . . . . . . . . . . . . . . . . . . . . . . . . . . . . . . 3
Chapter 2: Connecting to the Internet
Choosing the type of Internet access. . . . . . . . . . . . . . . . . . . . . . . . . . . . . . . . . . . . . . . . . 5
Choosing an ISP . . . . . . . . . . . . . . . . . . . . . . . . . . . . . . . . . . . . . . . . . . . . . . . . . . . . . . . . 5
Using the Windows New Connection Wizard . . . . . . . . . . . . . . . . . . . . . . . . . . . . . . . . . 5
Using HP Connection Manager software . . . . . . . . . . . . . . . . . . . . . . . . . . . . . . . . . . . . . 6
Using HP Wireless Assistant software (select models only) . . . . . . . . . . . . . . . . . . . . . . 6
Connecting to an existing wireless network . . . . . . . . . . . . . . . . . . . . . . . . . . . . . . . . . . . 6
Setting up a new wireless network . . . . . . . . . . . . . . . . . . . . . . . . . . . . . . . . . . . . . . . . . . 7
Step 1: Purchase high-speed Internet service . . . . . . . . . . . . . . . . . . . . . . . . . . . . . . 7
Step 2: Purchase and install a wireless router . . . . . . . . . . . . . . . . . . . . . . . . . . . . . . 8
Step 3: Configure the device to connect to the wireless network . . . . . . . . . . . . . . . 8
Connecting to a wired network . . . . . . . . . . . . . . . . . . . . . . . . . . . . . . . . . . . . . . . . . . . . . 9
Chapter 3: Using software
Identifying the Windows desktop features . . . . . . . . . . . . . . . . . . . . . . . . . . . . . . . . . . . 11
Identifying the software on the device . . . . . . . . . . . . . . . . . . . . . . . . . . . . . . . . . . . . . . 12
Updating the software installed on the device . . . . . . . . . . . . . . . . . . . . . . . . . . . . . . . . 12
Installing software from the Internet. . . . . . . . . . . . . . . . . . . . . . . . . . . . . . . . . . . . . . . . 12
Chapter 4: Keeping your device safe
Protecting the device from viruses . . . . . . . . . . . . . . . . . . . . . . . . . . . . . . . . . . . . . . . . . 13
Using Windows Security Center. . . . . . . . . . . . . . . . . . . . . . . . . . . . . . . . . . . . . . . 13
Protecting your system files . . . . . . . . . . . . . . . . . . . . . . . . . . . . . . . . . . . . . . . . . . . . . . 13
Protecting your privacy . . . . . . . . . . . . . . . . . . . . . . . . . . . . . . . . . . . . . . . . . . . . . . . . . . 13
Protecting the device from power surges . . . . . . . . . . . . . . . . . . . . . . . . . . . . . . . . . . . . 14
Using the device safely . . . . . . . . . . . . . . . . . . . . . . . . . . . . . . . . . . . . . . . . . . . . . . . . . . 14
Chapter 5: Backup and recovery
Backing up your information . . . . . . . . . . . . . . . . . . . . . . . . . . . . . . . . . . . . . . . . . . . . . 15
Using BackOnTrack . . . . . . . . . . . . . . . . . . . . . . . . . . . . . . . . . . . . . . . . . . . . . . . . 15
Performing a recovery. . . . . . . . . . . . . . . . . . . . . . . . . . . . . . . . . . . . . . . . . . . . . . . . . . . 16
Using the Disaster Recovery utility . . . . . . . . . . . . . . . . . . . . . . . . . . . . . . . . . . . . 16
Using the Instant Restore utility . . . . . . . . . . . . . . . . . . . . . . . . . . . . . . . . . . . . . . . 16
517684-001.book Page iii Thursday, December 11, 2008 10:02 PM

iv Notebook Essentials
Contents
Appendix A: Routine care
Cleaning the display . . . . . . . . . . . . . . . . . . . . . . . . . . . . . . . . . . . . . . . . . . . . . . . . . . . . . 19
Cleaning the TouchPad and keyboard . . . . . . . . . . . . . . . . . . . . . . . . . . . . . . . . . . . . . . . 19
Traveling and shipping . . . . . . . . . . . . . . . . . . . . . . . . . . . . . . . . . . . . . . . . . . . . . . . . . . . 19
Appendix B: Problem meets solution
Troubleshooting resources . . . . . . . . . . . . . . . . . . . . . . . . . . . . . . . . . . . . . . . . . . . . . . . . 21
Quick troubleshooting. . . . . . . . . . . . . . . . . . . . . . . . . . . . . . . . . . . . . . . . . . . . . . . . . . . . 21
The device is unable to start up. . . . . . . . . . . . . . . . . . . . . . . . . . . . . . . . . . . . . . . . . 21
The device screen is blank . . . . . . . . . . . . . . . . . . . . . . . . . . . . . . . . . . . . . . . . . . . . 22
Software is functioning abnormally . . . . . . . . . . . . . . . . . . . . . . . . . . . . . . . . . . . . . 22
The device is on but is not responding . . . . . . . . . . . . . . . . . . . . . . . . . . . . . . . . . . . 22
The device is unusually warm. . . . . . . . . . . . . . . . . . . . . . . . . . . . . . . . . . . . . . . . . . 22
An external device is not working . . . . . . . . . . . . . . . . . . . . . . . . . . . . . . . . . . . . . . 23
The wireless network connection is not working . . . . . . . . . . . . . . . . . . . . . . . . . . . 23
Appendix C: Specifications
Operating environment . . . . . . . . . . . . . . . . . . . . . . . . . . . . . . . . . . . . . . . . . . . . . . . . . . . 25
Input power . . . . . . . . . . . . . . . . . . . . . . . . . . . . . . . . . . . . . . . . . . . . . . . . . . . . . . . . . . . . 25
Index
517684-001.book Page iv Thursday, December 11, 2008 10:02 PM

Notebook Essentials 1
Chapter 1: What’s next
After you set up and register your device, there are important next steps to take before you
begin using your device. Read this chapter completely first, because it explains what to do
and where to find additional information. For example, this guide provides specific
instructions for connecting to wired and wireless networks.
You will also find practical information to help you protect and maintain the device. Then,
read the specific chapters for additional information.
For help in identifying specific components of the device, refer to the user guide. Click Start,
click Help and Support, and then click User Guides.
The following list highlights the entertainment features of your device and explains where to
get additional information for each feature.
■Play a video or view photos—Your device comes with preinstalled multimedia
software, including Windows® Media Player (select models only), which turns your
device into a mobile entertainment center. For details, refer to Chapter 3, “Using
software.”
■Listen to music—Your device includes integrated speakers. For more information on
using the integrated speakers and setting up optional external audio devices, refer to the
user guide in Help and Support.
■Take a picture—An integrated webcam takes photos. For more information on the
webcam, refer to the user guide in Help and Support.
■Chat with friends—You can use Instant Messenger to chat with friends or colleagues
while you are connected to the Internet.
Getting to know your device
517684-001.book Page 1 Thursday, December 11, 2008 10:02 PM

2 Notebook Essentials
Chapter 1: What’s next
After you set up your device, you can connect to a wireless or wired network so that you can
connect to the Internet and send and receive e-mail. Refer to Chapter 2, “Connecting to the
Internet,” for more information.
After you have connected to the Internet, manage your device’s defenses with Windows
Security Center. HP also recommends that you install antivirus software. Antivirus software
helps protect your device from damage caused by viruses. Refer to Chapter 4, “Keeping your
device safe,” for more information.
✎This guide contains the latest information about the device.
For detailed information about your device, such as power management, drives, memory,
security, and other features, click
Start
, click
Help and Support
, and then click
User
Guides
. You do not need to connect to the Internet to access the user guides in Help and
Support.
✎The desktop of your device may look slightly different from the illustration in this
section.
Connecting to the Internet
Protecting your device from viruses
Locating the electronic manuals
User Guides
Help and Support
517684-001.book Page 2 Thursday, December 11, 2008 10:02 PM

Notebook Essentials 3
Chapter 1: What’s next
In addition to the user guide, Help and Support also provides information about the operating
system, drivers, troubleshooting tools, and technical support. To access Help and Support,
click Start, and then click Help and Support. For country- or region-specific support, go to
http://www.hp.com/support, select your country or region, and follow the on-screen
instructions.
ÅWARNING: To reduce the risk of serious injury, read the Safety & Comfort Guide. It
describes proper workstation setup and proper posture, health, and work habits for
computer users. The Safety & Comfort Guide also provides important electrical and
mechanical safety information. The Safety & Comfort Guide contains information for
both HP and Compaq devices. To access this document, click Start, click Help and
Support, and then click User Guides.
For more safety and regulatory information, and for battery disposal information, refer to the
Regulatory, Safety and Environmental Notices. To access the notices, click Start, click Help
and Support, and then click User Guides.
Finding more information
517684-001.book Page 3 Thursday, December 11, 2008 10:02 PM

517684-001.book Page 4 Thursday, December 11, 2008 10:02 PM

Notebook Essentials 5
Chapter 2: Connecting to the Internet
✎Internet hardware and software features vary depending on device model and your
location.
Your device supports 2 types of Internet access:
■Wireless—For mobile Internet access, you can use a wireless connection. To learn
about setting up a wireless network or adding your device to an existing wireless
network, refer to the “Setting up a new wireless network” section or the “Connecting to
an existing wireless network” section.
■Wired—You can connect to a broadband network using the RJ-45 (network) jack.
The networking features of your device enable you to access high-speed broadband Internet
service providers (ISPs) with the following types of connections:
■Digital Subscriber Line (DSL)
■Satellite
■Other services
Broadband access may require additional hardware or software provided by your ISP.
You must set up Internet service before you can connect to the Internet. The device includes
the Windows New Connection Wizard to help you set up a new Internet account or configure
the device to use an existing account:
You can use the Windows New Connection Wizard to connect to the Internet in any of the
following situations:
■When you already have an account with an ISP.
■When you have a disc from an ISP.
■When you do not have an Internet account and would like to select an ISP from the list
provided within the wizard. (The list of ISP providers is not available in all regions.)
■When you have selected an unlisted ISP and the ISP has provided you with such
information as a specific IP address and POP3 and SMTP settings.
To access the Windows New Connection Wizard and instructions for using the wizard, click
Start, click Help and Support, and then click Start the New Connection Wizard.
✎If you are prompted within the wizard to choose between enabling or disabling
Windows Firewall, choose to enable the firewall.
Choosing the type of Internet access
Choosing an ISP
Using the Windows New Connection Wizard
517684-001.book Page 5 Thursday, December 11, 2008 10:02 PM

6 Notebook Essentials
Chapter 2: Connecting to the Internet
Connection Manager allows you to manage your Internet profiles, SMS (Short Message
Service) messaging, connection devices and methods, and edit additional settings.
To start Connection Manager, click the HP Connection Manager icon in the notification
area, at the far right of the taskbar.
✎For more details about using Connection Manager, refer to the Connection
Manager Help.
A wireless device can be turned on or off using the Wireless Assistant software. If a wireless
device is disabled by the Setup Utility, it must be reenabled by the Setup Utility before it can
be turned on or off using Wireless Assistant.
✎Enabling or turning on a wireless device does not automatically connect the system to a
network or a Bluetooth®-enabled device.
To view the state of the wireless devices, position the mouse pointer over the wireless icon in
the notification area, at the far right of the taskbar.
✎To display the wireless icon, click the Show hidden icons icon (< or <<) in the
notification area.
If the wireless icon is not displayed in the notification area, complete the following steps to
change Wireless Assistant properties:
1. Click Start, click Control Panel, click Network and Internet Connections, and then
click HP Wireless Assistant.
2. Click Properties.
3. Select the check box next to Wireless Assistant icon in notification area.
4. Click Apply.
For more information, refer to the Wireless Assistant software Help:
1. Open Wireless Assistant by double-clicking the icon in the notification area.
2. Click the Help button.
To connect the device to an existing wireless network, follow these steps:
1. Click Start, click Connect To, and then click Wireless Network Connection.
2. Select a network to connect to.
3. Click Connect.
4. If required, enter the security key.
Using HP Connection Manager software
Using HP Wireless Assistant software (select models only)
Connecting to an existing wireless network
517684-001.book Page 6 Thursday, December 11, 2008 10:02 PM

Notebook Essentials 7
Chapter 2: Connecting to the Internet
This section describes the steps necessary to set up a typical home or small office wireless
network, which is also called a wireless local network (WLAN), using a wireless device.
To set up a wireless network and to connect to the Internet, you need the following
equipment:
■A broadband modem (either DSL or cable) and high-speed Internet service purchased
from an ISP
■A wireless router (purchased separately)
■Your new wireless computer
The illustration below shows an example of a wireless network installation that is connected
to the Internet. As this network grows, additional wireless and wired computers can be
connected to the network to access the Internet.
Step 1: Purchase high-speed Internet service
If you already have high-speed Internet service (DSL, cable, or satellite), begin with the
“Step 2: Purchase and install a wireless router” section. If you do not have high-speed
Internet service, follow these steps:
1. Contact a local ISP to purchase high-speed Internet service and a DSL or cable modem.
The ISP will help set up the modem, install a network cable to connect your wireless
device to the modem, and test the Internet service.
2. Your ISP will give you a User ID and password to access the Internet. Record this
information and store it in a safe place.
Setting up a new wireless network
517684-001.book Page 7 Thursday, December 11, 2008 10:02 PM

8 Notebook Essentials
Chapter 2: Connecting to the Internet
Step 2: Purchase and install a wireless router
If your ISP provided a modem with a router, go to “Step 3: Configure your device to connect
to the wireless network.” Otherwise, read this section carefully before you install the wireless
router according to the manufacturer’s instructions. If you need technical assistance during
the router installation, contact the router manufacturer.
✎It is recommended that you temporarily connect your device to the router by using the
network cable provided with the router. In this way, you ensure that your device can
access the Internet.
1. Be sure that the wireless light on your device is off (amber). If the wireless light is on
(blue), slide the wireless switch to turn it off. Refer to the user guide in Help and
Support if you need help locating the wireless switch or light.
2. During the router installation, the router manufacturer's software allows you to change
the network name (SSID) and enable security to protect the privacy of your wireless
network. Many routers are shipped with a default network name and with security
disabled. If you change the default network name or enable security during the router
setup, record the information and store it in a safe place. You will need this information
when you configure your device and any other existing computers to access the router.
✎If you do not enable security, an unauthorized wireless user can access the data
on your device and use your Internet connection without your knowledge. For
more information on securing your wireless network, refer to the user guide in
Help and Support.
The Windows® operating system also provides tools to help you set up your wireless
network for the first time.
To use the Windows tools to set up your network:
1. Click Start, click Control Panel, click and then click Network and Internet
Connections.
2. Click Network Connections, and then click Create a new connection.
3. Follow the on-screen instructions.
Step 3: Configure the device to connect to the wireless network
1. If your device is off, turn it on.
2. If the wireless light is amber, turn on the wireless function by sliding the wireless
switch. Refer to the user guide in Help and Support if you need help locating the
wireless switch or light.
3. Connect your device to the wireless network:
a. Click Start, click Connect To, and then click Wireless Network Connection.
b. Select a network to connect.
c. Click Connect.
d. If required, enter the security key.
4. Test the wireless network by opening your Web browser and accessing a Web site.
517684-001.book Page 8 Thursday, December 11, 2008 10:02 PM
Notebook Essentials 9
Chapter 2: Connecting to the Internet
Connecting to a wired network requires an RJ-45 network cable (purchased separately). If
the cable contains noise suppression circuitry 1, which prevents interference from TV and
radio reception, orient the circuitry end of the cable 2toward the device.
To connect the cable:
ÅWARNING: To reduce the risk of electric shock, fire, or damage to the equipment,
do not plug a modem or telephone cable into the RJ-45 (network) jack.
1. Plug the cable into the jack 1on the device.
2. Plug the other end of the cable into a wall jack 2.
Connecting to a wired network
517684-001.book Page 9 Thursday, December 11, 2008 10:02 PM

517684-001.book Page 10 Thursday, December 11, 2008 10:02 PM
Notebook Essentials 11
Chapter 3: Using software
The Windows desktop is where you start when you turn on your device. It includes the
notification area at the far right of the taskbar, icon shortcuts that are used to start programs,
and the Start menu.
✎The desktop of your device may look slightly different from the illustration in this
section.
Identifying the Windows desktop features
Icon Name Description
HP Connection Manager Displays the status of HP Connection Manager and
opens the HP Connection Manager window.
Bluetooth status
(select models only)
Displays Bluetooth status.
Network status (2) Displays the status of your network connection.
(Continued)
517684-001.book Page 11 Thursday, December 11, 2008 10:02 PM

12 Notebook Essentials
Chapter 3: Using software
To see a list of the software preinstalled on the device, follow these steps:
»Click Start, and then click All Programs.
✎Double-click the name of a program to open it.
✎For details about using software included with the device, refer to the software
manufacturer’s instructions, which may be provided with the software or on the
manufacturer’s Web site.
Most software, including the operating system, is updated frequently by the manufacturer or
provider. Important updates to the software included with the device may have been released
since the device left the factory.
Some updates may affect the way the device responds to optional software or external
devices. Many updates provide security enhancements.
Update the operating system and other software installed on the device as soon as the device
is connected to the Internet. To access links for updating installed software, refer to Help and
Support.
To install software from the Internet, go to the software manufacturer’s Web site and follow
the instructions.
ÄCAUTION: Software downloaded from the Internet may contain viruses. Refer to
“Chapter 4: Keeping your device safe” for more information.
Wireless network status Displays the status of your wireless network
connection and opens the Wireless Network
Connection window.
Volume control Opens the Volume Control window.
Power Meter Displays the current power status and opens the
Power Meter window.
Synaptics Pointing Devices Opens the Mouse Properties window.
Icon Name Description
Identifying the software on the device
Updating the software installed on the device
Installing software from the Internet
517684-001.book Page 12 Thursday, December 11, 2008 10:02 PM
Notebook Essentials 13
Chapter 4: Keeping your device safe
When you use the device for e-mail or Internet access, you expose it to computer viruses that
can disable the operating system, programs, or utilities or cause them to function abnormally.
Antivirus software can detect most viruses, destroy them, and in most cases, repair damage
they have caused. To provide ongoing protection against newly discovered viruses, antivirus
software must be kept up to date.
Norton Internet Security, an antivirus program, is preinstalled on the computer.
■Your version of Norton Internet Security includes 60 days of free updates. It is strongly
recommended that you protect the computer against new viruses beyond 60 days by
purchasing extended update service. Instructions for using and updating Norton Internet
Security software and for purchasing extended update service are provided within the
program.
■To access Norton Internet Security, or to get more information about it, click Start,
click All Programs, and then click Norton Internet Security.
✎For more information about computer viruses, type viruses in the Search field in Help
and Support.
Using Windows Security Center
Windows Security Center manages your device’s defenses. To manage Windows Firewall
and automatic update settings, follow these steps:
1. Click Start, click Control Panel, and then click Security Center.
2. Click Internet Options to define the level of security your device should employ.
3. Click the Privacy tab to determine which embedded programs your browser should
allow.
The backup and recovery process allows you to back up your files and recover optimal
system functionality. For information, refer to Chapter 5, “Backup and recovery.”
When you use the device for e-mail, or for network or Internet access, it is possible for
unauthorized persons to obtain information about you or the device.
Protecting the device from viruses
Protecting your system files
Protecting your privacy
517684-001.book Page 13 Thursday, December 11, 2008 10:02 PM
14 Notebook Essentials
Chapter 4: Keeping your device safe
To optimize the privacy protection features of the device, follow these guidelines:
■Keep the operating system and other software updated. Many software updates contain
security enhancements.
■Use a firewall. Firewall software monitors incoming network traffic on the device to
block messages that do not meet specific security criteria. Some firewalls also monitor
outgoing traffic.
To protect the device from power surges that may be caused by an uncertain power supply or
an electrical storm, observe these practices:
■Plug the device power cord into a high-quality surge protector (purchased separately).
Surge protectors are available from most consumer hardware or electronics retailers.
■During an electrical storm, either run the device on battery power or shut down the
device and unplug the power cord.
ÅWARNING: To reduce the risk of electric shock or damage to your equipment, observe
these practices:
■Plug the power cord into an AC outlet that is easily accessible at all times.
■Disconnect power from the device by unplugging the power cord from the AC outlet
(not by unplugging the power cord from the device).
■If provided with a 3-pin attachment plug on your power cord, plug the cord into a
grounded (earthed) 3-pin outlet. Do not disable the power cord grounding pin, for
example, by attaching a 2-pin adapter. The grounding pin is an important safety
feature.
ÅWARNING: To reduce the possibility of heat-related injuries or of overheating the
device, do not place the device directly on your lap or obstruct the device air vents.
Use the device only on a hard, flat surface. Do not allow another hard surface, such
as an adjoining optional printer, or a soft surface, such as pillows or rugs or
clothing, to block airflow. Also, do not allow the AC adapter to contact the skin or a
soft surface, such as pillows or rugs or clothing, during operation. The device and
the AC adapter comply with the user-accessible surface temperature limits defined
by the International Standard for Safety of Information Technology Equipment
(IEC 60950).
ÅWARNING: To reduce potential safety issues, use only the AC adapter or battery
provided with the device, a replacement AC adapter or battery provided by HP, or a
compatible AC adapter or battery purchased as an accessory from HP.
Protecting the device from power surges
Using the device safely
517684-001.book Page 14 Thursday, December 11, 2008 10:02 PM
Notebook Essentials 15
Chapter 5: Backup and recovery
To protect your information, back up your files and folders. In case of system failure, you can
use the backup files to restore your device.
✎For detailed information, perform a search for these topics in Help and Support.
Successful recovery after a system failure depends on whether you have completely backed
up your files. You should use Roxio BackOnTrack immediately after software setup. As you
add new software and data files, you should continue to back up your system on a regular
basis to maintain a reasonably current backup.
Note the following guidelines when backing up your information:
■Store personal files in the My Documents folder and back up this folder regularly.
■Back up templates stored in their associated programs.
■Save customized settings in a window, toolbar, or menu bar by taking a screen shot of
your settings. The screen shot can be a time-saver if you have to reset your preferences.
To copy the screen and paste it into a word-processing document, follow these steps:
a. Display the screen.
b. Copy the screen:
To copy the active window, press alt+fn+prt sc.
To copy the entire screen, press fn+prt sc.
c. Open the word-processing document, click Edit, and then click Paste.
Using BackOnTrack
The back up drive function of BackOnTrack creates a backup that is an exact image of your
computer data. You can back up the image to an external hard drive (purchased separately).
To create a Disaster Recovery Set using BackOnTrack, follow these steps:
✎Be sure that the device is connected to AC power before you start the backup process.
1. Click Start, click All Programs, click Roxio, click BackOnTrack, click
BackOnTrack Home, and then click Disaster Recovery.
2. Follow the on-screen instructions.
Backing up your information
517684-001.book Page 15 Thursday, December 11, 2008 10:02 PM

16 Notebook Essentials
Chapter 5: Backup and recovery
In case of system failure or instability, the device provides the following ways to recover
your files:
■BackOnTrack Disaster Recovery utility: You can use Disaster Recovery to recover your
hard drive image (including your files, programs, and operating system) after a hard
drive failure.
■BackOnTrack Instant Restore utility: You can use Instant Restore to quickly restore your
device to a working state if a software-related problem occurs. The Instant Restore
utility automatically creates working states periodically. You can also define a working
state by saving the current computer state manually.
✎For more information about computer system states, refer to the
BackOnTrack software help.
■Operating System and Driver Recovery discs (included with your device): You can use
the discs to recover the operating system and the programs installed at the factory.
Using the Disaster Recovery utility
✎To perform a recovery with the Disaster Recovery utility, you need an external optical
drive (purchased separately).
The Disaster Recovery utility recovers data from a Disaster Recovery Set that you have
previously created.
To restore your hard drive image, follow these steps:
1. Click Start, click All Programs, click Roxio, click BackOnTrack, click
BackOnTrack Home, and then click Disaster Recovery.
2. Follow the on-screen instructions.
✎For more information about the Disaster Recovery utility, refer to the BackOnTrack
software help.
Using the Instant Restore utility
You can restore your computer from Windows when the operating system is functioning. If
the operating system is not functioning, you can also restore your computer when you start
your computer.
✎For more information about the Instant Restore utility, refer to the BackOnTrack
software help.
Using the Instant Restore utility when the operating system is functioning
To recover information when the operating system is functioning properly, follow these steps:
1. Save and close all open documents and close any open programs.
Performing a recovery
517684-001.book Page 16 Thursday, December 11, 2008 10:02 PM
Notebook Essentials 17
Chapter 5: Backup and recovery
2. Click Start, click All Programs, click Roxio, click BackOnTrack, click
BackOnTrack Home, and then click Instant Restore.
3. Follow the on-screen instructions.
Using the Instant Restore utility when the operating system is not functioning
To recover information when the operating system is not functioning, follow these steps:
1. Restart the computer.
✎If the operating system has crashed (and the computer screen is blue), you can
start the computer by turning the power switch off and then on.
2. When the HP logo is displayed on the screen continuously, press and release the
f6 button until the Windows status bar is displayed.
3. When the Roxio BackOnTrack screen is displayed, follow the on-screen instructions.
Using the
Operating System
and
Driver Recovery
discs
ÄCAUTION: The recovery process reformats the hard drive, completely erasing all
information. All files you have created and any software installed on the device are
permanently removed. The recovery process reinstalls the original operating system,
software, and drivers. Software, drivers, and updates not installed by HP must be
manually reinstalled.
✎To perform a recovery with the recovery discs, you will need an external optical drive
(purchased separately).
✎The recovery process will take several hours to complete.
To recover your operating system and programs, follow these steps:
1. If possible, back up all personal files.
2. Change the boot order by turning on or restarting the device, and then pressing f9 while
the “F9 = Change Boot Device Order” message is displayed in the lower-left corner of
the screen.
3. Use the arrow keys to select the USB optical drive, and then press enter.
4. When the confirmation prompt is displayed, press enter.
5. Insert the Operating System disc into an external optical drive (purchased separately).
6. Shut down the device.
7. Turn on the device.
8. Follow the on-screen instructions to install the operating system.
9. After the operating system is installed, remove the Operating System disc and insert the
Driver Recovery disc.
10. Follow the on-screen instructions to install the drivers and programs.
11. Restore your personal files.
517684-001.book Page 17 Thursday, December 11, 2008 10:02 PM

517684-001.book Page 18 Thursday, December 11, 2008 10:02 PM
Table of contents
Other HP Laptop manuals

HP
HP PRO X360 435 G10 Manual

HP
HP Envy 13-1007 User manual

HP
HP 520 - Notebook PC User manual

HP
HP OmniBook 5000 User manual

HP
HP 14-ba09 Series User manual

HP
HP Compaq nx5000 series User guide

HP
HP Compaq Presario User manual

HP
HP Nc6400 - Compaq Business Notebook Specification sheet

HP
HP MINI 5103 User manual

HP
HP Dv6-1030us - Pavilion Entertainment - Core 2 Duo... User manual

HP
HP Pavilion Notebook PC User manual

HP
HP Presario CQ43-300 User manual

HP
HP OmniBook 6000 Owner's manual

HP
HP PROBOOK 4730S User manual

HP
HP DesignJet 500 User manual

HP
HP ENVY 14 Manual

HP
HP Pavilion ze1200 Series User manual

HP
HP EliteBook 828 G3 Manual

HP
HP FM850UT - SMART BUY 4710S T6570 Notebook Manual

HP
HP Compaq Presario Manual