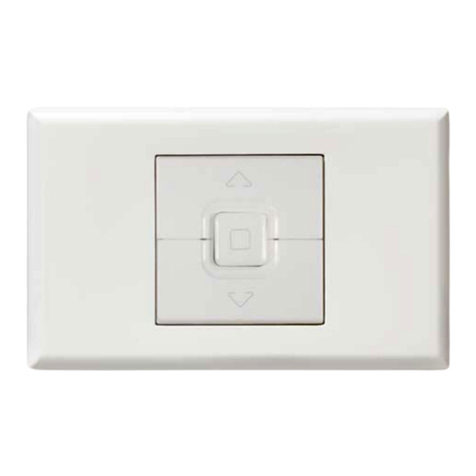
HPM XL770T User manual

Excel Light Switch
and Timer
24 hour and 7 day
Cat XL770T & XL770TH (horizontal)
The Cat XL770T & XL770TH timer switch simply replaces a normal
light switch and provides automatic switching of incandescent,
fluorescent, halogen or dichroic lights as well as fan motors.
A multitude of switching options can be carried out over a
7 day period.
Features
■ Simply replaces a standard light switch.
■ Operates as a normal light switch - or can be quickly switched
to ‘automatic’ for timer control.
■ If required, several may be used in key rooms of the house to
simulate a ‘lived in’ appearence.
■ Has ‘random’ setting to simulate ‘lived in’ situations when the
home is vacant.
■ Accurate 24 hour digital clock.
■ Backlight turns on with first button press.
Specification (at 25ºC)
Supply voltage: 230-240V a.c. 50Hz
Setting options: Up to 8 on/off times per day
Max and min load: See table below
Operating temperature 0 to 50ºC
Load Type Min Load Max Load
Incandescent &
240V Linear Halogen
10W
500W
240V GU10 Halogen Downlights Not suitable*
Compact Fluorescent 150W** 500W
Linear Fluorescent
(Electronic Ballast)
150W** 500W
Linear Fluorescent
(Magnetic Ballast with Power Factor Correction)
40W*** 500W***
Linear Fluorescent
(Magnetic balast without Power Factor Correction)
100VA**** 500VA****
Low Voltage Halogen
(Electronic Transformer)
10W 500W
Low Voltage Halogen
(Magnetic Transformer) 10W 400W
Fan Motor 10VA 500VA
*
GU10 240V Halogen Downlights can damage the XL770T when
they fail, and are therefore not recommended for use with this product.
**
A minimum load of 10W can be achieved if a resistive load is
connected in parellel with the fluorescent load. This can be, for
example a resistor or incandescent lamp rated at least 10W.
***
Power factor correction capacitors must be placed on the
line side of the XL770T. If this is not possible then they should
either be removed, or a 36W magnetic ballast should be
connected in parallel with the fluorescent load, to prevent
damage to the XL770T.
****
Refer to the following table for VA ratings when power factor
correction is not used:
PRODUCT
INFORMATION
Tube Size Effective load
1 x 15W 85VA
1 x 20W 85VA
1 x 30W 85VA
1 x 40W 105VA
Tube Size Effective load
1 x 65W 170VA
1 x 80W 210VA
2 x 20W 185VA
2 x 40W 210VA
Note:
1. This product cannot be used for two-way switching.
2. This product cannot be used with a light dimmer.
Installation
The XL770T & XL770TH is installed in the same way as a normal
light switch. A wiring diagram is shown on page 4, (Fig 3).
12:30 8
X
Sun
X
Mon
X
Tue
X
Wed
X
Thur
X
Fri
X
Sat
ON
OFF
ST
Random
Operation
Flashing timer.
Programs may be
altered when timer
is in this mode.
Shows whether
program is enabled
or disabled.
Summertime
switches to daylight
saving.
ON and OFF
for timer settings
Flashing number
represents
program(1 to 8)
Time & on/off
settings.
Fig 2.
1
MAN
AUTO
Set Day Hrs Min Man
We
OFF
12:30
Reset.
Switch operates
only in manual
mode.
Auto: switches on/off
in timer mode.
Man: manual operation
enables switch,
at left, to function.
Example: Cat XL770T
Fig 1.
N.B. If connected incorrectly or if load exceeds the above values,
an internal fuse will rupture, rendering the unit inoperable.
WHAT TO DO IF THE DISPLAY IS BLANK
When this unit is not connected to power for a long period
of time, the back-up battery will run down and the display
will go blank. When power is re-connected, wait for about 20
minutes for the internal battery to charge up before attempting
to program the unit. After this time, the display may still not
return to normal. If this should happen, press the reset button,
see Fig 1, using a small insulated object.
This procedure will erase the memory contents of the unit.

Setting the ‘switching off’ days and times
Having set the day/s of operation and the ‘on’ time, the ‘off’ time
must be chosen, otherwise the light/s will stay on permanently
from the ‘switching on’ time setting. After setting the ‘on’ time,
press set again to enter the setting for program 1 ‘off’ time.
Please note that the program 1 ‘on’ time will automatically be
copied to the ‘off’ time to make setting easier.
Press the ‘Hrs’ and ‘Min’ keys as before to set the ‘off’ time.
If, for instance, you wish the lights to turn off on Sunday (as in
‘on’ program) at, say, 23:15 hours (11.15pm), you must set the
‘off’ time as:
Press the ‘Day’ key to change the day you wish the lights to turn
off. However, this cannot be done if you have selected a group
of days, such as Monday to Friday.
When the program on/off time has been set properly, press
the ‘Set’ key once. This will allow you to set the ‘on’ time for
the next program.
Setting present day and time
In ‘clock’ mode, press the ‘Set’ key. A clock icon will appear at
the top right. The timer is now in ‘clock setting’ mode. (If no key
is pressed for 60 seconds, the timer will automatically revert to
‘clock’ mode.)
Clock setting mode
While the clock icon is flashing, press ‘Day’ until the present day
is illuminated at the bottom of the display, ‘Hrs’ until the present
hour appears (this is a 24 hour clock), then press ‘Min’ until the
current time is reached. By pressing and holding either the ‘Hrs’
or ‘Min’ key, the digits will increment automatically, and similarly
for the ‘Day’ key. The setting below represents 5.35pm
on a Monday.
‘Day’ and ‘time of day’ display
Setting the ‘switching on’ days
While in ‘clock setting’ mode, press ‘set’ once. The timer is now
in ‘program setting’ mode. (If no key is pressed for 60 seconds,
the timer will automatically revert to ‘clock’ mode.)
The display will show a flashing 1. This signifies that this is the
first of 8 programs.
By continually pressing ‘Day’, different days will be illuminated
at the bottom of the display. These indicate the days that the
timer will operate. For instance the above display signifies the
timer will come on during weekdays only (not weekends).
Pressing ‘Day’ once gives the following display:
This means that the timer is to operate during weekends only.
If ‘Day’ is pressed again all the days of the week will be
displayed, meaning the timer is to operate everyday. The next
press will highlight Su, then Mo, then Tu etc. Each progressive
press will highlight another single day, the timer to operate on
that day only.
Setting the ‘switching on’ time
With the 1 flashing, set the ‘switching on’ time for the first
program by pressing the ‘Hrs’ and ‘Min’ keys.
This display shows that the timer will operate on Sunday only
and the light/s will come on at 6.30pm.
2
0:00
17:35
Operating the time switch and setting
the programs
1
ON
1
ON
1
ON
18:30
23 15
1
OFF
2
ON
Note 1: The same on/off times can be set every day or on selected days. These
settings will occupy one program only.
If different on/off times are required on one night (say 3 different settings) then
3 programs would need to be utilised.
There are 8 programs in this timer which provide a maximum of 56 on/off
settings per week.
Note 2: Say for example that you are installing the timer at 11.00am. You set
the timer to turn on at 9.00am and off at 5.00pm. You will have to wait until
9.00am the next morning for the timer to turn on.
Press ‘Set’ after program 8 off time setting and the timer will
go back to ‘clock’ mode and show the current time.
Disabling program(s)
If you wish to cancel a particular program you may press
‘Man’ when that ‘on’ or ‘off’ time is displayed in ‘program
setting’ mode.
By doing this the black ‘ ’ icon appears on the top right of
the screen, which disables that time command.
If, for instance, the timer was programmed to switch on at 19:30
on Wednesday and turn off at 23:15, then by displaying the ‘on’
time (19:30) and pressing ‘Man’, the ‘ ’ icon would appear
and the lights would not switch on. Alternatively, if the turn-off
time of 23:15 was displayed and the ‘Man’ key pressed, the
result would be that the light would not switch off at 23:15 and
would remain on until the next switch-off time occurred.
To resume normal operation, view the time which had previously
been cancelled and press the ‘Man’ key again. The ‘ ’ icon
should disappear, and the program will be reinstated.

Using manual override
There are two ways to override the timer:
1. Turn the MAN/AUTO switch to the MAN position.This allows
the adjacent switch to operate as a normal light switch. In this
mode, the words ON and OFF on the LCD display will not
necessarily reflect the state of the light.
2. Press the ‘Man’ key (under the Excel cover). This will toggle the
light on and off. The words ON and OFF on the LCD display will
show the state of the light. If the word is flashing, this means that
normal programs have been overridden until such time as the
‘Man’ key is pressed again.
Placing in ‘Random mode’
Random mode switches the light/s on and off in a random
fashion, giving an appearance of the house being lived in.
Random switching is unpredictable, but the time the lights are
on will be between 10 minutes and 30 minutes.
Random mode is set by pressing the ‘Hrs’ button for 3 sec. It is
denoted by the following icon on the display:
When random mode is set, random ON/OFF switching will only
occur between the ON/OFF times in the 8 programs. If no
programs are set, no random switching will occur.
To exit random mode, press and hold the ‘Hrs’ button
for 3 sec.
Reading the program
In ‘clock’ mode, press the ‘Set’ key until the clock face icon
appears as a flashing sign at the top right of the display.
Continue to press ‘Set’ and the display will show ON/OFF times
and step from program 1 to 8.
Pressing ‘Set’ further, the timer will then revert to ‘clock’ mode.
Daylight saving time adjustment
In ‘clock’ mode, press and hold the ‘Min’ key for 3 seconds.
‘ST’ will appear on the display.
Press ‘Hrs’ key once to decrement the hour by 1 (-1).
Press ‘Hrs’ key again to increment the hour by 2 (+2).
Press ‘Hrs’ key again to decrement the hour by 1 (-1).
Press ‘Hrs’ key again to increment the hour by 2 (+2).
ie. the adjustment pattern is: -1, +2, -1, -1, +2, -1,...
When the adjustment has been made press ‘Min’ key to confirm
the setting and return to run mode. This will advance or retreat
all the time settings.
One Touch countdown timer
This feature can be used to switch the lights on for 10, 20, 30,
40 or 50 minutes.
To activate the countdown timer hold down ‘Day’ key for
2 seconds. The display will show 10:00 with ON symbol
showing. Repeatedly pressing the ‘Day’ key will increment the
timer value in steps of 10 minutes, until the maximum of 50:00 is
reached. The countdown will begin immediately.
When countdown is operating all preset programs or the
random function will be temporarily suspended.
The countdown feature can be cancelled at any time
by pressing the ‘Man’ key.
3

Red Orange
Blue
770M 770M
XL770T
Load Active
12:30
8
X X X X X X X
ON
OFF
ST
MAN
AUTO
12:30
8
X X X X X X X
ON
OFF
ST
Blue
Red
Orange
770M 770DM DUO SWITCH EXTRA SWITCH
Load Active
Cat XL770T
The switch on the right may be switched to AUTO (timer
operation) or to MAN (manual operation). When in manual
operation the switch on the left will turn lights on and off
just like a standard switch.
The MAN/AUTO switch must be returned to AUTO before
the programmed settings are operational.
Alternative wiring to accommodate an extra switch
(Extra switches available through HPM outlets).
The switch on the left is a Duo switch and is two switches
in one.
The left half of the Duo is a manual override switch. When
switched on, the lights will always be off, regardless of the
programmed settings.
When the left half of the duo is off, the right half switches
timer operation on and off, as shown in the following table:
DUO LEFT DUO RIGHT FUNCTION
OFF ON TIMER OPERATION
OFF OFF ALWAYS ON
ON OFF ALWAYS OFF
ON ON ALWAYS OFF
Note: Back-up battery
The back-up battery ensures that programmed information is
not lost in the event of a power failure. The battery has a life of
approximately 6 years. After this 6 year period, the back-up
facility may cease to function.
HPM Cat XL770T & XL770TH are warranted as here and after
appears, against faulty material and/or workmanship for a period of
one year from date of purchase.
The obligation of the manufacturer, under this warranty, is limited
to servicing and replacing defective parts when the unit is returned
to HPM Legrand, or the distributors in your state, freight pre-paid.
This warranty becomes void on any unit which has been tampered
with or damaged by accident, short circuited, loaded beyond rating or
damaged otherwise by improper operation.
The warranty is also conditional on the unit being installed by a
licensed electrical contractor.
All other warranties, whether expressed or implied, and whether
arising by operation of law or otherwise are hereby excluded.
HPM Legrand
Warranty
www.hpm.com.au
www.hpm.co.nz
Wiring diagrams
Fig 3.
Fig 4.
4
22727A
This manual suits for next models
1
Other HPM Switch manuals