Humimeter RH1 User manual

Instruction manual
Air humidity meter
paper moisture meter
with sword
Instruction manual
Air humidity meter
RH1
paper moisture meter
RH5
with sword
-
shaped sensor
version 1.2_en
© Schaller GmbH
2010
RH5
shaped sensor

page 2 version 1.2_en
Instruction manual short form
Positioning the instrument
RH1: Position your humimeter RH1 in a place that is representative for the
room climate, and make sure to prevent infiltration and unnatural
temperature fluctuations. Further the humimeter RH1 must not be
exposed to direct sunlight. When changing the place let your device adjust
to the surrounding temperature for at least one hour before measuring.
Optionally a wall mount for the humimeter RH1 is available.
First push the sword-sensor into the stack only a short distance (10 cm). At
brief intervals (10 seconds), push it a few more centimetres into the stack.
Let your humimeter RH5 adequately adjust to the material (at least 30
minutes) before you start to measure, particularly when the material pile was
stored at a different temperature than the device. When removing the sword-
shaped sensor please ensure that there is no up or down movement,
because this could deform the sensor. For heavy stacks and rolls please use
the optionally available sword sensor holder and the tool for removing the
sword sensor holder.
Measurement
To switch on the instrument, press the key for 3
seconds.
First the logo appears, and after that the measuring
window opens and the current temperature and
moisture value is displayed.
The calibration curves can be changed by pressing
oder . The calibration curves saved can be
found in the following chart.
Calibration curves
Calibration curve Description Unit Instrument
relHum Relative
humidity of air %RH RH1 / RH5
dewpoint dewpoint °C resp. °F RH1 / RH5
absHum Absolute
humidity of air g/m³ RH1
EMC wood
Equilibrium moisture
content of wood %EMC RH1

version 1.2_en page 3
Description of the definitions:
Relative humidity of air: indicates the relation between the current water
vapour pressure and the maximal possible water vapour pressure (called
saturation vapour pressure).
The relative humidity shows the degree the air is saturated with water
vapour. For example:
50% relative humidity indicates that at the current temperature and the
current pressure the air is half saturated with water vapour, 100 % relative
humidity means that the air is totally saturated. When the air has more than
100 % of relative humidity, the excessive moisture would condense or form
fog.
Absolute humidity: shows the contained amount of water in gramme per
cubic metre of air. The absolute humidity is a direct degree for the amount of
water vapour contained in a certain air volume. It shows how much moisture
can maximally condense or how much water has to be evaporated to receive
a certain desired air humidity.
Dew point temperature: The dew point indicates which temperature the not
completely saturated air has to reach in order to be completely saturated with
water vapour. If the room with the current relative humidity is cooled down to
the dew point temperature, the water vapour begins to condense.
EMC wood: shows the equilibrium moisture content of wood (for the timber
stored under these conditions) in % moisture content of wood and the
temperature in the selected unit (°C or °F).
Menu level overview
Keypad symbols
Measuring window:
Rolling Menu
Power ON / OFF
Switch upper
Switch lower
Save
Hold
Autolog
Watch the saved
data
Supplier´s data
can be added
Menu:

page 4 version 1.2_en
Type selection menu
Store menu
Main menu
Next calibration curve
Previous calibration curve
Power
off (3 sec.)
Show the last log
Store a new log
Power off (3 sec.)
Switch upper
Switch lower
pen this menu/Enter
Edit Logs
Manual Logs
Auto Logs
Clear Logs
Print Logs
Last Logs
All Logs
Clear Logs
Send Logs
Manual Logs
Auto Logs
Clear Logs
Options
Date / Time
Log Time
Language
Unlock
°C/°F
User lever
Light ON Time
Auto Off Time
Calib.
Material calib.
Setting
Password
Reset
Status

version 1.2_en page 5
Operating the instrument
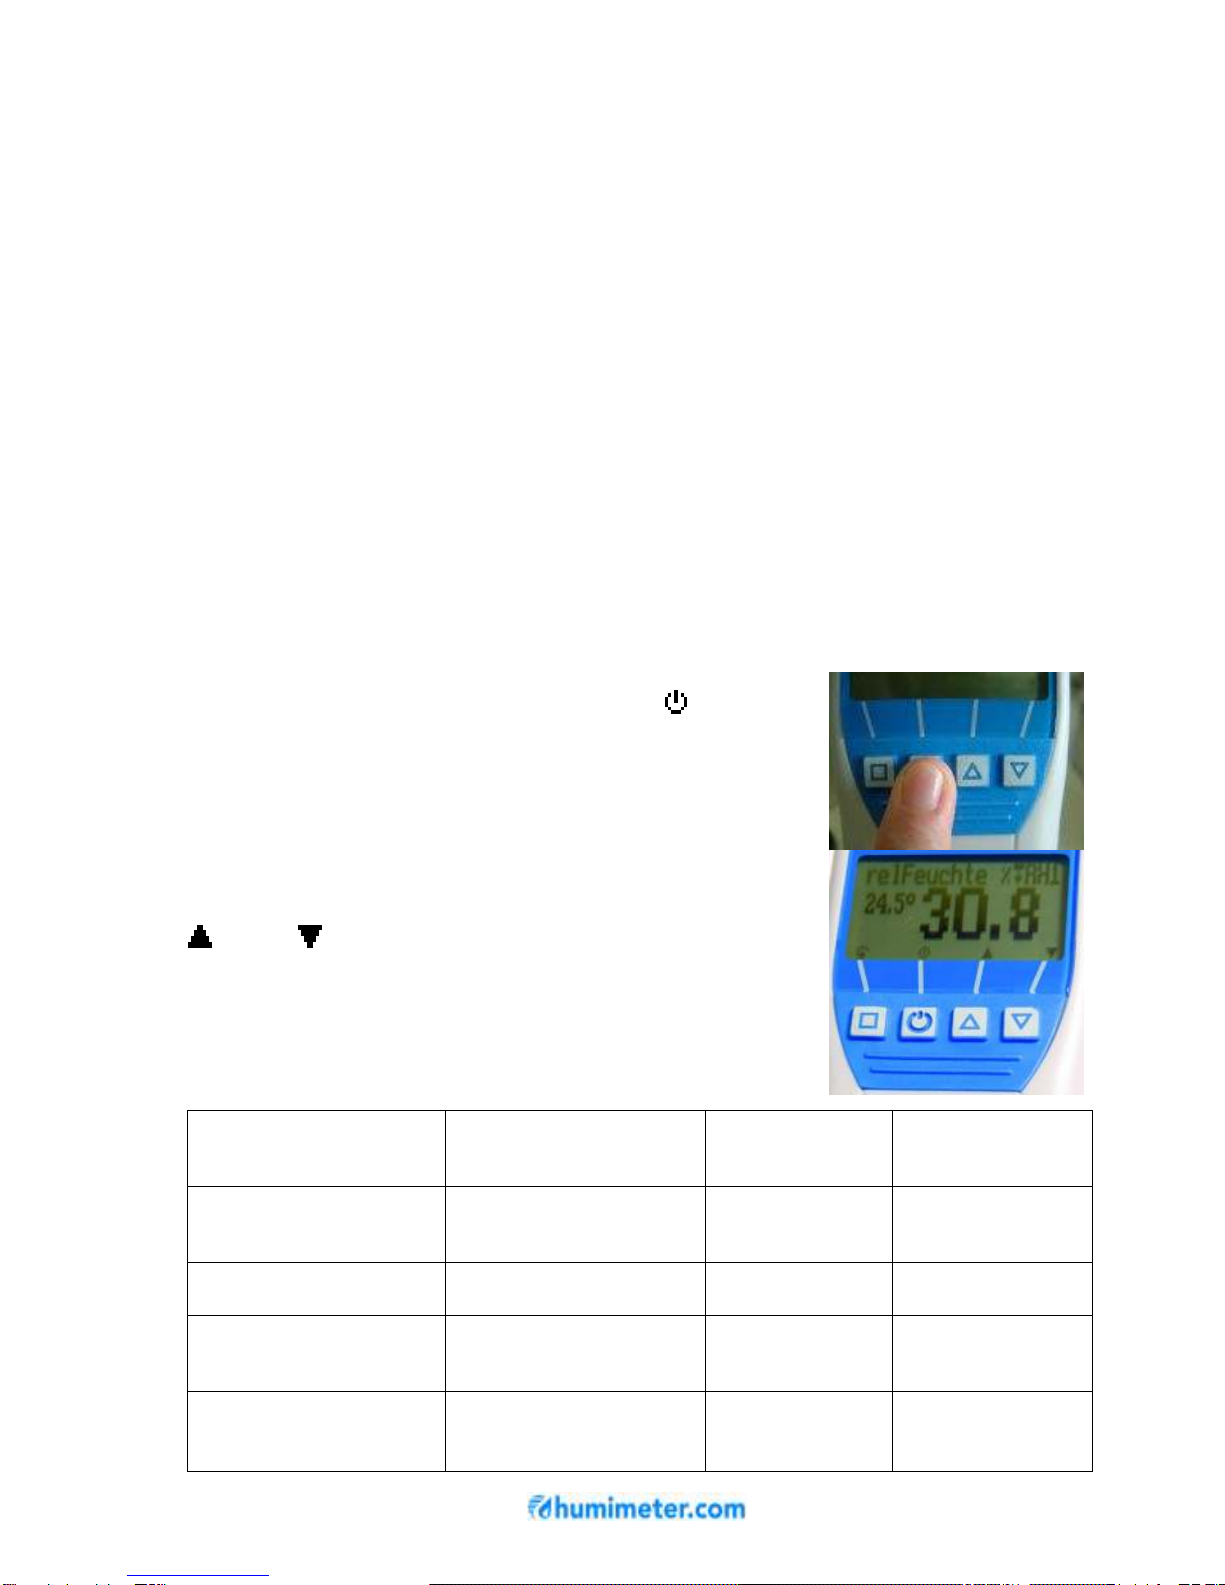
Switching on: Press for 3 seconds.
Changing the calibration curve: or .
Setting the time: Press three times - Options – Date / Time
Here you can set the date and time, according to the format indicated
(JJ.MM.TT), by pressing the button . When you have finished the input of
the year, press the button to adjust the month and then again the button
to adjust the day. For jumping from date to time also press the button .
When you have finished, press for saving date and time.
Datalog: Select your desired interval on the menu level Options – Log Time
using the arrow keys, and confirm by pressing OK. Now in the measuring
window appears in the store menu the symbol . By pressing this
symbol you can activate the AutoLog.
Info! For conserving battery power the device switches off
automatically when selecting a log interval of or longer than 1 minute,
and activates again for saving the logs!
For completing the AutoLog, switch on the device (if necessary) and press
the button. If you want to add supplier´s data please press the
button. You can also work on the supplier´s data subsequently.
Switching on the display lighting: Press the key briefly; the display
lighting switches off automatically after approx. 20 seconds. Pressing any
key activates the display lighting again, and the period for switching off again
is prolonged to 4 minutes (The display lighting time can be modified on menu
level Options – Light ON Time).
Switching off:
Press the
key for 5 seconds. The instrument switches off
when you stop pressing the key. The instrument switches off approx. 4
minutes after the last key has been pressed (The turn-off time can be
modified on menu level Options – Auto Off Time).
Other instrument functions – overview
Manual saving of single measuring values in a measurement series
Display of measuring series and measuring values directly on the
instrument
Printing the saved measuring series (only with PC interface and printer)
Transfer and saving of measuring series on a PC (only with PC
interface)
Automatic single-point adjustment at 50% humidity standard.
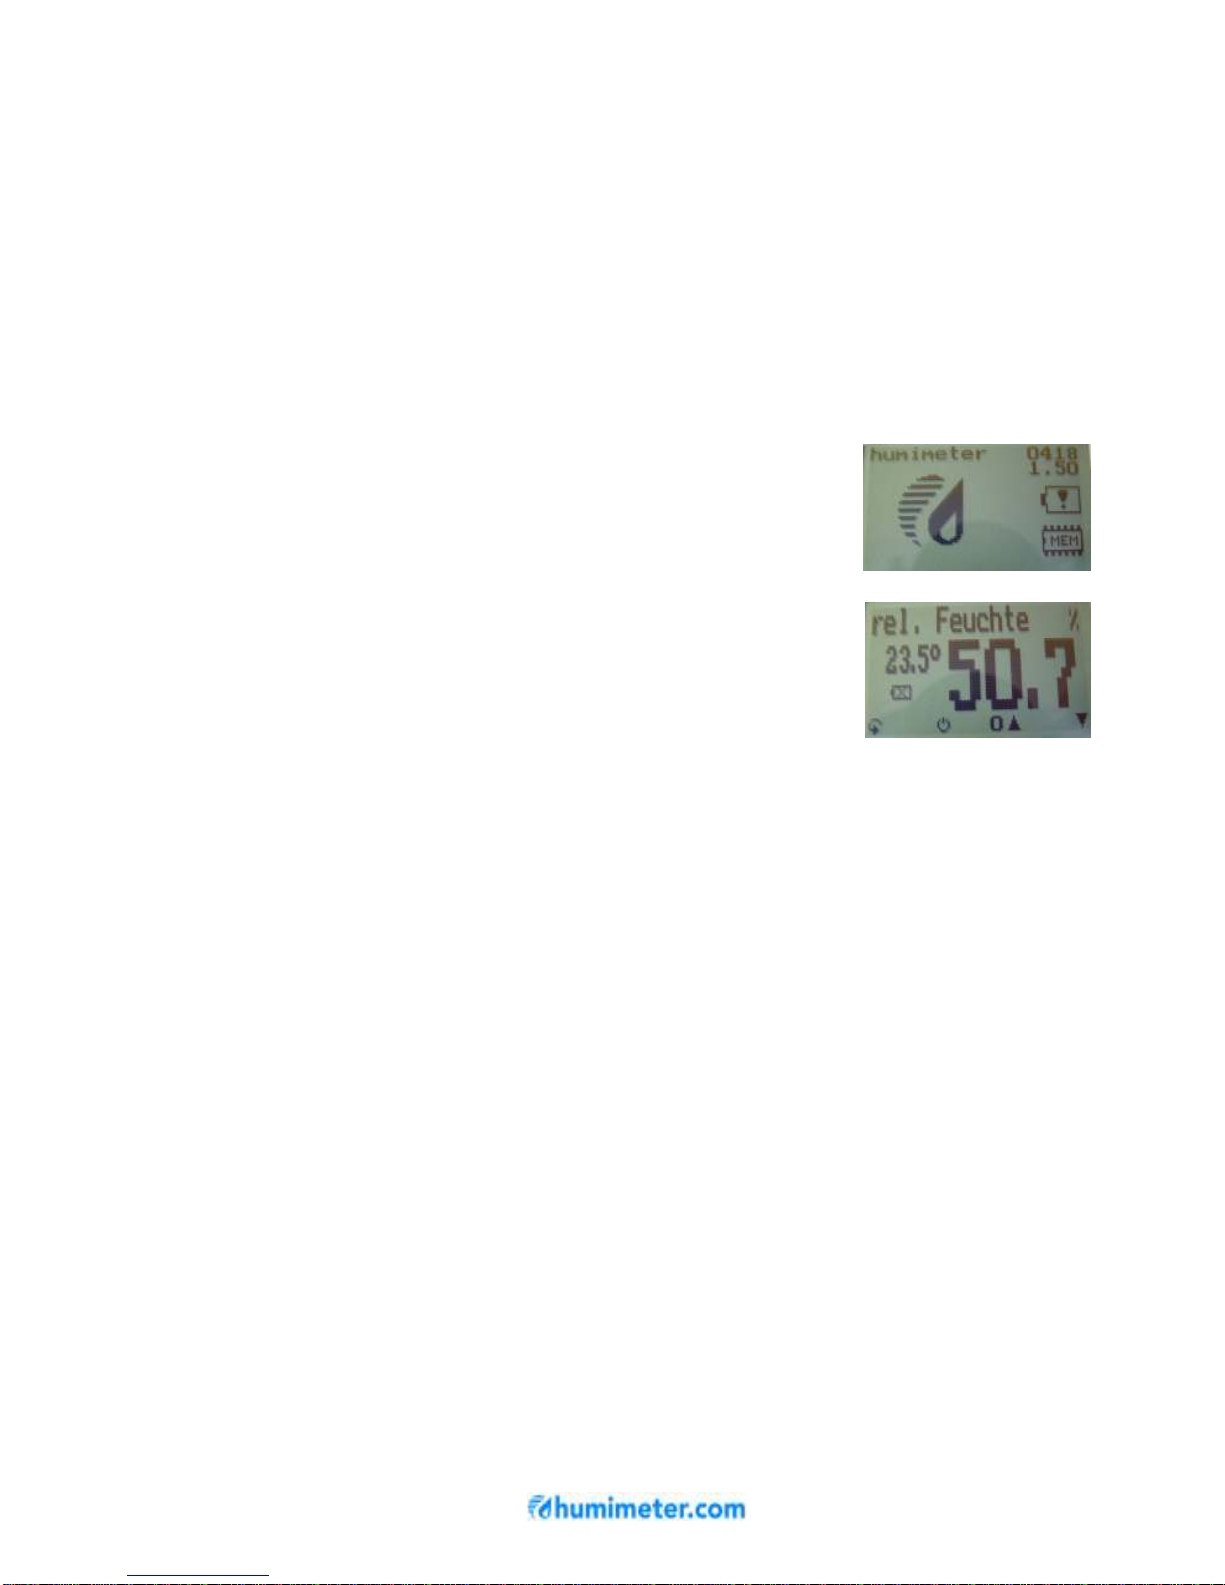
Display of the memory and battery status
Selection of the menu language (DE, EN, FR, IT, ES, RU)
Temperature can be shown in degrees Celsius or degrees Fahrenheit

page 6 version 1.2_en
Activation of a simple user operation
Further instrument functions can be seen on www.humimeter.com
NEW! Single-point adjustment at 50% humidity
standard
From software version 1.50!!!
For the adjustment you need the appropriate calibration equipment for your
device and certified calibration ampoules of 50% rel. humidity.
Details of proceeding
Preparation
To ensure as good as possible inspection results it is essential that the
measuring device, the calibration equipment and the calibration ampoules
have approximately the same temperature.
This temperature has to be between 20°C and 26°C.
The best way to ensure the same temperature of the different components is
to store all components together in a room with only small temperature
fluctuations minimum over night – better for 24 hours.
Mounting the sword-sensor in the
calibration equipment:
On this picture you can see the components of
the calibration equipment plus a calibration
ampoule beside the humimeter RH1 resp. RH5
measuring devices.
Assembling the calibration equipment for humimeter RH5
Assemble the first gasket ring into the upper part.
Plug in the sword-sensor as shown into the upper part.
Now assemble the second gasket ring into the upper part.
Insert the textile pad into the bottom part, open the ampoule and carefully
spill the liquid onto the pad.

version 1.2_en page 7
Assemble the third gasket ring into the bottom part, and put the aluminium
panel onto the gasket ring.
Put the upper part together with the humimeter RH5 carefully onto the
bottom part. Uplift the humimeter RH5 together with the calibration
equipment STRAIGHT in the air and DON´T TURN IT ROUND. As shown
on the picture screw it firmly.
Assembling the calibration equipment for humimeter RH1
Insert the textile pad into the bottom part, open the ampoule and carefully
spill the liquid onto the pad and screw it firmly onto the upper part.
Afterwards plug in the sword-sensor.
Put the humimeter RH1 or RH5 carefully on a table,
and go on with the procedure.
Conditioning of the sword-sensor
This is essential to ensure as good as possible inspection results.
Let the sword-sensor adjust for 2 hours.
The temperature has to be between 20°C and 26°C.
If the shown measuring value differs more than the factory tolerance (1,5%
r.h.) , we recommend to carry out a recalibration as follows:
Offset adjustment
1. Leave the measuring device in the calibration equipment, and switch it
on.
2. Press the Rolling Menu button until you are in the main menu
3. Select the menu level Options by pressing the button and confirm by
pressing .
4. Navigate by pressing to the menu item Unlock and press .

page 8 version 1.2_en
5. Enter the superuser password using the buttons resp. and
confirm by pressing .
•The superuser password after consignment is the serial number
of the device, apparent after switching on the device or in the
menu item Status.
6. Select the menu item Setting using the button and confirm by pressing
.
7. It appears a query if a setting is desired. Confirm
by pressing .
8. Wait until the bar has risen completely. The
device adjusts by itself and automatically jumps to
the measuring window again. The adjustment is
now completed.
9.
Check the result before you remove the device
from the calibration equipment. Press the Rolling
Menu button as long as you reach the measuring
window. Depending on the temperature the
display should show a humidity around 50% now.
If you have made a mistake during the setting, you can reset to the factory
calibration as follows:
Reset to factory calibration
1. Press the button 3 times to reach the menu point Options and
unlock by selecting Unlock if necessary.
2. Select the menu item Reset by pressing the button and confirm by
pressing .
•The query reset? appears on the display.
3. Press the button for resetting the device to the factory calibration.
•The software reloads the factory calibration data and reboots the
device. This will need about 15 to 20 seconds.
4. By pressing the button you can exit without any changes.
Conditioning characteristics of the sensor
During humidity and temperature measurement there are many parameters
which affect the time required until the real measurement value is displayed.
The parameter which may cause the largest measuring errors, is the
difference in temperature between the sensors or between the measuring
instrument and the substance to be measured or the air.
To shorten the time required for the sensors/instrument to reach the same
temperature as the substance or air, proceed as follows:

version 1.2_en page 9
RH1: Move around the instrument in the air
oHold the instrument securely in your hand and move it carefully
backwards and forwards.
Do not hit other objects with the instrument!
RH5: How to move the sword-sensor into the paper pile
oFirst push the sword-sensor into the stack only a short distance (10 cm).
At brief intervals (10 seconds), push it a few more centimetres into the
stack.
If there is a high temperature difference the proceeding should be
repeated – if necessary a few times!
oIf the sword-sensor holder for protecting the sword-sensor is used, make
sure that they are both the same temperature.
In this case push the sword-sensor holder little by little into the stack
stack and leave the sword-shaped sensor in the cover long enough to
ensure a correct measurement result.
Care instructions
Do not drop the instrument or expose it to excessive temperatures. Only
clean it with a lint-free, dry cloth. The instrument is not waterproof. Do not
immerse the sensor in liquid.
How often you need to check the instrument depends on the use and the
required level of accuracy. In general the drift of the sensor according to the
degree of use (constant humidity or use within the whole moisture measuring
range) is beneath 1,5 % per year. You can check humimeter RHx
instruments by yourself using the calibration equipment (see optional
accessories). For a fee, Messtechnik Schaller GmbH can also carry out a
calibration at their factory. On demand you will also receive a calibration
certificate.
Changing the batteries:
Use a finger to press the arrow on the battery cover
and pull it back.
Remove the flat batteries and replace them with four
new 1.5 Volt AA Alkaline batteries. Make sure you
place the battery poles in the right positions.
Press the batteries down so that you can close the
cover.

page 10 version 1.2_en
Liability
The manufacturer is not liable for any incorrect measurements and resulting
damages.
As this rapid measurement procedure is influenced by product-specific and
application-specific conditions, we recommend you to carry out a plausibility
check on the measurement results. Each instrument has a serial number and
warranty seal. If this is broken we cannot provide warranty. If the instrument
is defective, contact Messtechnik Schaller GmbH via www.humimeter.com
or your supplier.
If the battery symbol appears in the measuring window
resp. if a critical charge of battery is shown in the status,
the batteries have to be changed IMMEDIATELY.
If you do not use your humimeter RHx device for a
longer period, remove the batteries. For eventual
resulting damages we cannot provide any warranty.
Optional accessories:
•Wall holder / table stand - Two-in-one holder for the RHx instrument
series made of acrylic glass.
•Interface for printing saved data on a portable printer and/or transferring
data to a PC incl. software humimeter LogMemorizer
•humimeter LogMemorizer data recording and analysis software for
Windows® PCs based on a database; for recording data, direct analysis of
measurement values in the programme, numerous export functions;
download a demo version on
www.humimeter.com/wiki.
•Portable measurement value printer – battery-powered direct thermal
printer
•Sword sensor holder for RH5 to protect the sword-shaped sensor for use
with heavy stacks
•Tool for removing sword sensor holder for RH5 for removing the sword
cover from heavy stacks
•Calibration equipment and calibration ampoules: For checking your
own humimeter RHx

version 1.2_en page 11
Technical data
Measurement: Measuring range/Resolution/ Accuracy
rel. humidity: 0 to 100%RH / 0,1% / ±1,5% (0 - 90% at 25°C)
Temperature Pt1000 DIN B °C:
-10 to +60°C / 0,1°C / ±0,4°C (at 25°C)
Temperature °F: 14 to 140°F / 0,3°F / ±0,7°F (at 77°F)
Dewpoint °C: -55 to +60°C / 0,1°C
Dewpoint °F: -67 to 140°F / 0,3°F
abs. humidity: 0 to 130g/m³ / 0,1g/m³
Equilibrium moisture
content of wood: 2 to 30% / 0,1% / ±0,5% (at 25°C)
Operating temperature range: -10°C to 60°C / 14 to 140°F
Storage temperature: -20°C to 60°C / -4 to 140°F
Temperature compensation: automatic
Memory for measuring values: approx. 10.000 measuring values
Menu languages: German, English, French, Italian, Spanish,
Russian
Power supply: 4 x 1,5Volt AA Alkaline batteries
(approx. 1.800 measurements)
Switch-off time: after approx. 4 minutes
Power consumption: 55 mA (with display lighting)
Display: 128 x 64 matrix display,
with LED backlighting
Dimensions: Housing Sensor Weight (incl. batt.)
RH1: 145 x 63 x 24mm 100mm x Ø 12mm approx. 210g
RH5: 145 x 63 x 29mm 295mm x 20mm x 4mm approx. 285g
Protection class IP 40
Delivery includes Wooden case
4 x 1,5Volt AA Alkaline batteries
Short instruction manual

page 12 version 1.2_en
!IMPORTANT! Essential reading
Common reasons for incorrect measurements
•Sunlight or other sources of heat or cold which do not correspond
to the ambient temperature
•Measuring errors due to too short conditioning time
•Measuring errors due to differences in temperature
To show how important it is that the temperature of the instrument is the
same as the temperature of the substance to be measured, the table below
shows measuring errors due to a temperature difference of only 1°C / 1.8°F
between the measuring instrument and the substance to be measured at
different ambient temperatures.
. 10°C (50°F)
20°C (68°F)
30°C (86°F)
10%r.F.
±0,7% ±0,6% ±0,6%
50%r.F.
±3,5% ±3,2% ±3,0%
90%r.F.
±6,3% ±5,7% ±5,4%
At room temperature (20°C/68°F) and assumed paper m oisture value of
50%r.H. a deviation of 1°C / 1.8°F between the meas uring sensor and the
substance to be measured results in a measuring error of 3.2%r.H. A
deviation of 3°C / 5.4°F would result in a measurin g error of over 10%.
Further examples are given in the „Mollier i-x“ diagram.
•Dripping or sprayed water
•Irreversible damage of the sensor element due to aggressive
gases
•Danger of condensation following temperature changes
•Dirty moisture sensor
•Foreign objects on the sensor
Technical Support – User Support
You will find technical support and comprehensive application support
at http://support.humimeter.com
This manual suits for next models
1
Table of contents
Other Humimeter Measuring Instrument manuals