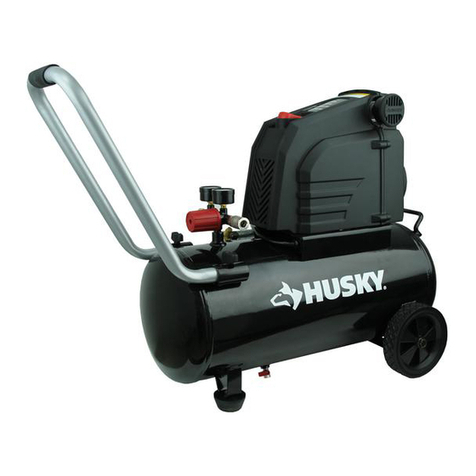
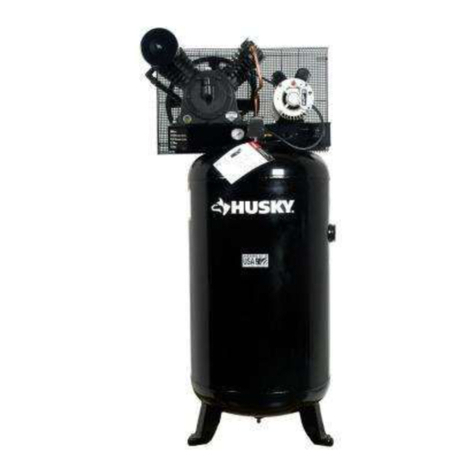
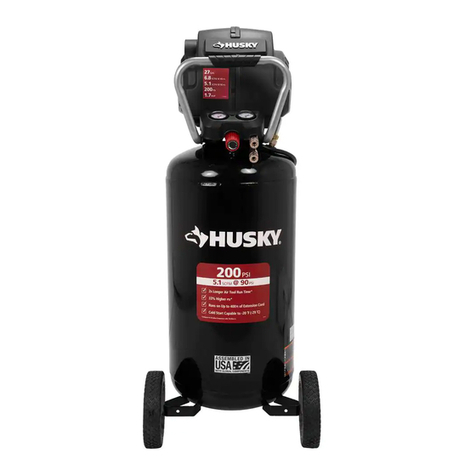
Husky F226VWD User manual

OPERATOR’S MANUAL
26 Gallon Portable Air Compressor
F226VWD / 585-819
Your air compressor has been engineered and manufactured to Husky’s high standard for dependability,
ease of operation, and operator safety. When properly cared for, it will give you years of rugged, trouble-
free performance.
Thank you for buying a Husky product.
SAVE THIS MANUAL FOR FUTURE REFERENCE
WARNING: To reduce the risk of injury, the user must read and understand the operator’s manual before
using this product.
02/09/2009

This tool has many features for making its use more pleasant and enjoyable. Safety, performance, and dependability have been
given top priority in the design of this product making it easy to maintain and operate.
CAUTION
This compressor is intended to be used at a duty cycle 50%.
DANGER
This compressor/pump is not equipped and should not be used to supply breathing quality air. Additional equipment
wouldbenecessarytoproperlylterandpurifytheairtomeetminimalspecicationsforGradeDbreathingasdescribed
inCompressedGasAssociation Commodity Specication G 7.1 - 1966, OSHA29CFR1910.134.CompressedGas
Association, 4221 Walney Road, Fifth Floor, Chantilly, VA 20151-2923, (703) 788-2700, www.cganet.com.Any such
additional equipment has not been examined and no implication of proper use for breathing air is intended or implied. If this
compressor is altered in any way, existing warranties shall be voided. Husky and MAT Holdings, Inc. disclaim
any liabilities whatsoever for any loss, personal injury, or damage.
TABLE OF CONTENTS
g GeneralSafetyRules .............................................................1-2
g SpecicSafetyRules...............................................................3
gSymbols........................................................................4-5
gElectrical ........................................................................6
g GlossaryofTerms .................................................................7
g Features........................................................................8-9
gAssembly ........................................................................9
g Operation.....................................................................10-13
gMaintenance ....................................................................14
gTroubleshooting ..................................................................15
g ExplodedView...................................................................16
gParts List .......................................................................17
gWarranty .......................................................................18
gNotes ..........................................................................19
INTRODUCTION

WARNING
Readandunderstandallinstructions.Failuretofollowall
instructionslistedbelowmayresultinelectricshock,re,
and/or serious personal injury.
SAVE THESE INSTRUCTIONS
WORK AREA
gKeep your work area clean and well lit. Cluttered
benchesanddarkareasinviteaccidents.Floormustnotbe
slippery from wax or dust.
gDo not operate power tools in explosive atmospheres,
such as in the presence of flammable liquids, gases,
or dust. Power tools create sparks which may ignite the
dust or fumes.
gKeep bystanders, children, and visitors away while
operating tools.Distractionscancauseyoutolose
control.
gOperate air compressor in an open area at least 18 in.
away from any wall or object that could restrict the
flow of fresh air to ventilation openings.
ELECTRICAL SAFETY
gAvoid body contact with grounded surfaces such as
pipes, radiators, ranges, and refrigerators. There is an
increased risk of electric shock if your body is grounded.
gDon’t expose power tools to rain or wet conditions.
Water entering a power tool will increase the risk of electric
shock.
gDo not abuse the cord. Never use the cord to carry the
tool or pull the plug from an outlet. Keep cord away
from heat, oil, sharp edges, or moving parts. Replace
damaged cords immediately. Damaged cords increase
the risk of electric shock.
gWhen operating a power tool outside, use an outdoor
extension cord marked “W-A” or “W”. These cords are
rated for outdoor use and reduce the risk of electric shock.
PERSONAL SAFETY
gEye protection which conforms to ANSI specifications
and provides protection against flying particles both
from the FRONT and SIDE should ALWAYS be worn by
the operator and others in the work area when loading,
operating, or servicing this tool. Eye protection is
requiredtoguardagainstyingfastenersanddebris,which
could cause severe eye injury.
gThe employer and/or user must ensure that proper eye
protection is worn.WerecommendaWideVisionSafety
Mask for use over eyeglasses or standard safety glasses
thatprovideprotectionagainstyingparticlesbothfromthe
front and side. Always use eye protection which is marked
tocomplywithANSIZ87.1.
gAdditional safety protection will be required in some
environments.Forexample,theworkingareamayinclude
exposure to a noise level which can lead to hearing
damage. The employer and user must ensure that any
necessary hearing protection is provided and used by the
operator and others in the work area. Some environments
will require the use of head protection equipment. When
required, the employer and user must ensure that head
protectionmarkedtocomplywithANSIZ89.1isused.
gStay alert, watch what you are doing, and use common
sense when operating a power tool. Do not use tool
while tired or under the influence of drugs, alcohol, or
medication. A moment of inattention while operating power
tools may result in serious personal injury.
gDress properly. Do not wear loose clothing or jewelry.
Contain long hair. Keep your hair, clothing, and
gloves away from moving parts. Loose clothes, jewelry,
or long hair can be caught in moving parts.
gDo not overreach. Keep proper footing and balance at
all times. Proper footing and balance enables better
control of the tool in unexpected situations.
gUse safety equipment. Always wear eye protection.
Dustmask,nonskidsafetyshoes,hardhat,orhearing
protection must be used for appropriate conditions.
gDo not use on a ladder or unstable support. Stable
footing on a solid surface enables better control of the tool
in unexpected situations.
TOOL USE AND CARE
gDo not exceed the pressure rating of any component
in the system.
gProtect material lines and air lines from damage or
puncture. Keep hose and power cord away from sharp
objects,chemicalspills,oil,solvents,andwetoors.
gCheck hoses for weak or worn condition before each
use, making certain all connections are secure.Donot
use if defect is found. Purchase a new hose or notify an
authorized service center for examination or repair.
gRelease all pressures within the system slowly. Dust
and debris may be harmful.
gStore idle tools out of the reach of children and other
untrained persons. Tools are dangerous in the hands of
untrained users.
Page 1
GENERAL SAFETY RULES

gMaintain tools with care.Followmaintenanceinstructions.
Properly maintained tools are easier to control.
gCheck for misalignment or binding of moving parts,
breakage of parts, and any other condition that may
affect the tool’s operation. If damaged, have the tool
serviced before using. Many accidents are caused by
poorly maintained tools.
gNever point any tool toward yourself or others.
gKeep the exterior of the air compressor dry, clean, and
free from oil and grease. Always use a clean cloth when
cleaning. Never use brake fluids, gasoline, petroleum-
based products, or any strong solvents to clean the unit.
Followingthisrulewillreducetheriskofdeteriorationofthe
enclosure plastic.
SERVICE
gTool service must be performed only by qualified repair
personnel. Service or maintenance performed by
unqualiedpersonnelmayresultinariskofinjury.
gDisconnect power supply, open drain valve to
decompress tank and allow water to drain, and allow
air compressor to become cool to the touch before
servicing. Turn pressure regulator knob fully c l o c k w i s e
after shutting off compressor.
gWhen servicing a tool, use only identical replacement
parts. Follow instructions in the Maintenance section
of this manual. Use of unauthorized parts or failure to
follow Maintenance instructions may create a risk of injury.
Page 2
GENERAL SAFETY RULES

gKnow your power tool.Readoperator’smanualcarefully.
Learnitsapplicationsandlimitations,aswellasthespecic
potentialhazardsrelated tothistool.Followingthisrulewill
reducetheriskofelectricshock,re,orseriousinjury.
gDrain tank of moisture after each day’s use. If unit will
not be used for a while, it is best to leave drain valve open
until such time as it is to be used. This will allow moisture
to completely drain out and help prevent corrosion on the
inside of tank.
gRisk of Fire or Explosion.Onlysprayammableliquids
suchaspaintsorlacquers.Neversprayammableliquids
inaconnedarea.Sprayareamustbewellventilated.Do
notsmokewhilesprayingorspraywheresparkorameis
present. Keep compressors as far from the spraying area
aspossible,atleast15feetfromthesprayingareaandall
explosive vapors.
gRisk of Bursting.Donotadjustregulatortoresultinoutput
pressure greater than marked maximum pressure of
attachment. Do not use a pressure greater than maximum
rated pressure of compressor.
gIf connected to a circuit protected by fuses, use time-
delay fuses with this product.
gTo reduce the risk of electric shock, do not expose to
rain. Store indoors.
gInspect tank yearly for rust, pin holes, or other
imperfections that could cause it to become unsafe.
Never weld or drill holes in the air tank.
gMake sure the hose is free of obstructions or snags.
Entangled or snarled hoses can cause loss of balance or
footing and may become damaged.
gUse the air compressor only for its intended use. Do
not alter or modify the unit from the original design or
function.
gAlways be aware that misuse and improper handling of
this tool can cause injury to yourself and others.
gNever leave a tool unattended with the air hose attached.
gDo not operate this tool if it does not contain a legible
warning label.
gDo not continue to use a tool or hose that leaks air or
does not function properly.
gAlways disconnect the air supply and power supply
before making adjustments, servicing a tool, or when a
tool is not in use.
gDo not attempt to pull or carry the air compressor by
the hose.
gYour tool may require more air consumption than this
air compressor is capable of providing.
gNever store tool with air connected. Storing the tool with
airconnectedcanresultinunexpectedringandpossible
serious personal injury.
gAlways follow all safety rules recommended by the
manufacturer of your air tool, in addition to all safety
rules for the air compressor. Following this rule will
reduce the risk of serious personal injury.
gNever direct a jet of compressed air toward people or
animals. Take care not to blow dust and dirt towards
yourself or others. Followingthisrulewillreducetherisk
of serious injury.
gProtect your lungs. Wear a face or dust mask if the
operationisdusty.Followingthisrulewillreducetherisk
of serious personal injury.
gDo not use this air compressor to spray chemicals. Your
lungs can be damaged by inhaling toxic fumes. A
respirator may be necessary in dusty environments or when
sprayingpaint.Donotcarrywhilepainting.
gInspect tool cords and hoses periodically and, if
damaged, have repaired at your nearest Authorized
Service Center. Constantly stay aware of cord
location.Followingthisrulewillreducetheriskofelectric
shockorre.
gNever use an electrical adaptor with this grounded plug.
gCheck damaged parts. Before further use of the air
compressor or air tool, a guard or other part that is
damaged should be carefully checked to determine
that it will operate properly and perform its intended
function. Check for alignment of moving parts,
binding of moving parts, breakage of parts,
mounting, and any other conditions that may affect
its operation. A guard or other part that is
damaged should be properly repaired or replaced by
an authorized service center. Following this rule will
reducetheriskofshock,re,orseriousinjury.
gMake sure your extension cord is in good condition.
When using an extension cord, be sure to use one
heavy enough to carry the current your product will
draw. A wire gauge size (A.W.G.) of at least 14 is
recommended for an extension cord 50 feet or less in
length. A cord exceeding 100 feet is not recommended.
If in doubt, use the next heavier gauge. The smaller
the gauge number, the heavier the cord. An undersized
cord will cause a drop in line voltage resulting in loss of
power and overheating.
gSave these instructions.Refertothemfrequentlyanduse
them to instruct others who may use this air compressor. If
you loan someone this tool, loan them these instructions
also.
Page 3
SPECIFIC SAFETY RULES
Page 4
Some of the following symbols may be used on this tool. Please study them and learn their meaning. Proper interpretation
of these symbols will allow you to operate the tool better and safer.
SYMBOLS
SYMBOL NAME DESIGNATION/EXPLANATION
V Volts Voltage
A Amperes Current
Hz Hertz Frequenct(cyclespersecond)
Alternating Current Type of current
Class II Construction Double-insulatedconstructon
Wet Conditions Alert Donotexposetorainoruseindamplocations.
ReadTheOperator’sManual To reduce the risk of injury, user must read and understand
operator’s manual before using this product.
Eye Protection Always wear safety goggles or safety glasses with side shields
and, as necessary, a full face shield when operating this product.
Safety Alert Precautions that involve your safety.
RiskofBursting Donotadjustregulatortoresultinoutputpressuregreaterthan
marked maximum pressure of attachment. Donotuseapres-
sure greater than maximum rated pressure of compressor.
RiskofFireorExplosion Donotsprayammableliquidinaconnedarea.Sprayarea
mustbewellventilated.Donotsmokewhilesprayingorspray
wheresparkorameispresent.Keepcompressorsasfarfrom
thesprayingareaaspossible,atleast15feetfromthespraying
area and all explosive vapors.
RiskofElectricalShock HazardousVoltage:Disconnectfrompowersourcebeforeser-
vicing.
Compressor must be grounded.
Hot Surface To reduce the risk of injury or damage, avoid contact with any
hot surface.
RisktoBreathing Air obtained directly from the air compressor should never be
used to supply air for human consumption.

Page 5
SYMBOLS
The following signal words and meanings are intended to explain the levels of risk associated with this product.
SYMBOL SIGNAL MEANING
DANGER Indicates an imminently hazardous situation, which, if not avoided, will result in death or
serious injury.
WARNING Indicates a potentially hazardous situation, which, if not avoided, could result in death or
serious injury.
CAUTION Indicates a potentially hazardous situation, which, if not avoided, may result in minor or
moderate injury.
CAUTION (WithoutSafetyAlertSymbol)Indicatesasituationthatmayresultinpropertydamage.
SERVICE
Servicing requires extreme care and knowledge and should be
performedonlybyaqualiedservicetechnician.Forservicewe
suggest you return the product to the nearest AUTHORIZED
SERVICE CENTER for repair. When servicing, use only identical
replacement parts.
WARNING
To avoid serious personal injury, do not attempt to use this
product until you read thoroughly and understand
completely the operator’s manual. If you do not
understand the warnings and instructions in the operator’s
manual, do not use this product. Call customer service for
assistance.
The operation of any power tool can result in foreign objects being thrown into your eyes, which can
result in severe eye damage. Before beginning power tool operation, always wear safety goggles or
safetyglasseswithsideshieldsand,whenneeded,afullfaceshield.WerecommendWideVisionSafety
Mask for use over eyeglasses or standard safety glasses with side shields. Always use eye protection
whichismarkedtocomplywithANSIZ87.1.
WARNING
SAVE THESE INSTRUCTIONS

EXTENSION CORDS
Useonly3-wireextensioncordsthathave3-pronggrounding
plugsand3-polereceptaclesthataccepttheproduct’splug.
When using a power tool at a considerable distance from the
power source, use an extension cord heavy enough to carry
the current that the product will draw. An undersized exten-
sion cord will cause a drop in line voltage, resulting in a loss
of power and causing the motor to overheat. Use the chart
provided below to determine the minimum wire size required
inanextension cord.Onlyroundjacketedcordslistedby
Underwriter’sLaboratories(UL)shouldbeused.
When working with the product outdoors, use an extension
cord that is designed for outside use. This is indicated by the
letters “WA” on the cord’s jacket.
Beforeusinganextensioncord,inspectitforlooseorexposed
wires and cut or worn insulation.
WARNING
Keep the extension cord clear of the working area.
Position the cord so that it will not get caught on lumber,
tools, or other obstructions while you are working with a
powertool.Failuretodosocanresultinseriouspersonal
injury.
WARNING
Check extension cords before each use. If damaged
replace immediately. Never use the product with a
damaged cord since touching the damaged area could
cause electrical shock resulting in serious injury.
ELECTRICAL CONNECTION
This product is powered by a precision-built electric motor. It
should be connected to a power supply that is 120 volts, 60
Hz, AC only (normal household current). Do not operate
thisproductondirectcurrent(DC).Asubstantialvoltagedrop
will cause a loss of power and the motor will overheat. If the
product does not operate when plugged into an outlet, double
check the power supply.
SPEED AND WIRING
Theno-loadspeedofthisproductisapproximately3,450rpm.
This speed is not constant and decreases under a load or with
lowervoltage.Forvoltage,thewiringinashopisasimpor-
tant as the motor’s horsepower rating. A line intended only for
lights cannot properly carry a power tool motor. Wire that is
heavy enough for a short distance will be too light for a greater
distance. A line that can support one power tool may not be
able to support two or three products.
GROUNDING INSTRUCTIONS
This product must be grounded. In the event of a malfunction
or breakdown, grounding provides a path of least resistance
for electric current to reduce the risk of electric shock. This
product is equipped with an electric cord having an equipment-
grounding conductor and a grounding plug. The plug must be
plugged into a matching outlet that is properly installed and
grounded in accordance with all local codes and ordinances.
Donotmodifytheplugprovided.Ifitwillnotttheoutlet,have
theproperoutletinstalledbyaqualiedelectrician.Improper
connection of the equipment-grounding conductor can result
in a risk of electric shock. The conductor with insulation having
an outer surface that is green with or without yellow stripes is
the equipment-grounding conductor. If repair or replacement
of the electric cord or plug is necessary, do not connect the
equipment-grounding conductor to a live terminal.
Checkwithaqualiedelectricianorservicepersonnelifthe
grounding instructions are not completely understood, or if in
doubtastowhethertheproductisproperlygrounded.Repair
or replace a damaged or worn cord immediately.
This product is intended for use on a circuit that has an outlet
liketheoneshowninFigure1.Italsohasagroundingpinlike
theoneshown.Onlyconnecttheproducttoanoutlet
having the same conguration as the plug. Do not use an
adapter with this product.
Figure1
Page 6
ELECTRICAL
**Ampererating(onproductdataplate)
0 - 2.0 2.1-3.4 3.5-5.0 5.1-7.0 7.1-12.0 12.1-16.0
Cord Length Wire Size (A.W.G.)
25´ 16 16 16 16 14 14
50´ 16 16 16 14 14 12
100´ 26 16 14 12 10 —
**Usedon12gauge-20ampcircuit.
NOTE:AWG=AmericanWireGauge
GROUNDING PIN 120V GROUNDED OUTLET

Page 7
GLOSSARY OF TERMS
Air Filter
Porous element contained within a metal or plastic housing
attached to the compressor cylinder head which removes
impurities from the intake air of the compressor.
Air Tank
Cylindrical component which contains the compressed air.
Check Valve
Devicethatpreventscompressedairfromowingbackfrom
the air tank to the compressor pump.
Cut-In Pressure
The low pressure at which the motor will automatically restart.
Cut-Off Pressure
The high pressure at which the motor will automatically shut
off.
Electric Motor
Devicewhichprovidestherotationalforcenecessarytooperate
the compressor pump.
Manual Automatic/Off Switch
Control which turns the air compressor on or off. The pressure
switch will not automatically start and control the compressor
unlessthemanualAutomatic/OffSwitchisintheAUTOMATIC
( l ) position.
NPT (National Pipe Thread)
A seal thread tape must be used to provide a leak-free seal on
pipe threaded connections.
Pressure Regulator Knob
Regulatestheoutgoingpressurefromtheairoutlettothetool.
It is possible to increase or decrease the pressure at the outlet
by adjusting this control knob.
Pressure Switch
Automatically controls the on/off cycling of the compressor. It
stops the compressor when the cut-off pressure in the tank
is reached and starts the compressor when the air pressure
drops below the cut-in pressure.
PSI (Pounds Per Square Inch)
Measurement of the pressure exerted by the force of the
air. The actual psi is measured by a pressure gauge on the
compressor.
Pump
Produces the compressed air with a reciprocating piston
contained within the cylinder.
Regulator Pressure Gauge
Displaysthecurrentlinepressure.Linepressureisadjusted
by rotating the pressure regulator knob.
Pressure Relief Valve
Prevents air pressure in the air tank from rising over a
predetermined limit.
SCFM (Standard Cubic Feet Per Minute)
A unit of measure of air delivery.
Tank Pressure Gauge
Indicates the pressure in the air tank.
Thermal Overload Switch
Automatically shuts off the compressor if the temperature of
the electric motor exceeds a predetermined limit.

Page 8
FEATURES
PRODUCT SPECIFICATIONS
RunningHorsepower.....................................................1.5HP
Air Tank Capacity........................................................... 26gal.
Air Pressure ........................................................ 150psimax.
AirDelivery ............................................... 4.0SCFM@90psi
Lubrication...................................................................Oil-Free
Gauges...............................................................2 in. diameter
Input................................... 120V,60Hz,ACOnly,15.0Amps
Net Weight.................................................................111.0lbs.
Figure2
PRESSURE REGULATOR
GAUGE TANK PRESSURE
GAUGE
PRESSURE
REGULATOR KNOB
AUTOMATIC / OFF
PRESSURE RELIEF VALVE
HANDLE MOTOR
RESET BUTTON

Page 9
FEATURES
HANDLE
The air compressor is equipped with a padded carrying handle
for ease of use.
OIL-FREE INDUCTION MOTOR
Your air compressor features permanently lubricated bearings.
PRESSURE REGULATOR KNOB
Use the pressure regulator knob to adjust the amount of air
being delivered through the hose.
PRESSURE RELIEF VALVE
The pressure relief valve is designed to automatically release
air if the air receiver pressure exceeds the preset maximum.
REGULATOR PRESSURE GAUGE
The current line pressure is displayed on the regulator
pressure gauge. This pressure can be adjusted by rotating the
pressure regulator knob.
TANK PRESSURE GAUGE
The tank pressure gauge indicates the pressure of the air in
the tank.
ASSEMBLY
ATTACHING HOSE
See Figure 3.
gMake sure the air compressor is off and unplugged.
gRotatepressureregulatorknobfullycounterclockwise.
gInsert hose adapter end of air hose into female coupler end
in air compressor.
FEMALE COUPLER
HOSE ADAPTER
END
PRESSURE REGULATOR KNOB OFF
Figure3
KNOW YOUR AIR COMPRESSOR
See Figure 2.
The safe use of this product requires an understanding of the information on the product and in this operator’s manual as well
asaknowledgeoftheprojectyouareattempting.Beforeuseofthisproduct,familiarizeyourselfwithalloperatingfeaturesand
safety rules.

Page 10
OPERATION
WARNING
If any parts are damaged or missing do not operate this
productuntilthepartsarereplaced.Failuretoheedthis
warning could result in serious personal injury.
WARNING
Do not attempt to modify this product or create
accessories not recommended for use with this product.
Anysuchalterationormodicationismisuseandcould
result in a hazardous condition leading to possible
serious personal injury.
WARNING
Donotattachairchuckorothertooltotheopenendof
the hose until start-up has been completed.
WARNING
Do not allow familiarity with products to make you
careless.Rememberthatacarelessfractionofasecond
issufcienttoinictseriousinjury.
WARNING
Always wear safety goggles or safety glasses with side
shields when operating power tools. Failure to do so
could result in objects being thrown into your eyes
resulting in possible serious injury.
WARNING
Do not use any attachments or accessories not
recommended by the manufacturer of this product. The
use of attachments or accessories not recommended
can result in serious personal injury.
CAUTION
Donotuseinanenvironmentthatisdustyorotherwise
contaminated. Using the air compressor in this type of
environment may cause damage to the unit.
UNPACKING
gCarefully remove the product from the box. Make sure that all items listed in the packing list are included.
gInspect the product carefully to make sure no breakage or damage occurred during shipping.
gDonotdiscardthepackingmaterialuntilyouhavecarfullyinspectedandsatisfactorilyoperatedtheproduct.
gIfanypartsaredamagedormissing,pleasecall1-866-340-3912forassistance.
PACKING LIST
Aircompressor1
Instructionmanual1

Page 11
OPERATION
APPLICATIONS
Air compressors are utilized in a variety of air system
applications. Match hoses, connectors, air tools, and
accessories to the capabilities of the air compressor.
You may use this tool for the purposes listed below:
gOperatingsomelightdutyairpoweredtools.
gInatingtires,airbeds,sportsequipment,etc.
(Inationaccessoriessoldseparately)
TURNING THE AIR COMPRESSOR ON/OFF
See Figure 4.
gTurn the power switch to the AUTOMATIC position to power
the compressor on.
gTo turn the air compressor off, turn the power switch to the
OFF position.
USING THE AIR COMPRESSOR
See Figures 4-5.
gEnsure power switch is in the OFF position and air
compressor is unplugged.
gIf not already installed, attach hose to compressor as
previously instructed.
gAttach1/4in.NPTmaleconnectorttingoftoolandinto
female couple end of air hose.
WARNING
AlwaysensuretheswitchisintheOFFpositionandthe
regulator pressure gauge reads zero before changing air
toolsordisconnectingthehosefromtheairoutlet.Failure
to do so could result in possible serious personal injury.
gRotateregulatorknobclockwisetoopenairflow.
gConnect the power cord to the power supply.
gTurn the switch AUTOMATIC.
gRotatepressureregulatorknobtodesiredlinepressure.
Turning the knob clockwise increases air pressure at the
outlet; turning counterclockwise reduces air pressure at
the outlet.
gFollowingallsafetyprecautionsinthismanualandthe
manufacturer’s instructions in the air tool manual, you
may now proceed to use your air powered tool.
WARNING
Your tool may require more air consumption than this air
compressor is capable of providing. Check the tool
manual to avoid damage to the tool or risk of personal
injury.
gIf using an ination accessory, control the amount of air
ow with the pressure regulator knob. Turning the knob
fullycounterclockwisewillcompletelystoptheowofair.
NOTE: Always use the minimum amount of pressure
necessary for your application. Using a higher pressure
than needed will drain air from the tank more rapidly and
cause the unit to cycle on more frequently.
gWhennished,alwaysdrainthetankandunplugtheunit.
Never leave the unit plugged in and/or running unattended.
(Seepage15fordraininginstructions.)
OFF/AUTOMATIC
OFFAUTOMATIC
QUICK-CONNE CT
AIR FITTING
1/4 in. QUICK
COU PLER
Figure4
Figure5

Page 12
OPERATION
WARNING
Always disconnect the air supply and power supply
before making adjustments, servicing a tool, or when a
tool is not in use.
DRAINING THE TANK
See Figure 6-1, 6-2.
To help prevent tank corrosion and keep moisture out of the air
used, the tank of the compressor should be drained daily.
To drain:
gTurn the air compressor off.
gPull the ring on the pressure relief valve to release until
pressure gauge reads less than 20 psi.
gRelease the ring.
gOpen the drain valve allowing air to bleed from the
tank. (6-1)
gTilt tank as shown in figure 8 to drain moisture from tank
into a suitable container.
NOTE: Condensate is a polluting material and should be
disposed of in compliance with local regulations.
gIf drain valve is clogged, release all air pressure, remove
and clean valve, then reinstall.
WARNING
Unplug the air compressor and release all air from the
tank before servicing. Failure to depressurize tank before
attempting to remove valve may cause serious personal
injury.
gClose the drain valve. (6-2)
Figure 6-2Figure 6-1

CHECKING THE PRESSURE RELIEF VALVE
See Figure 7-8.
DANGER
Donotattempttotamperwiththepressurereliefvalve.
Anythingloosenedfromthisdevicecouldyupandhit
you.Failuretoheedthiswarningcouldresultindeathor
serious personal injury.
The pressure relief valve will automatically release air if
the air receiver pressure exceeds the preset maximum.
The valve should be checked before each day of use by
pulling the ring by hand.
gTurntheaircompressoronandallowthetanktoll.The
compressor will shut off when the pressure reaches the
preset maximum.
gTurn the air compressor off.
gPull the ring on the pressure relief valve to release air for
threetoveseconds.
gReleasethering.Airmustimmediatelystopescaping
when the ring is released. Any continued loss of air
after releasing the ring indicates a problem with the
pressure relief valve. Discontinue use and seek service
before continued use of the air compressor.
WARNING
If air leaks after the ring has been released, or if the valve
is stuck and cannot be actuated by the ring, do not use the
air compressor until the pressure relief valve has been
replaced. Use of the air compressor in this condition
could result in serious personal injury.
RESET BUTTON
See Figure 9.
This compressor is equipped with a manual reset overload
protector which will shut off motor if it becomes overloaded.
IfoverloadprotectorshutsmotorOFFfrequently,lookforthe
following causes.
Low voltage
Lack of proper ventilation/room temperature too high
Wrong gauge wire or length of extension cord
To reset the air compressor:
gTurn the air compressor off.
gUnplug air compressor and wait until compressor cools
down.
gPlug the air compressor into an approved outlet.
gTurn the air compressor on.
gPress the reset button.
Page 13
OPERATION
Figure9
Figure7
PRESSURE RELIEF
VALVE
CHECK VALVE
PRESSURE RELIEF VALVE
RING
TO RELEASE AIR
Figure8
RESET BUTTON

Page 14
MAINTENANCE
WARNING
When servicing, use only identical Husky replacement
parts. Use of any other parts may create a hazard or
cause product damage.
WARNING
Do not attempt to modify this product or create
Always wear safety goggles or safety glasses with side
shields during power tool operation or when blowing dust.
If operation is dusty, also wear a dust mask.
WARNING
Always release all pressure, disconnect from power
supply, and allow unit to cool to the touch before cleaning
or making repairs on the air compressor.
GENERAL MAINTENANCE
Humidity in the air causes condensate to form in the air tank.
This condensate should be drained daily and/or every hour,
using the instructions found in Draining the Tank.
The pressure relief valve automatically releases air if the air
receiver pressure exceeds the preset maximum. Check the
pressure relief valve before each use following the instructions
found in Checking the Pressure Relief Valve.
Inspect the tank yearly for rust, pin holes, or other imperfections
that could cause it to become unsafe.
Avoid using solvents when cleaning plastic parts. Most plastics
are susceptible to damage from various types of commercial
solvents and may be damaged by their use. Use clean cloths to
remove dirt, dust, oil, grease, etc.
WARNING
Donotatanytimeletbrakeuids,gasoline,petroleum-
based products, penetrating oils, etc., come in contact
with plastic parts. Chemicals can damage, weaken or
destroy plastic which may result in serious personal
injury.Electrictoolsusedonberglassmaterial,wallboard,
spackling compounds, or plaster are subject to accelerated
wearandpossibleprematurefailurebecausetheberglass
chips and grindings are highly abrasive to bearings,
brushes, commutators, etc. Consequently, we do not
recommended using this tool for extended work on these
types of materials. However, if you do work with any of
these materials, it is extremely important to clean the tool
using compressed air.
LUBRICATION
Allofthebearingsinthistoolarelubricatedwithasufcient
amount of high grade lubricant for the life of the unit under
normal operating conditions. Therefore, no further lubrication
of the bearings is required.
CLEANING THE AIR FILTER
See Figure 10.
Fromtime to time, theairlter needs to beremovedand
cleaned.
gTurn the air compressor off.
gUnplug the air compressor.
g Turntheairtercovercounterclockwisetoremove.
g Removeairlterfromairlterhousing.
g Blowcompressedairthroughtheairlterfor10-15seconds.
STORAGE
1.Draintankofmoisture.
2. When not in use, store compressor in a cool, dry place.
3.Disconnecthoseandhangopenendsdowntoallowany
moisture to drain.
4. Wrap the power cord on handle
Figure10

Page 15
TROUBLESHOOTING
PROBLEM POSSIBLE CAUSE SOLUTION
Compressor will not run Loss of power or overheating
No electrical power
Blownshop/housefuse
Shop/house breaker open
PushButtonoverloadisactuated
Pressure switch bad
Tank is full of air
Check for proper use of extension cord
Check to be sure unit is plugged in
Check fuse/breaker or motor overload
Replaceshop/houseblownfuse
Resetshop/housebreaker,determiningwhy
problem happened
Depress the Push Button Overload button.
Seemanualpage13
Take compressor to service center
Motor hums but cannot run or runs slowly Low voltage
Wrong gauge wire or length of extension cord
Shorted or open motor winding
Defectivecheckvalveorunloader
Call an electrician
Check for proper gauge wire and cord length
Take compressor to service center
Fusesblow/circuitbreakertripsrepeatedly Incorrect size fuse, circuit overload
Wrong gauge wire or length of extension cord
Defectivecheckvalveorunderloader
Check for proper fuse, use time-delay fuse,
disconnect other electrical appliances from
circuit or operate compressor on its own
branch circuit
Check for proper gauge wire and cord length
Take compressor to service center
Push Button Overload protector cuts out
repeatedly
Low voltage
Lack of proper ventilation/room temperature
too high
Wrong gauge wire or length of extension cord
Call an electrician
Move compressor to well-ventilated area
Check for proper gauge wire and cord length
Air receiver pressure drops when compressor
shuts off
Loose connections
(ttings,tubing,etc.)
Loose drain valve
Check valve leaking
Check all connections with soap and water
solution and tighten
Tighten drain valve
Take compressor to service center
Excessive moisture in discharge air Excessive water in air tank
High humidity
Draintank
Movetoareaoflesshumidity;useairlinelter
Compressor runs continuously Defectivepressureswitch
Excessive air usage
Take compressor to service center
Decrease air usage; compressor not large
enough for tool’s requirement
Compressor vibrates Loose mounting bolts Tighten mounting bolts
Air output lower than normal Brokeninletvalves
Connections leaking
Take compressor to service center
Tighten connections

EXPLODED VIEW - Item Item #103155 | Model #F226VWD | SKU# 585-819
1
2
3
4
5
6
7
8
9
10
11
12
13
14
15
16
17
18
19
20
21
22
23
24
25
26
27
28
29
30
31
32
33
34
35
36
37 38
39
40
41
42
44
43
45
46
47
48
49
50
51 52
53
54
55
56
57
58
59
60 61
62
63 64
65
66
Page 16

PARTS LIST - Item #103155 | Model #F226VWD | SKU# 585-819
Page 17
NOTES
1 E100296 Shroud,Front,F2,Black 1
2 1 AirFilter,Base 1
3 1 AirFilter,Element 1
4 1 AirFilter,Cap 1
5 Screw,M5x0.8x15mm,
Lefthandthreads 1
6 Washer,Flat,M5 1
7 E100297 Fan,F2 1
8 2 Screw,M5x0.8x25mm,SHCS 1
9 2 Nut,M5x0.8 1
10 2 Piston 1
11 2 Ring,Piston 1
12 2 Cap,Piston 1
13 2 Screw,M5x0.8x16mm,SHCS 1
14 Screw,M6x1x35mm,SHCS 4
15 Washer,Lock,M6 4
16 Head,F2 1
17 3 Screw,M3x0.4x5mm,HFHS 1
18 3 Washer,Lock,M3 1
19 3 Retainer,OutletValve 1
20 3 Valve,Outlet 1
21 3 O-Ring,Head 1
22 3 Plate,Valve 1
23 3 O-Ring,Cylinder 1
24 3 Valve,Inlet 1
25 3 Retainer,InletValve 1
26 3 Screw,M3x0.4x5mm,HFHS 1
27 2 Cylinder 1
28 Motor/Pump,F2 1
29 E100300 Shroud,Rear,F2,Black 1
30 E100299 Shroud,Endcap,Motor 1
31 Screw,M6x1x12,HFHS 6
32 E100793 Grip,Handle 1
33 E103485 Handle 1
34 E100307 Coupler,QuickConnect 1
35 E103744 Gauge,2”,150psiRedLine, 1
250psimax,BackInlet
36 E103753 Regulator,withTallKnob 1
37 Nipple,1/4”mnptx40mm
38 E103744 Gauge,2”,150psiRedLine, 1
250psimax,BackInlet
39 E102612 Valve,Safety,165psi 1
40 E102750 Switch,Pressure,150psiCutOut 1
41 Bolt,M8x1.25x25mm 4
42 Washer,Lock 4
43 Tank,Asm,26Gallon,Vertical 1
44 PowerCord 1
45 Screw,M8x1.25x15mm,HFHS 4
46 Washer,Lock,M8 4
47 Washer,Flat,M8 4
48 Nut,1/4Compression 1
49 E103161 Tube,Relief,Copper 1
50 Nut,1/4Compression 1
51 E101362 Valve,Check 1
52 Nut,3/8Compression 1
53 E103162 Tube,Outlet,Copper 1
54 Nut,13mm,Flare 1
55 Elbow,13mm,Flarexmnpt 1
56 2 Bearing 1
57 2 Screw,M6x1x35mm,SHCS 1
58 2 Eccentric 1
Includes #54
59 Bolt,M10x1.25x39mm,HHSH 2
60 E100306 Wheel,7” 2
61 Washer,Flat,M10 2
62 Nut,Lock,M10x1.25 2
63 E100098 Valve,Drain 1
64 Nut,M8x1.25 2
65 E100240 Isolator,Round 2
66 Bolt,M8x1.25x30mm 2
Item
Number
Kit
Number
Part
Number Description Quantity Item
Number
Kit
Number
Part
Number Description Quantity
Kit
Number
Part
Number Kit Name Reference Number
1 E101611 AirFilterKit 8-13
2 E103495 PistonKit 27
3 E103497 ValvePlateAsmKit 56-58

Page 18
WARRANTY
LIMITED WARRANTY STATEMENT
MAT Holdings, Inc. warrants to the original retail purchaser
that this MAT Holdings, Inc. product is free from defect in
material and workmanship and agrees to repair or replace,
at MAT Holdings, Inc.’s discretion, any defective product
free of charge within these time periods from the date of
purchase.
gOneyeariftheproductisusedforpersonal,familyor
household use;
g90 days, if used for any other purpose, such as commercial
or rental.
This warranty extends to the original retail purchaser only
and commences on the date of the original retail purchase.
Any part of the MAT Holdings, Inc. product.manufactured or
supplied by MAT Holdings, Inc. and found in the reasonable
judgment of MAT Holdings, Inc. to be defective in material or
workmanship will be repaired or replaced by an authorized
MAT Holdings, Inc. service dealer without charge for parts
and labor.
The product, including any defective part, must be returned
to an authorized service dealer within the warranty period.
The expense of delivering the MAT Holdings, Inc. product to
the dealer for warranty work and the expense of returning it
back to the owner after repair or replacement will be paid by
the owner. MAT Holdings, Inc.’s responsibility in respect to
claims is limited to making the required repairs or replace-
ments and no claim of breach of warranty shall be cause for
cancellation or rescission of the contract of sale of any MAT
Holdings, Inc. product. Proof of purchase will be required by
the dealer to substantiate any warranty claim. All warranty
work must be performed by an authorized MAT Holdings,
Inc. service dealer.
Thiswarrantyislimitedtoninety(90)daysfromthedateof
original retail purchase for any MAT Holdings, Inc. product
that is used for rental or commercial purposes, or any other
income-producing purpose.
This warranty does not cover any MAT Holdings, Inc. product
that has been subject to misuse, neglect, negligence, or ac-
cident, or that has been operated in any way contrary to the
operatinginstructionsasspeciedinthisoperator’smanual.
This warranty does not apply to any damage to the MAT
Holdings, Inc. product that is the result of improper mainte-
nance or to any MAT Holdings, Inc. product that has been
alteredormodied.Thewarrantydoesnotextendtorepairs
made necessary by normal wear or by the use of parts or
accessories which are either INCOMPATIBLE WITH THE
MAT HOLDINGS, INC. product or adversely affect its
operation, performance, or durability.
MAT Holdings, Inc. reserves the right to change or improve
the design of any MAT Holdings, Inc. product without as-
suming any obligation to modify any product previously
manufactured.
ALLIMPLIEDWARRANTIESARELIMITEDINDURATION
TOTHESTATEDWARRANTYPERIOD.ACCORDINGLY,
ANY SUCH IMPLIED WARRANTIES INCLUDING MER-
CHANTABILITY, FITNESS FOR A PARTICULAR PUR-
POSE, OR OTHERWISE, ARE DISCLAIMED IN THEIR
ENTIRETYAFTERTHEEXPIRATIONOFTHEAPPROPRI-
ATETWO-YEAR,ONE-YEAR,ORNINETYDAYWARRAN-
TY PERIOD. MAT Holdings, Inc.’s OBLIGATION UNDER
THISWARRANTYISSTRICTLYANDEXCLUSIVELYLIM-
ITED TO THE REPAIR OR REPLACEMENT OF DEFEC-
TIVEPARTSANDMATHoldings,Inc.DOESNOTASSUME
ORAUTHORIZEANYONETOASSUMEFORTHEMANY
OTHER OBLIGATION. SOME STATES DO NOTALLOW
LIMITATIONS ONHOW LONGANIMPLIED WARRANTY
LASTS,SOTHEABOVELIMITATIONMAYNOTAPPLYTO
YOU.MATHoldings,Inc.ASSUMESNORESPONSIBILITY
FORINCIDENTAL,CONSEQUENTIAL,OROTHERDAM-
AGES INCLUDING, BUT NOT LIMITED TO, EXPENSE
OF RETURNING THE MAT Holdings, Inc. PRODUCTTO
ANAUTHORIZEDSERVICEDEALERANDEXPENSEOF
DELIVERING IT BACK TO THE OWNER, MECHANIC’S
TRAVELTIME,TELEPHONEORTELEGRAMCHARGES,
RENTALOFALIKEPRODUCTDURINGTHETIMEWAR-
RANTY SERVICE IS BEING PERFORMED, TRAVEL,
LOSS OR DAMAGE TO PERSONAL PROPERTY, LOSS
OFREVENUE,LOSSOFUSEOFTHEPRODUCT,LOSS
OFTIME,ORINCONVENIENCE.SOMESTATESDONOT
ALLOWTHEEXCLUSIONORLIMITATIONOFINCIDEN-
TAL OR CONSEQUENTIAL DAMAGES, SOTHEABOVE
LIMITATIONOREXCLUSIONMAYNOTAPPLYTOYOU.
Thiswarrantygivesyouspeciclegalrights,andyoumay
also have other rights which vary from state to state.
This warranty applies to all MAT Holdings, Inc. products man-
ufactured or supplied by MAT Holdings, Inc. and sold in the
United States and Canada.
Tolocateyournearestservicedealer,dial1-866-340-3912.
This manual suits for next models
1
Table of contents
Languages:
Other Husky Air Compressor manuals

Husky
Husky Trim Plus H1503TP User manual

Husky
Husky 835-522 User manual

Husky
Husky Y1000 User manual

Husky
Husky H2G3TK User manual

Husky
Husky Trim Plus H1503TP User manual

Husky
Husky FP2205 Series User manual

Husky
Husky VT631404 User manual

Husky
Husky H1301F User manual

Husky
Husky HS518102 User manual

Husky
Husky C271H User manual