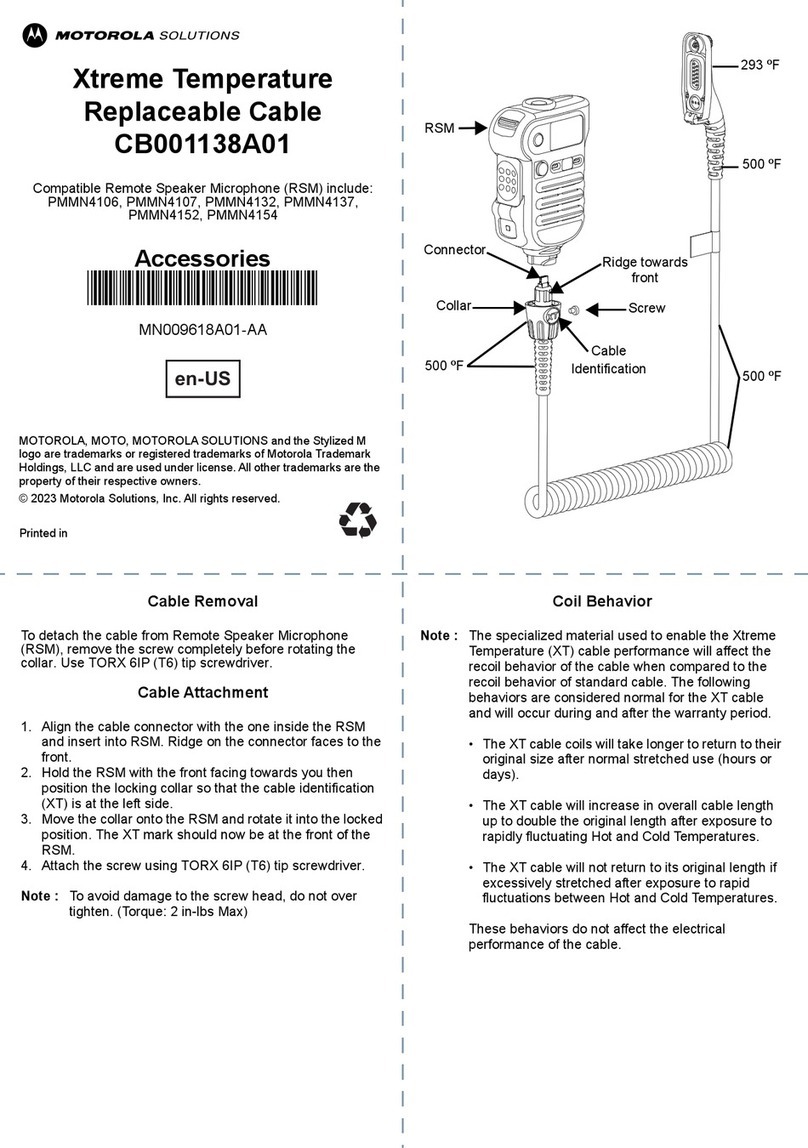
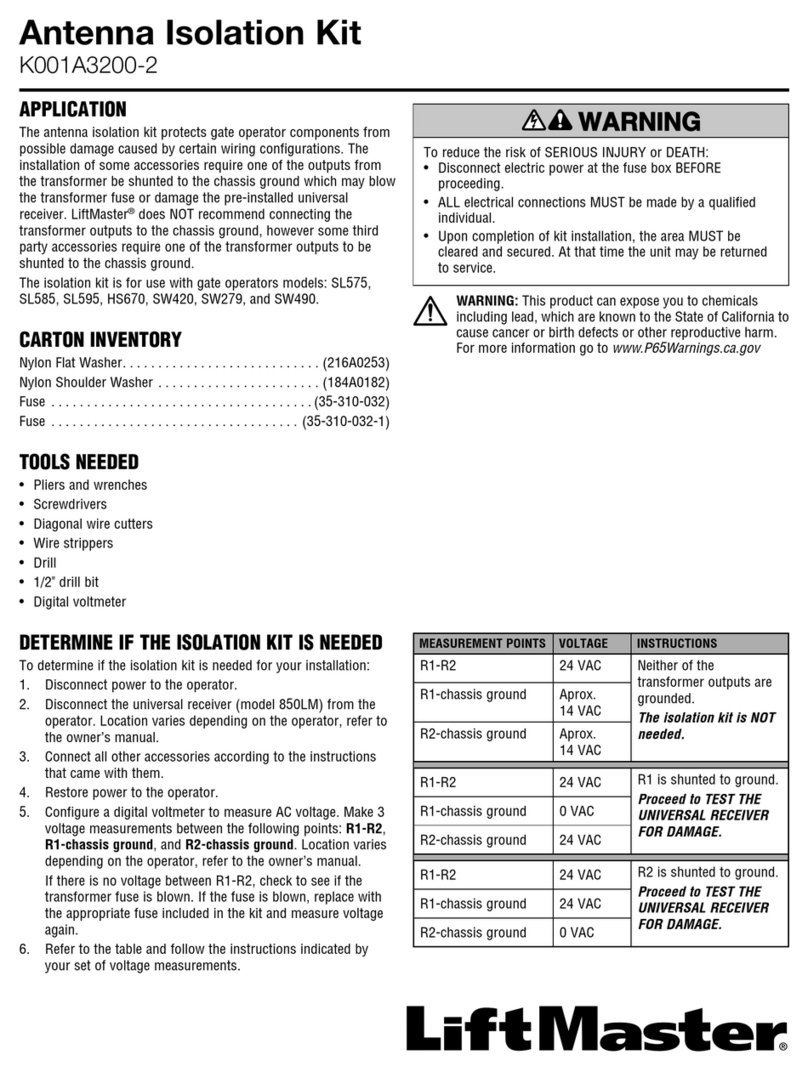
Hyperkin M07411 User manual

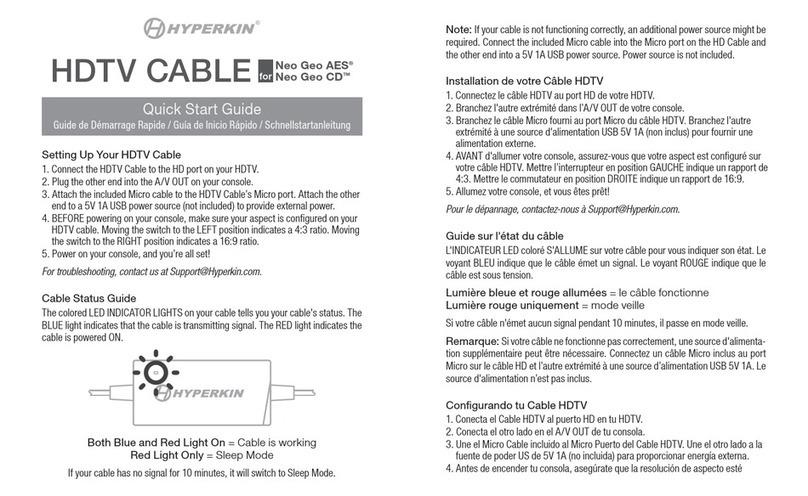
Both Blue and Red Light On = Cable is working
Red Light Only = Sleep Mode
If your cable has no signal for 10 minutes, it will switch to Sleep Mode.
Note: If your cable is not functioning correctly, an additional power source might be
required. Connect the included Micro cable into the Micro port on the HD Cable and
the other end into a 5V 1A USB power source. Power source is not included.
Installation de votre Câble HDTV
1. Connectez le câble HDTV au port HD de votre HDTV.
2. Branchez l'autre extrémité sur la sortie A/V SORTIE de votre console.
3. Branchez le câble Micro fourni sur le port Micro du câble HDTV. Branchez l'autre
extrémité à une source d'alimentation USB 5V 1A (non fournie) pour alimenter
l'appareil de façon externe.
4. AVANT d'allumer votre câble, assurez-vous que votre format est conguré. Mettre
l’interrupteur en position GAUCHE indique un rapport de 4:3. Le fait de mettre
l’interrupteur en position DROITE indique un rapport de 16:9.
5. Allumez votre console, et vous êtes prêt!
Pour le dépannage, contactez-nous à Support@Hyperkin.com.
Guide sur l'état du câble
L'INDICATEUR LED coloré S'ALLUME sur votre câble pour vous indiquer son état. Le
voyant BLEU indique que le câble émet un signal. Le voyant ROUGE indique que le
câble est sous tension.
Lumière bleue et rouge allumées = le câble fonctionne
Lumière rouge uniquement = mode veille
Si votre câble n'émet aucun signal pendant 10 minutes, il passe en mode veille.
Remarque: Si votre câble ne fonctionne pas correctement, une source d'alimenta-
tion supplémentaire peut être nécessaire. Connectez un câble Micro inclus au port
Micro sur le câble HD et l’autre extrémité à une source d’alimentation USB 5V 1A. Le
source d'alimentation n’est pas inclus.
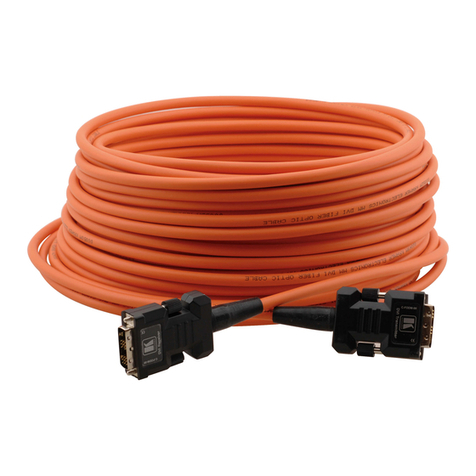
Setting Up Your HDTV Cable
1. Connect the HDTV Cable to the HD port on your HDTV.
2. Plug the other end into the A/V OUT on your console.
3. Attach the included Micro cable to the HDTV Cable’s Micro port. Attach the other
end to a 5V 1A USB power source (not included) to provide external power.
4. BEFORE powering on your cable, make sure your aspect is congured. Moving the
switch to the LEFT position indicates a 4:3 ratio. Moving the switch to the RIGHT
position indicates a 16:9 ratio.
5. Power on your console, and you’re all set!
For troubleshooting, contact us at Support@hyperkin.com.
Cable Status Guide
The colored LED INDICATOR LIGHTS on your cable tells you your cable's status. The
BLUE light indicates that the cable is transmitting signal. The RED light indicates the
cable is powered ON.
Quick Start Guide
Guide de Démarrage Rapide / Guía de Inicio Rápido / Schnellstartanleitung
HDT Cable
for
Saturn™

Please visit www.Hyperkin.com/warranty to register your ofcial Hyperkin product
for Hyperkin’s Warranty.
Veuillez visiter www.Hyperkin.com/warranty pour enregistrer votre produit ofciel
Hyperkin pour la garantie Hyperkin.
Por favor visite www.Hyperkin.com/warranty para registrar su producto ocial de
Hyperkin para la garantía de Hyperkin.
Bitte besuchen Sie www.Hyperkin.com/warranty, um Ihr ofzielles Hyperkin-Pro-
dukt für die Garantie von Hyperkin zu registrieren.
4. Vergewissern Sie sich VOR dem Einschalten des Kabels, dass Ihr Aspekt
konguriert ist. Wenn Sie den Schalter auf LINKS stellen, wird ein Verhältnis von 4:
3 angezeigt. Wenn Sie den Schalter auf die Position RECHTS stellen, wird ein
Verhältnis von 16:9 angezeigt.
5. Schalten Sie Ihre Konsole ein und fertig!
Zur Fehlerbehebung kontaktieren Sie uns unter Support@Hyperkin.com.
Anleitung für Status des Kabels
Die farbige LED-ANZEIGELEUCHTE auf Ihrem Kabel informiert Sie über den Status
Ihres Kabels. Das BLAUE Licht bedeutet, dass das Kabel Signale übermittelt. Das
ROTE Licht bedeutet, dass das Kabel eingeschaltet ist.
Blaues und rotes Licht an = Kabel funktioniert
Nur rotes Licht = Schlafmodus
Wenn das Kabel 10 Minuten lang ohne Signal ist, wechselt es in den Ruhemodus.
Hinweis: Wenn das Kabel nicht ordnungsgemäß funktioniert, ist möglicherweise
eine zusätzliche Stromquelle erforderlich. Schließen Sie ein Micro Kabel an den Micro
Port des HD Kabels und das andere Ende an eine 5V 1A USB Stromquelle an. Micro
Kabel und Stromquelle sind nicht im Lieferumfang enthalten.
Configuración de su cable HDTV
1. Conecte el cable de HDTV al puerto HD de su HDTV.
2. Enchufe el otro extremo en la salida A/V OUT de su consola.
3. Conecte el cable Micro incluido al puerto Micro del cable de HDTV. Conecte el otro
extremo a una fuente de alimentación USB de 5V 1A (no incluida) para proporcionar
alimentación externa.
4. ANTES de encender su cable, asegúrese de que su aspecto esté congurado.
Mover el interruptor a la posición IZQUIERDA indica una relación de 4: 3. Mover el
interruptor a la posición DERECHA indica una relación de 16: 9.
5. Encienda su consola y ¡ya está listo!
Para la solución de problemas, póngase en contacto con nosotros en Support@Hyper-
kin.com.
Guía de Estado del Cable
Las luces indicadoras LED de colores de tu cable te indican el estado del mismo. La
luz AZUL indica que el cable está transmitiendo señal. La luz ROJA indica que el
cable está encendido.
Tanto la luz azul como la luz roja encendidas = El cable está
funcionando
Sólo la luz roja = Modo de sueño
Si su cable no tiene señal durante 10 minutos, cambiará al modo de reposo.
Nota: Si tu cable no funciona correctamente, es posible que se requiera una fuente
de alimentación adicional. Conecte el cable Micro incluido al puerto Micro en el cable
HD y la otra punta a una fuente de alimentación USB de 5V 1A. La fuente de
alimentación no está incluido.
Einrichtung Ihres HDTV-Kabels
1. Schließen Sie das HDTV-Kabel an den HD-Anschluss Ihres HDTV an.
2. Schließen Sie das andere Ende an den A/V OUT Ihrer Konsole an.
3. Schließen Sie das mitgelieferte Mikrokabel an den Mikroanschluss des
HDTV-Kabels an. Schließen Sie das andere Ende an eine 5-V-1A-USB-Stromquelle
an (nicht im Lieferumfang enthalten), um eine externe Stromversorgung
bereitzustellen.

Statement of Compliance with EU Directive
Hyperkin Inc., located at 1939 West Mission Blvd, Pomona, CA 91766, declares under our sole
responsibility that the product, HDTV Cable for Saturn™, is in compliance with the essential
requirements and other relevant provisions of Low Voltage Directive (LVD) 2014/35/EU, EMC Directive
2014/30/EU, and RoHS Directive 2011/65/EU and carries the CE marking.
The full Declaration of Conformity can be requested by emailing:
Email: compliance@hyperkin.com
Company Name: Hyperkin Inc.
Address: 1939 West Mission Blvd, Pomona, CA 91766
Déclaration de Conformité à la Directive Européenne
Hyperkin Inc. située au 1939 West Mission Blvd, Pomona, CA 91766, affirme sous notre seule
responsabilité que le produit, HDTV Cable for Saturn™, est conforme aux exigences essentielles et
autres dispositions pertinentes des Low Voltage (LVD) 2014/35/EU, EMC Directive 2014/30/EU, et
RoHS Directive 2011/65/EU et porte le marquage CE.
La Déclaration de Conformité complète peut être demandée par e-mail:
Nom de l'entreprise: Hyperkin Inc.
Adresse: 1939 West Mission Blvd, Pomona, CA 91766
Erklärung zur Einhaltung der EU-Richtlinie
Hyperkin Inc., 1939 West Mission Blvd, Pomona, CA 91766, erklärt unter unserer alleinigen
Verantwortung, dass das Produkt, HDTV Cable for Saturn™, den grundlegenden Anforderungen und
anderen relevanten Bestimmungen der Low Voltage (LVD) 2014/35/EU, EMC Directive 2014/30/EU,
und RoHS Directive 2011/65/EU und die CE-Kennzeichnung trägt.
Die vollständige Konformitätserklärung kann per e-mail angefordert werden:
Firma: Hyperkin Inc.
Adresse: 1939 West Mission Blvd, Pomona, CA 91766
© 2020 Hyperkin Inc. Hyperkin® is a registered trademark of Hyperkin Inc. Saturn™ is a registered trademark of Kabushiki
Kaisha Sega. This product is not designed, manufactured, sponsored, endorsed, or licensed by Kabushiki Kaisha Sega in the
United States and/or other countries. All rights reserved. Made in China.
© 2020 Hyperkin Inc. Hyperkin® est une marque déposée de Hyperkin Inc. Saturn™ est une marque déposée de Kabushiki
Kaisha Sega. Ce produit n'est pas conçu, fabriqué, parrainé, approuvé ou autorisé par Kabushiki Kaisha Sega aux États-Unis
et/ou dans d'autres pays. Tous droits réservés. Fabriqué en Chine.
Other Hyperkin Cables And Connectors manuals
