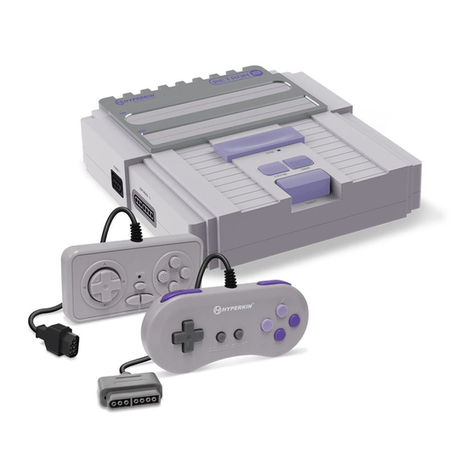
Hyperkin Retron 3 User manual

ENGLISH / FRENCH / SPANISH
INSTRUCTION MANUAL
www.hyperkin.com

ENGLISH / TABLE OF CONTENTS ..... 01
Package Contents ..... 02
RetroN®3 Layout ..... 03
RetroN®3 Setup ..... 04
RetroN®3 Wireless Controller Setup ..... 05
Syncing and using the Wireless Controllers ..... 05
Playing Games ..... 06
Using NES, SNES, or Genesis Controllers ..... 06
FRANÇAIS / TABLE DES MATIÈRES ..... 07
Contenu de l’emballage ..... 08
Plan du RetroN®3 ..... 09
Installation du RetroN®3 ..... 10
Installation des manettes sans fil RetroN®3 ..... 11
Synchronisation et utilisation des manettes sans fils ..... 11
Jouer au jeu ..... 12
Utiliser NES, SNES, ou les manettes Genesis ..... 12
ESPAÑOL / TABLA DE CONTENIDO ..... 13
Contenido del paquete ..... 14
Diseño del RetroN®3 ..... 15
Configuración del RetroN®3 ..... 16
Configuración del mando inalámbrico RetroN®3 ..... 17
Emparejamiento y uso del mando inalámbrico RetroN® 3 ..... 17
Juegos ..... 18
Usando mandos de NES, SNES, o Genesis ..... 18
Thank you for purchasing the RetroN® 3 Gaming System. For your safety and the safety of others, please
carefully read the instruction manual before using this product.
This device complies with part 15 of the FCC Rules. Operation is subject to the following two conditions: (1)
This device may not cause harmful interference, and (2) this device must accept any interference received,
including interference that may cause undesired operation.
2
PACKAGE CONTENTS
2- RetroN® 3
Wireless Controllers
RetroN® 3 Console
POWER RESET
AC Adapter S-Video Cable
AV-Cable

NES Cartridge Slot
Infrared Sensor
S-Video Out
DC In
SNES Controller Port 1
Genesis Controller Port 1
Region Selector
(Genesis Only)
AV-Out
NES Controller Port 1
Genesis Controller Port 2
NES Controller Port 2
SNES Controller Port 2
SNES Cartridge Slot
Game Selector
Power Button
Reset Button
FRONT
BACK
Genesis Cartridge Slot
RetroN® 3 LAYOUT
3

1. Insert the AV/S Cable into the AV or S-Video Out (video output only) on the RetroN 3.
The S-Video function only works on SNES and Genesis games.
2. Insert the other end of the AV/S Cable into the AV or S-Video ports on the TV.
3. Insert the AC Adapter into the DC port on the RetroN 3.
4. Plug the AC Adapter into a power outlet.
AC Adapter
S-AV Cable
RetroN® 3 SETUP
4
TV
S-VIDEO AUDIO IN
VIDEO
L R
POWER RESET

SYNCING AND USING THE WIRELESS CONTROLLERS
1. Turn on RetroN 3.
2. Within 30 seconds after turning on the console, hold down the Select/Mode button and the Start/Reset
button simultaneously for 10-15 seconds. Your controller should now be synced.
1. Unscrew the screw on the battery cover and remove the battery cover.
2. Insert two (not included) AAA batteries into the battery port.
3. Place the cover back on the battery port and secure it with the screw.
4. Begin using the wireless controller by positioning yourself in front of the RetroN 3’s Infrared Sensor,
located in the front of the RetroN 3.
Note: The dot located on the face of the controller indicates which controller is synced to which player. One
dot indicates Player 1, while two dots indicate Player 2.
RetroN® 3 WIRELESS CONTROLLER SETUP
5
SELECT/MODE
START/RESET
BB X
AA Y
A B
B A
Y X
X Y
Z Z
B A
A B
C C
Y X
X Y
R Z
B A
A B
L C
NES GENESIS SNES

PLAYING GAMES
Using NES, SNES, or Genesis Controllers
1. Insert the cartridge into its appropriate slot (NES, SNES, or Genesis).
2. Turn the Game Selector Knob to the corresponding system (NES, SNES, or Genesis).
3. Turn ON the RetroN 3 by pressing the Power button.
Note: There is a switch on the back labeled “O/J” which lets you switch the region of your Genesis slot.
“O” for Genesis and “J” for Mega Drive (Japan).
With the RetroN 3 turned OFF, insert the controller(s) into their corresponding slot (NES, SNES, or Genesis).
Note: NES, SNES, and Genesis controllers (not included) are only playable with their corresponding systems.
6
NES
GENESIS
SNES
Genesis ControllerNES Controller SNES Controller

7
FRANÇAIS / TABLE DES MATIÈRES
Table des matières ..... 07
Contenu de l’emballage ..... 08
Plan du RetroN®3 ..... 09
Installation du RetroN®3 ..... 10
Installation des manettes sans fil RetroN®3 ..... 11
Synchronisation et utilisation des manettes sans fils ..... 11
Jouer au jeu ..... 12
Utiliser NES, SNES, ou les manettes Genesis ..... 12SIS

Merci d’avoir acheté le RetroN® 3 Système de jeu. Pour votre sécurité et celle des autres, veuillez lire
attentivement le manuel d’instructions avant d’utiliser ce produit.
Cet appareil est conforme à la partie 15 des Règles FCC. Son fonctionnement est soumis aux deux conditions
suivantes : (1) Cet appareil ne doit pas provoquer d’interférences nuisibles, et (2) cet appareil doit accepter
toute interférence reçue, y compris des interférences pouvant provoquer un fonctionnement indésirable.
8
CONTENU DE L’EMBALLAGE
2- manette sans l
RetroN® 3
1-Console RetroN® 3
POWER RESET
Adaptateur secteur Câble S-vidéo
Câble AV

9
Port Cartouche NES
Infrared Sensor
S-Video Out
Alimentation sélecteur
SNES Port manette 1
Genesis Port manette 1
Sélecteur de régions
(Genesis uniquement)
AV-Out
NES Port manette 1
Genesis Port manette 2
NES Port manette 2
SNES Port manette 2
Port Cartouche SNES
Game Selector
Bouton Power
Bouton Reset
AVANT
ARRIÈRE
Port Cartouche Genesis
PLAN DU RetroN® 3

1. Insérer l’AV/S Câble dans l’AV ou S-Video Out (sortie vidéo uniquement) sur le RetroN® 3. La fonction
S-Vidéo ne fonctionne uniquement que sur la SNES et les jeux Genesis.
2. Insérez l’autre extrémité du câble AV/S dans l’AV ou dans le port S-Vidéo du téléviseur.
3. Insérez l’adaptateur secteur sur le port CC sur le RetroN® 3.
4. Branchez l’adaptateur secteur CA dans une prise de courant.
Adaptateur secteur
S-AV câble
INSTALLATION DU RetroN® 3
TV
S-VIDEO AUDIO IN
VIDEO
L R
POWER RESET
10

11
SYNCHRONISATION ET UTILISATION DES MANETTES SANS FILS
1. Activer le RetroN® 3.
2. Dans les 30 secondes après la mise sous tension de la console, maintenez le bouton Sélectionner/bouton
mode et du bouton Power/Reset simultanément pendant 10 à 15 secondes. Votre console devrait maintenant
être synchronisée.
1. Dévisser la vis sur le couvercle de la batterie et retirez le couvercle de la batterie.
2. Insérez deux (non inclus) piles AAA dans le port de la batterie.
3. Placez le couvercle arrière sur le port de la batterie et xer avec la vis.
4. Commencer à utiliser le contrôleur sans l par vous positionner devant le capteur infrarouge situé à
l’avant du RetroN® 3.
Note: La dot située sur la face de la manette indique quelle manette est synchronisée à quel joueur. Un point
indique le joueur 1, tandis que deux points indiquent Player 2
INSTALLATION DES MANETTES SANS FIL RETRON® 3
SELECT/MODE
START/RESET
BB X
AA Y
A B
B A
Y X
X Y
Z Z
B A
A B
C C
Y X
X Y
R Z
B A
A B
L C
NES GENESIS SNES

JOUER AU JEU
UTILISER NES, SNES, OU LES MANETTES GENESIS
1. Insérez la cartouche dans le logement approprié (NES, SNES, ou Genesis).
2. Mettez le Sélecteur de Jeu sur le système correspondant (NES, SNES, ou Genesis).
3. Allumez le RetroN® 3 en appuyant sur le bouton d’alimentation.
Note: Il y a un commutateur à l’arrière étiqueté “O/J” qui vous permet de changer la région de votre logement
Genesis. “O” pour Genèse et “J” pour Mega Drive (Japon).
Avec le RetroN® 3 éteint, insérez le(s) contrôleur(s) dans leur fente correspondante (NES, SNES, ou Genesis).
Note: NES, SNES et Genèse contrôleurs (non inclus) sont uniquement jouable avec leurs systèmes correspondants.
NES
GENESIS
SNES
Genesis ControllerNES Controller SNES Controller
12

ESPAÑOL / TABLA DE CONTENIDO
Tabla de contenido ..... 13
Contenido del paquete ..... 14
Diseño del RetroN®3 ..... 15
Configuración del RetroN®3 ..... 16
Configuración del mando inalámbrico RetroN®3 ..... 17
Emparejamiento y uso del mando inalámbrico RetroN® 3 ..... 17
Juegos ..... 18
Usando mandos de NES, SNES, o Genesis ..... 18
Gracias por comprar la consola de Juegos RetroN® 3. Por su seguridad y la de los demás, por favor lea
cuidadosamente las instrucciones del manual antes de usar este producto
Este dispositivo cumple con la parte 15 de las reglas de la FCC. La operación está sujeta a las siguientes
condiciones: (1) El dispositivo puede no causar interferencia dañina, y (2) este dispositivo debe aceptar toda
interferencia que reciba, incluyendo interferencia que puede causar una operación indeseada.
14
CONTENIDO DEL PAQUETE
2- Mandos inalámbricos de
RetroN® 3
1 Consola RetroN® 3
POWER RESET
Adaptador de corriente Cable de S-Video
Cable de AV

Ranura de cartuchos NES
Sensor infrarrojo
Adaptador de video - S
Entrada de corriente DC
Puerto 1 del mando SNES
Puerto 1 del mando Genesis
Selección de región
(Genesis Solamente)
Cable de salida AV
Puerto 1 del mando NES
Puerto 2 del mando Genesis
Puerto 2 del mando NES
Puerto 2 del mando SNES
Ranura de cartuchos SNES
Selector de juegos
Botón de encendido
Botón de servicio
ADELANTE
ATRÁS
Ranura de cartuchos Genesis
DISEÑO DEL RetroN® 3
15

1. Inserte el cable AV/S en la salida AV o S (salida de video solamente) en el RetroN® 3. El adaptador de
video solo sirve en juegos de SNES y Genesis.
2. Inserte el otro extreme del cable AV/S en los puertos AV de video en el televisor.
3. Inserte el adaptador de corriente alterna en el puerto de corriente directa en el RetroN® 3.
4. Conecte el adaptador de corriente alterna en la fuente de poder.
Adaptador de corriente
Cable S-AV
CONFIGURACION DEL RetroN® 3
16
TV
S-VIDEO AUDIO IN
VIDEO
L R
POWER RESET

EMPAREJAMIENTO Y USO DEL MANDO INALABRICO RetroN® 3
1. Encienda el RetroN® 3.
2. Alrededor de unos 30 segundos después de haber encendido la consola, mantenga presionado el botón
Select/Mode y el botón de Start/Reset simultáneamente por 10 o 15 segundos. Su mando debe estar sincronizado.
1. Desatornille los tornillos en la tapa de las baterías y retire la tapa.
2. Introduzca dos baterías AAA en el Puerto de la bacteria (no están incluidas)
3. Coloque la tapa de nuevo en el puerto de la bacteria y asegúrelo con los tornillos.
4. Comience a utilizar el mando inalámbrico posicionándose en frente del sensor infrarrojo del RetroN® 3.
Sensor infrarrojo del RetroN® 3 está localizado al frente del RetroN® 3.
Nota: El punto localizado en la parte frontal del mando indica cual mando está sincronizado con cual
jugador. Un punto indica que es el jugador 1, mientras que dos puntos indican que es el jugador 2.
CONFIGURACION DEL MANDO INALABRICO RetroN® 3
17
SELECT/MODE
START/RESET
BB X
AA Y
A B
B A
Y X
X Y
Z Z
B A
A B
C C
Y X
X Y
R Z
B A
A B
L C
NES GENESIS SNES

JUEGOS
USANDO MANDOS DE NES, SNES, O Genesis
1. Introduzca el cartucho en su ranura apropiada (NES, SNES, Genesis).
2. Gire la perilla de selección de juegos al sistema correspondiente (NES, SNES, Genesis).
3. Encienda el RetroN® 3 presionando el botón de encendido.
Nota: Hay un interruptor en la parte trasera rotulada como “O/J” que le permite cambiar la región de su ranura
Genesis. “O” de Genesis y “J” de “mega drive” (Japón)
Con el RetroN® 3 apagado, introduce el/los controles en su ranura correspondiente (NES, SNES, Genesis).
Nota: Los mandos de NES, SNES y Genesis (No incluidos) solo funcionan con su sistema correspondiente.
18
NES
GENESIS
SNES
Mando del GenesisMando del NES Mando del SNES

©2015 Hyperkin®. Hyperkin® and RetroN® and their logos are trademarks and/or registered trademarks of Hyperkin, and/or
its afliated companies. All other product names and images, trademarks or registered trademarks are properties of their
respective owners. This is a product 100% NOT ofcial and is NOT manufactured, guaranteed, sponsored, endorsed or approved
by Nintendo nor Sega. Made in China. All rights reserved. Product features, appearances and specications may be subject to
change without notice. Please retain this information for future.
© 2015 Hyperkin Windows® . Hyperkin Intel® et Intel® RetroN et leurs logos sont des marques commerciales et/ou des
marques déposées de Hyperkin, et/ou de ses sociétés afliées. Tous les autres noms et images de produits, des marques ou des
marques déposées sont les propriétés de leurs propriétaires respectifs. C’est un produit 100% non-ofciel et n’est pas fabriqué,
garanti et parrainé, homologués ou approuvéspar Nintendo ni Sega. Fabriqué en Chine. Tous droits réservés. Caractéristiques du
produit, les apparences et les spécications peuvent être soumises à modication sans préavis. Veuillez conserver cette che
d’information dans l’avenir.
©2015 Hyperkin®. Hyperkin® and RetroN® y sus logotipos son marcas y/o marcas registradas de Hyperkin, y/o sus compañias
aliadas. Todos los nombres de productos e imagines, marcas o marcas registradas son propiedad de sus dueños respectivos.
Este producto es 100% no ocial y no es fabricado, garantizado, patrocinado, endosado o aprobado por Nintendo ni Sega. Hecho
en China. Todos los derechos reservados. Las características de los productos, apariencia y especicaciones podrían estar sujetas
a cambios sin previo aviso. Por favor guarde esta información para un futuro.
Table of contents
Languages:
Other Hyperkin Game Console manuals

Hyperkin
Hyperkin RetroN User manual

Hyperkin
Hyperkin SupaBoy Black Gold User manual

Hyperkin
Hyperkin RetroN 5 User manual

Hyperkin
Hyperkin Retron 2 User manual

Hyperkin
Hyperkin SupaRetroN HD User manual

Hyperkin
Hyperkin RETRON HD User manual

Hyperkin
Hyperkin RetroN User manual

Hyperkin
Hyperkin RetroN 5 User manual

Hyperkin
Hyperkin RETRON 2 HD User manual