Hyside Pro 20.0 User manual

1
HYSIDE OWNER’S MANUAL
Congratulations on the purchase of your new HYSIDE!
For over 30 years, HYSIDE has been synonymous with the most durable and longest lasting inatables on the
planet. Through the industry’s most durable fabric and the use of the newest technologies, we’ve designed these
boats to be the workhorses for the commercial outtting industry. We’re certain that you’ll enjoy this boat as a
worry free source of FUN for years.
In this manual, you’ll nd a comprehensive assembly of tips and instructions on using and caring for your new
inatable.
ANYWHERE YOU WANT TO GO, GET THERE WITH HYSIDE!
This is an owner/operator manual for all of HYSIDE’s inatable line up.

800.868.5987 / HYSIDE.COM /2
TABLE OF CONTENTS
OVERVIEW ON PAGE 3
•Boat Anatomy
•Valves
•Thwarts
•Floors
PREVENTATIVE CARE AND MAINTENANCE ON PAGE 7
•Inating/Deating your HYSIDE
•Cleaning Your HYSIDE
•Protecting Your HYSIDE
•Storing Your HYSIDE
•Transporting Your HYSIDE
•Restoring Your HYSIDE
•Tips for Outtters
REPAIR ON PAGE 14
•Locating a Leak
•Removing an Old Patch
•Loose Edges
•Basic Repair/Glue Instructions & Tips
•Replacement Parts
TROUBLE SHOOTING ON PAGE 18
WARRANTY INFORMATION ON PAGE 19

3
OVERVIEW
BOAT ANATOMY
The goal of this section is to give you a simple explanation of the parts of your boat and how they function and
operate. Getting to know your boat inside and out is the rst step to caring for your inatable. See below for a
brief list of terms and parts on your HYSIDE:
Standard Floor Raft
Includes all of the features the self-bailing raft has, with the exception of the oor type and xed thwarts.
Self-Bailing Raft
HINGE AND PIN
THWARTS
FIXED
THWARTS
HYPALON COATED
NYLON FABRIC
FULL LENGTH URETHANE
BOTTOM CHAFERS
TRIPLE BONDED
SEAMS
LEAFIELD
INFLATION VALVES (C7)
LEAFIELD PRESSURE
RELEASE VALVE (A6)
D-RINGS I-BEAMHANDLES
SELF BAILING
FLOOR
NON-SELF BAILING
FLOOR
KICK/ROCKER STRAIGHT TUBE/FLAT AREA

800.868.5987 / HYSIDE.COM /4
VALVES
VALVE TYPES
Your boat consists of multiple air chambers, each with its own valve. There are two types of valves we are currently using:
The ination valve (Leaeld C7) and the Pressure Release Valve (Leaeld A6). They are very durable and simple to use.
The Ination Valve (Leaeld C7)
The inside center of the valve has a spring loaded stem with a at plunger on
the bottom. When inating, make sure the spring isn’t held open. You can do
this by pushing the spring down and to the left (counterclockwise). This will
make sure the valve is closed, so air can only pass through into the chamber.
In order to deate, you will need to push the stem down and twist it to the right.
This will hold the spring in the open position to allow the boat to fully deate.
Make sure to always keep the valve cap on, when not inating/deating.
This will protect the stem and keep debris out. There are replacement caps
available should you lose any.
The Pressure Release Valve (Leaeld A6)
Unlike the round design of the tubes, which distribute increases in pressure
evenly, the oor’s mattress design is smaller and less forgiving with more
drastic pressure changes.
We equip our oors with PRV’s designed to release at 2.0 PSI.
NOTE: The old leaeld pressure release valves were color coded and blue
indicated a 2.0 PSI valve. The newer valves have the PSI engraved in the valve
itself. So if you can’t determine the color dot, it is a good indication that it is a
very old valve and needs to be replaced.
VALVE INSTALLATION & CLEANING
Valves come pre-installed on your boat, direct from the factory. If for some reason you have to remove/re-install
the valve, here’s a detailed instruction. Both the C7 and A6 Leaeld valves are very similar to install. Both have
a female part inside the boat, then an outside washer and male part.
Ination Valve (Leaeld C7)
Push the male/threaded part of the valve through the valve hole opening in the oor or tube. Grasp the valve base rmly
and thread the valve together making sure that the boat fabric does not twist as the valve is tightened. Hand tighten the
valve, then nish tightening with the provided valve wrench after the tube is inated to operating pressure. Removing the
valve would be the exact opposite, just remember that the female base in the boat is free oating!
Cleaning your Ination Valve
The most common causes of leaks are from valves. If your valves are not airtight, dirt and grit can work its way into your
valve, causing an improper seal (leak) and cleaning the valve will usually solve the problem. First, deate the tube of the
valve needing to be cleaned. Next, quickly depress the spring up and down a few times and use a pump to blow bursts
of air into the valve while it’s in the open position, to help dislodge any debris that might be holding the spring open. The
valve seal at the bottom of the valve stem should be free of debris, as this creates the seal. Once done, reinate the tube
and test. If still leaking, remove the valve for a more thorough cleaning. (See Valve Installation)
ACC-343
ACC-343F
ACC-307

5
THWART INSTALLATION
We’ve made it very simple to install and remove your thwarts. Like a door
hinge, the two hinged knuckles connect with a pin. Removing is simple, just
remove the pin! You might need pliers to grab the pin when removing.
Older model HYSIDEs were outtted with lace-in thwart attachments. We still
stock lace-in thwart attachments as an option, as well as xed attachments.
The knuckles can also be installed at various points in your boat to allow for
multiple setups, depending on your use! See “gluing instruction” on how to
install knuckles.
STEP 1 STEP 2 STEP 3
ACC-324
ACC-325
Pressure Release Valve (PRV-Leaeld A6)
The PRV’s base inside the oor is free-oating. To install, work the base into position so that the collar of the base
protrudes through the opening in the oor. Line up the valve with the hole in the oor. Insert the male/threaded
part of the valve into the hole of the oor.
Cleaning your Pressure Release Valve (PRV, A6)
Your pressure release valve is a great little insurance policy for your oor. Designed to release pressure at 2.0PSI,
if working properly the PRV will help prevent costly damage to your oor from drastic pressure changes or over-
ination. But the thing is, it has to be working properly!
Never plug a PRV if it is leaking! Either clean or replace the valve.
Because of the location in the boat, the PRV will usually need more attention and cleaning than the other valves.
Sand and grit can cause the PRV to function improperly, either leaking air or not releasing at the appropriate
pressure like it’s designed to do. To clean your PRV, simply unscrew the valve with your star-shaped end of your
valve wrench. Next wash the valve in warm, soapy water, pressing the spring up and down as you wash and rinse.
This should dislodge anything that might be hindering the spring from operation properly. Next, reinstall the
valve by hand tightening. Make sure the valve is aligned around the oor fabric. Once aligned and hand tight,
tighten with your valve wrench. Next, you’ll want to reinate your oor and test for leaks (spray with soapy water
and watch for air bubbles). NOTE: If the valve is leaking from the perimeter of the valve, it is either not aligned
properly or it’s not tight enough. Unscrew, align and retighten to be sure. If the valve is leaking from the inside/
spring area of the valve, there’s still something holding the spring open, requiring a more thorough cleaning.
Repeat steps above, reinstall and retest.
Grasp the valve base rmly and thread the lock ring onto the valve making sure that the oor fabric doesn’t twist
as the valve is tightened. Hand tighten, snug with the valve wrench, then nish tightening with the wrench after
the tube is inated to operating pressure. Removing the valve would be the exact opposite, just remember that
the female base in the boat is free oating!
(See TROUBLE SHOOTING for tips on leaky valves and maintaining valves).

800.868.5987 / HYSIDE.COM /6
INFLATABLE FLOOR ATTACHMENT TYPES
Inatable oors are either glued in or laced-in with webbing, through
grommets, when attached to the main tubes. We transitioned to the
“attached” self-bailing oor back in 2000 for all stock models, due to ease
of use and maintenance for the customer, however, we still produce
Lace-in oors, especially for international clients who need to break down
the boats for transport. If you need instructions on lacing-in an inatable
oor, please see our website’s Tips and Trips section at www.hyside.com.
FLOOR VALVES
All HYSIDE inatable oors are equipped with a Leaeld A6 Pressure
Release Valve (PRV). This PRV is an added insurance policy against over
ination. The PRV we place in our oors is built to release at 2.0 PSI
(blue dot). Please note that there are other PRV’s with higher pressure
releases! This can void your warranty if damage is caused to the oor
from using a PRV with higher PSI than recommended.
FLOORS
FLOOR TYPES – SELF BAILING VS. NON SELF BAILING
The main dierence between a standard and self bailing oor is that standard (non self-bailing) oors are sealed
to the outer tubes, whereas the self-bailing oor is inated and is either laced in or glued in, with holes installed
around the perimeter, allowing the water to exit. The oor of a self bailing raft is a wide at inated chamber.
When inated, the oor is about 5 inches thick, so the top surface of the oor is above the surface of the water.
When water splashes into the raft, it ows across the oor, down over the edge of the oor, and out through the
lacing.
Features of a NON Self-Bailing oor:
•If running Class I or II whitewater the inside of the boat/oor boat should stay dryer
•Requires a bucket to bail water
•When water enters, the boat becomes heavier and less maneuverable
•Chances of getting stuck on a rock is more because they are heavier with water in the boat
•Costs less than Self-Bailing oors
Most of our raft line-up nowadays is self-bailing. Our entire Kayak line is self-bailing, as well as our Outtter
and Outtter Pro Raft series. Running extreme whitewater is safer and easier with a self-bailing oor and other
benets include a dry oor for passengers as well as a more rm oor to stand on or sh from.
Features of a Self-Bailing oor:
•Does not require buckets or pumps to remove water
•Much more maneuverable since any water splashing in quickly exits (in a few seconds)
•Less likely of getting stuck on a rock because the boat remains lighter
•Makes a nice mattress when ipped over
•More expensive than ‘Standard’ non-bailing oors

7
PREVENTIVE CARE
AND MAINTENANCE
Your HYSIDE inatable was designed to withstand the everyday abuse from Commercial Outtters.
We’ve designed our boats to be very dependable and very simple to use and operate, even in the toughest
conditions. Here are some in-depth tips and processes to keep your HYSIDE running in tip top shape for DECADES,
like many of our happy customers have reported.
INFLATING YOUR HYSIDE
Your boat consists of multiple air chambers. When inating your raft or boat, ll each air chamber in a clockwise
pattern around the boat, just until the craft takes shape. Then work your way back around the boat lling the
chambers to the pressure level indicated for that particular boat.
Each chamber has a cone shaped bae that separates it from the others. Maximizing pressure on a single bae
can easily damage it; therefore equal amounts of pressure should be applied to each chamber until you reach
maximum pressure.
To inate your boat, a hand, foot or electric pump can be used. A low pressure pump (designed specically for
inatables) is best, as we recommend a max pressure of 2.0 psi in the oor (Self-bailing models only) and 3.0 psi
in the tubes. If the oor of the boat is inatable, add air until the pressure relief valve releases a small amount of
air. Use caution when inating the oor! The pressure release valve can only release air so fast,
so if the air ow is faster than the release of pressure, you could cause damage.
Also consider super heated surfaces, like asphalt and sand. They have temperatures that far exceed the air temp
and can cause the boat pressure to exceed recommended pressure within minutes.
Most boats that come in for oor repair typically have a plugged or non working PRV, or the user was forcing the
air in faster than it could release, after it was full.
For info on cleaning your PRV see on page 5
A rule of thumb for gauging the proper pressure for the tubes is to push down with your thumb at the center of
the tube. If you can deect about a half an inch from the top plane of the tube, it will be close to 3.0 psi.
Don’t overll. A properly inated boat should have just a bit of give.
Be aware that air temperature causes changes in the air pressure in the inatable chambers. Many boaters ll
their boats in the morning when the air is cool, but as the temperature increases over the course of the day, the
air in the tubes expands, increasing the pressure. If a tube or chamber becomes too pressurized, it can explode
if struck by a sharp object. You may have to let some air out at dierent points throughout the day if you operate
your inatable in the hot sun.
19” DOUBLE ACTION PUMP
ACC-602
BIG RED ELECTRIC PUMP
ACC-600
BRAVO 2 - FOOT PUMP
ACC-608
RULE 12V ELECTRIC PUMP
ACC-611

800.868.5987 / HYSIDE.COM /8
DEFLATING YOUR HYSIDE
The preferred way to deate your inatable is by deating all main chambers simultaneously, as this will help
avoid stress on any one bae (get a friend to help). You can then move on to deating the thwarts and oor.
To set the valves for deation, simply push the valve stem in approximately 3/8” and turn it about ½ turn until it
locks in the open position. You can use the bottom side of a pump to suck the remaining air out of the chambers.
CLEANING YOUR HYSIDE
Keeping your inatable clean, especially prior to storage, will help prolong the life of your craft!
Sand and gravel can cause abrasion and plug air valves. If left to soak into an inatable boat, salt water can cause
the material to deteriorate.
You can use soap and water to clean your boat. For grimy messes, there are inatable cleaners on the market
that clean the surface and won’t harm it. Hypalon is very resistant to most chemicals, so the worst a heavy duty
cleaner can usually do is bleach the pigment, which doesn’t aect the Hypalon.
Use a largescrub padwith handle and work in four foot sections. Rinse the boat o with a power washer then spray
the cleaner on and wait ve minutes. Using a circular motion, scrub the area and then fully rinse immediately. The
boat will appear to be faded, but a coat of 303 Protectant will bring back the shine.
PROTECTING YOUR HYSIDE
We recommend 303 Protectant for your HYSIDE. Like sunscreen for your
boat, it protects against UV rays and it seems to work as a coating that doesn’t
allow dirt to adhere as much as if it weren’t there.
Originally intended by American Propeller Co to protect rubber and vinyl
airplane parts from high altitude UV, it is ideally suited for inatable protection.
Given that Hypalon is used to coat high power wires and reservoirs, it has
incredible UV resistance. We have found that 303 helps reduce pigment fading,
leaves a layer that is easier to clean o dirt and prolongs the life of the boat.
It is suggested that you apply 303 prior to storing your boats for the winter. Besides the fact that the boats will be
ready for use in the Spring and Summer, it can soften the areas that cause fold marks in some fabrics.
303 reacts to water, so polish until dry after applying to reduce the slippery eect.
Number of applications per year can vary, so to determine if it’s time for another application, rub some 303 on the
boat the size of a baseball. If it brings back the color to a noticeable degree, then it’s time for another application.
STORING YOUR HYSIDE
Removing Water
Preventing moisture during storage will greatly increase the lifespan of your boat.
Over time, moisture inside the tubes can break down the glue joints, so it needs to be removed promptly. The
obvious signs of trapped moisture are hearing it sloshing around or rubbing the two sides of a deated tube
together and if it feels slippery/slimey inside, you probably have old moisture inside (part of a routine inspection).
Removing the valve to the chamber is the rst step in cleaning it out. Use a pulley or turn the boat to the required
position and tie it o. The goal is to position the boat where you can get excess water to pool, then use ashop
vacwith a hose outside in the sunlight. Next, tape a ½ inch piece of PVC hose to the end of the hose and stick it
in the chamber, use this to remove all remaining pooled water. For the remaining moisture in the tubes, turn the
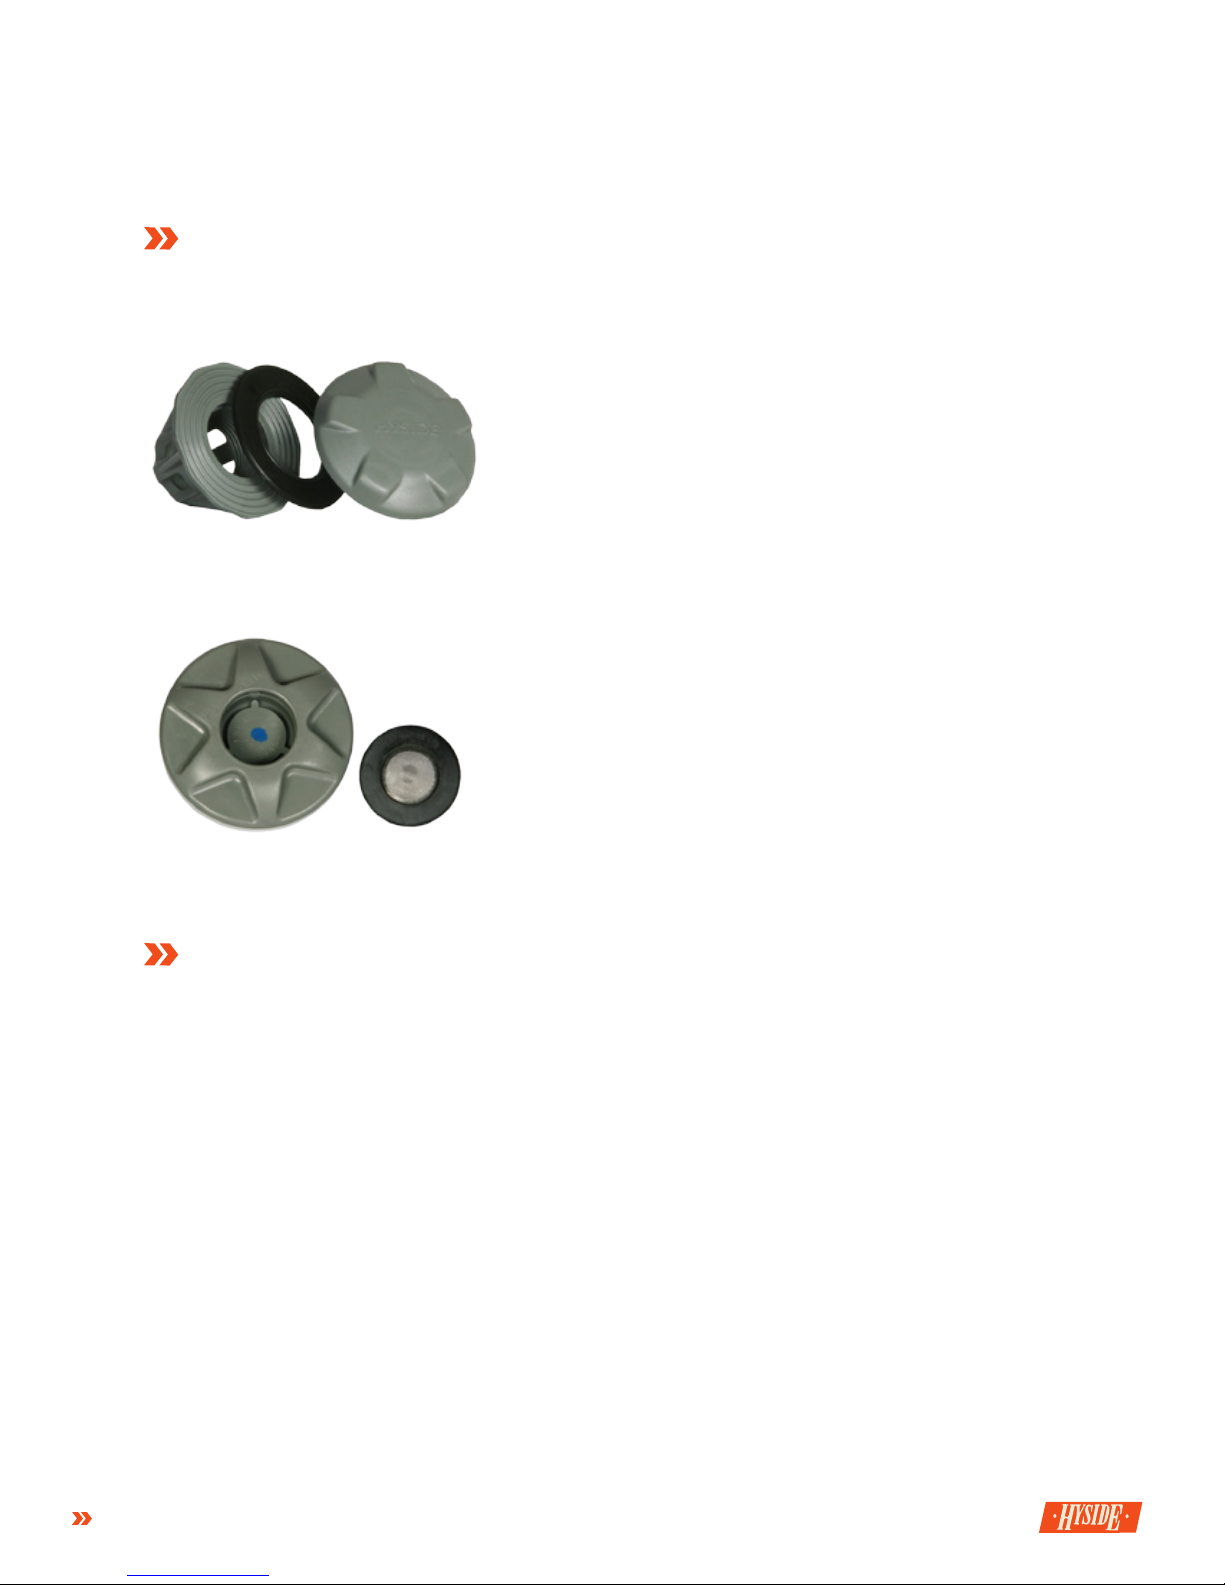
ACC-878
ACC-875

9
boat upside down and place the boat in the sun (black bottom heats in sun)
Using the same PVC pipe, reverse the ow of air with the vacuum and blow air into the oor. The hot air will
circulate and evaporate it until it is completely dry.
ROLLING YOUR HYSIDE
Rolling your boat is very simple.
1. Lay the boat out at and deated, making sure to remove any straps or equipment.
2. Start your fold length-wise and fold inward towards the middle.
3. Depending on the size of your boat and how tight you want to roll for storage (packing it for a trip or just
storing in a closet for winter), will determine whether to fold the boat in thirds, or just in half.
4. Once you’ve folded the boat length-wise towards the center, start rolling at the end opposite of the oor valves
(this will allow air to continue to escape as you roll) and roll until it’s a nice little rubber burrito.
5. Cam strap from there and you’re done!
Short Term Storage
Wipe down, partially deate (1 PSI) and cover with tarp. If this is not possible, completely deate the boat and
be sure it is dry and clean before rolling and storing. If you plan to store your inatable boat on a trailer, be sure
there are no bends or kinks in the boat.
Long Term Storage
After the season, rinse o any dirt/grime and allow the boat to FULLY air dry.
Moisture can get caught in the tubes and oor, so make sure to let it air dry completely!
Store your boat dry, clean and preferable 303’d. Store the boat in a cool, dry place out of sunlight. Ideally, storing
the boat partially inated is the best, but if space is not an option, you can denitely roll it up as tight as needed.
Do not store directly on concrete! Moisture and mold will transfer onto the boat and cause permanent
staining. Put a pallet down or something in between to reduce moisture transfer. Store your inatable o the
ground, out of reach of rodents, as they have a fondness for chewing holes and nesting in inatable material.

800.868.5987 / HYSIDE.COM /10
TRANSPORTING YOUR HYSIDE
The bonus with our Hypalon material is that it’s easier to roll than other boat fabrics, it’s lighter and is less likely
to get damaged in transport. That said, there are still some precautions to take when transporting your boat.
Standard Precautions
Because punctures are the main concern with inatable boats, it is important to protect it from sharp objects.
Use care when transporting knives, shing hooks, and other objects that could puncture the skin of the inatable
boat. Watch for sharp metal or branches when navigating the waters, as well as avoid dragging the boat over
rocks and debris when landing on a beach.
Even dull objects such as oars, ropes, or coolers can cause abrasion and deterioration of the coating material if
allowed to rub for an extended period of time.
Make sure all valve caps are screwed on prior to rolling. Roll the boat as tight as possible, cam strap it secure and
package in the smallest box possible (if shipping). This will avoid damage during transit and will save on freight if
you are shipping it. If too big for a box, wrap the boat in a tarp, canvas, or HYSIDE Boat bag. Be sure not to load
other equipment on top of the boat that could potentially wear on your boat.
Moving the boats has been known to cause more damage than usage on the river unless closely monitored.
Using the handles as tie-downs, abrasive ropes rubbing on the tubes, and the biggest culprit of all, tossing the
boats to the ground!
RESTORING YOUR HYSIDE
As time goes on and your boat has been beaten by the sun and the various adventures you’ve put it through, here
are some tips to bring your HYSIDE back to life:
Worn Areas
Areas that have had abrasion to the point that fabric is showing can be painted with Gaco Hypalon paint. Don’t
use this technique to attempt to stop air leaks (it won’t work). This is a remedy for random scratches. Areas
where there is constant wear, a pad or urethane coating should be applied. In some situations you may be able
to stop the cause if it originated from improper trailering or dragging of the boats. To apply the paint, rst clean
the surface with MEK using a cloth. Then build-up thin layers of paint using the same process explained in gluing:
short bristle paint brush and multiple thin coats.
Removing Loose Threads
The aging of a boat will always produce frayed ends from the nylon base cloth. You can cut the ends o with
scissors and then nish it o by waving a heat gun over the clipped area. This step not only removes them from
sight, but reduces the chances of future fraying.
If the seam tape, handle or D-ring bases are heavily worn, you can clip the frayed edges and then use aDremel
toolto bevel the edges and then ash it with a heat gun. To nish it o, use someGaco paintto touch up the area,
then put303 Protectanton it to bring back the shine.

11
TIPS FOR OUTFITTERS
This section is a more in-depth guide for Outtter’s eet care and maintenance.
Most Outtters would agree that over 90% of the wear and tear of rafts occurs o the river. How you care for
your rafts and what systems you use for transporting and taking your raft in and out of the water will determine
the life expectancy of your eet. In direct proportion to the above will be your prots, down-time, maintenance
expenditures and stress level. The following information has been broken up into four categories:
1. Handling
2. Maintenance
3. Repair
4. Storage
HANDLING
The most damage that occurs to a raft is during handling. Whether you are taking rafts to the put-in inated
or deated, the following applies:
1. Do not tie down the rafts with a rope. The vibrations and movement on a trailer or back of a truck will cause
the rope to abrade away the raft coating, oftentimes right down to the nylon.
2. Be very alert to any abrasion if you are running webbing over the rafts during transportation. A wide soft
webbing is preferable. Probably the ideal method is 2” webbing running through a 10’ length of re hose.
The re hose stays in one place while the 2” webbing could slide back and forth.
3. When transporting large numbers of boats deated on a truck bed or trailer, try to stagger the “stack” so that
valves, D-rings and rubber motor mounts do not pile up on top of one another to cause pressure points.
4. Be careful to look for any surfaces that may come in contact with the rafts during transportation. This
includes wheels, wheel-wells, bolts, etc. Close attention to the above should eliminate 30%-40% of your
repair expenditures.
5. Putting the raft in the river and taking it out is probably the second leading cause of raft damage. Never drag
the raft on cement or gravel. Carry the raft until it is in the water. Instruct your crew as to the importance of
this rule and let them know that you won’t tolerate dragging rafts.
6. Use a tarp, tables and pads as a surface where boats are rolled up. This helps keep sand and mud out of
valves and out of rolled boats while they are being transported.
MAINTENANCE
Preventive maintenance is your best tool in keeping your eet on the river.
1. At the beginning of the rafting season, spray all rubber parts with 303 protectant.
(See “Protecting Your HYSIDE”)
2. Whenever possible, store boats under a shelter, out of the sun’s harmful rays. Never let boats unnecessarily
bake in the sun.
3. Relieve air pressure when not in use.
4. Store boats unrolled if possible
5. Always wash boats down after and between use to get rid of sand and grit that can damage seams and clog
valves.
6. Number the boats and routinely pull them for inspection throughout the season. You’ll begin to notice and
prevent problems like trailer abrasion and drag marks. Remember, catching a problem before it causes
downtime will save you considerable TIME, MONEY and CUSTOMERS. In addition, inspect your boats at the
end of the season for wear and tear.

800.868.5987 / HYSIDE.COM /12
REPAIR
If repairs are required, DO NOT WAIT until spring to get your boats xed. Be sure to inspect all of your repair
materials prior to the start of a new season, especially your adhesives. Adhesives usually have a one-year shelf
life so it is important to bring in fresh materials every season. Without discussing the technical aspects of repair,
let’s discuss the overall concept of repair.
1. Minor repairs are easily made at your place of business only with the proper equipment. An investment of
less than $100 will buy you proper glues, solvents, grinding wheels, rollers, etc. We regularly stock everything
you need for boat repair and maintenance.
2. Cosmetics are critical to raft repair. Your clients may not return if they see rafts have sloppy repairs. Repairs
must be of the same color fabric. Properly cut and rounded patches and all excess glue cleaned o from
around the repaired area.
3. Major repairs will most likely need to be completed at a repair facility. If the raft needs to be returned to
service quickly, call the repair facility and advise them of the problem. With advance notice, they can set
aside time to do your repair promptly and return the raft on schedule. If you have enough rafts to cover
your needs, set aside major repairs until the end of the season. It’s usually a good investment of 10% to
30% of a new raft to recondition your raft at a quality repair facility. Generally the work performed comes
with a one year warranty. Call us for a list of authorized repair centers in your area or checkout hyside.com.
STORAGE
As mentioned under “Storing your HYSIDE”, rafts should be stored clean, dry and out of the sun. Wash the raft
at the take out to get rid of sand, sticks, etc. and allow the raft to dry upside down in the sun. After the bottom is
dry, turn the raft over, wipe out excess water with a sponge and allow the inside to dry (in hot weather, this will
only take a few minutes). After the raft is dry, store out of the sun. UV rays are your worst enemy. Raft colors will
fade and the fabric can become dry and brittle (cracks) with constant exposure to the sun. Store in a building or
under an awning or tarp. Never allow rafts to bake in the sun.
Occasionally, water may enter the inside of the tubes. This water must be removed immediately and the inside
dried. Moisture will eventually deteriorate the glue around the seams, so make sure boats are dry when stored.
Remove the ination valve and pour out all the water possible. Insert a 1/2” hose to the end of the air chamber
and connect it to the exhaust hose of a vacuum cleaner. Let the vacuum cleaner run for one hour or more to
remove all moisture.
During the o-season, rafts may be stored inated or deated. It is best not to roll up the raft during the o-
season as this may eventually cause cracks in the material. When deating, open the air valves and deate one
raft on top of another. Do not suck the air out and close the valve, this again may cause cracks in the material.
A word of caution: Do not store on cement (because of moisture) and put plenty of bait out for mice and rats (they
love to chew on and nest in your rafts).

13
ADDITIONAL SUGGESTIONS
Designating a specic inspection area with all the necessary tools available will facilitate the frequency of your
inspection routine.
• Whenever possible, transport inatables on the top of the load, inated, or by themselves. No coated material
can withstand the constant grating of a hard object and sand or dirt down miles of dirt road.
•Train crew to wet down straps before they are pulled through frames. A wet strap will not cause abrasion to
Hypalon or Neoprene.
•Be aware that rodents will eat coated fabrics that have food substances on them, especially in winter. Keep
your boats clean.
• Placing talc inside the tubes of your boat will help prevent rot and mildew build-up during the o-season.
REMEMBER: Your boats are a reection of your operation. Leaky, beat up, less than topnotch boats will result in
lost customers, poor guide morale and most importantly, less cash in the bank. The results of a daily maintenance
schedule and a year-end repair and refurbish program will be boats which impress your clients, boats which will
impart condence to your guides and boats whose repair costs will hit you a little at a time, rather than all at
once.

800.868.5987 / HYSIDE.COM /14
REPAIR
Many manufacturers recommend that you bring your boat to a professional for larger repairs, because it can be
dicult to get a good seal with a patch. However, if you have a small puncture, want to add-on D-rings/Footcones,
or are in a situation where you need to make immediate repairs, follow the directions below.
LOCATING A LEAK
Sometimes, even with the best care and safety precautions, your inatable boat can develop a leak. Unless you
have a major and obvious accident, it may be dicult to determine the location of the leak. Never assume there
is only one leak. Check the entire boat with soapy water to be sure before setting out on the water. More often
than not, a leak comes from a loose valve or an old patch that was applied incorrectly.
With the boat inated, start at the valve and spray with soapy water, watching for bubbles to form on the surface
of the boat, as a result of escaping air.
If the leak is coming from the outskirts of the valve, it is either loose, the washer is upside down or the valve is o
center. Simply remove the valve, readjust and re-tighten.
If it leaks from the center, something is holding the spring open (usually silt/sand). Remove the valve, wash with
soapy water, making sure to depress the spring several times to free any debris. Once you re-install the valve,
check for leaks again. Refer to the Valve section for complete instructions to install/remove.
If the leak is in the fabric, patch with an appropriate sized piece of fabric following the Gluing Instructions on the
next page.
REMOVING AN OLD PATCH
Pulling o an old patch is identical to replacing a broken handle or D-ring. You simply take theheat gunand wave
it over a corner at low heat until you are able to lift the corner withchannel lock pliers. Then work the heat gun
down the patch until you pull the whole thing o. Be careful not to apply too much heat to one location or it will
blister.
Once it is o you will need to clean the surfaces. If someone left you with a mess, you may need the more
aggressive bung wheel (item # 125G). But be extremely careful not to remove too much Hypalon, all you need
to do is remove the glue. If you ever need to repair the area again, you’ll want to have some Hypalon to work with.
LOOSE EDGES
If you have aloose edgeon a footcone, handle or D-ring patch and wish to tack it down, pull up on the loose edge
until you nd good adhesion. If more than ½ of the surface area pulls up easily it will be necessary to completely
reinstall the item.
COMMON TOOLS FOR REPAIR
Below are some common tools for repairing your inatable. Most of the items you’ll need can be found in your
repair kit (included with new boats and available in our online store).
Hyside Repair Kit
The repair kit includes everything you need for a solid repair on or o the water.
It includes plenty of fabric (color of your boat and black), a 4 oz Stabond 2 part
adhesive, brush, sandpaper and a Leaeld Valve Tool.
ACC-116

15
Rollers and Wheels
Use Rollers to compress the fabric materials together during a glue job, to ensure a solid bond. Standard
Compression Roller is ACC-114. Ergo Roller (blue) is ACC-112.
The black wheel is for cleaning up after a glue job. ACC-125K
The orange wheel is for standard bung and prep work. ACC-125O
The gray wheel is aggressive, for heavy duty jobs like removing old glue. ACC-125G
You can also use Dremel tools, especially for detailed areas, like just around the patch’s shape when prepping a
boat for a D-ring/Handle. Use Dremel Grinding Stone #952.
GLUING INSTRUCTIONS
To ensure success when attempting glue repair, please keep in mind that planning and preparation prior
to applying the glue is 90% of the eort.
Preparation
1. Calculate size of patch (usually 2 inches larger than tear, all the way around).
2. If attaching D-rings or handles, chamber should be inated.
If repairing a tear or installing footcones, deate air chamber and place on a at, rm
surface. Make alignment marks on both the surface and the patch at 12-3-6-9 o’clock
positions, so you can see where to sand and where to line up the patch when applying to surface. (Use a
grease pen or pencil for easy removal).
3. With 40 grit sandpaper, lightly sand both the patch and surface, only enough to remove the sheen. If you
are replacing a patch, be sure both surfaces are free of old glue.
4. Make sure room is well ventilated. Install fan if necessary to remove fumes.
CAUTION: The mixture is ammable and contains Free Isocyanate.
5. Stabond is MEK based, so you can wipe the sanded area with MEK to clean. If not available, you can use
acetone or rubbing alcohol.
Mixing Glue
We chose 2 part glue because it has a faster set up time and a much stronger adhesion.
Glue mixing is required. Stabond UK-148 consists of both a resin (clear in can) and an activator
(brown in bottle).
TIPS:
• When humidity is over 55%, DO NOT attempt to glue. Apply glue indoors for best results.
If outside, WORK IN THE SHADE, as direct sunlight will speed dry time.
• Mixing in a glass jar with a cap is the best method and use a stick when mixing.
• If glass jar not available, you can use a tuna can, but keep in mind you may need a cap.
7. Calculate the amount of glue needed.
A. 4 ounces will cover approximately 2 sq. ft. with 2 coats
B. Each size comes pre-measured with 8 parts resin to 1 part activator. (1 can to 1 bottle, ½ can to ½ bottle
and so on). Mix appropriate amount of activator and resin using a mixing stick.
C. MIXED GLUE ONLY LASTS 4 HOURS WHEN CAPPED AND PLACED IN A COOL DRY PLACE.
After each use, seal remaining UNMIXED glue preferably in glass. This should last the remainder of the
shelf life (1 year). (See Storage section for best results.)
ACC-125K ACC-125O ACC-125G
ACC-112
ACC-114
ACC-126S

800.868.5987 / HYSIDE.COM /16
GLUING INSTRUCTIONS CONTINUED
Application
TIPS:
• Most common problems arise from putting too much glue on any one surface during
application. Thick heavy coats will actually create LESS of a bond between the fabrics,
so go with two light coats!
• Make sure you plan for no interruptions during the application.
• If available, get an egg timer to keep drying time consistent. The longer you take, the faster the
base of the glue will evaporate, making the glue thicken.
• Cut bristles on brush down to 1/2 inch to assure a sti end, to hold less glue.
8. Apply very thin coats of glue to both sanded surfaces using brush. When applying, you want to put it on so
thin, you won’t even see the brush strokes.
9. Let rst coat dry for minimum of 20 minutes depending on temperature and humidity, or to a non-tacky
state.
10. Apply a second coat to both surfaces and let stand until slightly tacky.
(approx 5-10 minutes depending on humidity)
Patch Placement
11. While the glue is still tacky, carefully line up patch with marks you’ve made and press both surfaces
together rmly. The patch should be applied on a rm surface so you can use your weight to ensure the
two surfaces have made contact. This is particularly true when you have something like a D-ring that has
multiple layers of materials fabric and webbing to atten.
12. Fully deate chamber and place on rm surface. (If repairing a tear or installing footcones, you’ve already
done this). Using a roller, roll all areas of the patch to ensure surface contact to all areas. Working from the
center towards the outside, use the roller to work out any wrinkles or bubbles.
TIP:
• If your patch goes down crooked or wrinkled, use a heat gun to re-activate the glue
making it easier to remove and reapply.
• DO NOT PATCH OVER A SEAM. Seam leaks travel, so lift the seam and nd the origin of the leak.
Clean Up
13. When gluing, it’s okay to go over the lines, but you want to make sure to remove the excess glue within 24
hours, before it turns brown. There are a couple options:
1. You can wipe the excess glue with MEK, but don’t soak it or it may seep into the edges and loosen the glue
bond.
2. Using a soft nylon wheel and drill, remove excess glue from the surrounding area of repair. Make sure the
direction of the spinning wheel spins outward, away from the patch, so you don’t lift an edge.
Storage
Keep glue stored in a dry area at room temperature. Date bottom of can and replace annually. You can re-
use the brushes if they are stored in MEK in a jar that has a hole in the lid large enough to slide the brush
in. Use aluminum foil to ll any gaps.

17
REPLACEMENT PARTS
We normally stock most replacement parts for your inatable, like D-rings, Handles and Footcones.
Since the boats are handmade, the
two parts that are not normally
stocked are replacement oors and
thwarts (since the measurements
can vary slightly). If you need a
replacement oor or thwart, we need
the following measurements listed in
the diagram(s) below, when you place
your order. The best time to order is
from Late Summer to December, for
delivery the following spring, if you
need it by the start of the season.
Measure oors while deated,
measure thwarts while inated.
REMOVABLE THWART (INFLATED)
Measure length (A) of straight section and
(B, diameter when inated.
D-RINGS
ACC-300
ACC-319
ACC-750
ACC-302
HANDLES
FOOTCONES

800.868.5987 / HYSIDE.COM /18
TROUBLE SHOOTING
VALVE DOES NOT RETAIN AIR WHEN PUMP IS REMOVED
Make sure that the center spring is in the closed/up position.
Clear any debris that might be preventing the valve from sealing. This can be accomplished by pumping quick
bursts of air into the valve with the valve in both closed and open positions.
Make sure that the lock ring on the valve is tight.
TUBE BECOMES SOFT AFTER INFLATION PROCESS
Determine which air chamber is soft. Starting at the valve, spray with soapy water to nd leak. Make sure the
valve is functioning correctly, with no signs of leaking. (See above)
TIP: If you spray the valve with soapy water and it leaks from the outside of the valve it is either loose, the washer is
upside down or the valve is o center. If it leaks from the center, something is holding the spring open.
If the leak is at the fabric, nd the hole in the fabric and patch with an appropriate sized fabric patch. (See Gluing
Instructions under Repair)
FLOOR BECOMES SOFT AFTER BOAT IS ON THE WATER
The cooling eect of the water will soften the oor from its initial pressure. Top o the oor again until the relief
valve opens. If it becomes soft again, see process above for locating a leak, starting with the valves.
PRESSURE RELEASE VALVE NOT OPENING AT 2.0 PSI
Remove the valve and wash it in soapy water and rinse it thoroughly. If your PRV fails to work after cleaning and
properly reinstalling, replace it immediately. This could result in a blown I-beam in the mattress oor, which
averages a $300 repair cost. Under the lter screen is a colored dot that indicates the PSI, so make sure it is the
mfg suggested setting of either a blue dot (2.0 PSI release) or yellow dot (1.75 PSI release).

19
WARRANTY INFORMATION
HYSIDE’s goal is to provide you with a product that won’t leave you worrying about a warranty. Warranties won’t
help you in remote locations or on the river. That said, if you do have any issues, please see the Terms and
Conditions below, as well as our Limited Warranty and Limited Liability (our lawyers made us do it).
RETURN POLICY
Any merchandise being returned for any reason, must have a Return Authorization (RA) number. Please call our
toll free number, 800-868-5987, for a RA #. HYSIDE sta will guide you through some trouble-shooting techniques
before issuing a RA number (we may be able to solve your problem over the phone). We will advise you where to
return the item and buyer is responsible for return shipping.
Products are eligible for return 14 days from the date of delivery. Products can only be returned unused and in
commercially resalable condition. Any products returned wet or having been wet, not in their original factory
packaging or shrink wrapping are not eligible for refund. These products are only eligible to be serviced under
their warranty. Special order merchandise or dropped shipped items are not eligible for return.
DAMAGED ITEMS
Damaged items or boxes must be reported immediately to the delivery driver to be reported to the shipper, in
order to make a claim. If boxes are visibly damaged, we recommend opening the boxes in the presence of the
delivery driver or possibly even refusing the shipment depending on condition. Our boxes are well packed when
they leave our dock and all items are tightly packed. Damage is the responsibility of the freight company, but
must be reported properly.
RESTOCKING FEES
If products are returned unused and in resalable condition, using a RA # issued within a 14-day period of the
delivery date, a 10% or $10 minimum transaction fee is charged. Returned orders that received Free Shipping
will be subject to a $10 fee or the actual shipping amount, whichever is greater, to cover the cost of shipping.
Shipping and installation fees are non-refundable services.
Acceptance of delivery of any product constitutes purchaser’s acceptance of this agreement and subjects
purchaser to its contents.

800.868.5987 / HYSIDE.COM /20
LIMITED WARRANTY
All registered HYSIDE Inatables and Accessories are warranted under conditions of
normal handling and use, as described in the HYSIDE Owner’s Manual, to the original
purchaser, for the following:
• HYSIDE’s Hypalon fabric and workmanship is warranted for a period of Five (5) Years from
the date of purchase against defects and deterioration aecting serviceability (such as aging,
cracking).
• Air holding seams are warranted to meet HYSIDE psi standards for Five (5) Years from date
of purchase.
• Parts, accessories are warranted for a period of One (1) Year from date of purchase.
HYSIDE Inatables or its appointed distributors will repair or replace, at their option, any of the
above described defects during the respective warranty periods. In order to have any defect
corrected, the owner of the inatable must send notication of the defect to HYSIDE Inatables,
12100 Sierra Way, Kernville, CA 93238 or call our toll free number. HYSIDE Inatables, as outlined
in the ‘Return Policy’ will then issue a Return Authorization # and advise the owner where to
send, freight prepaid, the boat or part for repair or replacement.
The judgment of our factory-trained experts is nal as to the extent of any liability. Any repair
made as a result of an accident, neglect, alteration or abuse will be made at a charge to the
owner.
Other than as stated herein, HYSIDE Inatables or its appointed distributors make no warranty
of merchantability and there are no warranties which extend beyond the description on the
face hereof.
LIMITATION OF SELLER LIABILITY
Seller’s liability is as stated in the written express Limited Warranty and is expressly limited solely to the
replacement and/or repair of this inatable for defects in material and workmanship as covered by said warranty,
and seller shall not be liable for any loss or damage, directly or indirectly arising from the use of this inatable or
for consequential damages (including, but not limited to, incidental or consequential damages for lost prot, lost
sales or any other incidental or consequential loss). HYSIDE Inatables does not have control of the use and/or
operation of your new HYSIDE inatable. Said inatable has not been warranted to be t for any particular use, or
purpose, nor is HYSIDE responsible for the experience level or training of those who will use, occupy or maintain
this inatable, nor is HYSIDE responsible or liable for personal injury in connection with the use of this product.
This manual suits for next models
27
Table of contents
Popular Boat manuals by other brands

GREEN DREAM BOATS
GREEN DREAM BOATS SOLLINER instruction manual

Mercury
Mercury 200 OptiMax DTS owner's manual

Pro-Line Boats
Pro-Line Boats 2006 25 Sport owner's manual

Pelican
Pelican 130X owner's manual

AYC
AYC Defiant II Operation manual

Sportsman
Sportsman OPEN 232 Owner's manual and quick reference guide