manuals.online logo
Brands
  1. Home
  2. •
  3. Brands
  4. •
  5. Hyundai
  6. •
  7. Automobile
  8. •
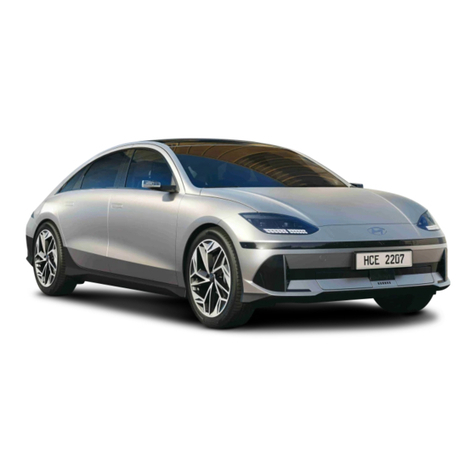
  9. Hyundai IONIQ 6 ELECTRIC 2023 User manual

Hyundai IONIQ 6 ELECTRIC 2023 User manual

Other Hyundai Automobile manuals

Hyundai GENESIS User manual

Hyundai

Hyundai GENESIS User manual

Hyundai ELANTRA GT User manual

Hyundai

Hyundai ELANTRA GT User manual

Hyundai Azera 2017 User manual

Hyundai

Hyundai Azera 2017 User manual

Hyundai KONA 2019 User manual

Hyundai

Hyundai KONA 2019 User manual

Hyundai SONATA hybrid User manual

Hyundai

Hyundai SONATA hybrid User manual

Hyundai 2012 Sonata Hybrid User manual

Hyundai

Hyundai 2012 Sonata Hybrid User manual

Hyundai 2013 Azera User manual

Hyundai

Hyundai 2013 Azera User manual

Hyundai XG350 2003 User manual

Hyundai

Hyundai XG350 2003 User manual

Hyundai 2010 Elantra User manual

Hyundai

Hyundai 2010 Elantra User manual

Hyundai KONA 2021 User manual

Hyundai

Hyundai KONA 2021 User manual

Hyundai 2009 Entourage User manual

Hyundai

Hyundai 2009 Entourage User manual

Hyundai Sonata Hybrid 2014 User guide

Hyundai

Hyundai Sonata Hybrid 2014 User guide

Hyundai Santa Fe 2007 User manual

Hyundai

Hyundai Santa Fe 2007 User manual

Hyundai ELANTRA User manual

Hyundai

Hyundai ELANTRA User manual

Hyundai Elite i20 User manual

Hyundai

Hyundai Elite i20 User manual

Hyundai ACCENT User manual

Hyundai

Hyundai ACCENT User manual

Hyundai SONATA User manual

Hyundai

Hyundai SONATA User manual

Hyundai IONIQ EV User manual

Hyundai

Hyundai IONIQ EV User manual

Hyundai VEHICLE 2013 User guide

Hyundai

Hyundai VEHICLE 2013 User guide

Hyundai Kona Hybrid 2023 User manual

Hyundai

Hyundai Kona Hybrid 2023 User manual

Hyundai Tucson 2013 User manual

Hyundai

Hyundai Tucson 2013 User manual

Hyundai 2006 Elantra User manual

Hyundai

Hyundai 2006 Elantra User manual

Hyundai Elite i20 User manual

Hyundai

Hyundai Elite i20 User manual

Hyundai SONATA User manual

Hyundai

Hyundai SONATA User manual

Popular Automobile manuals by other brands

Jeep Compass user guide

Jeep

Jeep Compass user guide

Mitsubishi 3000GT Service manual

Mitsubishi

Mitsubishi 3000GT Service manual

Chevrolet Traverse 2012 owner's manual

Chevrolet

Chevrolet Traverse 2012 owner's manual

Oldsmobile 1996 Achieva owner's manual

Oldsmobile

Oldsmobile 1996 Achieva owner's manual

Cadillac 2005 CTS Personalization guide

Cadillac

Cadillac 2005 CTS Personalization guide

Toyota AVALON HYBRID Warranty & maintenance guide

Toyota

Toyota AVALON HYBRID Warranty & maintenance guide

Toyota HILUX Owner's manual supplement

Toyota

Toyota HILUX Owner's manual supplement

Lincoln 2015 NAVIGATOR owner's manual

Lincoln

Lincoln 2015 NAVIGATOR owner's manual

Toyota Corolla 2002 owner's manual

Toyota

Toyota Corolla 2002 owner's manual

Toyota 2002 MR2 Spyder owner's manual

Toyota

Toyota 2002 MR2 Spyder owner's manual

Toyota Camry Hybrid 2012 Warranty & maintenance guide

Toyota

Toyota Camry Hybrid 2012 Warranty & maintenance guide

Mazda 323 Protege owner's manual

Mazda

Mazda 323 Protege owner's manual

Subaru 2014 Forester Quick manual

Subaru

Subaru 2014 Forester Quick manual

Toyota Avensis ZZT251 2003 Service and repair manual

Toyota

Toyota Avensis ZZT251 2003 Service and repair manual

Mercedes-Benz 2013 SL Operator's manual

Mercedes-Benz

Mercedes-Benz 2013 SL Operator's manual

Chrysler 300 2013 Product highlights

Chrysler

Chrysler 300 2013 Product highlights

Toyota Corolla 2008 owner's manual

Toyota

Toyota Corolla 2008 owner's manual

Volkswagen california d3519cdb02a9dab29cd827771f7c11a

Volkswagen

Volkswagen california d3519cdb02a9dab29cd827771f7c11a

manuals.online logo
manuals.online logoBrands
  • About & Mission
  • Contact us
  • Privacy Policy
  • Terms and Conditions

Copyright 2025 Manuals.Online. All Rights Reserved.

Roadside Assistance: 1-800-243-7766
Consumer Affairs: 1-800-633-5151
Sirius XM®Radio: 1-800-967-2346
Bluelink: 1-855-2BLUELINK
(1-855-225-8354)
Quick Reference Guide
HYUNDAI
IONIQ 6
ELECTRIC
MIST
OFF
AUTO
LO
HI
CLIMATE
WARMER
AUTO
OFF
Instrument
Cluster
Page 11
Navigation
Page 26
EV system modes,
LCD display control & modes
Page 16
Dual Automatic
Temperature Control
Page 17
Steering wheel
audio controls
Page 19
Smart Cruise
Control
Page 29
USB port
Page 15
Wipers and
Washer
Page 07
* Some vehicles may not be equipped
with all the listed features.
FEATURES AND CONTROLS
Automatic climate control system 17
Aux. battery saver+ 14
Charging door 05
Driver’s main controls 03
Electric vehicle system modes 16
Hands free smart trunk 04
High voltage battery SOC (state of charge) gauge
13
Homelink wireless control system 09
Instrument cluster 11
Key hole access (driver door) 08
LCD display control 14
LCD display modes 14
Power trunk operation 04
Seat-Driver position memory system 03
Seat-Heated/Ventilated front seats 01
Seat-Power driver’s seat adjustment 01
Seat-Folding rear seats 02
USB charger 15
USB port 15
Vehicle power gauge 13
Warnings and indicators 11
Wipers and washer 07
Wireless cellular phone charging system 15
INFOTAINMENT
Apple CarPlay & Android Auto Setup 21
Bluelink connected car system 22
Bluetooth® audio quality tips 20
Bluetooth® operational tips 20
Bluetooth® phone operation 19
Bluetooth® phone pairing 19
Navigation 26
Radio mode 25
Steering wheel audio control 19
Voice recognition tips 22
DRIVING
Blind-Spot Collision-Avoidance Assist (BCA)
32
Battery conditioning mode 34
Drive mode 36
Electronic parking brake (EPB) 30
Forward Collision–Avoidance Assist (FCA) 31
Highway Driving Assist (HDA) 30
Lane Keeping Assist (LKA) 31
Near field communication (NFC) 35
Regenerative brake level control paddles 27
Shift By Wire Gear Selector 27
Smart Cruise Control (SCC) 29
Tire pressure monitoring system (TPMS) 33
Use this Quick Reference Guide to
learn about the features that will
enhance your enjoyment of your
Hyundai. More detailed information
about these features are available in
your Owner’s Manual.
WARNING!
To reduce the risk of serious injury to
yourself and others, read and
understand the important SAFETY
INFORMATION in your Owner’s
Manual.
HYUNDAI VEHICLE OWNER PRIVACY POLICY
Your Hyundai vehicle may be equipped with technologies and services that use
information collected, generated, recorded or stored by the vehicle. Hyundai has created
a Vehicle Owner Privacy Policy to explain how these technologies and services collect,
use, and share this information.
You may read our Vehicle Owner Privacy Policy on the Hyundaiusa.com website at
https://www.hyundaiusa.com/owner-privacy-policy.aspx
If you would like to receive a hard copy of our Vehicle Owner Privacy Policy, please
contact our Customer Care Center at:
Hyundai Customer Care
P.O. Box 20850
Fountain Valley, CA 92728
800-633-5151
consumer[email protected]
Hyundai’s Customer Care Center representatives are available Monday through Friday,
between the hours of 6:00 AM and 5:00 PM PST and Saturday between 6:30 AM and
3:00 PM PST (English).
For Customer Connect Center assistance in Spanish or Korean, representatives are
available Monday through Friday between 6:30 AM and 3:00 PM PST.
Quick Reference Guide I 02
01 I Quick Reference Guide
IONIQ 6 ELECTRICHYUNDAI
FEATURES AND CONTROLS
HEATED/VENTILATED FRONT SEATS
POWER DRIVER’S SEATADJUSTMENT
Forward and backward
1
Seat height
1
Lumbar support
3
12
3
Seatback angle
2
While the vehicle is running,
touch Heating/Ventilation icon
in the infotainment home
screen. Press WARMER in the
front climate control panel.
1. Set the front seat to the upright
position and if necessary, slide
the front seat forward.
2. Lower the rear head restraints to
the lowest position.
To fold down the rear seat back:
To activate seat warmer/air ventilation of each front seat, touch icon
on the infotainment screen. Adjust the temperature by pressing either
or icons.
3. Route the seat belt webbing
to the outward of the rear
seat to prevent the belts
from being trapped behind
or under the seats. Be wary
of center belt routing and
locking when lowering rear
seat.
4. Fold the rear seats toward the
front of the vehicle.
5. To use the rear seat, lift and pull
the seats rearward. Pull the
seatback firmly until it clicks into
place. Make sure the seat back
is locked in place.
FOLDING REAR SEATS
Quick Reference Guide I 04
03 I Quick Reference Guide
IONIQ 6 ELECTRICHYUNDAI
FEATURES AND CONTROLS
Storing Memory Positions
1. Shift to P (Park) while the Start/Stop
button is in the ON position.
2. Adjust the driver's seat position, outside
rearview mirror position, and head-up
display height to the desired position.
3. Hold the button (1 or 2). The system will
beep once and notify you 'Driver 1 (or
2) settings saved' will appear on the
infotainment screen.
NOTE: The gear position must be in P (Park).
Recalling
Press the desired memory button (1 or 2). The system will beep once.
DRIVER POSITION MEMORY SYSTEM
2
1
DRIVER'S MAIN CONTROLS
Folding outer side view mirrors
Press to fold/unfold mirrors.
Press the lock or unlock button on the
smart key in AUTO position, and the
mirrors will be folded or unfolded.
Outer side view mirror
•Press the L or R button.
•Adjust the mirror by using
the directional switch.
Door lock
Locks/unlocks all doors.
Window switches
•Front doors power window switches.
•Rear doors power window switches.
Power window and child lock button
Disables the power window switches
on the rear passenger doors.
To activate
To enable Smart
Trunk
, go to User
Settings mode on the LCD display, or
Setup, then Vehicle on the Navigation
display and under the Door menu
make sure the Power
Trunk
and
Smart
Trunk
boxes are checked.
P
P
POWER TRUNK OPERATION
Press to open.
Smart key must be within the range.
Press for
about 1
second to
open. Press
and hold to
close.
Car must be in Park
(P). Press for about
1 second to open.
Press and hold to
close.
HANDS FREE SMART TRUNK
Power Trunk Opening Height
For your convenience, there are four levels to adjust the trunk opening
height. These can be selected in the User Settings menu.
1. Select User Settings from the LCD Display, or Setup - Vehicle from
the Navigation screen.
2. Select Door Menu, then Power Trunk Opening Height
3. Choose between Level 1 ~ 3 or Full Open
Hands Free Smart Trunk Operation
The trunk can be opened with no-touch activation after the below
conditions are met:
•After 15 seconds from when all doors are closed and locked
• You approach the rear of the vehicle (trunk area) for at least 3
seconds with the Smart Key in your posession
On vehicles equipped with Smart
Trunk, the trunk can be opened
with no-touch activation.
NOTE: Feature is default OFF from factory to avoid accidental activation.
LR
P
2
1
LR
P
LR
P
2
1
LR
P
P
P
Quick Reference Guide I 06
05 I Quick Reference Guide
IONIQ 6 ELECTRICHYUNDAI
FEATURES AND CONTROLS
CLOSE
HOLD
HOLD
CLOSE
To open, while vehicle is
unlocked, press on the
outside of the charging door
or use Voice Recognition.
After recharging, install the
bottom inlet cover first
before installing the upper
inlet cover. Press the close
button to close the charging
door.
CHARGING DOOR
Emergency Charge Connector
Release:
If the charging cable will not
release, open the trunk and pull
the emergency cable.
Charging Connector Lock
Locking mode for connected
charging cable.


Mode
HOLD
HOLD
CLOSE
TO OPEN
TO CLOSE
Always lock Lock while
charging Do not lock
Before charging O X X
While charging O O X
Finished charging O X X
Charging Status
Electric Charging door
HOLD
Charge Indicator
light SOC (%)
0~24
25~49
50~74
75~100
HOLD
HOLD
CLOSE
Scheduled Charging Override
HOLD
If you have a charge schedule set and would like
to charge your vehicle outside that window, you
can press and hold the button after plugging your
vehicle in and it will start charging.
Quick Reference Guide I 08
07 I Quick Reference Guide
IONIQ 6 ELECTRICHYUNDAI
FEATURES AND CONTROLS
KEY HOLE ACCESS driver door
Press the front part
1
of the door
handle to pull out the rear part of
the door handle. While keep
pressing the front part of the door
handle, insert the mechanical key
to the lock.
To lock door, turn the key
clockwise. To unlock, turn the key
counterclockwise.
Windshield Washer
Pull the lever gently towards you to
spray washer fluid on the
windshield and to run the wipers1-3
cycles.
MIST
OFF
AUTO
LO
HI
MIST
OFF
AUTO
LO
HI
MIST
OFF
AUTO
LO
HI
MIST
OFF
AUTO
LO
HI
MIST
OFF
AUTO
LO
HI
MIST
OFF
AUTO
LO
HI
MIST
OFF
AUTO
LO
HI
MIST
OFF
AUTO
LO
HI
MIST
OFF
AUTO
LO
HI
MIST
OFF
AUTO
LO
HI
MIST
OFF
AUTO
LO
HI
MIST
OFF
AUTO
LO
HI
MIST
OFF
AUTO
LO
HI
MIST
OFF
AUTO
LO
HI
OFF -Off
OFF
MIST -Single wipe
MIST
INT - Intermittent wipe
INT/
AUTO
LO -Low wiper speed
LO
HI -High wiper speed
HI
Intermittent wipe time adjustment
Move the speed control switch
MIST
OFF
AUTO
LO
HI
MIST
OFF
AUTO
LO
HI
MIST
OFF
AUTO
LO
HI
MIST
OFF
AUTO
LO
HI
MIST
OFF
AUTO
LO
HI
MIST
OFF
AUTO
LO
HI
MIST
OFF
AUTO
LO
HI
Fastest wiper speed
Slowest wiper speed
PULL
WIPERS AND WASHER
1
How To Unlock AC Outlet Panel
Unlock the AC outlet
panel by using the “tip” of
the mechanical key or a
flat blade screwdriver to
turn the lock mechanism.
MaxAC 120V,16A
MaxAC 120V,16A
i
U
N
L
O
C
K
L
O
C
K
MaxAC 120V,16A
i
U
N
L
O
C
K
L
O
C
K
MaxAC 120V,16A
MaxAC 120V,16A
i
U
N
L
O
C
K
L
O
C
K
MaxAC 120V,16A
i
U
N
L
O
C
K
L
O
C
K
MaxAC 120V,16A
MaxAC 120V,16A
i
U
N
L
O
C
K
L
O
C
K
MaxAC 120V,16A
i
U
N
L
O
C
K
L
O
C
K
Quick Reference Guide I 10
09 I Quick Reference Guide
IONIQ 6 ELECTRICHYUNDAI
FEATURES AND CONTROLS
Rolling Code Programming
•You may need a ladder to access your garage door opener.
•You may need help from a second person.
•Be prepared some of the steps are time sensitive.
1. Firmly press and release the “Learn”, "Smart”, or “ Program” button
of garage door opener on the ceiling while the indicator
7

in Green. Once the button is pressed, you have approximately 30
seconds to initiate the next step.

for two seconds and release the button up to three times. Do not
press the HomeLink button rapidly. At this point programming is
complete and your device should operate.
For more detailed information, please refer to your Owner’s manual
or visit www.homelink.com or call (800) 355-3515
HOMELINK WIRELESS CONTROL SYSTEM
1. Press and release
1
,
2
or
3
button.
• If the indicator
7
is turned ON in Orange, go to Step 3
(programming mode)
• If the indicator
7

rapidly several times, go to Step 2 (erasing mode)
2. Press and hold the button you wish to program for approximately

3. Hold the Garage Door Opener Original Transmitter near the
HomeLink Mirror.
4. Press the Original Transmitter button until the indicator
7
is

seconds and it indicates the programing is completed.
NOTE:
If the indicator
7

garage door opener does not operate, please continue to follow
Rolling Code Programming steps below.
Indicator
4
&
6
:


123
4
4
5
7
6
6
Two Way Communication
Some new garage door openers come equipped with a two-way
communication feature. If your garage door opener has this feature,
please also continue to follow the Rolling Code Programming steps
below. For more information and programming tips on two-way
communication please visit www. homelink.com/compatible/two-
waycommunication or call (800)-355-3515.
NOTE: If your garage door opener has Two-Way Communication
functionality, it is possible for HomeLink to stop functioning the garage
door shortly after initial programming, if the Two-Way Communication
Programming wasn’t properly completed. If you experience this,
completing the “Programming a New HomeLink Button” and “Two-
Way Communication Programming” will restore door operation.
Quick Reference Guide I 12
11 I Quick Reference Guide
IONIQ 6 ELECTRICHYUNDAI
FEATURES AND CONTROLS
Charging cable indicator
This indicator shows the charging status of the high
voltage battery.
• When a charge cable is connected, the indicator
illuminates in red. The approximate charge time will be
displayed on the dash after a few minutes.
High voltage battery low level warning light
This warning light illuminates when the high voltage battery
level is low.
When the warning light turns ON, charge the battery
immediately.
Ready indicator light
When the vehicle is ready to be driven, this indicator
is illuminated.
When the ready indicator goes off or blinks, we recommend
the vehicle be checked by an authorized HYUNDAI dealer.
Service warning light
If a problem with the electric vehicle control system
occurs, the service warning light will illuminate.
We recommend the vehicle be checked by an authorized
HYUNDAI dealer.
Power down warning light
When the vehicle power should be limited for the safety of
the electric vehicle, this warning light illuminates.
Charge the battery immediately when the high voltage
battery level is not enough.
Main indicators in cluster for Electric Vehicle
NOTE: DC Quick charge session is time limited and may not
reach maximum charge in one session depending on initial
battery % SOC. The maximum charge possible in Ioniq Electric is
94% SOC on a DC
Quick charger which will show a slightly lower
range than with Level-1
and 2 chargers with maximum possible
charge to 100%SOC.
1
Speedometer
2
Power/Charge gauge
3
Distance to empty
3
6
4
4
4
1
2
5
WARNINGS AND INDICATORS
Ready indicator
light
Service warning
light
Power down warning
light
Air bag warning light
Motor Driven Power Steering
(MDPS) warning light
Electronic Brake force
Distribution (EBD)
System warning light
Charging indicator
Low tire pressure
warning light
AUTO HOLD indicator
LED headlamp
warning light
Regenerative brake
warning light
Anti-lock Brake
System (ABS)
warning light
Electic Parking Brake
(EPB) warning light
Parking brake &
brake fluid warning
light
Seat belt
warning light
Turn signal indicator
light
Immobilizer indicator
Master warning light
Electronic Stability
Control (ESC) OFF
indicator light
Electronic Stability
Control (ESC)
Indicator Light
Light ON indicator
light
Low beam
indicator light
High beam
indicator light
INSTRUMENT CLUSTER
High voltage battery
low level warning
light
Forward Safety
Warning Light
Lane Safety
Indicator
4
Warning and indicator lights
5
Cluster display
6
Battery SOC (State of Charge) gauge
High beam assist
indicator light
Driver attention
warning light
Quick Reference Guide I 14
13 I Quick Reference Guide
IONIQ 6 ELECTRICHYUNDAI
FEATURES AND CONTROLS
Modes Symbol Explanation
Trip Computer
This mode displays driving information such
as the tripmeter, fuel economy, etc.
Turn By Turn (TBT)
(if equipped)
This mode displays the state of the
navigation.
Driving Assist
• This mode displays the state of the Advanced
Lane Keeping Assist and Smart Cruise
Control.
• This mode displays information related to
Tire Pressure.
User Settings In this mode, you can change settings of
the doors, lamps, etc.
Warning
This mode displays warning messages
related to one or more systems on your
vehicle. Service by an authorized Hyundai
dealer may be required.
LCD DISPLAY MODES
1
: MODE button for changing
modes
2
: MOVE switch for changing
items
3
: SELECT / RESET button for
setting or resetting the
selected item
LCD DISPLAY CONTROL
1
2
3
Energy consumption Rate
conditions:
POWER
Driving uphill or accelerating.
ECO
Normal Driving Conditions.
CHARGE
Using regenerative brakes
(decelerating or driving downhill).
The SOC gauge shows the charging
status of the high voltage battery.
“L(Low)” position on the indicator
indicates that there is not enough
energy in the high voltage battery.
“H(High)” position indicates that the
driving battery is fully charged.
When there are 2~3 gauge bars
(near the “L(Low)” area) on the
gauge, the warning light turns ON
and, the vehicle can drive an
additional 12~18 miles depending on
the driving condition. Charging is
required.
VEHICLE POWER GAUGE
HIGH VOLTAGE BATTERY SOC STATE OF CHARGE
GAUGE
The Aux. Battery Saver+ function
monitors the charging status of
the 12 V auxiliary battery. If the
auxiliary battery level is low, the
main high voltage battery charges
the auxiliary battery.
AUX. BATTERY SAVER+
NOTE: Do not touch the high voltage electric wire(orange), connector,
and all electric components and devices when the function is activating.
Quick Reference Guide I 16
15 I Quick Reference Guide
IONIQ 6 ELECTRICHYUNDAI
FEATURES AND CONTROLS
ELECTRIC VEHICLE SYSTEM MODES
1
Returns to the previous step.
2
View the current battery level.
If you press the vehicle image, the energy information screen appears.
3
Can search for nearby charging stations.
The details of charging stations displayed on the map screen may
not match the actual information.
4
View the distance to empty for the current climate control settings.
The details of drivable range displayed on the map screen may not
match the actual information.
5
Set the next departure time.
►
See "Setting the next departure time."
6

according to the departure time.
►
See "Scheduling a charge and
climate controls."
7
Set an electricity usage limit.
►
See "Setting an electricity usage limit."
•V2L: This technology uses the battery power of an electric vehicle to
power electronic devices in the vehicle.
8
You can set to enable the Electric Vehicle mode.
►

the EV settings."
9
Shows the solar roof charging status (if equipped).
1
2
3
4
8
7
6
5
9
WIRELESS CELLULAR PHONE CHARGING SYSTEM
CLIMATE
WARMER
AUTO
OFF
CLIMATE
WARMER
AUTO
OFF
There is a wireless cellular phone
charging system in front of the
cup holders. The system operates
with all doors closed, and the
Engine Start/Stop button in the
ACC/ON/START position.
Wireless charging system can be
disabled in the instrument cluster
settings menu.
NOTE: The wireless cellular phone charging system supports
only the Qi-enabled cellular phones ( ).
NOTE: Do not place any metallic items such as coins, keys on the
charger. Avoid placing credit cards on the charger as they may
be damaged by the magnetic field.
The charging area may be warm while using wireless charging.
NOTE: Wireless charger will deactivate whenever a door is opened.
Use a USB-A cable to connect an
external audio device and listen
to it through the audio system in
your vehicle.
The USB charger is designed to recharge batteries of small size
electrical devices using a USB-C cable.
The electrical devices can be recharged when the Start/Stop button
is in the ON or START position.
USB PORT
USB CHARGER
FRONT USB CHARGER REAR USB CHARGER
CLIMATE
WARMER
AUTO
OFF