Hyundai HASBT35 User manual

PETROL BLOWER VACCUM SHREDDER
HASBT35
WARNING: Read thoroughly the instruction manual before using.

CONTENTS
1. SAFETY INSTRUCTIONS.....................................................................................................................3
2. YOUR PRODUCT................................................................................................................................... 7
3. ASSEMBLY............................................................................................................................................. 8
4. FILLING THE FUEL TANK................................................................................................................. 10
5. OPERATION..........................................................................................................................................11
6. MAINTENANCE....................................................................................................................................12
7. DECLARATION OF CONFORMITY..................................................................................................14
8. WARRANTY.......................................................................................................................................... 15
9. PRODUCT FAILURE........................................................................................................................... 16
10. WARRANTY EXCLUSIONS.............................................................................................................17
02

1. SAFETY INSTRUCTIONS
WARNING! Before using this tool, please read these instructions of safety and use. It
will help you to use safely the machine and reduce the risk of electrical shocks and
accidents. If you give this tool to another person, also give this manual.
Use this tool as described in this manual. Any mishandling and any use contrary to
instructions will not in any way engage the liability of the manufacturer.
Non-compliance with safety instructions and use can cause a risk of electric shock, fire
and / or injury to persons.
This appliance is not intended for use by persons (including children) with reduced physical,
sensory or mental capabilities, or lack of experience and knowledge, unless they have been
given supervision or instruction concerning use of the appliance by a person responsible for
their safety.
Children should be supervised to ensure that they do not play with the appliance.
Never allow children, persons with reduced physical, sensory or mental capabilities or lack of
experience and knowledge or people unfamiliar with these instructions to use the machine,
local regulations may restrict the age of the operator.
Never use the machine when people, especially children, or pets are nearby.
Remember that the operator or user is responsible for accidents or hazards occurring to
persons or their belongings.
Do not disassemble the tool yourself. Disassembly, repair or verification must be made
exclusively by qualified personnel.
Use the tool fully assembled and secure. Before use, check if the protections and safety
devices are in place.
During the operation of the machine, always wear protective equipment, including protective
masks, visors or goggles, ear protection, helmet, gloves, non-slip footwear and protective
clothing.
Always carry the machine by its handle; never use the cord or any other part of the machine.
Do not use the machine when you are tired, under the influence of alcohol or drugs or sick.
Use the tool to suck and blow leaves and similar materials. Do not blow flammable materials,
cigarette butts and materials that can damage the device.
Do not use the appliance to suck water or wet debris.
Always use the machine with the collection bag.
Avoid using the machine in bad weather, especially when there is a risk of thunderstorms and
lightning.
In case of accident, immediately stop using the machine. Turn off and unplug it and check the
problem. Do not use the machine while the machine is damaged.
Operate the machine only at reasonable hours – not early in the morning or late at night when
people might be disturbed;
Organize your work time. Do not operate this tool for a long time, you could be tired. Make
some pauses and take rest between 2 work sessions.
use rakes and brooms to loosen debris before blowing/vacuuming;
slightly dampen surfaces in dusty conditions or use mister attachment;
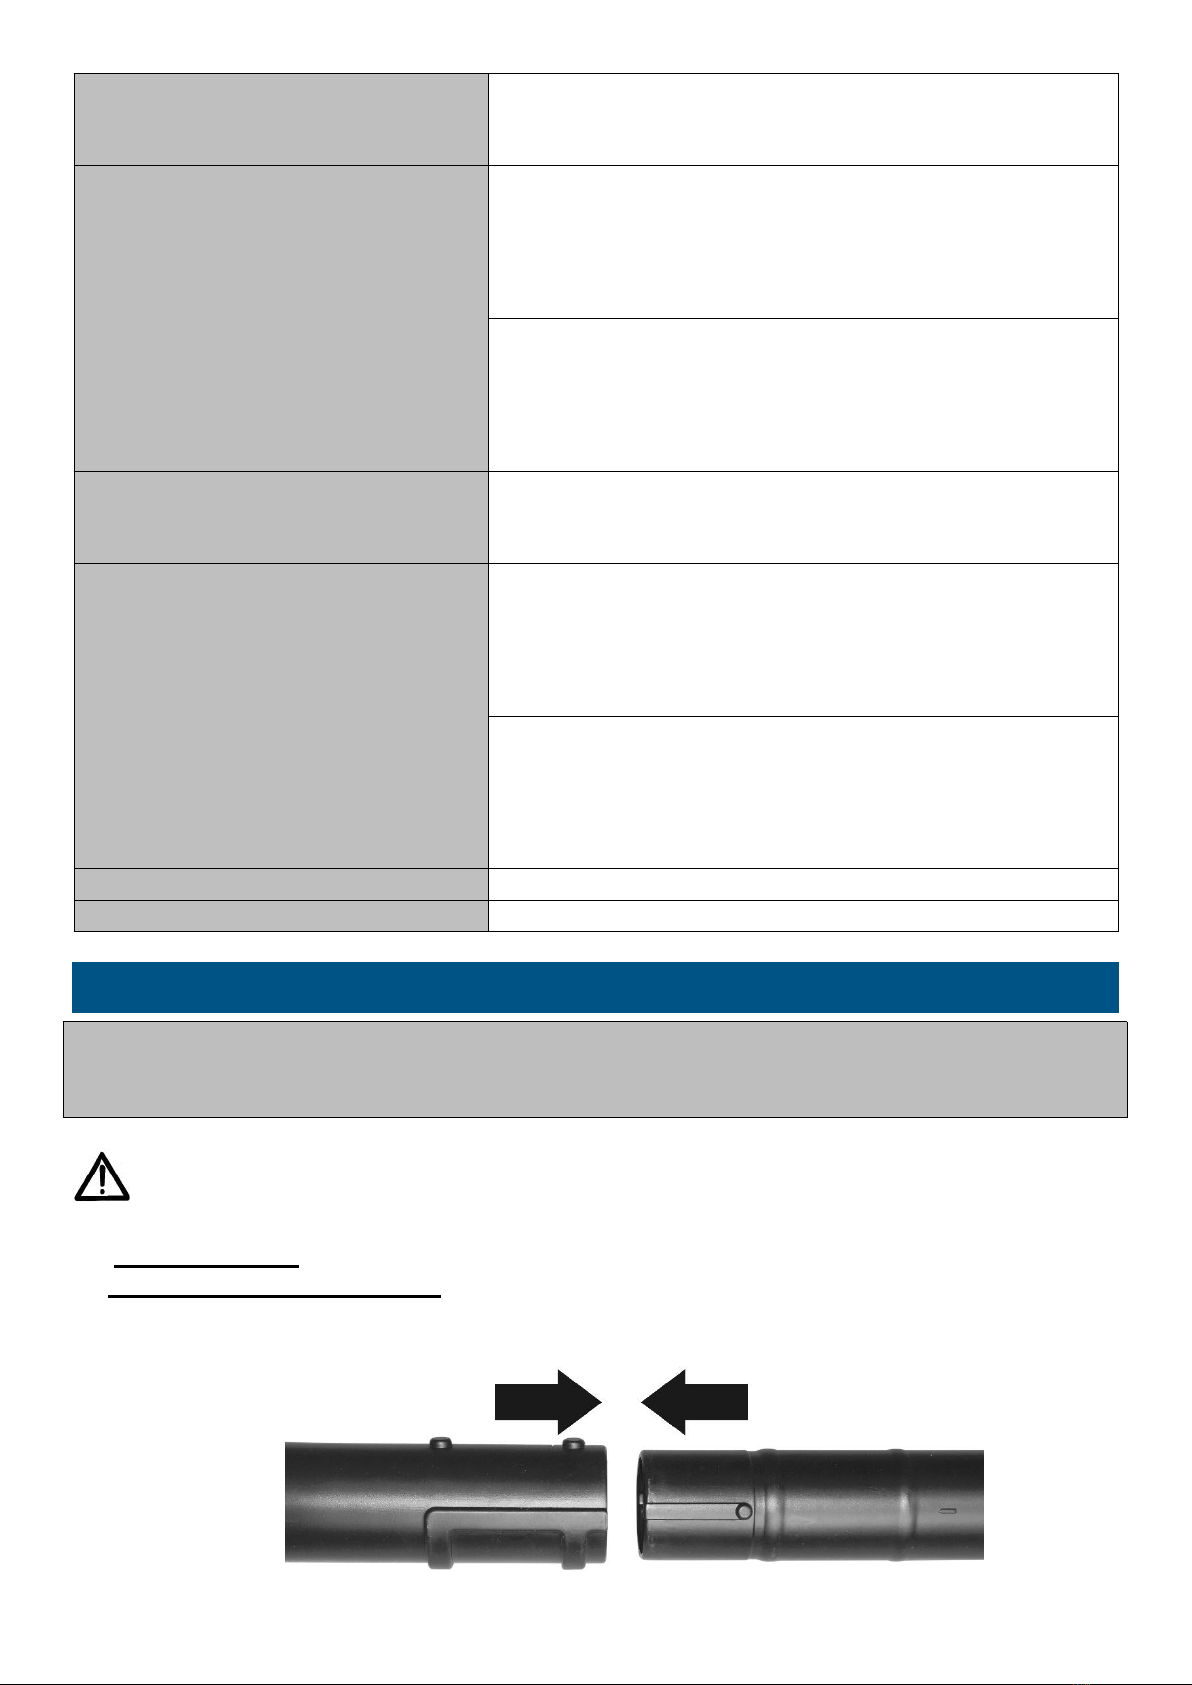
Always use the full blower nozzle extension so the air stream can work close to the ground.
Do not use the tool in an area where ventilation is poor. Gas emissions can cause injury.
Do not use the tool in the presence of flammable liquids or gases.
Caution: The machine releases gases when it is used. Avoid coming into contact with these
gases.
03

SAFE OPERATING PRACTICES FOR THE TOOL
Training
Read the instructions carefully. Be familiar with the controls and the correct use of the machine.
Never allow children or people unfamiliar with these instructions to use the machine.
Local regulations can restrict the age of the operator.
Keep in mind, that the operator or user is responsible for accidents or hazards occurring to
other people or their property.
Preparation
Obtain ear protection and safety glasses. Wear them at all times while operating the machine.
While operating the machine always wear substantial footwear and long trousers. Do not
operate the machine when barefoot or wearing open sandals. Avoid wearing clothing that is
loose fitting or that has hanging cords or ties.
Do not wear loose clothing or jewellery that can be drawn into the air inlet. Keep long hair away
from the air inlets.
Operate the machine in a recommended position and only on a firm, level surface.
Do not operate the machine on a paved or gravel surface where ejected material could cause
injury.
Before using, always visually inspect to see, that the shredding means, shredding means bolts
and other fasteners are secure, the housing is undamaged and that guards and screens are in
place. Replace worn or damaged components in sets to preserve balance. Replace damaged
or unreadable labels.
Never operate the machine while people, especially children, or pets are nearby.
Operation
Before starting the machine, make certain that the feeding chamber is empty.
Keep your face and body away from the feed intake opening.
Do not allow hands or any other part of the body or clothing inside the feeding chamber,
discharge chute, or near any moving part.
Keep proper balance and footing at all times. Do not overreach. Never stand at a higher
level than the base of the machine when feeding material into it.
Always stand clear of the discharge zone when operating this machine.
When feeding material into the machine be extremely careful that pieces of metal, rocks,
bottles, cans or other foreign objects are not included.
If the cutting mechanism strikes any foreign objects or if the machine should start
making any unusual noise or vibration, immediately shut off the power source and allow
the machine to stop. Disconnect the machine from the supply and take the following
steps before restarting and operating the machine:
a) inspect for damage;
b) replace or repair any damaged parts;
c) Check for and tighten any loose parts.
Do not allow processed material to build up in the discharge zone; this may prevent
proper discharge and can result in kickback of material through the intake opening.
If the machine becomes clogged, shut-off the power source and disconnect the machine from
supply before cleaning debris.
Never operate the machine with defective guards or shields, or without safety devices, for
example debris collector in place.
Keep the power source clean of debris and other accumulations to prevent damage to the
power source or possible fire.
Do not transport this machine while the power source is running.
Stop the machine, and remove plug from the socket. Make sure that all moving parts have
04

come to a complete stop
a) whenever you leave the machine,
b) Before clearing blockages or unclogging chute,
c) Before checking, cleaning or working on the machine.
Do not tilt the machine while the power source is running.
Fuel Handling
Be very careful when handling fuels. They are flammable and the vapors are explosive.
Use only an approved container.
Never remove the fuel cap or add fuel while the machine is on. Turn off the unit and allow the
engine and exhaust components to cool before refueling.
Do not smoke.
Never refuel inside a room.
Never store the tool and the fuel tray indoors where there is a naked flame, such as near a
water heater.
If fuel has spilled, do not attempt to start the machine, but rather move it away from the spill
before starting to use it. Clean any spills.
Replace and tighten the fuel tank cap after refueling.
Follow the instructions in this manual for filling the tool with fuel.
Maintenance and storage
When the machine is stopped for servicing, inspection, or storage, or to change an accessory, shut
off the power source, disconnect the machine from the supply and make sure that all moving parts
are come to a complete stop. Allow the machine to cool before making any inspections,
adjustments, etc. Maintain the machine with care and keep it clean.
Store the machine in a dry place out of the reach of children.
Always allow the machine to cool before storing.
Replace worn or damaged parts for safety. Use only genuine replacement parts and
accessories.
Never attempt to override the interlocked feature of the guard.
Store the tool where fuel vapor will not reach a flame or spark.
Additional safety instructions for units with bagging attachments
Switch-off the machine before attaching or removing the bag.
Residuals risks
Even if you use this product in compliance with all safety requirements, the potential risks of injury
and damage remain. The following hazards may arise in the structure and design of this product.
Always be vigilant when using this product, so you can recognize and manage the risks rather.
Rapid intervention can prevent serious injury and property damage.
Turn off the tool if there are any malfunctions. Have it checked by a qualified professional and
have repairs carried out, if necessary, before using it again.
There are harmful health consequences resulting from the emission of vibrations if the product is
used for long periods of time or not properly managed and properly maintained.
There is risk of injury and property damage due to attachments or broken the sudden impact of
hidden objects.
Risk of injury to persons and property caused by flying objects.
Prolonged use of this product exposes the operator to vibration and can produce so-called "white
finger" disease. To reduce the risk, wear gloves and keep your hands warm.
If any of the symptoms of "white finger syndrome" occur, seek immediate medical attention.
Symptoms of the "white finger" include numbness, loss of sensitivity, tingling, tingling, and pain,
05

loss of strength, color changes or skin condition. These symptoms usually appear on the fingers,
hands or wrists. Risk increases at low temperatures
Inhalation of particles of material blown/vacuumed
Unattended projections
Contact with foreign objects
Contact with the tool in operation
Hearing loss in the absence of correct hearing protection
Symbols
Read the instructions.
Risk of projections! Keep bystanders away.
Warning: the fan is still rotating when open or close the cover, be careful,
especially the inlets cover.
Warning: Wear eye and ear protection.
Guarantee noise emission.
Warning: Wear gloves and foot protection.
Do not use the tool when the tubes are not fully assembled on it.
Risk of hot surface.
Warning: Wear head protection
Intended use
This vacuum blower is intended to be used for the vacuuming and the blowing of leaves, dust,
and similar little materials. It must not to be used for vacuuming and blowing water, chemical
products, flammable material, metal or wood and others dangerous objects.
This product is intended for private domestic use only. It must be use outdoor.
This product is not intended to be used in a closed room and places where exhausted gas and
flames can be present.
The use of this product in case of rain or humid environment is prohibited.
Any other use might lead to damage of the appliance, property or personal injury.
06

2. YOUR TOOL
a. Description
1. ON/OFF switch
2. Collector bag adaptor
3. Handle
4. Trigger
5. Blower tube
6. Vacuum tube
7. Collector bag
8. Housing of vacuum tube
9. Fuel tank
10. Starter
11. Choke
12. Air filter
13. Bottle for fuel mixture
14. Screwdriver
15. Primer bulb
b. Technical data
Model
HASBT35
Engine displacement
33 cm3
Rated engine power
1.0 kW/7500 min¹
Max engine speed
9000 min¹
Idling speed
3000 ±300 min-1
Air velocity
240km/h
Air volume
600 m3/h
Fuel tank capacity
600ml
Fuel mixture
40:1
Collecting bag
40L
Grinding coefficient
10:1
Measured sound power level
Blower noise, sound power level:
-Idling: 86.5 dB(A)
-Racing: 102.74 dB(A)
-Average: 102.74 dB(A)
-Uncertainly K=3 dB(A)
Vacuum noise, sound power level:
-Idling: 86.51 dB(A)
07

-Racing: 101.64 dB(A)
-Average: 101.64 dB(A)
-Uncertainly K=3 dB(A)
Measured sound pressure level
Blower noise, sound pressure level:
-Idling: 73.6 dB(A)
-Racing: 93.4 dB(A)
-Average: 92.7 dB(A)
-Uncertainly K=3 dB(A)
Vacuum noise, sound pressure level:
-Idling: 73.5 dB(A)
-Racing: 93.2 dB(A)
-Average: 92.54 dB(A)
-Uncertainly K=3 dB(A)
Measured and guarantee sound
power level
Sound power level (according to 2000/14/EC):
-Measured: 103.34 dB(A)
-Guaranteed: 110 dB(A)
Vibration
Blower vibration:
-Idling: 4.821 m/s2
-Racing: 5.373 m/s2
-Average: 5.237 m/s2
-Uncertainly K=1.5 m/s2
Vacuum vibration:
-Idling: 5.067 m/s2
-Racing: 5.508 m/s2
-Average: 5.446 m/s2
-Uncertainly K=1.5 m/s2
Dry weight
5.6 Kg
Year of construction
BJ2023
3. ASSEMBLY
For safety reasons, the product is equipped with safety contactors. It will start only when
accessories are installed.
It is strictly forbidden to modify safety system installed by the manufacturer.
WARNING! You cannot use both functions simultaneously.
A. BLOWER MODE
Assembly of the blower tube
1. Connect the blower tubes together. Push the tubes together and turn them so that they lock
together.
08

2.1 Remove screw A from the housing,
2.2 Push the tube onto the housing. Turn to lock onto place.
2.3 install screw A on the corresponding position, and fix the tube on the housing.
To remove the tubes, rotate the tubes to unlock them remove from the blower housing outlet.
B. VACUUM MODE
Assembly of the suction tubes
Connect the vacuum tubes together
Loosen the screw on the inlet cover and open. Push the tube onto the housing. Turn to lock onto
place.
To remove the vacuum tubes:
Remove the vacuum tubes from the blower housing.
Close the inlet cover door and tighten the screw securely.
09

C. Assembly of the collect bag
Remove the Upper blower tube and Lower blower tube from the blower.
Unzip the vacuum bag and place the adaptor inside as shown.
Push the bag adaptor onto the housing. Turn to lock onto place.
Install screw A on the corresponding position
Make sure the vacuum bag is zipped and closed before starting the unit.
4. FILLING THE FUEL TANK
MOTOR FUEL: mix the petrol and oil at 40:1 only
Use fresh unleaded petrol. You must use 100% synthetic oil specifically made for heavily
stressed two stroke engines.
Mix the petrol and oil in an approved container. Never mix fuel directly in the vacuum blower
fuel tank.
Place the vacuum blower on the ground or on a sturdy bench and wipe any debris from around
the fuel cap.
Unscrew the fuel tank cap and pour the mixture into the tank with the aid of a funnel.
Be careful not to spill any mixture. If this happens, wipe the spill with a clean rag.
Start the engine at least three metres away from the area where the fuel tank has been filled
up in order to avoid any risk of fire.
10

Danger of fire and burn injuries
Always use extreme care when handling fuel! Fuel is highly flammable.
Never attempt to fuel the vacuum blower if the fuel system components are damaged or are
leaking.
Never attempt the refuel the engine while it is running or still warm, allow it to cool before
fuelling.
Never smoke or light any fires near the vacuum blower or fuels.
Always transport and store fuels in an approved container.
Never place flammable material closes the engine muffler.
Never operate the vacuum blower without a properly functioning muffler and spark arrestor
installed.
Never operate the vacuum blower unless it is properly assembled and in good working
condition.
Do not use petrol which contains ethanol or methanol as it may damage the fuel lines and
other engine parts.
Mix only enough fuel for your immediate needs. If fuel must be stored longer than 30 days, it
should first be treated with a stabilizer or similar product.
5. OPERATION
a. Before starting
- Be sure that you have correctly completed the installation.
- Inspect the work area. Make sure there are no obstacles or dangerous debris that could
damage the tool.
b. Start/stop the machine
NOTE: Starting the product differs depending on whether the engine is cold or warm.
1. Move the ignition switch to the on position marked I.
2. Move the choke lever upwards to the start position (cold start).
Note. This is not required if the engine is already warm.
3. Push the primer button 8 times, until the petrol/oil mixture flows in and out of the discharge
hose located above the fuel tank.
4. Pull the recoil starter 2-3 times until you hear the engine starting.
5. Push the choke lever down to the run position (warm start).
11

6. The engine may start, or it may be required to pull on the recoil starter until the engine starts.
7. Allow the engine to run idle for around 10 seconds to let it warm up.
To stop:
1. Release the throttle trigger and allow the engine to idle for a few moments.
2. Move the ignition switch to the off position marked STOP.
3. The engine will now stop.
c. Blower mode
- Inspect the work area before starting. Remove any debris or objects that could be thrown or
those that can get caught or obstruct the device.
- Hold the machine by the handle. Walk and hold the tube just above the ground and blow the
debris.
- Work in order to gather the debris in one or more lots. Use the vacuum mode to collect the
heap. You can also pick up the pile of debris with a broom (or rake) and a shovel.
- Throw away the debris in a trash bin.
d. Vacuum mode
IMPORTANT!
Do not vacuum wet debris (they must be dry), nor large and hard objects that may
damage the machine (stones, cans, pieces of wood too large, etc.).
Do not vacuum flammable objects, and objects on fire.
The collection bag must always be set during suction.
- Inspect the work area before starting. Remove any debris or objects that could be thrown or
those that can get caught or obstruct the device.
- Hold the handle of the tool and the tube to raise and maintain the machine.
- Put the tube to the ground without putting it in the debris. Move while sucking debris.
When the collection bag is filled, stop working and empty the bag.
6. MAINTENANCE
Follow these instructions to keep your machine in a good condition. A machine cleaned
and in a good condition will give better operating results and preserves the life of the
device. Regularly maintain your machine.
WARNING! Do not use products that can damage the device (abrasive, corrosive,
alcohols, steam cleaners, abrasive cloths, scrapers, etc.).
Do not install the appliance in a dishwasher for cleaning!
The unit must be completely switched off, unplugged, and cool before cleaning.
a. Care
After each use:
- Remove the collection bag and empty its contents into a dustbin.
- Use a brush to remove debris from fan and inside the tube.
- If necessary, you can clean the body of the tool with a soft dry cloth.
b. Maintenance
After each use:
- Check all nuts, bolts and screws are tight and that the safety devices are properly positioned.
12

- Check if the machine has not suffered damage. If the machine is damaged, you will need to
hire a qualified technician to inspect the machine and makes repairs.
WARNING
Use only original manufacture’s replacement parts, accessories and attachment. Failure to
do so can cause possible injury, poor performance.
c. Replacing and cleaning the air filter
For proper performance and long life, keep air filter clean.
Push down the cover of the air filter.
Remove the air filter and clean it in warm soapy water. Let dry completely. For best
performance, replace the air filter annually.
Reinstall the air filter into the filter base.
Push the cover back in place. Push the latch back into the slot and ensure the cover is locked
in place.
d. Clean Fuel Filter
Fuel tank is fitted with a filter.
Filter is situated at the free end of fuel pipe and can be picked out through fuel port with a piece
of hooked wire or the like.
Check the fuel filter periodically. Do not allow dust to enter the fuel tank. Clogged filter will
cause difficulty when starting engine or abnormalities in engine performance.
When the filter is dirty, replace the filter.
When the inside of the fuel tank is dirty, it can be cleaned by rinsing the tank out with petrol.
e. Checking the spark plug
Check the spark plug every 10-15 hours of use.
Remove the spark plug cover.
Use the spark plug wrench to remove the spark plug, by turning it counter-clockwise.
Clean and adjust the spark plug gap to 0.6 - 0.7mm.
Replace any damaged or visibly worn plug with a TORCH L8RTC or equivalent spark plug.
Install the spark plug finger tight in the cylinder head, and then tighten it firmly with the spark
plug wrench.
13

7. DECLARATION OF CONFORMITY
BUILDER SAS
ZI, 32 rue Aristide Bergès – 31270 Cugnaux - France
Tel: +33 (0)5.34.502.502 Fax: +33 (0)5.34.502.503
Declares that the machines:
PETROL BLOWER VACCUM SHREDDER
Model: HASBT35
Serial No.: 20230806833-20230807052
Have been designed in compliance with the following standards:
EN 15503: 2009+A2
EN ISO14982: 2009
EN ISO 3744:1995 & ISO 11094:1991
And in accordance with the following directives:
Directive Machine 2006/42/EC
Directive EMC 2014/30/EU
Noise Directive 2000/14/EC ANNEX V & Directive 2005/88/EC
Emission directive 2016/1628/EU & 2018/989/EU
Measured sound power level: 103.34 dB(A)
Guaranteed sound power level: 110 dB(A)
The people name holding the technical file:M. Olivier Patriarca
Cugnaux, 17/07/2023
Philippe MARIE / PDG
14

WARRANTY
The manufacturer guarantees the product against defects in material and workmanship for a period of 2
years from the date of the original purchase. The warranty only applies if the product is for household use.
The warranty does not cover breakdowns due to normal wear and tear.
The manufacturer agrees to replace parts identied as defective by the designated distributor. The
manufacturer does not accept responsibility for the replacement of the machine, in whole or in part , and/or
ensuing damage.
The warranty does not cover breakdowns due to:
• insucient maintenance.
• abnormal assembly, adjustment or operations of the product.
• parts subject to normal wear and tear.
The warranty does not extend to:
• shipping and packaging costs.
• using the tool for a purpose other than that for which it was designed.
• the use and maintenance of the machine done in a manner not described in the user manual.
Due to our policy of continuous product improvement, we reserve the right to alter or change specications
without notice. Consequently, the product may be dierent from the information contained therein, but a
modication will be undertaken without notice if it is recognized as an improvement of the preceding
characteristic.
READ THE MANUAL CAREFULLY BEFORE USING THE MACHINE.
When ordering spare parts, please indicate the part number or code, you can nd this in the spare parts list
in this manual. Keep the purchase receipt; without it, the warranty is invalid. To help you with your product,
we invite you to contact us by phone or via our website:
• +33 (0)9.70.75.30.30
• https://services.swap-europe.com/contact
You must create a "ticket" via the web platform.
• Register or create your account.
• Indicate the reference of the tool.
• Choose the subject of your request.
• Describe your problem.
• Attach these les: invoice or sales receipt, photo
of the identication plate (serial number), photo
of the part you need (for example: pins on the
transformer plug which are broken).
8. WARRANTY
15

WHAT TO DO IF MY MACHINE BREAKS DOWN?
the repairer will refuse the machine.
Go to the store with the complete machine and with the receipt or invoice.
the repairer will refuse the machine.
c) Create a SWAP-Europe service ticket on the site: https://services.swap-europe.com When making the
request on SWAP-Europe, you must attach the invoice and the photo of the nameplate (serial number).
d) Contact the repair station to make sure it is available before dropping o the machine.
Go to the repair station with the complete machine packed, accompanied by the purchase invoice and the
station support sheet downloadable after the service request is completed on the SWAP-Europe site
For machines with engine failure from manufacturers BRIGGS & STRATTON, HONDA and RATO, please
refer to the following instructions.
Repairs will be done by approved engine manufacturers of these manufacturers, see their site:
• http://www.briggsandstratton.com/eu/fr
• http://www.honda-engines-eu.com/fr/service-network-page;jsessionid=5EE8456CF39CD572AA2AEEDFD
290CDAE
• https://www.rato-europe.com/it/service-network
Please keep your original packaging to allow for after-sales service returns or pack your machine
with a similar cardboard box of the same dimensions.
For any question concerning our after-sales service you can make a request on our website https://
services.swap-europe.com
Our hotline remains available at +33 (9) 70 75 30 30.
If you bought your product in a store:
a) Empty the fuel tank if your product has one.
b) Make sure that your machine is complete with all accessories supplied, and clean! If this is not the case,
If you bought your product on a website:
a) Empty the fuel tank if your product has one..
b) Make sure that your machine is complete with all accessories supplied, and clean! If this is not the case,
9. PRODUCT FAILURE
16

THE WARRANTY DOES NOT COVER:
• Start-up and setting up of the product.
• Damage resulting from normal wear and tear of the product.
• Damage resulting from improper use of the product.
• Damage resulting from assembly or start-up not in accordance with the user manual.
• Breakdowns related to carburetion beyond 90 days and fouling of carburetors.
• Periodic and standard maintenance events.
• Actions of modication and dismantling that directly void the warranty.
• Products whose original authentication marking (brand, serial number) has been degraded, altered or
withdrawn.
• Replacement of consumables.
• The use of non-original parts.
• Breakage of parts following impacts or projections.
• Accessories breakdowns.
• Defects and their consequences linked to any external cause.
• Loss of components and loss due to insucient screwing.
• Cutting components and any damage related to the loosening of parts.
• Overload or overheating.
• Poor power supply quality: faulty voltage, voltage error, etc.
• Damages resulting from the deprivation of enjoyment of the product during the time necessary for repairs
and more generally the costs related to the immobilization of the product.
• The costs of a second opinion established by a third party following an estimate by a SWAP-Europe repair
station
• The use of a product which would show a defect or a breakage which was not the subject of an immediate
report and/or repair with the services of SWAP-Europe.
• Deterioration linked to transport and storage*.
• Launchers beyond 90 days.
• Oil, petrol, grease.
• Damages related to the use of non-compliant fuels or lubricants.
* In accordance with transport legislation, damage related to transport must be declared to carriers within 48
hours maximum after observation by registered letter with acknowledgement of receipt.
This document is a supplement to your notice, a non-exhaustive list.
Attention: all orders must be checked in the presence of the delivery person. In case of refusal by the
delivery person, it you must simply refuse the delivery and notify your refusal.
Reminder: the reserves do not exclude the notication by registered letter with acknowledgement within 72
hours.
Information:
Thermal devices must be wintered each season (service available on the SWAP-Europe site).
Batteries must be charged before being stored.
10. WARRANTY EXCLUSIONS
17

Table of contents
Other Hyundai Blower manuals

Hyundai
Hyundai HYB60Li User manual

Hyundai
Hyundai HYBV200 User manual

Hyundai
Hyundai HSDT45 User manual

Hyundai
Hyundai HAS3000 User manual

Hyundai
Hyundai HSEN40V-A User manual

Hyundai
Hyundai HSEC40V-4A User manual

Hyundai
Hyundai HSDT55 User manual

Hyundai
Hyundai WR6022-1800Q User manual

Hyundai
Hyundai HYB5200 User manual

Hyundai
Hyundai HYB33 User manual