manuals.online logo
Brands
  1. Home
  2. •
  3. Brands
  4. •
  5. Hyundai
  6. •
  7. Stereo System
  8. •
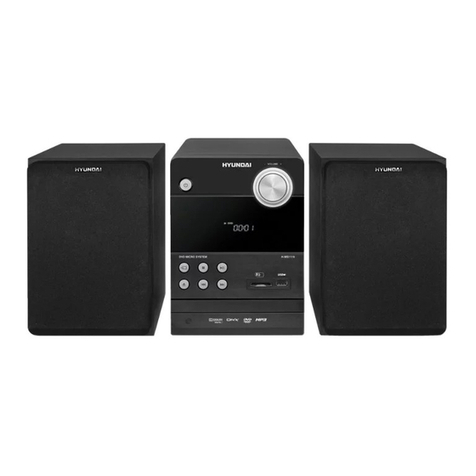
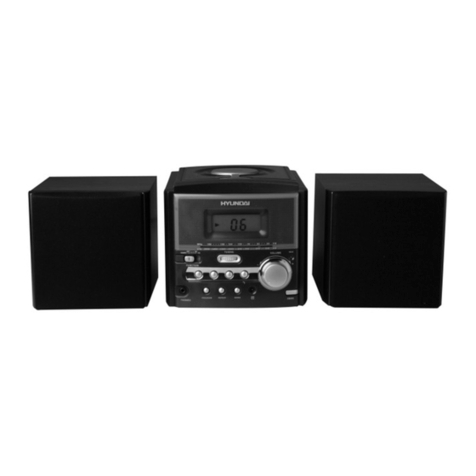
  9. Hyundai H-MS1100 User manual

Hyundai H-MS1100 User manual

Other manuals for H-MS1100

1

Other Hyundai Stereo System manuals

Hyundai H-MS1105 User manual

Hyundai

Hyundai H-MS1105 User manual

Hyundai H-PS1201 User manual

Hyundai

Hyundai H-PS1201 User manual

Hyundai MS 531 A3 User manual

Hyundai

Hyundai MS 531 A3 User manual

Hyundai RTC 611 User manual

Hyundai

Hyundai RTC 611 User manual

Hyundai RT620 User manual

Hyundai

Hyundai RT620 User manual

Hyundai MSR 568 D3 User manual

Hyundai

Hyundai MSR 568 D3 User manual

Hyundai H-1427 User manual

Hyundai

Hyundai H-1427 User manual

Hyundai H-MS2302 User manual

Hyundai

Hyundai H-MS2302 User manual

Hyundai RTCC 513 RIP User manual

Hyundai

Hyundai RTCC 513 RIP User manual

Hyundai RTCC 636 SURIP User manual

Hyundai

Hyundai RTCC 636 SURIP User manual

Hyundai H-MS1101 User manual

Hyundai

Hyundai H-MS1101 User manual

Hyundai H-MS1113 User manual

Hyundai

Hyundai H-MS1113 User manual

Hyundai MS 808 DU3 User manual

Hyundai

Hyundai MS 808 DU3 User manual

Hyundai RTCC632SURIP User manual

Hyundai

Hyundai RTCC632SURIP User manual

Hyundai H-PS1206 User manual

Hyundai

Hyundai H-PS1206 User manual

Hyundai MSD761DRSU User manual

Hyundai

Hyundai MSD761DRSU User manual

Hyundai H-MS1104 User manual

Hyundai

Hyundai H-MS1104 User manual

Hyundai MS 101 DUIP3 User manual

Hyundai

Hyundai MS 101 DUIP3 User manual

Hyundai H-PS1202 User manual

Hyundai

Hyundai H-PS1202 User manual

Hyundai H-MS2303 User manual

Hyundai

Hyundai H-MS2303 User manual

Hyundai RTCC 808 SU RIP User manual

Hyundai

Hyundai RTCC 808 SU RIP User manual

Hyundai MSD 861 DRU User manual

Hyundai

Hyundai MSD 861 DRU User manual

Hyundai MS 238 DU3BL User manual

Hyundai

Hyundai MS 238 DU3BL User manual

Hyundai H-1402 User manual

Hyundai

Hyundai H-1402 User manual

Popular Stereo System manuals by other brands

Sony HCD-VX88 Service manual

Sony

Sony HCD-VX88 Service manual

Philips MCM398D/12 user manual

Philips

Philips MCM398D/12 user manual

Sony CMT-SPZ90DB operating instructions

Sony

Sony CMT-SPZ90DB operating instructions

LG OM4560 owner's manual

LG

LG OM4560 owner's manual

JVC UX-G3 instructions

JVC

JVC UX-G3 instructions

Odys ODYS - LOOP instruction manual

Odys

Odys ODYS - LOOP instruction manual

Aiwa NSX-AJ700 Service manual

Aiwa

Aiwa NSX-AJ700 Service manual

Panasonic SC-AK100 operating instructions

Panasonic

Panasonic SC-AK100 operating instructions

Sharp CD-G10000V Operation manual

Sharp

Sharp CD-G10000V Operation manual

Bogen NEARSCAPES 4.1 manual

Bogen

Bogen NEARSCAPES 4.1 manual

Panasonic SCPM29 - MINI HES W/CD PLAYER operating instructions

Panasonic

Panasonic SCPM29 - MINI HES W/CD PLAYER operating instructions

Meyer LD-3 operating instructions

Meyer

Meyer LD-3 operating instructions

THOMSON MIC302U manual

THOMSON

THOMSON MIC302U manual

Philips MCM530 Service manual

Philips

Philips MCM530 Service manual

Sony SS-CEP50 Service manual

Sony

Sony SS-CEP50 Service manual

Cetacea Sound CVS-II user guide

Cetacea Sound

Cetacea Sound CVS-II user guide

Sony MHC-V21D Service manual

Sony

Sony MHC-V21D Service manual

Denon UCD-250 Service manual

Denon

Denon UCD-250 Service manual

manuals.online logo
manuals.online logoBrands
  • About & Mission
  • Contact us
  • Privacy Policy
  • Terms and Conditions

Copyright 2025 Manuals.Online. All Rights Reserved.

INSTRUCTION MANUAL
H-MS1100
All manuals and user guides at all-guides.com
all-guides.com
- 1 -
Before Connection ................................................................................................................... 2
For your safety ......................................................................................................................................... 2
Precautions .............................................................................................................................................. 2
Control Section ........................................................................................................................ 3
The unit ..................................................................................................................................................... 3
Remote control ......................................................................................................................................... 4
Connection .............................................................................................................................. 5
Connect to the TV .................................................................................................................................... 5
Connect to 5.1 channel surround sound speaker boxes ........................................................................ 6
Connect to AM antenna ........................................................................................................................... 7
Connect to the assistance equipment ..................................................................................................... 7
Connect to the amplifier with digital signal input terminal ...................................................................... 8
Connecting the AC Power Cord ............................................................................................................... 8
Connect the Headphone .......................................................................................................................... 8
Installation of Batteries in the Remote Control ....................................................................... 9
Turning the Power On and Off ................................................................................................ 9
Normal playing ......................................................................................................................... 9
Use the discs ............................................................................................................................................ 9
Play picture CD disc ............................................................................................................................... 13
Listening to Radio Broadcasts ............................................................................................................... 14
Setting the Clock .................................................................................................................................... 15
Setting the Daily Timer ........................................................................................................................... 15
Setting the Sleep Timer ......................................................................................................................... 15
Function Menu Setting List ...................................................................................................16
Menu function setup ............................................................................................................................... 16
General Setup Page ............................................................................................................................... 16
Audio Setup Page .................................................................................................................................. 17
Video Setup Page .................................................................................................................................. 18
Preference Page .................................................................................................................................... 18
Password Setup Page ............................................................................................................................ 18
Protect the Disc .....................................................................................................................19
Troubleshooting ..................................................................................................................... 19
Specification .......................................................................................................................... 20
Table of Contents
Manufactured under license from Dolby Laboratories.
Dolby, Pro Logic and the double-D symbol are trademarks of Dolby Laboratories.
All manuals and user guides at all-guides.com
- 2 -
Laser Product
This product is equipped with low power laser equip-
ment inside, for using safely, dont take apart any cov-
ers or try to take apart the product inside. Please con-
tact the qualified personnel for repairing.
This symbol indicates that there are important op-
erating and maintenance instructions in the litera-
ture accompanying this unit.
This symbol indicates that dangerous voltage con-
stituting a risk of electric shock is present within
this unit.
Caution:
To prevent fire or shock hazard, do not expose this
equipment to rain or moisture place.
Power Requirement
Because the power requirement of the electric prod-
ucts is different in various places, before you use this
product, make sure that the power requirement of the
product is complied to the power that the native dis-
trict supplies.
CAUTION:
TO REDUCE THE RISK OF ELECTRIC SHOCK, DO
NOT REMOVE COVER. NO USER SERVICEABLE
PARTS INSIDE, REFER SERVICING TO QUALIFIED
SERVICE PERSONNEL.
Before Connection
Thank you for purchasing this DVD 5.1 channel component system, in order to fully utilize this system,
please read this instruction book carefully before use it.
For your safety
CAUTION
RISK OF ELECTRIC SHOCK
DO NOT OPEN
Precautions
1. Before operating this system, check the voltage of
this system to see if it is identical with the voltage
of your local power supply.
2. Unplug the system from the wall outlet if it is not
used for a long time. To disconnect the cord, pull it
out by grasping the plug
3. To avoid electric shock, do not open the cabinet by
unqualified personnel
4. There is no user serviceable parts inside. In case
of system failure, unplug the power cord and
consult your dealer
5. Do not place this unit to an unstable and slope
position. Keep this unit in a place with good
ventilation surrounding. To prevent fire, do not cover
the ventilation of the apparatus with news papers,
table-cloths, curtains, etc.
6. To prevent fire or shock hazard, do not place
objects filled with liquids, such as vases, on the
apparatus. And dont place lighted candles on the
apparatus.
7. To prevent fire or shock hazard, do not expose this
equipment to hot places, rain, moisture or dust.
8. Dont get close to the water source when using this
unit, such as near bathtub, bath slot, ish-washing
slot, washing machine to use it; also, dont use this
unit on damp plinth or nearby swimming pool or
similar close to the water source.
9. Do not place this unit close to strong magnetic field.
10. Dont place this unit close to the damper, or the
moisture will affect the life of the laser head.
11. If the system is brought directly from a cold to a
warm location, or is placed in a very damp room,
moisture may condense on the lens inside the
player. Should this occur, the system will not
operate properly. Remove the disc and leave the
system turned on for about an hour until the
moisture evaporates.
12. Should any solid object or liquid fall into the system,
unplug the system and have it checked by qualified
personnel before operating it any further.
13. Before cleaning this unit, unplug the system from
the wall outlet first. Dont use the cleaner which is
with liquid or aerosol (e.g. pesticide). You can use
a clean cloth to clean this unit.
14. Please use the connection cable to connect to unit.
Dont use accessorial equipment recommended by
non manufacturer. It may course an electric shock
by using this equipment.
CLASS 1
LASER PRODUCT
Caution:
This product is equipped with low power la-
ser equipment inside, for your safety, dont
open the laser radiation protective
equipment. Dont look at the laser radiation
district when the equipment is operating.
All manuals and user guides at all-guides.com
- 3 -
Control Section
The unit
1. Standby Button
2. VFD Display Lens
3. Surround Mode Select Button
4. Remote Sensor
5. Display Button
6. Volume Control Knob
7. Stop/Return Button
Band Switch
8. Headphone Jack
9. Disc Door
10. Open/Close Button
11. Function Select Button
12. Subtitle Button
Memory Button
13. Multi function button
(Press downward) Play/Pause Button
(Push upward) Fast Forward Button
Channel Select Forward Button
(Push downward) Fast Reverse Button
Channel Select Backward Button
(Push left) Previous Button
Tuning Backward Button
(Push right) Next Button
Tuning Forward Button
14. Vocal Mode Select / Language Select Button
MONO/Stereo Select Button
15. AUX 1 Input Terminals
16. AUX 2 Input Terminals
17. FM Antenna
18. AM Antenna Socket
19. Coaxial Output Terminal
20. Front Speaker Box Output Terminals
21. Center Speaker Box Output Terminals
22. Surround Speaker Box Output Terminals
23. Woofer Speaker Box Output Terminal
24. Scart Socket
25. Optical Fibre Output Terminal
26. AC Power Cord
All manuals and user guides at all-guides.com
- 4 -
Remote control
6. Surround Mode Select Button
7. Preset Equalizer Button
8. Volume Up Button
9. Fast Reverse Button
Tuning Backward Button
10. Volume Down Button
11. Previous Button
Channel Select Backward Button
12. Play/Pause Button
MONO/Stereo Select Button
13. Repeat Button
14. Number Buttons
15. Direction Button ( )
16. Confirmation Button
17. PBC Button
Root Button
18. Function Setting Button
19. Subtitle Button
20. OSD Button
21. Mute Button
22. AUX1 Function Button
23. AUX2 Function Button
24. VFD Display Mode Button
VFD Darkness Select Button (in standby mode)
25. Pro Logic Button
26. Volume Mode Select Button
27. Super Bass Button
28. Fast Forward Button
Tuning Forward Button
29. Next Button
Channel Select Forward Button
30. Stop/Return Button
Memory Button
31. Program Button
32. Time Search Button
33. Direction Button ( )
34. Direction Button ( )
35. Direction Button ( )
36. Title Button
37. Zoom Button
38. Angle Select Button
39. Vocal Mode Select Button
Language Select Button
1. Standby Button
2. DVD Function Button
Interlace/P-SCAM Switch Button
3. TUNER Function Button
Band Switch
4. Clock Button
5. Sleep Button
Timer Button
All manuals and user guides at all-guides.com
- 5 -
Connection
Caution: Please turn off all the equipment power before connecting.
Connect to the TV
Connecting diagram
Safety precautions
Some setting should be done for the unit according to the TV connection.
* According to the color system setting of TV, select the color system in the TV Display function
setting.
* If the unit is connected to wide screen TV, then set TV display to Wide in the function setting item.
* If the unit is connected to normal TV, then set TV display to Normal/PS or Normal/LB in the
function setting item.
Terminal board for the player
Terminal board for the TV
TV
All manuals and user guides at all-guides.com
all-guides.com
- 6 -
Connect to 5.1 channel surround sound speaker boxes
Connecting diagram
Connection precautions
1. Output of the unit has wide dynamic range, so the volume of unit should be moderated, if other
speakers are used, they must be choose correctly according to our speaker specification, or the loud
speaker will be damaged by the heavy volume.
2. Before connecting or cutting short the unit power, please turn off the power of unit or turn the volume
to minimum level first or it may damage the loudspeaker.
Terminal board for the player
Front left
speaker box TV
Woofer speaker box
Center speaker box
Left surround speaker box Right surround speaker box
Front right
speaker box
All manuals and user guides at all-guides.com
- 7 -
Connect to AM antenna
AM loop antenna
a. Open the AM antenna terminals on the rear of the unit.
b. Attach the AM loop to its base by snapping the tabs on the
loop into the slot in the base.
c. Close each of the terminals to connect the antenna securely.
Rotate AM ring shape antenna till the receiving effect is the best.
(Dont place the AM ring shape antenna on the unit cover, or it will
affect the receiving effect.)
Connect to the assistance equipment
Connecting diagram
Connection precautions
This unit has two groups of audio input terminals, you can use signal line to connect audio input terminals
of this unit and audio output terminals of assistance equipment respectively, then you can hear the sound
sources.
Cautions:
Press the AUX1 function button to select AUX1 function.
When you are connecting AUX1 audio terminals, please press this function button.
Press the AUX2 function button to select AUX2 function.
When you are connecting AUX2 audio terminals, please press this function button.
Assistance equipment
Terminal board for the
assistance equipment
Terminal board for the player
All manuals and user guides at all-guides.com
- 8 -
Connect to the amplifier with digital signal input terminal
Connecting diagram
Connection precautions
Use optical fibre, coaxial signal wire to connect optical fibre, coaxial output jack of the unit with optical
fibre, coaxial input jack of other amplifier, then you can feel the super digital sound effect (cant use two
output mode at the same time, if you connect the optical fibre and coaxial with the signal wire at the same
time, the unit is for coaxial output only.).
Caution: Optical fibre output terminal is for use the system with optical fibre output function only.
Connecting the AC Power Cord
Insert the AC power cord into a wall outlet, and your system is at your command!
Caution: Be sure to unplug the power cord from the outlet when going out or the system is not in use for
an extended period of time.
Connect the Headphone
Connect a pair of headphones to the phone jacks. No sound comes out of the speakers.
Note: Be sure to turn down the volume before connecting or putting on headphones.
Terminal board for the player
With digital signal input terminals DTS,
Dolby Digital signal decode amplifier
With digital signal input terminals
DTS, Dolby Digital signal decode
amplifier terminal board
All manuals and user guides at all-guides.com
- 9 -
Installation of Batteries in the Remote Control
1. Remove the battery compartment cover.
2. Insert two batteries (size AAA) correctly, so that the + and - polarities match the polarity diagrams in
the battery compartment.
* About half a year of normal operation can be expected when using the general batteries.
* When the batteries are exhausted, the commander can no longer operate the system. Replace both
batteries at the same time with new ones.
* Dont use an old battery with a new one.
* Dont use different types of batteries together.
* When the unit is not used for a long period of time, remove the batteries to avoid damage caused by
battery leakage and corrosion.
Turning the Power On and Off
You can use all the functions on the panel of the unit or the remote control after turning the system power
on (called Standby Mode), the clock will display on the VFD.
Turning the System On
Press the standby button (STANDBY) to turn the system on from standby mode.
Caution: If turning the system on, the system will be ready to continue in the mode it was in when it was
turned off last time.
Turning the System Off
Press the standby button (STANDBY) again to turn the system off (called Standby Mode), the clock will
display on the VFD.
Caution: Be sure to unplug the power cord from the outlet when going out or the system is not in use for
an extended period of time.
Normal playing
Use the discs
In power on mode, press the DVD function button (DVD) to select DVD function.
In DVD function mode, press the Interlace/P-SCAM switch button (I/P) to select Interlace or
P-SCAN TV output mode.
Press the open/close button (K) on the unit to open the disc tray and place the disc on the
disc tray (with the printed side up). Press this button again to close the disc tray, the unit will
read the disc and the disc type will display on the TV screen then play it automatically.
Correspondingly press the direction button ( ,,, ) to move the cursor to illuminate the
desired menu to up, to down, to left, to right direction.
Press the confirmation button (ENTER) to enter menu you selected.
In stop mode, press the play/pause button (BF) to start playing the disc.
When playing disc, press the play/pause button (BF) to temporarily stop the playing, press
the button again, it will continue to play.
(You can also operate the key BF on the panel of unit.)
All manuals and user guides at all-guides.com