Function
The I-WARM 760© is designed for the control of electrical underfloor heating systems (heating mats or cable units) or other
electrical indoor heating systems. It automatically maintains a specified temperature exactly when you need it. There is no need
to think about your heating management. You will never have to remember to turn it on. You only need to set the time when you
need it, and the I-WARM 760© will turn the heat on for you so far in advance that the required temperature will be achieved by
the time you specify. The I-WARM 760© is an intelligent and self-developing system. Its operation is based on its particular
experience of heating your house, so it strives every time to execute your commands more and more precisely and efficiently.
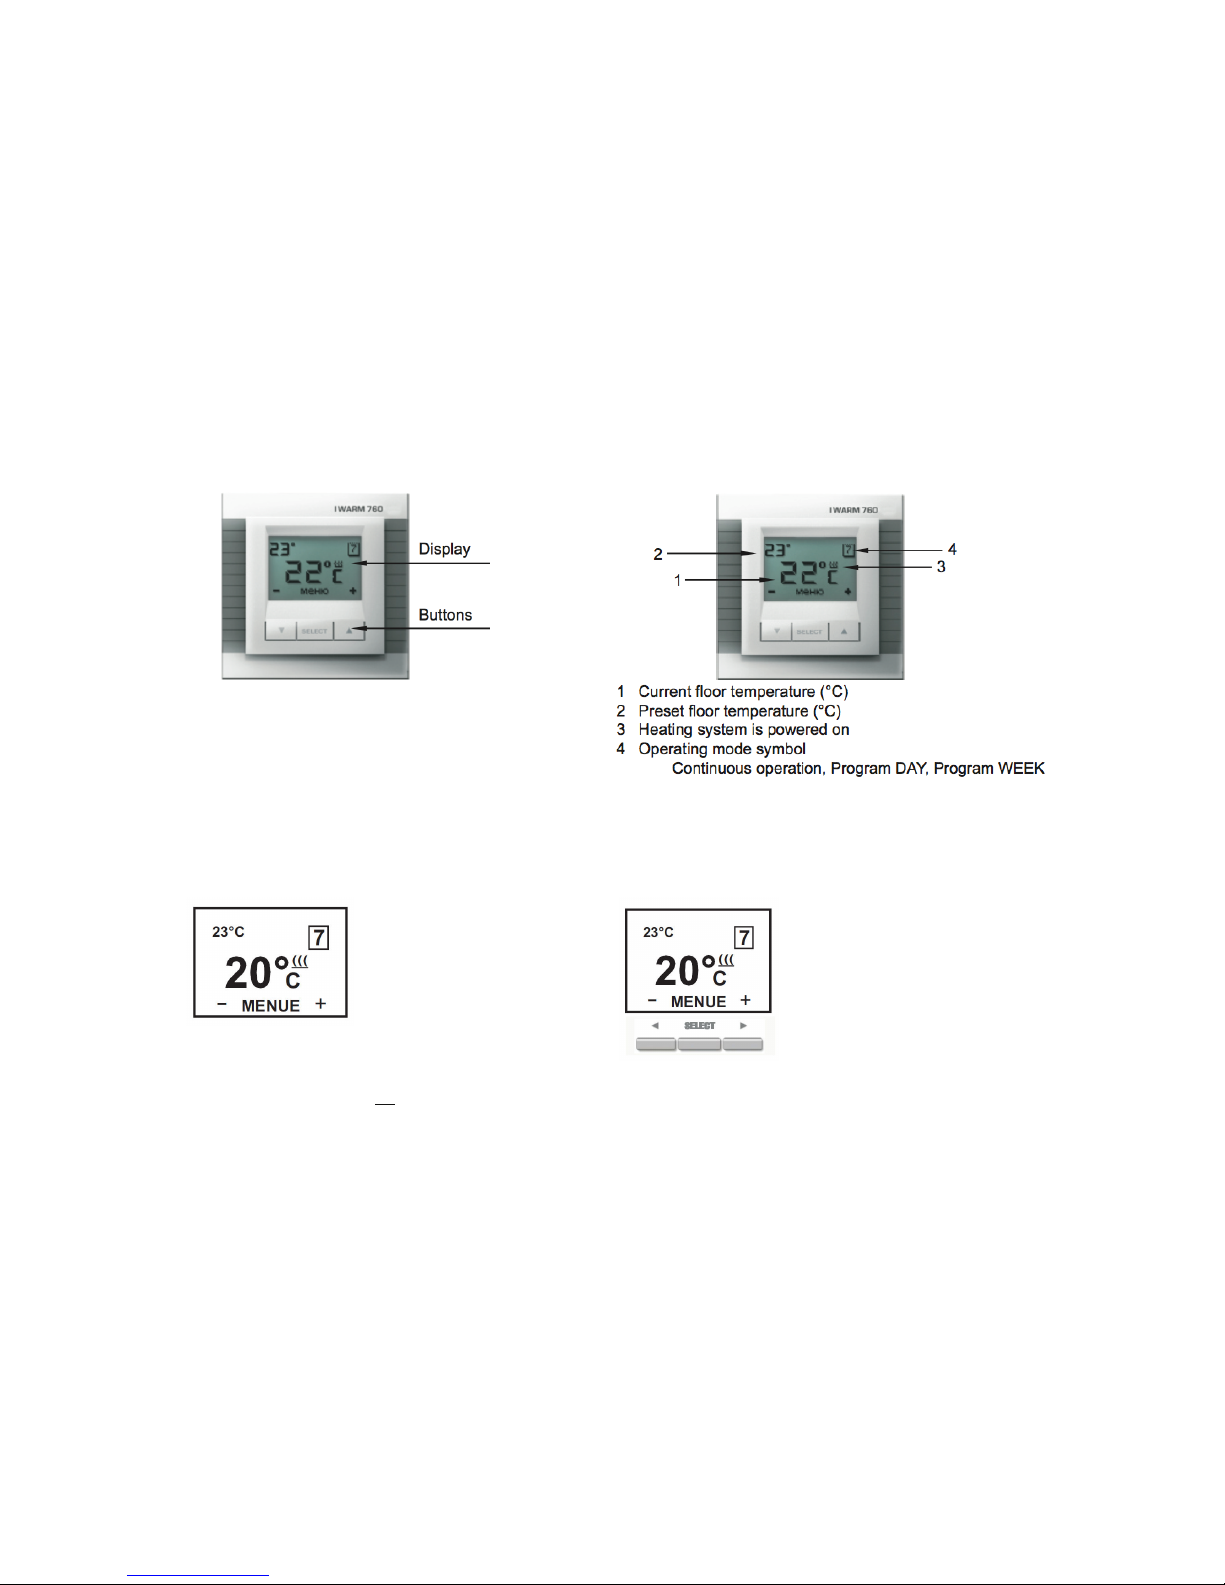
The thermostat is equipped with a large highlighted LCD-Display with extended indication that makes it very easy to use the
device. 3 multifunctional control buttons are located under the display; a help string appears in the bottom part of the display
which indicates the current function of the buttons.
The highlight appears when pressing any button and turns off automatically 40 seconds after the last button is pressed. The I-
WARM 760© controls the temperature based upon data received from the floor temperature sensor (included in the package).
The device displays two temperatures — the actual floor temperature and the « set by you» temperature.
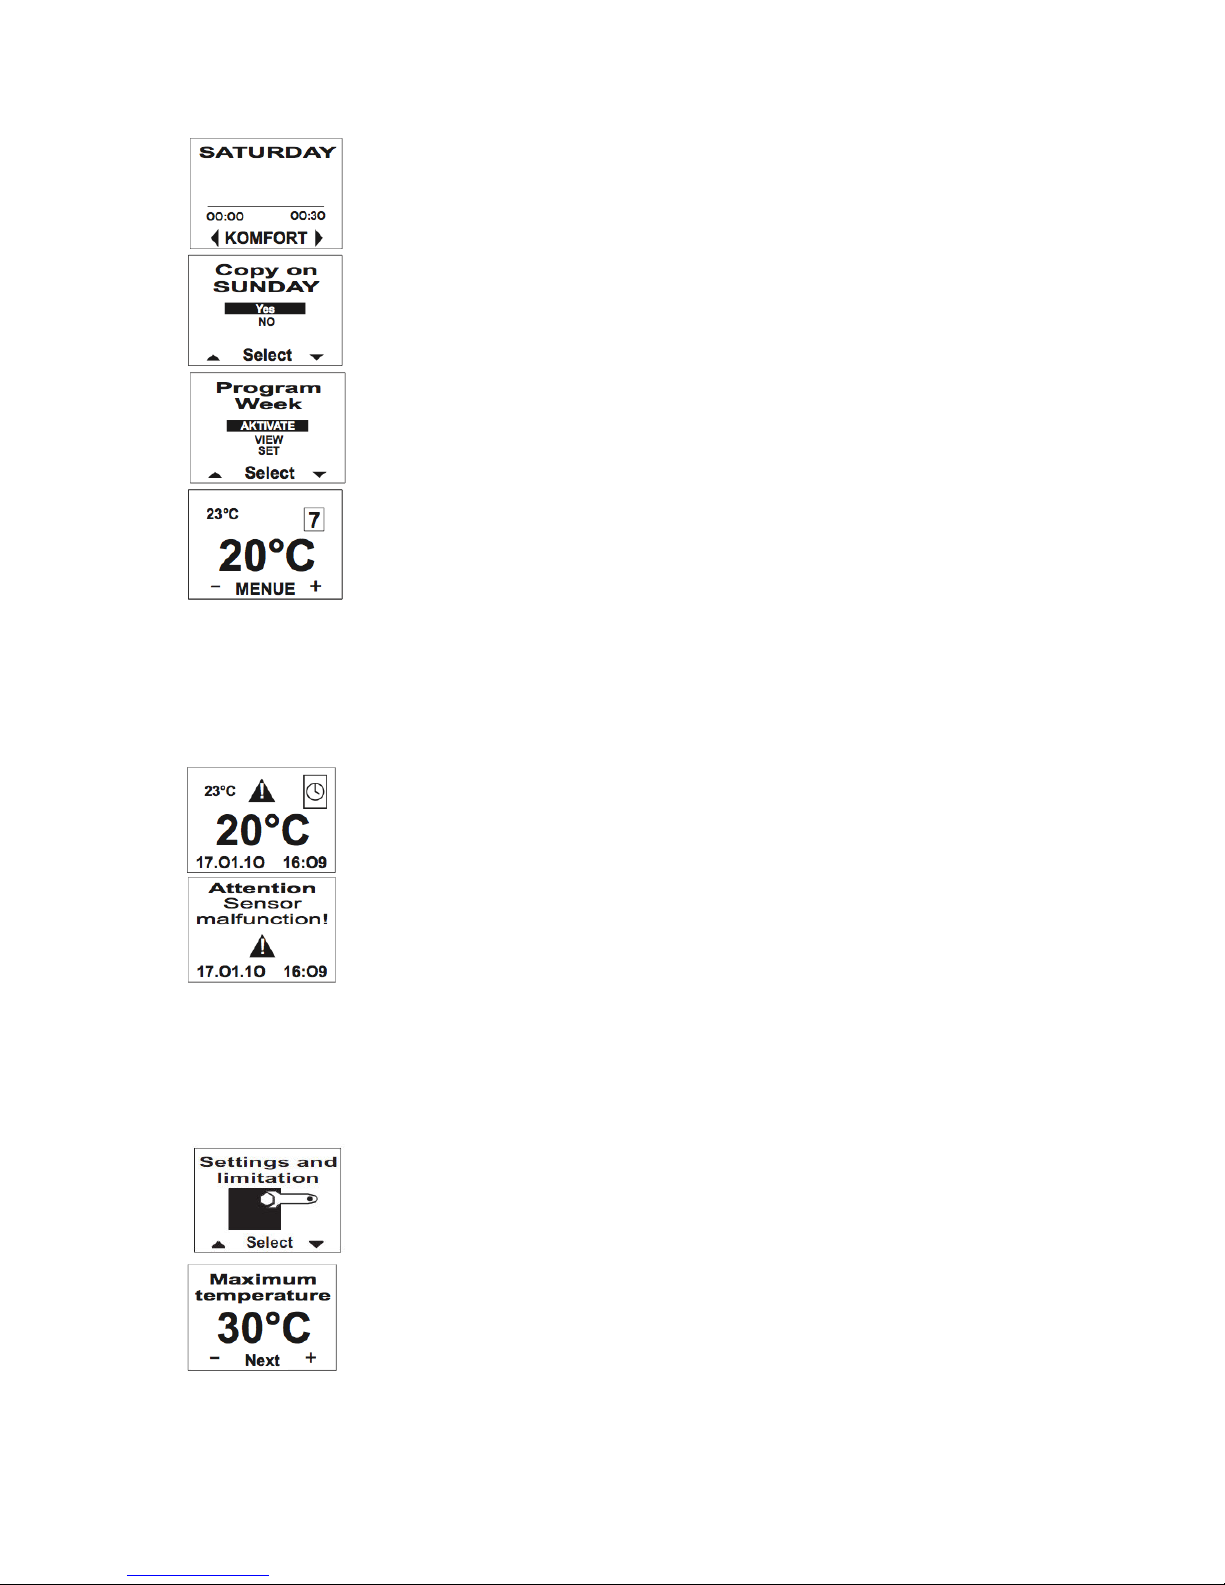
The display also shows the maintenance mode (continuous, daily or weekly schedule). In the bottom part of the display the
current day and time are displayed. The device has self-diagnostics, and will display warning messages. You can set a limit of
maximum floor temperature. The device will also show energy saving statistics per day, per week or per month in the form of a
percentage figure.
Controls and display
Start-up of the thermostat
The thermostat can be turned on after wiring connections are complete and tested.
To turn the I-WARM 760© ON/OFF press the middle button for not less than 3 seconds.
Turning ON/OFF is accompanied by an appropriate animation on the display. After the I-WARM 760© is turned on the basic
indication appears on the highlighted display.
The larger numbers (20°C)
indicate the actual floor
temperature, the figures in the
upper left corner (23°C) show the
floor temperature to be
maintained (the «comfort»
temperature), the sign in the
upper right corner indicates the
continuous temperature
maintenance mode. This symbol
((( informs you about the
operation status of the heating
system (the heating is powered
when the symbol is visible).
In the bottom indicator the current
functions of the buttons are shown (e.g.
at Start)
- : lowering of the preset temperature :
Menue : enter into device's Menue
+ : increasing of the preset
temperatureStart):
When the I-WARM 760© thermostat is turned on for the first time it starts working in the maintenance mode (factory setting
+25°C). When turned on, with your selected settings, the I-WARM 760© starts working in that mode and will retain those
parameters until you change them. You can change the preset floor temperature by pressing the selection buttons for increasing
and for reducing. This value will remain set, as the comfort temperature in all the modes, until you change it again. To activate
the device press, and hold, any button. The buttons are not active, i.e. their first button pressed only «wakes up» the device and
turns on the highlighting.
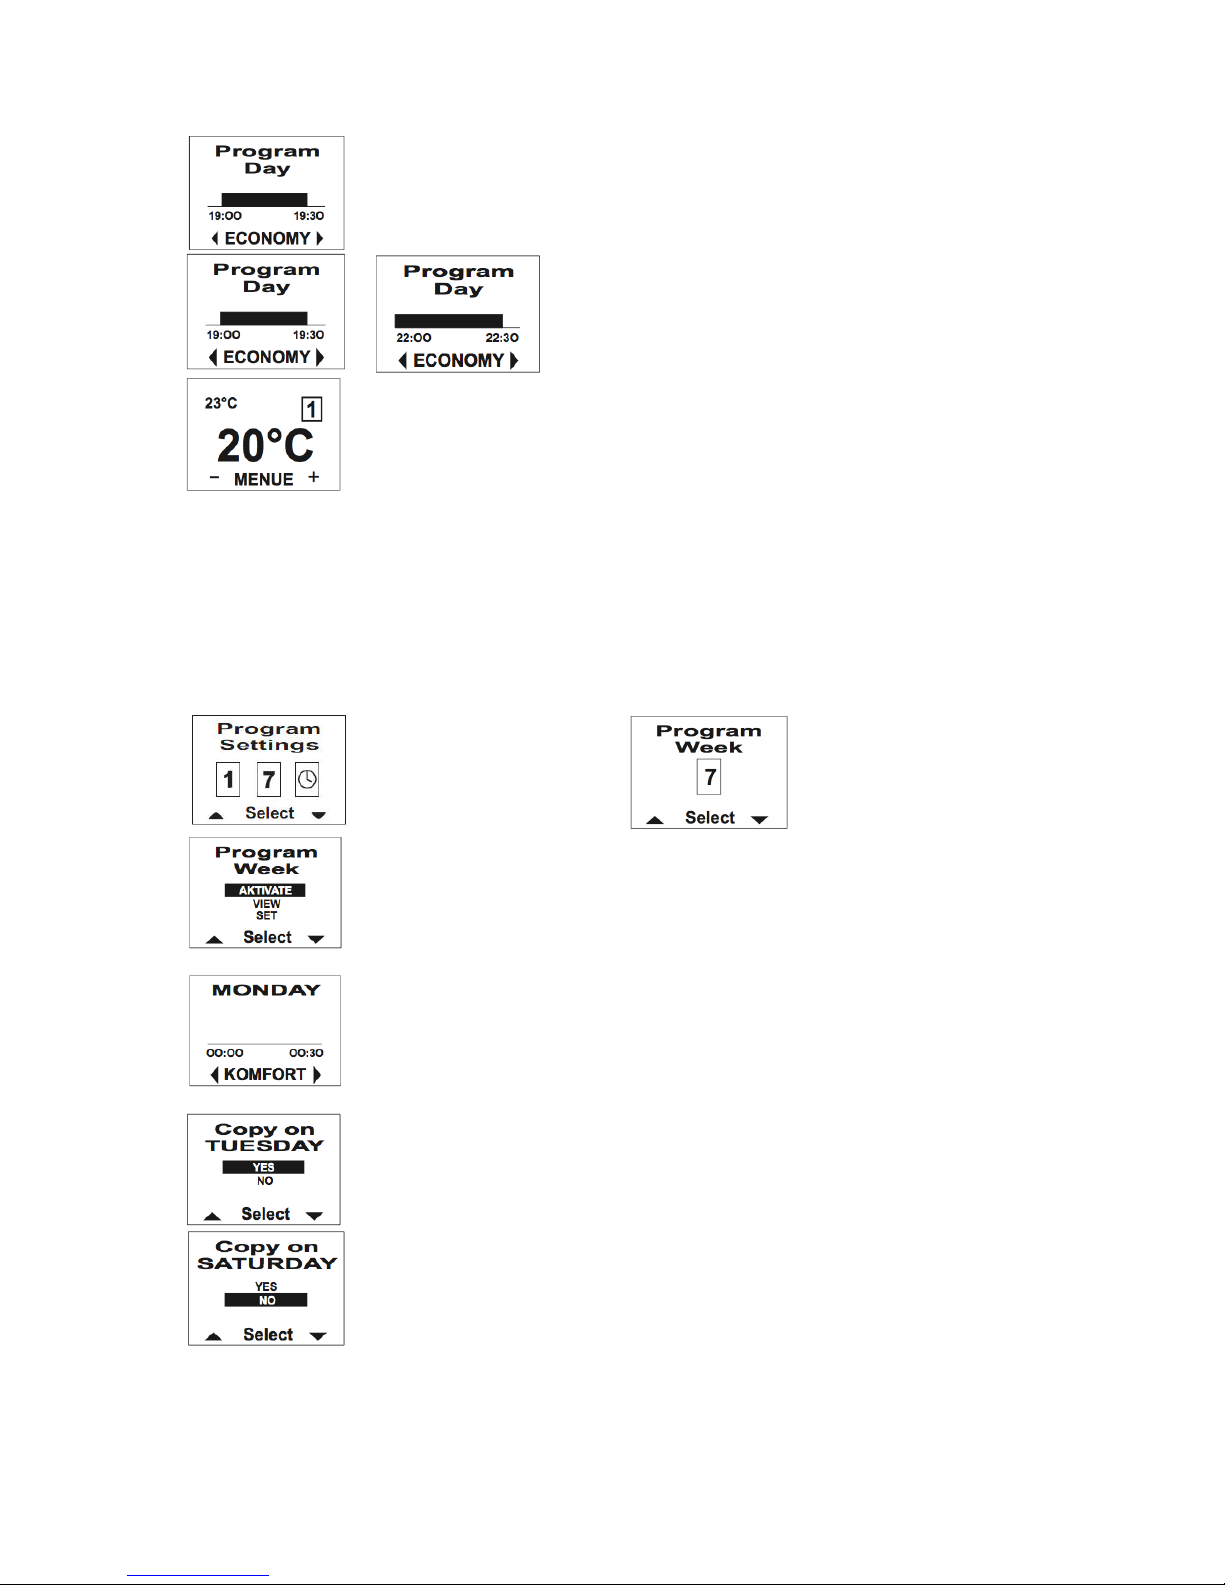
Menu structure of the thermostat
To control the device, and the setting of its working parameters, the thermostat is provided with a graphic Menu, subdivided into
parts according to their purpose of function. To enter the Menu, press the Menu button in the main indication window of the
thermostat. The name of Menu subdivisions will be displayed. The subdivisions can be browsed by pressing the selection
buttons, in the following sequence: