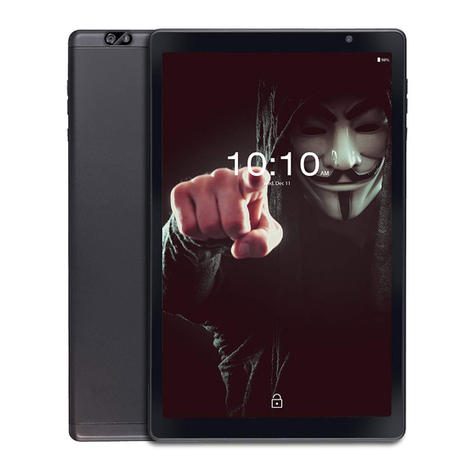
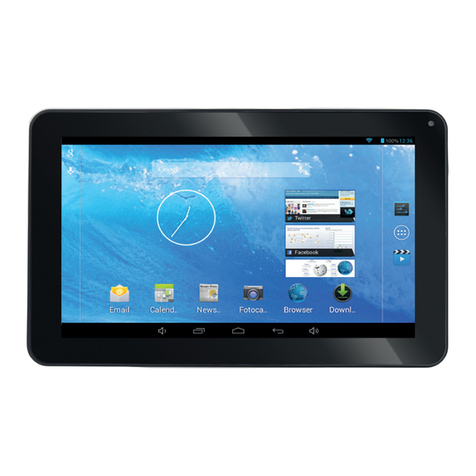
iBall Slide i9018 User manual

Model: iBall Slide i9018
Enjoy the ride
User Manual

Legal Information
All rights are reserved. Reproduction, transfer, distribution of the contents herein in any manner without the prior written Permission of
Best IT World (India) Pvt. Ltd. is prohibited. Best IT World (India) Pvt. Ltd. reserves the right to add, modify or delete any of the contents
herein or withdraw this document at any time without prior notice and without assigning any Reasons thereof. For detailed terms and
conditions refer www.iballslide.com
Safety Precautions
Operate Safely:
\ Make sure to charge the battery to full for first time usage.
\ Do not use the Device if the screen is cracked or broken. Cracked and / or broken screens could cause injury.
\ To reduce the risk of motion injuries:
- While using your MID, hold it with a relaxed grip and hold with two hands.
- Do not handle the MID with wet hands.
- Use hands-free accessories.
- Switch off the MID before cleaning it.
- Keep your MID and all accessories out of reach of small children and animals.
Careful handling:
\ Avoid potential damage to your MID as under:
- Keep away from liquids.
- Avoid using and / or storing in dusty and / or dirty places / environments.
- Do not drop, knock, throw or otherwise handle the MID roughly.
- Avoid exposing your MID to extreme temperatures. Extreme temperatures reduce the charging capacity and life of batteries and MID.
- Never use damaged chargers. Use only approved iBall chargers.
- Do not use chemicals or other cleaning solutions to clean the MID.
- Use Fiber cloth which is provided with MID.
Turn Off In Restricted Areas:
Use of MID in certain areas / places / conditions can be hazardous.
Switch off your MID:
\ Inside aircrafts;
\ Areas where chemicals are used and / or stored;
\ In and around areas having electrical / electronic equipments;
\ Areas where any kind of blasting activity is being carried out.
Drive Safety:
Avoid using your MID while driving and respect and obey all regulations that restrict the use of devices while Driving. Primary consideration
while driving should be safety.
In order to use the device correctly, please read the following statement of the user manual carefully before using the Tablet / Mobile Internet
Device (MID).

\ Index
1. Using this Guide ................................................................................................................1
2. Introducing iBall Slide i9018 ..............................................................................................1
3. Specifications ...................................................................................................................2
4. Know your device..............................................................................................................3
5. Getting Started ..................................................................................................................5
6. Settings............................................................................................................................. 7
7. Wi-Fi .................................................................................................................................7
8. Bluetooth...........................................................................................................................8
9. Data Usage........................................................................................................................9
10. More .................................................................................................................................9
11. Sound ...............................................................................................................................10
12. Display..............................................................................................................................10
13. Storage .............................................................................................................................10
14. Battery..............................................................................................................................10
15. Apps .................................................................................................................................10
16. Users ................................................................................................................................10
17. Location Access................................................................................................................10
18. Security.............................................................................................................................11
19. Language & Input..............................................................................................................11
20.Backup & Reset .................................................................................................................12
21. Google ..............................................................................................................................12
22. +Add Account .................................................................................................................. 13
23. Date & Time ......................................................................................................................13

24. Accessibilty.......................................................................................................................13
25. Developer option ...............................................................................................................14
26. About Slide........................................................................................................................14
27. Music................................................................................................................................15
28. Gallery ..............................................................................................................................15
29. Camera .............................................................................................................................16
30. Maps.................................................................................................................................16
31. Youtube.............................................................................................................................17
32. Playstore...........................................................................................................................17
33. Money Control...................................................................................................................17
34. IBN LIVE............................................................................................................................ 17
35. Cricket Next.......................................................................................................................18
36. RTI India............................................................................................................................18
37. Documents to Go ..............................................................................................................18
38. Nimbuzz............................................................................................................................19
39. Zomato..............................................................................................................................19
40. Supported Data Card List...................................................................................................19
41. USB Dongle (Data card) Installation ..................................................................................20

\ Using this Guide
This guide has been specially designed to guide you through the basics of your device, such as getting started with the device. Please read
this guide carefully before using your device to ensure safe and correct use.
The descriptions in this guide are based on the default settings of your device.
Please keep this guide for future reference.
\ Introducing iBall Slide i9018
Congratulations on your purchase of the iBall Slide. Built on the Google Android™ operating system, the device gives you access to
thousands of useful and entertaining applications to enrich your mobile web experience. This Powerful device puts the best of the web and
mobile computing at your fingertips in a lightweight, highly versatile platform the fits your active lifestyle.
With integrated wireless access and a responsive capacitive touch screen, you can keep in touch with versatile messaging, read books and
newspaper on the go; stay up to date on the latest news, weather and sports, manage your multimedia and business files.
1

A. Specification of iBall Slide i9018
CPU Powerful ARM Cortex A7 1Ghz Dual-Core
1.2 GHz Processor Speed
Memory 1 GB DDR3
Storage Built-in Storage 8 GB & Expandable up to 32 GB
Display 22.86cm (9”) with 1024x600 HD screen
O.S. Android 4.2 Jelly Bean
Wi-Fi 802.11b/g/n & Wi-Fi Direct
Bluetooth Yes
3G On USB Dongle
G-Sensor Yes
Camera 2.0 MP rear & front camera for Video Chatting
HDMI Port Yes
Video Formats AVI(H.264, DIVX, DIVX, XVID, rm, rmvb, MKV(H.264, DIVX, DIVX, XVID), WMV, MOV, MP4(H.264, MPEG,
DIVX, XVID), MPEG, MPG, FLV(H.263,H.264)
Image Format JPG, JPEG, GIF, BMP, PNG
Audio Format MP3,WMA,MP2,OGG,AAC,M4A,MA4,FLAC,APE,3GP,WAV
Audio Ports 3.5mm Earphone Port
USB Micro USB Port
Hardware Keys Power, Home & Reset
Battery 5000mAh
Work Time 4 to 5 hrs approx.
Power Jack 5V / 2A
Dimension 244.18mm x 187.76mm x 10.35mm
Weight 476gms
Documents Excel, Power point,Word,PDF
Apps Documents To Go, IBN live, cricket next ,facebook, money control ,Nimbuzz ,RTI India , YouTube, Zomato
2
\ Know your device
3
Camera
Camera

\ What accessories you find in Box?
1. Slide Main Device
2. Earphone
3. USB OTG & HOST cables
4. Travel Adapter
5. User Manual
6. Warranty Card
7. Cleaning Cloth
4

B. Getting Started
Connect to the Internet wirelessly High-speed Wi-Fi 802.11 b/g/n networking or with USB dongle
Browse the Web : Visit your favorite websites / Check your e-mail Keep in touch with friends and family / Watch YouTube™ videos
Browse the world’s most popular video-sharing community / Read your favorite books download thousands of books with
E-book reader */ Video Chatting
Discover more thousands of apps for Android™ Games, applications, and more with marketplace (need for customer installed)
HDMI™ output to your display device ™ Enjoy in the comfort of your living room
Requires optional HDMI cable (Type A-to-Type C). 1080p HD video playback requires a video file encoded at 4K Streaming video quality
will be affected by the source, and the quality and condition of your network connection.
Enjoy your media library anywhere Portable powerhouse plays popular music, video, and photo formats
Micro SD memory card reader Increase your storage capacity (up to 32 GB supported)
Built-in cameras : convenient front-facing camera and rear camera.
Automatic orientation detection Read any way you want; the display adjusts automatically!
1. Notification icons
While using the slide the following icons will appear on notification bar. Just hold & drag down the notification bar to view the more
details about it . Please find the meaning of icons in this list.
5

2. Turning Slide on or off
To turn the Slide on:
Press and hold the Power key until the LCD screen turns on with iBall Logo. Wait until the Home screen appears; the Slide is now ready
for use.
To turn the Slide Off:
1. Press and hold the Power key until the Device Options menu appears.
2. Touch ok the screen to turn off the Slide.
Turning the Screen On or Off (Standby)
When the Slide is on, you can turn off the screen to conserve battery power. Simply press the Power key once to turn the screen
off. Press the Power key again to turn the screen back on.
To conserve battery power, the screen can be set to turn off automatically when the Slide is not in use (between 15 seconds 30 minutes).
This Screen timeout option can be found in the Display menu.
3. Home Screen
The Home screen is the starting point to access all of the device’s features. It displays indicator icons, widgets, shortcuts to applications,
and others.
The Home screen can have multiple panels. To view other panels, scroll left or right.
• Adding an application icon: On the Home screen, tap Apps, tap and hold an application icon, and then drag it into a panel preview.
• Adding an item: Customize the Home screen by adding widgets or folders. Tap and hold the empty area on the Home screen, and then
select one of the following categories:
• Apps and widgets: Add widgets to the Home screen.
• Folder: Create a new folder or add folders for contacts.
• Moving an item : Tap and hold an item and drag it to a new location. To move it to another panel, drag it to the side of the screen.
6

Getting Started
Unlocking the Screen
When the screen turns off, you will have to unlock the screen when you turn it back on. To unlock the screen, drag the lock icon across the
screen towards the lock icon.
Applications
To open an application, touch the application icon on the home screen or in the Launcher where you can tap the icon right up on the home
screen to get in. The screen shown above is for illustrative purposes only. Reserves the right to modify and improve the final list of
applications available on the Slide.
4. About Applications
Preinstalled Applications
Some applications have been installed on your Slide for your convenience.
These applications include: Cricket Next, Documents to go, Google Plus, facebook etc.
Applications
Installing Applications
You can also download install additional applications from the device’s applications marketplace, Play Store the web browser, or
other sources.
C. Settings
1. Wi-Fi
The Notification bar displays icons that indicate your Slide’s Wi-Fi status.
Notification that an open Wi-Fi network is in range.
Connected to a Wi-Fi network (waves indicate connection strength).
1. Turn on the Wi-Fi , if it is not already on. To turn on Wi-Fi:
a. Go to the Home screen.
b. Open the Settings menu: tap the icon right up on the home screen to get into the launcher, then touch Settings icon.
c. Open the Wireless & networks menu: Slide the icon to ON status.
7

When Wi-Fi is on, the Slide will look for and display a list of available Wi-Fi networks.
1. If a network that you have connected to previously is found, the Slide will connect to it. If you don’t see your network in the list, you can
force it to re-scan. To scan for networks, tap the Menu key, and then touch Scan.
2. Select an available Wi-Fi network to connect to: In the same Wi-Fi settings menu above, touch a network in the list.
If the network is open, the Slide will prompt you to confirm connection to the network. Touch Connect to confirm.
If the network is secured (as indicated by a Lock icon), the Slide will prompt you to enter a password or other credentials. Touch the
Wireless password box to show the on-screen keyboard and then use it to enter the password. Touch Connect to confirm.
When you have successfully connected to a Wi-Fi network, the Notifications bar at the low of the screen will show a Wi-Fi signal indicator.
2. Bluetooth
Bluetooth on/off: Use this check box to turn Bluetooth services on or off.
Bluetooth settings: With Bluetooth services on, you can open the Bluetooth settings screen to:
• Pair or Unpaired with one of the Bluetooth devices in range - You will be asked to type a PIN before pairing. Refer to the manufacturer’s
documentation for the PIN code.
• Rescan for devices.
Turn on Bluetooth services
1. Select Bluetooth, and then Slide the icon to ON status to turn on Bluetooth services.
2. When on, the Bluetooth icon appears in the status bar.
8

9
Pair & connect with Bluetooth devices
Before your slide can communicate with a Bluetooth headset or hands-free car kit, the devices must “pair”, then “connect”:
1. Make sure you have turned Bluetooth on.
2. Select Settings > Bluetooth > Bluetooth settings.
3. Your slide starts scanning for Bluetooth devices within range. As they are found, the devices appear in the list of Bluetooth devices.
4. To pair with a device in the list, select it.
5. Type the device’s PIN and then selects ‘OK’.
6. Once paired, select the device name to connect. You can also touch & hold The name to open the context menu, and then select Connect.
7. Pairing and connection status appear under the device name.
8. To disconnect or unpaired with a device, touch & hold the device to open the context menu. Select Disconnect or Unpair, as appropriate.
If you select
‘Unpair’ when connected, you will be disconnected as well.
Notes: The slide supports only the headset and hands-free Bluetooth profiles, so if you try to connect to a device that is not a headset or
hands-free car kit, then you will receive an “unable to connect” message.
If you pair with a second headset while connected to the first, the first headset will remain connected. To switch connection to the second
headset you must manually select that headset again after pairing.
Rescan for Bluetooth devices
If you want to update the list of Bluetooth devices, select ‘Scan for devices’.
3. Data Usage
With this option you can set your Slide data downloading limitation, in the Setting (right up corner) you will get the source option of Auto
Sync data & Mobile hotspots. With the help of graph, you can get the updated information of downloaded data.
Auto Sync : Any Changes you make to your accounts on the web will be automatically copied to your tablet. Sime accounts may also
automatically copy any changes you make on the tablet to the web. A Google account works this way. To choose which kinds of
information to sync within each account, go to Settings / Accounts.
Mobile Hotspot : Select the Wi-Fi networks which are mobile hotspots. Apps can be restricted from using these networks when in the
background. Apps may also warn before using these networks for large downloads.
4. More
• Airplane mode: When airplane mode is selected, all wireless connectivity is off. This icon will display in the status bar when airplane
mode is selected.
• Ethernet : You can connect your Ethernet network/ LAN cable to this Slide with Convertor.
• VPN : VPN stands for Virtual Private Mode. Using this feature, you can connect to your private network through a public network in a
secured way. You can add a VPN connection, customize it as per your requirement and then save the settings. Once the network is
created, select the network again to connect to it.
• Portable hotspot: Using hotspot, you can share your mobile network with other Wi-Fi enabled devices.
• Mobile Network :
Data Enabled: Enable data access over Mobile network.
Data Roaming: Use the device to connect to another network when you are roaming or Your home network is not available.
Access Point Names: Set up access point names (APN) as per your Data card vendor.
Use only 2G : Use of 2G network will save battery usage.
Network operator : Search for available networks and select a network for roaming.
Tethering and portable hotspot Use the device to connect to another network when you are roaming or your home network is
not available.
• 3G Support information : This is will help you of supported data cards list in this menu.

10
5. Sound
• Volume: Adjust the volume level for music, videos, notifications etc.
• Default notification: You can set the tones of default notification
• Touch Sound: You can set the sound of Touch. Enable or disable it.
• Screen Lock Sound: Set the default sound of screen lock.
6. Display
•Brightness: You can adjust your Slide display brightness
• Wallpaper: Choose your favorite wallpaper from Gallery & Preloaded.
• Sleep: You can adjust the backlight of Slide with time schedule
• Daydream: It will works as a screen saver, it will display your assign iamges on screen when your slide while charging ,
while docked etc.
• Font Size: You can select the size of fonts with Small, Normal, Large & Huge option.
• Accelerometer coordinate system: accelerometer uses a special coordinate system, for some games.
• Screen adaption: Used to adjust size of some games display screen.
7. Storage
You will get the current status of your storage data in details, through Application Storage, Internal SD Storage, External SD card, External
USB Storage (if any).
8. Battery
It gives you the current battery level, along with the distribution of battery consumption by different apps like Cell standby, consumption
of Bluetooth network, Slide idle, consumption of Wi-Fi network & Screen consumption battery power.
9. Apps
• Choose application, after entering, you can manage and delete installed applications.
• You will found the four lists of installed apps in your Slide Downloaded apps, Apps which are installed on SD card , Running Apps, &
All Apps . You can control the installed apps from this option. Also you can stop, move & un-install the apps from your Slide.
10. Users : User can store their profile information like profile image, Name, Phone, Email, Address, Notes etc. to view this details just
drag down the notification bar.
11. Location Access
Access to my location : This app have asked your permission use your location information
Wi-Fi & mobile network location: This app use Google’s location service to estimate your location faster. Anonymous location data will
be collected and sent to Google.
Google’s location service: Allow anonymous location data to be sent to Google. Also allow permitted apps to use data from sources
such as Wi-Fi and mobile networks to determine your approximate location.
Location & Google search: Let Google use your location to improve search results and other services.

11
12. Security
Screen Lock
• Slide: This is the simple screen lock , you just have to Slide the locked window , no any type of password is there.
• Face Unlock: Face Unlock allows you to unlock your slide by having the front camera verify that it is you. This is very useful if you do
not want to be bothered with a passcode or pattern but still want some security.
• Pattern: The unlocked pattern board pop up, there are nine touch spots, connect 4 points from vertical, horizontal or diagonal
direction. As Picture 4.10, move your finger from the screen when finish. The system will record yours new unlock pattern.
• PIN: You can enter the numeric value as a password Click Pin Choose PIN in text setting area.
Enter new PIN code (numbers) and clicks continue. Enter new PIN code again and click confirm.
• Password: You can enter the alphabetic value as a password Set password in text setting area.
Set new password (letters and numbers) and then click continue. Enter the password again and the click confirm.
Owner information: Type text to display on screen lock mode.
Make Password visible: You can select this option to view the draw Password.
Unknown Sources: With this option you can install the third party (.apk) applications.
13. Language & Input
• Language: You will found the various languages more than 30 language option for your Slide, the default language will be English.
• Spelling Correction: This option will help you to correct your spellings.
• Personal Dictionary: You can create your personal directory; it will help you for proper wording while typing.
• KEYBOARD & INPUT METHOD
The Default input method is English Android Keyboard.
Google voice typing: On selecting this option, you can convert the voice message into a text message.
•SPEECH
Voice search: You can make Google Searches by giving a voice input.
Text-to-Speech output: It controls the rate at which the words are to be spoken for the search engine to understand and provide a
correct translation into words.
• MOUSE / TRACK PAD
Pointer speed: On selecting this option, you can control the pointer speed.

12
14. Backup & Reset
You can have a backup of the present data in your Slide on the Google server using your Google Account.
Backup My data: Backup app data, Wi-Fi passwords, and other settings to Google servers.
Backup accounts: Backing up to debug only private cache.
Automatic restore: When reinstalling an app, restore backed up settings and data.
Automatic restore: When reinstalling an app, restore backed up settings and data
You can select to reset your slide to factory settings. This will erase all your data from the slide and require you to sign in and go through
the setup screens to use any of the applications.
Factory data reset: This will erase all data from your Slide’s data & set you slide with default settings & apps.
Warning: Please keep a backup of your present data like Email accounts ,contacts , Apps, Files, Images etc. before this action. Also
remove the Micro SD card & Pen drive before run this.
Recovery Mode: Reboot into the system in Recovery Mode. Can clear the data or system upgrade
15. Google
The registered Gmail ID , you can view from this option, you can sync your data with registered Gmail ID.
Also you can sync Maps, Search, Location & advertisement with your Gmail ID

16. +Add account
To add some accounts, you may need to obtain details from system administrator about the service to which the account connects. For
example, you may need to know the account’s domain
17. Date & Time
According to the pre-set, system will voluntarily apply the date, zone, and time provided by internet.
Manual set date, time and zone
• Automatic date & time : you can set you Slide date & time settings , which can detect automatically by following option
Use network provided time , Use GPS provided time
• Set Date : Click upper or down button to adjust date, month, and year, click setting when you finish selection.
• Set Time: Click upper or down button to adjust hour and minute, click AM or PM to change morning or afternoon (there is no such
selection when you set 24-hour format). Click setting to finish.
• Select time zone : The Time Zone list is there to select your Time zone as per your current location If you not select this , than you
have to set the date & time with zone manually.
• Use 24-hour format: Click 24-hour format, switch between 12-hour or 24-hour format, the time format you choose will be used on the
alarm clock.
• Choose date format: Click date format setting, and then choose the time format you want to show on SLIDE.
18. Accessibility
These are certain special features which help people with certain disabilities.
• Talk Back: When Talk Back is on, your device provides spoken feedback to help blind and low-vision users. For Example, it describes
what you touch select and activate. It can collect all of the text you type, except passwords. This includes personal data such as credit
card numbers , it can also collect data about your interactions with the tablet
• Magnification gesture : With this feature you can zoom in and out by triple-tapping the screen.
Triple tap for magnification works everywhere except the keyboard and navigation bar.
• Large text: The font size throughout the slide can be increased or decreased for better view ability for the user.
• Auto-roated screen: Check to have the screen rotate automatically when you change the slide's orientation.
• Speak Password: Check to get spoken feedback while typing passwords.
• Text-to-speech output: Google text-to-speech engine
• Touch & hold delay: Lets you adjust the delay required for the slide to notice that you're touching and holding an item (for example, to
move an app to a Home screen).
• Enhance web accessibility: it will help you to make the web content more accessible. Set applications to install web scripts to make
their web content more accessible.
13

19. Developer options
• Take Bug report: It will collect the information about your current device state, to send as an e-mail message. It will take a little time
from starting the bug report until it is ready to be sent
• Desktop Backup password: Set a password to secure your backup data.
•Stay Awake: Set the screen to remain on while you are charging the battery.
• HDCP Checking: Use HDCP checking for DRM content only
• Protect SD Card: Apps must request permission to read SD card
• USB Debugging: Activate USB debugging mode to connect Slide to Laptop/PC with USB cable. USB debugging is intended for
development purpose only. Use it to copy data between your computer and your device, install apps on your device without notification
and read log data.
• Allow mock location: Allow mock location and service information to be sent to a location manager service for testing.
• Select Debug app: Select the application to debug and prevent error when you pause debugging.
• Show touches: Set to show the pointer when you touch the screen.
• Pointer Location: Set to show the co-ordinates and traces of the pointer when you touch the screen.
• Show layout bounds: Set to show boundaries.
• Show GPU view updates: Set to flash areas of the screen when they are updated in GPU.
• Show Surface update: Flash the entire window surfaces when they update.
•Windows animation scale: Select the speed for opening & closing Pop-up windows.
• Transition animation scale: Select the speed for switching between screens.
• Animator duration scale: Select how long pop-up windows will be shown.
• Disable HW overlays: Set to hide hardware overlays.
• Force GPU rendering: Set to use 2D hardware acceleration to improve graphic performance.
• Strict mode enabled: Set the device to flash the screen when application perform long operation.
• Show CPU Usage: Set to list all active process
• Profile GPU rendering: Set to check the time of GPU rendering time
• Enable traces: Set to capture trace of application when you launch a new application
• Don’t Keep activities: Set to end a running
• Background process limit: Set to limit the number of process that can run in background
• Show all ANRs: Set the device to alert you to unresponsive application that are running in the background.
20. About iBall Slide
Access device information & update device software like Status, Legal information, Model number, Android version, Baseband version,
Kernel version & build number.
14

15
D- Music
Enter into music player: in menu or desktop click music icon to enter into music player, click the music you want to play
Support Format: MP3, WAV, WMA, ACC, OGG, FLAC, AMR etc.
E-Gallery
Photo gallery application can auto search photos and video files in SD card, and photo gallery will classify these photos and videos in
folder. You can apply photo gallery to view and edit photos, set the photos as wallpaper.
Supported Image formats: JPG/ BMP/ PNG/ GIF etc.
Edit and Set pictures
When check the pictures in full screen mode, click menu key to display menu selection, you can choose the selection you need to edit
and setting pictures.
Slide Show
1. Open a picture, use virtual key to click menu key, display menu selection.
2. Click Slide show, it will auto loop play(or choose button in picture folder)
Edit
1. Click menu key( Top right corner), display the menu selection.
2. Click edit.
3. Adjust the brightness, style, color, antialiasing setting in selection.
4. Clicks save.
Crop
1. Click menu (Top right corner) key to display menu selection.
2. Then click crop, click and drag related area to adjust the cropper.
3. Click cropper and drag it inside and outside to adjust the image.
4. After adjust the size you want, click crop.
5. If you wish to give up to crop, click cancel to return to picture browse.
1. If you want to give up edit, click return key, click not to return to picture browse.

16
•Set Picture as
1. You can set the picture as Wallpaper & for Contact photo.
•Details
1. This will give you the details of particular file the details like date & time, dimension, file size, path etc.
Video Player
Use this application to play the videos with Supported formats: 4KAVI, MPEG, 3GP, MP4, M4V, WMV, WMV, MOV, M2TS, FLV, MKV.
F-Camera
• In the main interface or desktop, click camera application procedure, enter into camera
1. Camera switch – Rear and front
2. Shot mode – A ) Normal – Normal single shot
3. Snap Mode – A) Normal-normal view image click.
B) Panorama- you can click wide screen image
4. Scene mode : Normal, Cloudy, Daylight, AW, Fluorescent, Incandescent
5. Camera setting : Exposure, picture Size Store location restore defaults.
6. Still picture and Video recording switch.
7. Capture button. Use it to capture the image
After taking a photo, select the image viewer to view it.
To view more photos, scroll left or right.
To zoom in or out, place two fingers on the screen and Slowly spread them apart or pinch them together. To return to the original size,
double-tap the screen.
To send the photo to others or share it, select.
To start a slide show, select Start. Tap the screen to stop the slide show.
To delete the photo, select.
To register the faces in the photo as face tags, press the Option key and select Face tag.
To add the photo to the clipboard, press the Option key and select Copy to clipboard.
To rotate the photo anti-clockwise, press the Option key and select Rotate left.
To rotate the photo clockwise, press the Option key and select Rotate right.
To crop a section from the photo, press the Option key and select Crop.
To edit the photo with the image editor, press the Option key and select Edit.
To set the photo as your wallpaper or a contact image, press the Option key and select Set picture as.
G-Maps
Use this application to pinpoint the location of the device, search for places, or get directions.
Tap Maps on the Applications screen.
This application may not be available depending on the region or service provider.
Viewing maps. Scroll in any direction to view a location or find your way. To zoom in or out the map, spread two fingers apart on the
screen to zoom in, and pinch to zoom out.
To overlay multiple layers including satellite images, traffic information, and more, tap Searching for locations
Tap enter an address, and then tap . Select a location to view the detailed location information. To search for nearby locations, tap. Once
the location is found, tap and use one of the following functions:
• Clear Map: Clear the map.
• Make available offline: Save the map of a specified area to view it offline.
• Settings: Change the map settings.
• Help: View information about using the map. To view current location, tap.
Table of contents
Other iBall Tablet manuals

iBall
iBall iTAB BIZNIZ MINI User manual

iBall
iBall Slide Q400x+ User manual

iBall
iBall 7334-Q10 User manual

iBall
iBall Slide 3G7271-HD70 User manual

iBall
iBall Slide WQ149R User manual

iBall
iBall Slide Iris Drishti 4G User manual

iBall
iBall Slide 7236 2G User manual

iBall
iBall Slide Elan 4G2+ User manual

iBall
iBall iTAB MovieZ Pro User manual

iBall
iBall Slide i701 User manual