IBM UPS 3U Extend Run Assembly instructions

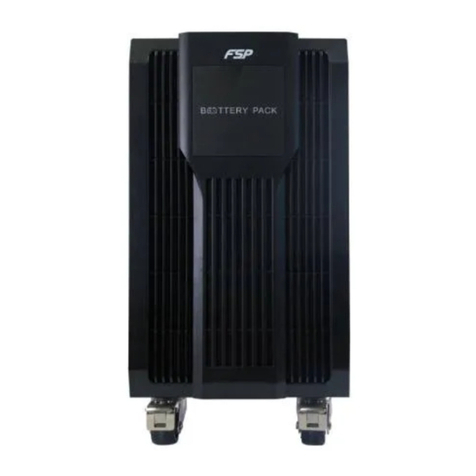
IBM UPS 3U Extend Run Battery Pack
Operation and Setup Guide
25R5637


1
Safety
Before installing this product, read the Safety Information.
Antes de instalar este produto, leia as Informações de Segurança.
Pred instalací tohoto produktu si prectete prírucku bezpecnostních instrukcí.
Læs sikkerhedsforskrifterne, før du installerer dette produkt.
Lees voordat u dit product installeert eerst de veiligheidsvoorschriften.
Ennen kuin asennat tämän tuotteen, lue turvaohjeet kohdasta Safety Information.
Avant d'installer ce produit, lisez les consignes de sécurité.
Vor der Installation dieses Produkts die Sicherheitshinweise lesen.
Prima di installare questo prodotto, leggere le Informazioni sulla Sicurezza.
Les sikkerhetsinformasjonen (Safety Information) før du installerer dette produktet.

2
Antes de instalar este produto, leia as Informações sobre Segurança.
Antes de instalar este producto, lea la información de seguridad.
Läs säkerhetsinformationen innan du installerar den här produkten.
WARNING: Handling the cord on this product or cords associated with accessories sold with this product, will
expose you to lead, a chemical known to the State of California to cause cancer, and birth defects or other
reproductive harm. Wash hands after handling.
ADVERTENCIA: El contacto con el cable de este producto o con cables de accesorios que se venden junto con
este producto, pueden exponerle al plomo, un elemento químico que en el estado de California de los Estados
Unidos está considerado como un causante de cancer y de defectos congénitos, además de otros riesgos
reproductivos. Lávese las manos después de usar el producto.

3
CAUTION! Handling Safety - Use safe practices when lifting.
<18 kg (<40 lb) 32–55 kg (70–120 lb)
18–32 kg (40–70 lb) >55 kg (>120 lb) >10º
CAUTION! Electrical Safety
Electrical Current from power, telephone, and communication cables is hazardous. Please read the following safety statements.
•Do not connect or disconnect any cables or perform installation, maintenance, or reconfiguration of this product during an electrical storm.
•Connect all power cords to a properly wired and grounded electrical outlet.
•Connect to properly wired outlets any equipment that will be attached to this product.
•When possible, use one hand only to connect or disconnect signal cables.
•Never turn on any equipment when there is evidence of fire, water, or structural damage.
•Disconnect the attached power cords, telecommunications systems, networks, and modems before you open the device covers, unless instructed otherwise
in the installation and configuration procedures.
•Connect and disconnect cables as described in the following steps when installing, moving, or opening covers on this product or attached devices.
To Connect: To Disconnect:
1. Turn everything OFF.
2. First attach all cables to devices.
3. Attach signal cables to connectors.
4. Attach power cords to outlet.
5. Turn device ON.
1. Turn everything OFF.
2. First remove power cords from outlet.
3. Remove signal cables from connectors.
4. Remove all cables from devices.
•Do not work alone under hazardous conditions.
•High current through conductive materials could cause severe burns.
•Check that the power cord(s), plug(s), and sockets are in good condition.
•When grounding cannot be verified, disconnect the equipment from the utility power outlet before installing or connecting to other equipment. Reconnect
the power cord only after all connections are made.
•Do not handle any metallic connector before the power has been disconnected.
•Connect the equipment to a three wire utility outlet (two poles plus ground). The receptacle must be connected to appropriate branch circuit/mains protec-
tion (fuse or circuit breaker). Connection to any other type of receptacle may result in risk of electrical shock.
•In order to maintain compliance with the EMC directive for products sold in Europe, output cords attached to the UPS should not exceed 10 meters in
length.
CAUTION! De-energizing Safety
•The UPS has an internal energy source, the battery. The output may be energized when the unit is not connected to a utility power outlet.
•To de-energize the UPS, press the OFF button to shut the equipment off. Unplug the UPS from the utility power outlet. Disconnect the external batteries
where applicable and disconnect the internal battery (see Operation and Setup Guide). Push the ON button to de-energize the capacitors.
CAUTION! Battery Safety
•This equipment contains potentially hazardous voltages. Refer to your product documentation to determine which parts are user-replaceable.
•Do not dispose of batteries in a fire; they may explode.
•Do not open or mutilate batteries. They contain an electrolyte that is toxic and harmful to the skin and eyes.
•To avoid personal injury due to energy hazard, remove wristwatches and jewelry such as rings when replacing the batteries. Use tools with insulated han-
dles.
•Replace the battery module with the same number and type as originally installed in the equipment.
Be sure to deliver the spent battery to a recycling facility.

4
1: INSTALLATION
Introduction
The IBM®UPS 3U Extend Run Battery Pack, for use with the IBM UPS 7500XHV and UPS 10000XHV, provides extended
load protection and extra security during the uninterruptible power supply battery replacement.
The IBM UPS 7500XHV and UPS 10000XHV can support up to four external battery packs. Both units use the 3U Extend Run
Battery Pack and are designed to operate in the rack-mount and tower configurations.
Battery pack connectors are color-coded and keyed to prevent improper connection.
For battery replacement and service information, see the Uninterruptible Power Supply Operation and Setup Guide.
Unpacking
Attention: Read the Safety Instructions before you install the battery packs.
Note: The illustrations in this document might differ slightly from your hardware.
Inspect the battery pack upon receipt. Accidents and damage can occur during shipment. Notify the carrier and your IBM mar-
keting representative or authorized reseller if there is damage.
The packaging is recyclable; save it for reuse or dispose of it properly.
Check the package contents:
!Battery pack
!Front bezel
!Rail kit
!Tower conversion kit
!Accessory kit containing:
!Quick Installation Guide
!Documentation CD
!Warranty flyer
!Rack-mounting brackets
!Hardware
You will need the following tools to install the battery pack:
!Utility knife or scissors
!Two Philips screwdrivers (#1 and #2)
!Two wrenches (7/16” and 1/4”)
!Cage nut insertion tool or flat-blade screwdriver (for installing cage nuts in some rack cabinets)
Removing the Battery Modules
Attention: The battery pack is heavy. To lighten the weight of the unit, remove the battery modules.
!Remove the battery door. "Remove the battery modules.

5
Positioning the Battery Pack
18–32 kg
(40–70 lb)
Attention: The unit will remain heavy without the batteries. Select a location sturdy enough to handle the weight.
Do not operate in excessive dust or in temperature and humidity conditions outside the specified limits.
Make sure that the air vents on the front and rear of the unit are not blocked.
Placement of the unit should correspond with the following graphical depiction.
Mounting the Battery Pack in the Rack
!Attach the mounting brackets. "Install the rails per the rail installation diagram in the Rail
Kit. Referencing the chart below, Install the cage nuts (or clip
nuts). The solid squares indicate the cage nut or clip nut loca-
tions. Mount the battery pack in the rack. Note: The battery
packs must be mounted below the uninterruptible power supply.
#Secure in the rack.

6
Connecting the Battery Pack(s) to the Uninterruptible Power Supply
Attention: To set the uninterruptible power supply to recognize the battery packs, see Setting the Uninterruptible Power Supply
to Recognize the Battery Packs via Terminal Mode.
!Connect the green/yellow ground wire hanging from the battery pack to the TVSS screw on the uninterruptible power sup-
ply. For multiple battery packs, connect the wire to the TVSS screw on the nearest battery pack.
"Connect to the uninterruptible power supply battery pack outlets (indicated below) using rear panel battery connectors. For
multiple battery packs, connect the rear panel battery connectors to the outlets on the nearest battery pack.
Installing and Connecting the Battery Modules and Attaching the Bezel
!Reinstall the battery modules. "Connect the batteries.

7
#Reinstall the battery door. Make sure that the cords are posi-
tioned so that they do not get pinched.
$Attach the bezel.
Tower Configuration and Connecting to the Uninterruptible Power Supply
Attention: Before converting to tower configuration, remove the battery modules (see Removing the Battery Modules).
Note: The external battery packs must be installed to the right of the uninterruptible power supply when facing the front of the
units.
!Remove the rail guides. "Install the top tie bracket.
#Install the rear tie brackets. Note: Tie brackets on the center battery pack share a common screw.

8
$Connect the green/yellow ground wire hanging from the battery pack to the TVSS screw on the uninterruptible power sup-
ply. For multiple battery packs, connect the wire to the TVSS screw on the nearest battery pack.
%Attention: To set the uninterruptible power supply to recognize the battery packs, see Settting the Uninterruptible Power
Supply to Recognize the Battery Packs via Terminal Mode.
Connect to the uninterruptible power supply battery pack outlets (indicated below) using rear panel battery connectors. For mul-
tiple battery packs, connect the rear panel battery connectors to the outlets on the nearest battery pack.
"Install the top panel.

9
Installing and Connecting the Battery Modules and Attaching the Bezel
!Reinstall all battery modules. Start installation at the bot-
tom and work upward.
"Connect the batteries.
#Reinstall the battery door. Make sure that the cords are
positioned so that they will not get pinched.
$Attach the bezel.

10
Determining On Battery Runtime
The battery pack charges when connected to an uninterruptible power supply. See the battery runtime tables for corresponding
recharge times. Do not expect full battery run capability during the initial charge period.
Battery Runtime Tables
The dark gray shaded areas in the charts represent minutes; the other areas represent hours.
Note: The recharge time is the approximate time it takes to get to 90% capacity from a complete discharge at a 50% load.
UPS 7500XHV Model:
Number of Battery Packs
Load (W) Internal +1 +2 +4
50 7.56 13.83 21.50 37.68
100 6.00 10.93 17.06 29.83
200 4.16 7.65 11.93 20.90
300 3.16 5.83 9.11 16.00
400 2.51 4.68 7.36 12.89
500 2.11 3.91 6.12 10.75
600 1.80 3.33 5.25 9.23
700 1.56 2.90 4.52 8.00
800 1.38 2.56 4.01 7.03
900 1.23 2.30 3.61 6.38
1000 1.10 2.08 3.28 5.78
1200 55 1.73 2.74 4.83
1400 47 1.50 2.35 4.16
1600 41 1.28 2.05 3.63
1800 36 1.13 1.81 3.23
2000 32 1.00 1.61 2.90
2500 24 48 1.28 2.28
3000 19 39 1.05 1.88
3400 17 34 55 1.65
4000 13 28 46 1.36
5000 10 21 35 1.06
6000 7 16 28 52
Recharge
Hours 3 7 10 17
UPS 10000XHV Model:
Number of Battery Packs
Load (W) Internal +1 +2 +4
50 7.56 13.83 21.55 37.68
100 6.00 10.93 17.06 29.83
200 4.16 7.65 11.93 20.90
300 3.16 5.83 9.11 16.00
400 2.55 4.68 7.35 12.88
500 2.11 3.91 6.12 10.75
600 1.80 3.33 5.24 9.21
700 1.56 2.90 4.56 8.03
800 1.38 2.56 4.05 7.11
900 1.23 2.30 3.61 6.38
1000 1.16 2.08 3.28 5.78
1200 55 1.73 2.73 4.85
1400 47 1.50 2.35 4.16
1600 41 1.28 2.05 3.63
1800 36 1.13 1.81 3.23
2000 32 1.00 1.61 2.90
2500 24 48 1.28 2.28
3000 19 39 1.05 1.88
3400 17 34 55 1.65
4000 13 28 46 1.36
5000 10 21 35 1.06
6000 7 16 28 52
7000 5 13 23 44
8000 4 11 20 37
Recharge
Hours 3 7 10 17

11
2: HARDWARE MAINTENANCE INFORMATION
This chapter contains information about IBM customer replaceable unit (CRU) availability for the IBM UPS 3U Extend Run
Battery Pack.
Customer Replaceable Unit Part Numbers
IBM CRU part numbers are subject to change without notice. This section contains a listing of the CRU part numbers available
at the time this document was published.
INDEX CRU PART # DESCRIPTION
1 25R5591 Replacement Battery Module
2 25R5600 Accessory Kit
3 25R5597 Rack-to-Tower Conversion Kit
4 73P5769 Rail Kit
5 25R5588 Battery Pack Chassis
6 25R5595 Battery Pack Bezel

12
3: SETTING THE UNINTERRUPTIBLE POWER SUPPLY TO RECOGNIZE THE BATTERY
PACKS VIA TERMINAL MODE
Terminal Mode is a menu driven interface that enables enhanced configuration of the uninterruptible power supply.
Connect the serial cable to the serial port on the back of the uninterruptible power supply.
When using PowerChute®Network Shutdown software:
1. Exit the PowerChute Business Edition agent and server using the following steps:
a. From the desktop, click Start=> Settings=> Control Panel=> Administrative Tools=> Services.
b. Select PCBE Server and PCBE Agent; then, right click the mouse and select Stop.
2. Open a terminal program, for example HyperTerminal.
From the desktop, click Start => Programs => Accessories => Communication =>HyperTerminal.
3. Double-click on the HyperTerminal icon.
a. Follow the prompts to choose a name and select an icon. Disregard the message, must install a modem, if it is dis-
played. Click OK.
b. Select the COM port that is connected to your uninterruptible power supply. The port settings are:
#bits per second - 2400
#data - bits 8
#parity - none
#stop bit - 1
#flow control - none
c. Click Enter.
4. To set the number of external battery packs (IBM 3U Extend Run Battery Packs):
a. Press Enter to initiate terminal mode. Press Enter multiple times, until the User Name prompt is displayed. Follow the
prompts. Type slowly, waiting until each character is displayed on the screen before typing the next character.
Network Management Card defaults:
•User Name: apc
•Password: apc
b. Press 1 and Enter to select Device Manager.
Select the model by entering the corresponding number, then press Enter.
c. Press 3 and Enter to select Configuration.
d. Press 1 and Enter to select Battery.
e. Press 2 and Enter to change the Battery Settings.
Type in the number of external battery packs (four battery modules per pack), then press Enter. (Number of packs: 1=
internal battery module, 2 = 1 IBM 3U Extend Run Battery Pack, 3 = 2 IBM 3U Extend Run Battery Packs, etc.)
f. Press 3 and Enter to Accept Changes.
g. Press Esc multiple times to return to the main menu.
h. Press 4 and Enter to log out.
Second Edition (February 2005)
© Copyright International Business Machines Corporation 2004, 2005. All rights reserved.
U.S. Government Users Restricted Rights — Use, duplication, or disclosure restricted by GSA ADP Schedule Contract with IBM Corp.
Trademarks
IBM is a trademark of International Business Machines Corporation in the United States, other countries, or both.
APC and PowerChute are registered trademarks of American Power Conversion Corporation. Other company, product, or service names may be the trademarks
or service marks of others.
Table of contents
Other IBM Batteries Pack manuals
Popular Batteries Pack manuals by other brands
Hawaii Energy Connection
Hawaii Energy Connection Kumukit Powerblocks 3.2 General Overview of Operation
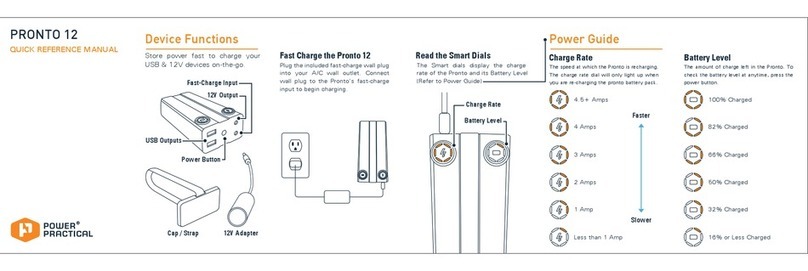
Power Practical
Power Practical PRONTO 12 Quick reference manual
Huawei
Huawei UPS2000-G Series Quick installation guide

Chauvet
Chauvet Satellite TV System user manual

Bosch
Bosch CompactTube 400 operating instructions
Sony
Sony NP-FX110 operating instructions
