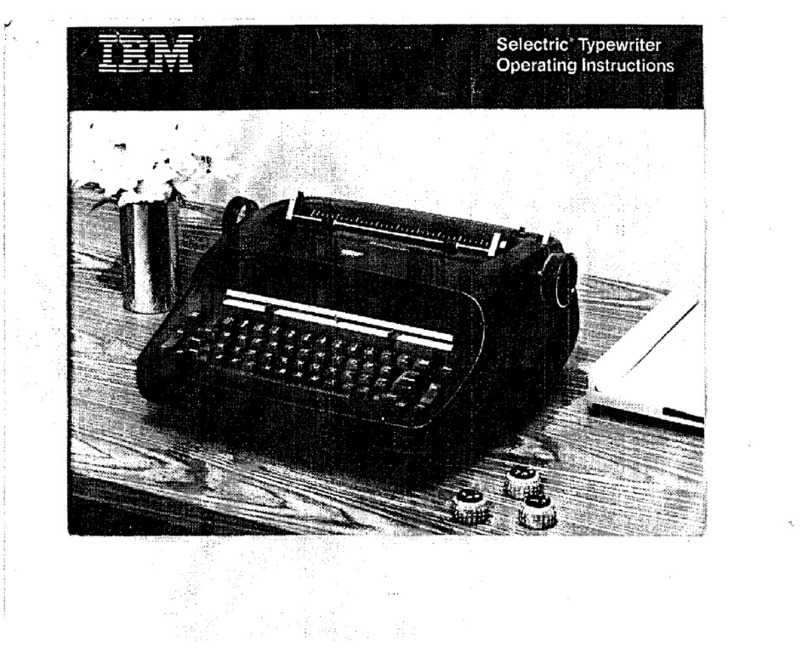
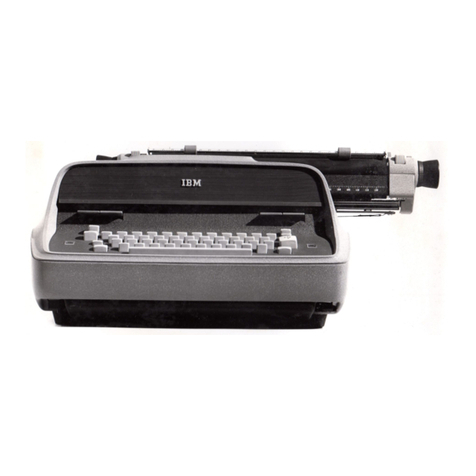
IBM Selectric Personal Typewriter User manual

Operating Instructions


First
Ed
ition (November 1982)
References
in
t h
is
book
to
IBM products, programs,
or
servi
ces
do
not
imply
that
IBM inten
ds
to
ma ke
these available outside the United States.
This
book may contain typogra
ph
ical
or
techni
cal
errors.
If
you w i
sh
to
report such errors
or
make
other remarks,
use
the
reader's comment
form
in
the
back
of
the book. If
the
form
has
been
removed, send your comments
to
IB
M,
Dept. F98,
Bld
g. 962-3, Lexington, Kentucky
40
5
11
.
By
sendi
ng
the form you agree t
hat
IB
M may
use
the
informat
ion you provide
without
any obligation
to
you .
© International Business Machines Corporation, 1982

Contents Platen
Va
ri
ab
le . . . . .
..
. . . . .
..
. . . . .
..
..
. .10
Sh
i
ft
Keys
and
Sh
i
ft
Lock
(SH
I
FT
and
LOCK)
..
. .
..
17
Page-End Indicato r
.........
...
. .
.....
. .
..
. .
11
To
type uppercase characters
..
17
Introdu
cti
on To use the page-end indicator . . . . . .
..
. . . . . .11
To
keep
the
typewri
ter in uppercase . .
..
....
.17
The
Pa
r
ts
of
Your T
ypewr
i
ter
. .
..
. . . . . . .
..
.
..
. 2 Ready Reference Chart
..
. . . .
..
.11
To
release
the
shi
ft
l
ock
. .
...
. . . .
....
. .
..
. .
17
Repeat
Keys
....
. . . .
.....
...
. . . . . .
..
. . . . . .18
The Controls on
the
Top of
Yo
ur Typewrit
er
The Keyboard on
You
r T
ypewr
i
ter
Carrier
Re
turn
Key
(RETURN)
...
.
..
.
... ...
. . .
18
Li
ne
Space
Lever . . . . . . . . . . . . . . . . . . . . . . . . . 7
On/Off
Control (ON/
OFF)
. . . . . . . . . .. . . .14 Index Key
(INDEX)
..
. . • .
.•...
. . . .18
Paper
Re
lease Lever 7
Marg
in
Sca
le and
Margin
Stops
..
............
15
Hyphen/U
nde
rline Key
.....
..
. .
...
..
..
. .
..
18
Paper Guide 7
To
set
or
change
the
left
or
ri
g
ht
marg
in ...
..
15
Backspace Key
(BACKSPACE)
.
..
. .
.•
. .
...
..
. .18
Paper
Ba
il . . . . . . . . . . . . . . • . . . s
Ma
rgin
Re
lease Key
(MAR
REL)
.
...
. . .
..
....
...
15
Spacebar
..
. . . . . . . . .
....
.......
..
. . . . . . .18
Copy Guide and Copy Guide
Sca
le 8
To
mo
ve
to
the
l
eft
of
the
left
margin
.. ..
. . .
15
Co rrecting Key
..
.
..
. .
.. ..
..
. .
.. ..
. . . . . . .19
To
center paper . . . . . . .
...
.
......
..
..
. . . . 8
To
typ
e
thro
ugh
the ri
ght
ma
rgin .
.........
.
15
To
correct er
ror
s
...
...
.....
. . . .
....
.
...
19
Inserting Paper . . . . . . . . . 9
Tab
Contro
l
(SE
T and
CLR)
. . .
....
. . . . . . . . . .
...
16
To
insert paper . . . . . . . . . . . . . . . . . . . . . . . 9
To
set a
tab
st
op
. .
.....
..
.
..
. . . . . . . .
..
.
..
16
Line
Fi
nder . . . . . . . . . . . . . . . .
..
. .
.....
. . .1O
To
clear a
tab
stop
..
. . . . . . . . . . . . .
..
16
To
use
the
l
in
e f
in
der
. . .
..
.
...
. .
..
1O
To
clear all tab stops
..
.
...
...
..
. .
....
...
..
16
P
la
ten
Knobs .
..
..
.
...
. .
..
....
..
.
.....
..
. .1o
Tab
Key
(TAB)
. . .
..
.
....
.
..
. . . . .
...••
.
...
. .
16
Insid
e Yo
ur
T
ypewr
i
ter
Ca
r
dholder
. . . . . . .
23
To
rea
li
g n characters
for
a correction
..
23
Drawing Lines . . . . . . . . . .
.23
To
draw
a
ve
rtical line . . . . . .
23
To
dr
aw
a horizontal line . . . . . . . . .
..
23
Impression Control . . . . . . . . .
..
23
To
ch
ange
the impression control setting
...
. .
23
Type Element s
..
......
..
. . . .
.....
. . . . . . .
...
24
Changing Type Elements . . . . . . . . . . . . . . .25
To
t ake
off
an element . . . .
..
25
To
put
on
an element . . .
....
.
..
. . . . .
..
. .
..
25
Ribbons .
....
. . .
..
. .
....
...
..
. . . . . .
..
. . .
..
26
To
remove a ribbon
...
..
.....
..
. .
...
26
To
insta
ll
a ribbon .
...
. . .
.. ..
. . . . . . . . .
.. ..
26
Correcting
Tape
To
remove
the
tape
.
..
.
. .
...
27
. .
...
27
To install
new
tape . . . . . . . . . . . . . . . .
...
....
27
Typi
ng
Stencils
Serial
Number
.
...
.
To
locate
the
se
rial
numbe
r . . . .
.
..
..
...
. .
..
28
.
.•...
.
28
. . .28
Su
ppl
i
es
and
Serv
i
ce
Ordering Supplies
..
.
..
.. ..
. .
....
.
.. ..
.
..
..
.
30
Type Elemen
ts
. . . . . . . .
...
. . . . . . . .
...
30
Ribbon and Correcting Tape . . .
..
. . . .
...
.
..
..
34
IBM
210
Correcta ble Ri
bbo
n
Casse
tt
e . .
34
I
BM
Co
lor Correctable R
ibbon
Cassette . . . .34
I
BM
800 T
-11
1Ribbon Cassette . . .
34
Correcti
ng
Tape
Se
rv
ice . . .
Cari
ng
for
You
rT
ypewr
iter
. . .
..
.
..
. . .
.....
34
Checklist
for
Proper
Type
writ
er Operation
. .3 5
. . .
35
..
. . . .35
Index . . . .
..
. . . . . . . . . . .
....
. . .
..
. . .
..
. .
..
36


For
ye
ars
, businesses
ha
ve
used
IBM typewriters
to
give their documents a professional appearance .
With your new
IB
M typewrit
er;
you
to
o can enjoy
high-quality typing.
Your IBM typewriter fea
tu
res
:
•
An
88-character type element
th
at
moves quickly
across
the
page
as
you type and offe
rs
yo
u a
wide variety
of
type styles
• A correction key
fo
r semi-automatic correction
• A choice
of
single, space-and-a-half,
or
double
line spacing
•
An
ea
sy
-to-remove, long-lasting ribbon and
co
rr
ecti
on
tape
2
Use
th
ese
features
on
your
new
typewriter
to
help
you create beautifully typed documents!
Thank you
for
choosing an
IBM
typewriter. We
hope you enjoy it.
T
he
Parts
of
YourTypewriter
While you read the instruct io
ns
,
use
the following
picture
to
help you find and identify the par
ts
of
your typewriter.

~-
---
---
-
~--
- - -
--
=~---......_-._.....
................
_________________
_______
'!!!!!!!!!!!!_
3
T
yp
e element - page
24
Impre
ssi
on
co ntrol - page 23
Copy
gu ide and copy guide scale - page 8 Cardholder - page
23
Paper bail- page 8 1
'e
space
le
, ec- ,
:~~:
,~lease l
e,e
c- page 7
w~
Lin
e finder - page lO
Platen
kn
ob - page 1o
/
--
Pa
ge-end in
di
c
at
o r- page 11
Paper gui
de
-page
7--
---
- - -
--
---.
---
Pl
atec kcob -
page
10~
Margin
scal
e - page 15
a~
$ o b m M «
\ 4 I 11 11
'I
I l 1 1 I • I ii I
\'
· ! I I I t ti! I / 11
!r
1 11 1 11 ii I
Lef
t marg in stop - page 15-
--~-
--
- - -
-~
-
----
-------
Right margin stop - page 15
Tab
co
ntrol - page 16
Sp
aceba r - page
18
11:11
s.--
-
------
--
ln
de
x
key-p
age 18
Q
-------
On
/
Off
cont
ro
l - page 14
Cor
rect
in
g key- page 19


8
r---~-------
-==
~
/~
I I. . . . . . . . I
I I I I
It
I I I I I I I I I I I I I I I I I I I I I I I l I I
JI
---
Paper Bail
The
paper bail
is
the metal bar
with
rubber rollers
that
extends across the platen.
The
paper bail holds paper firmly against the
platen
Pull
the paper bail forward when you insert
paper.
Push
the paper
ba
il back, against the
platen, to hold the paper
in
place
wh
ile you type.
Copy Guide and Copy Guide Scale
The black metal copy guide and its
scale
are
located behind the paper bail next
to
the platen.
The copy guide prevents the paper
from
winding
back around the platen.
The
guide also provides a
flat surface
for
erasing.
Using the copy guide
scale,
you
can
easily center
paper
in
the typewri
ter.
The marks on the
scale
start from
zero
in
the center and go up in
eac
h
direction.
To
center paper:
Insert the paper
so
that
it
s l
eft
and
right
edges
touch the
same
number on the
scale.
For
example,
to
center standard-size paper
(B
Y
,"
x 11 "),
each
edge
of
the paper should
to
uc
h 41
/4 .

9
I I. • . . . . . . . I
I I I I I I I I I I I I I I I I I I I I I I t I I I I
It
I I I I I -
---
--
.
;:-,•
. .
Inserting Paper
To
ins
ert paper:
Use
the levers and knobs
on
your typewr
it
er
to
he
lp you i
nse
rt paper.
1. Make sure the paper
re
l
ease
lever is all
the
way
back.
2.
Pu
ll the
pa
per bail forward.
3 . Pl
ace
the
left
edge
of
the paper against
the
paper
gui
de in the slot behi nd t
he
copy gu ide.
4. P
ress
the index key
(IND
E
X)
all the way
down
so
that
it
repeats. As the key repeats, t he
typewr
iter
ro
ll
s the paper around the platen.
You
can also
use
the platen knobs
to
roll paper
into
t he
typew
ri
ter.
5.
Pus
h the paper
ba
il b
ac
k.

Line Finder
Use
the line finder to leave a typewritten line and
return to it again.
Fo
r exampl
e,
you may wa
nt
to
use
the
lever
when
you:
•
Erase
•
Type
superscripts
or
subscripts
• Create
do
ub
le
underlines
• Make corrections
To use
the
line
finder:
1.
Pull
the
line finder
toward
you.
2. Turn
the
platen knob
to
move
to
the line
you
wan
t.
3.
Type your inserti
on
or
correction.
4. Turn
the
platen knob
to
move
to
th
e
or
ig
inal
typing line.
5.
Push
t
he
line finder away
from
you.
6.
Pr
ess
the
ca
rrier return key
(RETURN).
10
I I. . . . • . . . . I
I I I I I I I I I I I I I I I I I I I I I I I I I I I I I I I I
It
_
---
Platen Knobs
Using
the
l
eft
and right platen knobs, you
can
ro
ll
the platen manually.
Use
the platen knobs to
help you insert paper or move up
or
down
the
page
to
a different typing line.
•,
Platen Variable
Press
ing
in
the left platen knob allows
the
platen
to
roll freel
y.
Using th
is
platen
va
riable, you
ca
n
permanently change
the
position
of
the
typing
lin
e.
If you ne
ed
to
re
i
ns
ert
a page
for
corrections
or
add
it
ion
s.
use
the
platen variable
to
he
lp
you
align
the
paper.

Page-End Indicator
The page-end indicator
is
the round dial
on
the
right platen knob.
The
white numbers and
dashes
mark
ha
lf -inch increments and sh
ow
t
he
number
of
inches remaining
to
the
bottom
of
the page .
To
use
the
page-end indicator:
1.
Align the paper w i
th
the top
edge
of
the
copy guide
(see
photo).
2. Find
the
indicator setting opposi
te
your paper
length
on
the
reference chart
on
this page.
3. Rotate the page-end indicator until
the
cor
re
ct
se
tting
is
at
the small horizontal mark
to
the
left
of
the platen knob.
When the typing
li
ne
is
fo
ur inches
or
le
ss
from the
bo
tt
om
of
the page, the indicato r shows the
number
of
inches remaining.
11
w
•
Ready Reference For Page-End Indicator Settings (For Paper 3"
To
14" Long)
Length
Of
Indicator Length
Of
Paper (Inches) Setti
ng
P
aper
(I
nches)
3"
9"
3V2"
1Y
2 9
V2"
4" 2 10"
4V2"
2V2
10V2
"
5"
3 11" Standa rd Si
ze
5V2"
3V, 1
1V2"
6" 4 12"
6V2"
0 1
2\/2
"
7"
V2
13"
7\/2" 13V,"
8"
1V2
14"
8\/2" 2
Indicator
Setting
2V2
3
3V2
4
0
y,
1V,
2
2 V2
3


T
yp
ing is conveni
ent
and
easy
on
your typewriter
beca
u
se
its gradual slope places all
keys
within
comfor
table reach
of
the home row.
The
con-
tou
r
ed
keys
fit
your fingers, making typing
more comfortable.
14
On/Off
Control (ON/OFF)
The
on
/
off
control (
ON
/O
FF)
is located on
the
bottom ri
ght
side
of
the keyboard.
To
switch t he typew riter on,
press
the
top
part
of
the control
(ON)
. T
he
red p
ort
ion
of
the control
appears when the typewri
te
r is on.
Warn i
ng:
Ke
ep
ha
i
r,
fingers, and personal
ob
jects
(such
as
br
acelets, necklaces, neckti
es)
out
of
the
p
ri
nt
i
ng
and ribbon
area
when t
he
typewriter is on.
To pre
ve
nt long hair, f ingers, and personal arti
cle
s
from getting caug
ht
o n t he ro
tat
ing shaft in the
machine, you
sh
ou
ld
comply w i
th th
is
warning and
e
ns
u
re
that
other persons
do
al
so.

Margin Scale
and
Margin
Stops
Th
e margin
sca
le and margin stops are l
oca
ted
directly above t he keyboard on t he front
of
your
typewriter. The
re
d ar
row
that m
oves
along
th
e
sca
le
as
you
ty
pe
sh
ows
yo
u t he exact typing
p
os
ition.
These
featur
es
make marg in resetting a
ve
ry simple operation.
The pit
ch
of
yo
ur typewriter is s
how
n o n the left
side
of
th
e margin
sca
le.
Yo
ur
typew
ri
ter is a
12
-
pit
ch (
eli
te) typew riter with a 12-pitch ma
rg
in scale,
w hich means t
ha
t 12 c
ha
ract ers fit in
each
typed
in
ch.
Alw a
ys
us
e a 12-pitch type element
on
t his
typew
ri
ter.
15
To
se
t
or
cha
nge
t he le
ft
or
rig
ht
m
ar
g in :
P
ush
in on t he appropriate margin st
op
and slide
it
to t he correct
pos
ition on the margin
sca
le.
Use t he spacebar
to
move the
ca
rrier out of t
he
w ay w hen
se
tti
ng a margin t o t he ri
gh
t of the
ca
rri
er's
prese
nt loca
ti
on
.
You
ca
n spa
ce
and tab through
the
right ma rgi
n,
but you cannot type t hro ugh t he right margin
unl
ess
you pr
ess
the ma rgin re
le
ase
ke
y
(M
AR
R
EL
).
M argin
Re
lease Key (MAR R
EL
)
Us
e t he margin rel
ea
se key (M
AR
REL) to
mo
ve the
ca
rri
er beyond t he left or right margi
n.
To
move
to
t he le
ft
of
the
left margin:
1.
Press
t he carrier
re
turn
ke
y (
RETU
R
N)
to
retu
rn
t he
ca
rrier to t he left margin.
2 .
Pr
e
ss
the margin rel
ease
key
(M
AR
RE
L
).
3.
Press
the b
ac
k
space
ke
y (
BAC
KS
PA
CE
)
to
backsp
ace
th
ro
ugh the ma rgin.
To t ype
thr
o
ugh
t
he
r
ight
marg
in :
1. When
th
e keyb
oa
rd
locks, pr
ess
the margin
re
lease k
ey
(M
AR
RE
L)
2.
Co
nt inue typ
in
g.

Tab
Control
(SET
and
CLR)
Use
the
tab
contro
l
on
the
left side
of
t
he
key-
board
to
set
and
clear tabs.
To
set
a
tab
stop:
1.
Press
the
spacebar
to
move t
he
carrier
to
the
desired point on
the
writing
lin
e .
2. Press
the
set
end
(S
ET)
of
the
tab
co
nt
rol.
To
clear a tab stop :
1. Press t
he
tab
key
(TAB)
to
mo
ve
to
the
stop
you
w ish
to
clear.
2.
Pr
es
s.the clea r e nd (
CL
R)
of
the t
ab
co
nt
ro
l.
16
To
clear
all
tab stops:
1. Press
the
spacebar
or
tab key (
TAB)
to
mo
ve t he
carrier
all
t
he
way
to
the
right.
2. Press
and
hold
do
wn the clear
en
d (CL
R)
of
the
tab
control while you press t
he
carrier r
etu
rn key
(
RETURN).
T
he
carrier moves
to
t
he
left margi n ,
clearing
al
l
stops
as it moves.
Tab Key
(TAB)
To
mo
ve t he ca
rr
ie r to a tab s
top
, press the
ta
b key
(T
AB)
. Repeat ing this ac
ti
on moves t
he
ca rrier to
each pr
ese
t t ab s
top
on t
he
wri
ti
ng
li
ne
. The tab
key do
es
not
c
aus
e
the
ca
rri
er to s
to
p at
the
rig
ht
ma rgin, unle
ss
a
ta
b
stop
is set a t
th
e right ma
rg
in .
Table of contents
Other IBM Typewriter manuals

IBM
IBM Selectric III Operating instructions

IBM
IBM Executive User manual

IBM
IBM 6747 Manual

IBM
IBM Correcting Selectric III User manual

IBM
IBM Selectric User manual

IBM
IBM C-1 User manual

IBM
IBM Wheelwriter 10 - IBM Wheelwriter 10 Professional... Manual

IBM
IBM Selectric User manual

IBM
IBM Selectric User manual

IBM
IBM Wheelwriter 2500 User manual

IBM
IBM Selectric User manual

IBM
IBM Selectric User manual

IBM
IBM 01 Operating manual

IBM
IBM 6 - Lexmark Wheelwriter 6 Professional... User manual
IBM
IBM B-1 Guide

IBM
IBM Selectric II User manual

IBM
IBM Selectric User manual

IBM
IBM Selectric II User manual

IBM
IBM B-1 User manual

IBM
IBM Personal Wheelwriter 6781 Manual