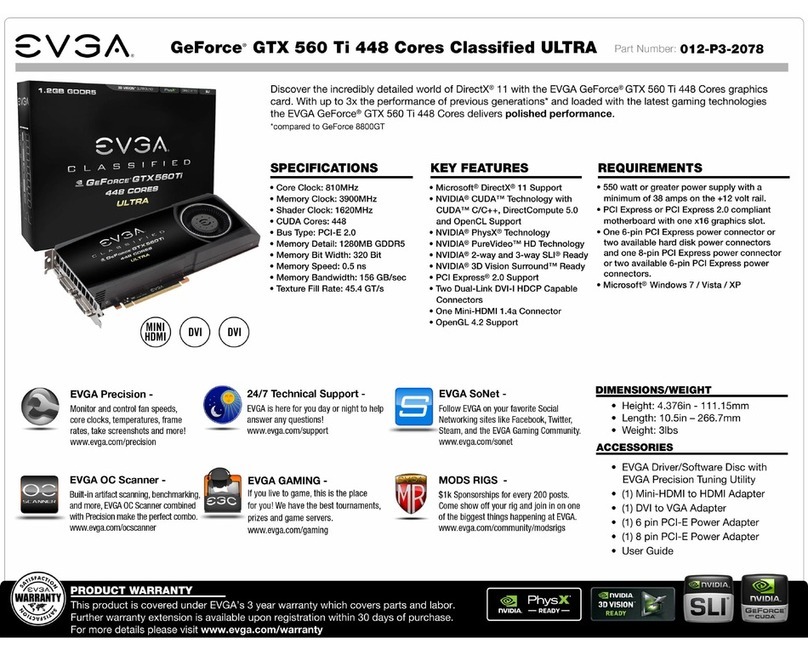
IBM POWER GXT4000P Guide

POWER GXT4000P and POWER GXT6000P Graphics
Adapter
Installation and Using Guide
SA23-1236-00

First Edition (September 2000)
Before using this information and the product it supports, read the information in “Safety Information” on page v and
“Appendix B. Notices” on page 25.
©International Business Machines Corporation 2000. All rights reserved.
Note to U.S. Government Users Restricted Rights--Use, duplication or disclosure restricted by GSA ADP Schedule
Contract with IBM Corp.
Note
Before using this information and the product it supports, be sure to read the general information
under ″Product Warranties and Notices″included with your system unit.

Contents
Safety Information.......................v
Handling Static-Sensitive Devices.................vii
About This Book .......................ix
ISO 9000 ..........................ix
Related Publications ......................ix
Trademarks .........................ix
Chapter 1. Overview ......................1
Software Requirements .....................3
Chapter 2. Preparing for Installation ................5
Checking Prerequisites .....................5
Chapter 3. Installing Device Driver Software .............7
Chapter 4. Installing the POWER GXT4000P and POWER GXT6000P Graphics
Adapter .........................9
Installing the Adapter ......................9
Troubleshooting .......................11
Checking Cables ......................11
Verifying AIX Software Installation ................11
Checking Console......................11
Verifying AIX Hardware Installation ................12
Chapter 5. Display Information ..................13
Changing Resolution and Refresh Rates ...............13
Chapter 6. Software Application Considerations............15
Starting the Server in Overlay and Color Planes.............15
Starting the X Server for the 3D APIs ................15
APIforGLX1.3......................15
API for OpenGL 1.2 .....................15
API for graPHIGS ......................15
Chapter 7. Stereo-Ready System Unit, Sync and Power-Supplied......19
Using the X_STEREO Environment Variable ..............20
Appendix A. Communications Statements ..............21
Federal Communications Commission (FCC) Statement ..........21
European Union (EU) Statement ..................22
International Electrotechnical Commission (IEC) Statement .........22
United Kingdom Telecommunications Safety Requirements .........22
Avis de conformité aux normes du ministère des Communications du Canada. . . 22
Canadian Department of Communications Compliance Statement .......22
iii

Safety Information
DANGER
An electrical outlet that is not correctly wired could place hazardous voltage
on metal parts of the system or the devices that attach to the system. It is the
responsibility of the customer to ensure that the outlet is correctly wired and
grounded to prevent an electrical shock.
Before installing or removing signal cables, ensure that the power cables for
the system unit and all attached devices are unplugged.
When adding or removing any additional devices to or from the system,
ensure that the power cables for those devices are unplugged before the
signal cables are connected. If possible, disconnect all power cables from the
existing system before you add a device.
Use one hand, when possible, to connect or disconnect signal cables to
prevent a possible shock from touching two surfaces with different electrical
potentials.
During an electrical storm, do not connect cables for display stations, printers,
telephones, or station protectors for communication lines.
v

vi POWER GXT4000P and POWER GXT6000P Graphics Adapter: Installation and Using Guide

Handling Static-Sensitive Devices
Attention: Static electricity can damage this device and your system unit. To avoid
damage, keep this device in its anti-static protective bag until you are ready to install it.
To reduce the possibility of electrostatic discharge, follow the precautions listed below:
vLimit your movement. Movement can cause static electricity to build up around you.
vHandle the device carefully, holding it by its edges or its frame.
vDo not touch solder joints, pins, or exposed printed circuitry.
vDo not leave the device where others can handle and possibly damage the device.
vWhile the device is still in its anti-static package, touch it to an unpainted metal part
of the system unit for at least two seconds. (This drains static electricity from the
package and from your body.)
vRemove the device from its package and install it directly into your system unit
without setting it down. If it is necessary to set the device down, place it on its
static-protective package. (If your device is an adapter, place it component-side up.)
Do not place the device on your system unit cover or on a metal table.
vTake additional care when handling devices during cold weather, as heating reduces
indoor humidity and increases static electricity.
vii

viii POWER GXT4000P and POWER GXT6000P Graphics Adapter: Installation and Using Guide

About This Book
Use this book with your system unit documentation to install the POWER GXT4000P or
the POWER GXT6000P graphics adapter with its associated device driver software.
ISO 9000
ISO 9000 registered quality systems were used in the development and manufacturing
of this product.
Related Publications
The following publications contain related information:
vSystem unit documentation for information specific to your hardware configuration
vOperating system documentation for information specific to your software
configuration
This documentation is located on the AIX V4.3 documentation CD. The
documentation information is made accessible by loading the documentation CD onto
the hard disk or by mounting the CD in the CD-ROM drive.
v
PCI Adapter Placement Reference Guide
(for the latest version, you may need to
contact your marketing representative)
v
Adapters, Devices, and Cable Information for Multiple Bus Systems
(for the latest
version, you may need to contact your marketing representative)
Trademarks
The following terms are trademarks of International Business Machines Corporation in
the United States, other countries, or both:
vAIX
vPOWER GXT4000P
vPOWER GXT6000P
Other company, product, and service names may be trademarks or service marks of
others.
ix

xPOWER GXT4000P and POWER GXT6000P Graphics Adapter: Installation and Using Guide

Chapter 1. Overview
The POWER GXT4000P and POWER GXT6000P graphics adapters are single card
adapters that attach to your system unit in a PCI bus slot. The PCI bus interface
provides 64 bit, 66MHz (50MHz systems) and bus master support and requires 3.3 volt
power. These adapters provide 3D graphics acceleration. Connection to the video
monitor is made through a DVI (Digital Video Interface) connector.
Refer to the
PCI Adapter Placement Reference
for supported system units and
supported slot locations.
Note: Be sure to retain your proof of purchase as it might be required to receive
warranty service.
The POWER GXT4000P Adapter supports the following:
v24 bit double-buffered up to 1920x1200
v8 bit double-buffered alpha
v4/8 bit overlay double-buffered
v8 bits of window IDs
v24 bit Z-buffer
v8 bit stencil/clip planes
vOpenGL 1.2, graPHIGS, GLX 1.3, X 11R6
v3D Acceleration:
– Depth Buffering
– Antialiasing
– Gouraud shading
– Fog and atmospheric effects
– Stencil test
– Alpha test
Figure 1. POWER GXT6000P Top View; (POWER GXT4000P does not include shaded technology)
1

– Blending
– Dithering
vTexture mapping:
– 108MB Texture Memory (1280x1024)
– Dual Textures
– 3D Texture
vDisplay resolution:
– 640x480x24@85Hz
– 1024x768x24@85Hz
– 1280x1024x24@85Hz
– 1600x1200x24@85Hz
– 1920x1200x24@76Hz
– 1280x1024x24@120Hz (quad BFR stereo)
– 2048x1536x24@60Hz (Analog only)
(including monitors that comply with ISO 9241, Part 3 Std.)
vStereo viewing
The POWER GXT6000P Adapter supports the following:
v24 bit double-buffered up to 1920x1200
v8 bit double-buffered alpha
v4/8 bit overlay double-buffered
v8 bits of window IDs
v24 bit Z-buffer
v8 bit stencil/clip planes
vOpenGL 1.2, graPHIGS, GLX 1.3, X 11R6
v3D Acceleration:
– Depth Buffering
– Antialiasing
– Gouraud shading
– Fog and atmospheric effects
– Stencil test
– Alpha test
– Blending
– Dithering
vTexture mapping:
– 108MB Texture Memory (1280x1024)
– Dual Textures
– 3D Texture
– Texture Color Table
vDisplay resolution:
2POWER GXT4000P and POWER GXT6000P Graphics Adapter: Installation and Using Guide

– 640x480x24@85Hz
– 1024x768x24@85Hz
– 1280x1024x24@85Hz
– 1600x1200x24@85Hz
– 1920x1200x24@76Hz
– 1280x1024x24@120Hz (quad BFR stereo)
– 2048x1536x24@60Hz(Digital and Analog)
(includes monitors that comply with ISO 9241, Part 3 Std.)
vStereo viewing
vHardware Geometry Acceleration and Lighting
Software Requirements
The POWER GXT4000P and the POWER GXT6000P are supported on AIX Version
4.3.3 with AIX 4.3.3.0-05 Recommended Maintenance package. If support is required
on an AIX release other than AIX 4.3.3, ensure that this adapter is supported on that
release of AIX prior to installation. Contact your support representative for assistance.
OpenGL
requires the OpenGL 1.2. for AIX, Version 4.3.3 Licensed Program Product
(5696-939). If support is required on an AIX release other than AIX 4.3.3, ensure that
this adapter is supported on that release of AIX prior to installation. Contact your
support representative for assistance.
graPHIGS
requires the graPHIGS for AIX, Version 4.3.3 Licensed Program Product
(5696-907). If support is required on an AIX release other than AIX 4.3.3, ensure that
this adapter is supported on that release of AIX prior to installation. Contact your
support representative for assistance.
Chapter 1. Overview 3

4POWER GXT4000P and POWER GXT6000P Graphics Adapter: Installation and Using Guide

Chapter 2. Preparing for Installation
This chapter helps you prepare to install the POWER GXT4000P or the POWER
GXT6000P graphics adapter.
Note: If AIX is not installed on your system unit, install your graphics adapter before
you install the operating system. (See “Chapter 4. Installing the POWER
GXT4000P and POWER GXT6000P Graphics Adapter” on page 9.) When you
install AIX, your device driver software automatically installs.
If AIX is operating on your system, install your device driver software before you
install your graphics adapter. (See “Chapter 3. Installing Device Driver Software”
on page 7.)
Checking Prerequisites
To install the POWER GXT4000P or the POWER GXT6000P graphics adapter, make
sure you have the following on hand:
vThe adapter
vThis document,
POWER GXT4000P and POWER GXT6000P Graphics Adapter
Installation and Using Guide
vThe user’s guide for the system unit
vThe operating system documentation
v
PCI Adapter Placement Reference
vA flat-blade screwdriver or a 5mm nut driver
vMedia containing the device driver software
5

6POWER GXT4000P and POWER GXT6000P Graphics Adapter: Installation and Using Guide

Chapter 3. Installing Device Driver Software
This chapter explains how to install the device driver software.
Be sure you have read “Chapter 2. Preparing for Installation” on page 5 to determine:
vIf you should install your device driver software first, go to step 1 and continue with
this section.
vIf you should install your graphics adapter hardware first, go to “Chapter 4. Installing
the POWER GXT4000P and POWER GXT6000P Graphics Adapter” on page 9.
When you install AIX, your graphics adapter device driver automatically installs.
To install the device driver software on an AIX system, do the following:
1. Turn on the system unit power.
2. Log in as root user.
3. Insert the media containing the device driver software (example: CD-ROM) into the
appropriate media device.
4. Type the following System Management Interface Tool (SMIT) fast path:
smitty devinst
5. Press Enter. The Install Additional Device Software screen highlights the INPUT
device/directory for software option.
6. Select or type
your input device
:
vPress F4 to display the input device list. Select the
name of the device
(example: CD-ROM) that you are using and press Enter.
OR
vIn the entry field, type the
name of the input device
you are using and press
Enter. The Install Additional Device Software window highlights the SOFTWARE
to install option.
7. Press F4 to display the SOFTWARE to install window.
8. Type the following to display the Find window:
/
9. Type the following for POWER GXT4000P:
devices.pci.14106E01
OR
10. Type the following for POWER GXT6000P:
devices.pci.14107001
Press Enter. (The system finds and highlights this device driver software.)
Example:
devices.pci.14107001
11. Press PF7 to select the highlighted device driver software and press Enter.
7

12. The Install Additional Device Software screen displays. Entry data fields are
automatically updated. Press Enter to accept the data.
13. The ARE YOU SURE window displays. Press Enter to accept the data.
14. The COMMAND STATUS screen appears.
vThe term RUNNING is highlighted to indicate that the install and configure
command is in progress.
vWhen RUNNING changes to OK, scroll down to the bottom of the page and locate
the Installation Summary.
vAfter a successful installation, SUCCESS will appear in the Result column of the
summary at the bottom of the page.
15. Remove the installation media from the drive.
16. Press F10 to exit SMIT.
17. Go to graphics adapter install procedure, “Chapter 4. Installing the POWER
GXT4000P and POWER GXT6000P Graphics Adapter” on page 9.
8POWER GXT4000P and POWER GXT6000P Graphics Adapter: Installation and Using Guide

Chapter 4. Installing the POWER GXT4000P and POWER GXT6000P
Graphics Adapter
This chapter explains how to install the graphics adapter. Before you begin, be sure you
have read “Handling Static-Sensitive Devices” on page vii.
Attention: Do not remove the POWER GXT4000P or POWER GXT6000P adapter from
its anti-static package at this time.
Installing the Adapter
1. Be sure you have read “Chapter 2. Preparing for Installation” on page 5 to
determine:
vIf you should install your graphics adapter hardware first, go to 2 and continue
with this section.
vIf you should install your device driver software first, go back to “Chapter 3.
Installing Device Driver Software” on page 7. Return here to install your
hardware.
vIf you should install your POWER GXT4000P or POWER GXT6000P Graphics
adapter as a second graphics adapter and you have only one display, leave the
display attached to the original adapter when you first turn on the system power.
This enables you to redirect the console to the new graphics adapter during the
power on sequence.
2. Refer to the User’s Guide that shipped with your system unit to perform the
following:
vShut down your system unit
vInstall the graphics adapter in your system unit
Refer to the
PCI Adapter Placement Reference
to identify supported installation
slots for a POWER GXT4000P or POWER GXT6000P adapter. Return here to
complete the process.
Attention: Failure to install your graphics adapter in the correct slot can cause
your adapter or system unit to function incorrectly.
3. After you have completed the basic installation, connect your keyboard and mouse
to the system unit and connect your video cable to the graphics adapter.
If only one display is available during installation and you are installing the POWER
GXT4000P or POWER GXT6000P as the second graphics adapter, the display
must be connected to the original graphics adapter so that you can redirect the
console to the new graphics adapter.
Attention: If you are attaching a display which has a 15-pin D-shell connector, the
Digital Video Interface (DVI) to 15-pin D-shell converter supplied with the adapter
must be used.
4. Turn on both your system unit and your display. Follow any instructions on the
screen.
9

5. A select display (console) icon appears on your screen. Press the number key (for
example, 1 or 2) on your keyboard of the monitor you want to be your default
display.
Note: If you are planning to run applications such as OpenGL 1.2, GLX 1.3, graPHIGS,
or X 11R6, be sure to install the appropriate level of the licensed program after
you install the POWER GXT4000P or POWER GXT6000P Adapter.
10 POWER GXT4000P and POWER GXT6000P Graphics Adapter: Installation and Using Guide
This manual suits for next models
1
Table of contents
Other IBM Video Card manuals
Popular Video Card manuals by other brands

Gigabyte
Gigabyte GV-N68T256DH user manual
Nvidia
Nvidia 9500GT - GeForce 9500 GT 550MHz 128-bit DDR2 1GB PCI-Express Pcie x16 Video... user manual
ATI Technologies
ATI Technologies X1650 - AMD Radeon XT 256MB PCI-E Graphics... user guide

ATI Technologies
ATI Technologies RADEON 117-40122-20 Features guide
POWERCOLOR
POWERCOLOR Red Devil RX 6900 Series Quick installation guide
EVGA
EVGA GeForce RTX 3080 Ti FTW3 Ultra Gaming user guide

