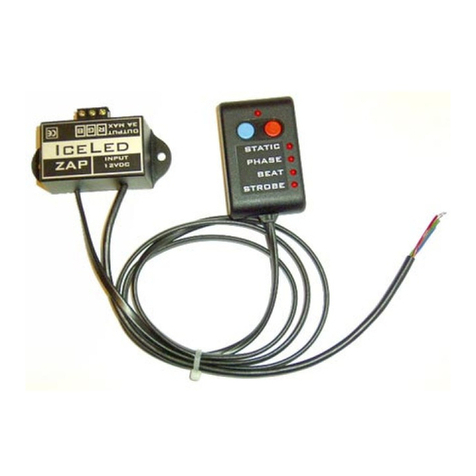
ICELED ZEN User manual

ICELED Ltd. ZEN Guide V6
WARNING
WARNINGWARNING
WARNING
This product has been deliberatel designed to create a highl noticeable
lighting effect that will turn heads at car shows and exhibitions. Because
of this it is EXTREMELY important that it is not used on the public highwa
not used on the public highwanot used on the public highwa
not used on the public highwa
to prevent the distraction of other road users.
Having issued this warning ICELED Ltd. Will not accept an responsibilit for
issues arising from an failure to compl with this clear instruction.
ICELED Ltd. Will not accept responsibilit for an other issues arising from
improper use or fitting of this product as these matters are be ond our control.
This product is capable of producing stroboscopic lighting effects when
connected to IceLed light sources.
IceLed
Electro St ling
ZEN
USER GUIDE
INSTALLATION GUIDE

www.IceLed.co.uk
IceLed ltd ZEN GUIDE v4
2
Features
ICELED ZEN is a programmable lighting controller that can independently connect
and command between one and four zones of interior or exterior ICELED emitters
ZEN allows each Zone to be lit with different colours and intensity levels according to
any of 10 user-predefined programs Simply selecting the appropriate program can
quickly make dramatic changes to the entire lighting arrangement
The four zones may correspond to separate areas - inside a car for example; floor,
console, under-dash and roof lights Some zones may need to be dimmed-out for
driving – in which case certain programs can be edited to dim these zones and can
be selected whenever required Not all zones have to be used, ZEN will be equally
useful providing control over fewer than four zones If more than four zones are
required, additional ZEN controllers can also be linked together
Lighting effects
Each of the 10 programs has access to a number of lighting effects that can be
applied to individual zones For example, there is a variable-speed ‘sweep’ function,
which can be used to cycle through a range of colours Sound reactivity can also be
applied to animate the colour or other qualities of the light produced in time with a
music beat A further option allows zones to be synchronised to the ICELED UFO
controller when present A separate ‘lightning’ program causes all zones to strobe in
random sequences
Automatic operation
Each ZEN has an Enable input that can be connected to an external circuit (e g door
switch or sidelights) allowing a preset lighting scheme to be switched-on
automatically whenever the external circuit is active This always selects program 0
The most obvious application is for switching-on interior lighting when doors are
opened, however, ZEN may also be useful for controlling external lighting where the
colour of each zone can be preset to conform to a particular lighting requirement e g
white to the front, red to the rear etc At other times different programs can be
selected to override those colours with something more interesting for shows or
other off-road meetings
IceLed
ZEN

www.IceLed.co.uk
IceLed ltd ZEN GUIDE v4
3
Remote Control quick-reference
For your convenience the remote control supplied with ZEN is a “universal” type that
can be programmed to operate up to four different devices In addition to being used
to operate ICELED controllers it may therefore also be used to operate common
Audio/Visual equipment As supplied the remote is set to operate ZEN on both of the
rightmost device buttons
Note
–
The remote control device code for ZEN is
0172
To assign a particular code to a device select button first press the target device
button then press and hold the setup button until the indicator lights Finally enter
the four-digit code for your device The indicator should go straight out If it flashes
twice then the code is not allowed
P
rogram
dit
mode
Hue
up
down
Saturation
more
less
Level
more
less
Program
P
lay mode
Colour
range
up
down
Audio effect
range
up
down
Beat
divider
up
down
Activate programs 0 to 9
(Hold to edit programs)
Demonstration mode p<p
Program
P
lay mode
Remote control
setup
Programs remote
control to operate
up to four
different devices
(See note below
for details)
xit
Returns directly to
Program Display mode
from any other mode
Unused
by ZEN
Preset ‘pure hue’ selection
Program
dit
m
ode
Adjust
sweep speed
Program
P
lay mode
Step thru Zones 1 to 4
(Hold to step thru additional
ZEN controllers)
Program
dit
m
ode
Step thru programs 0 to 9
Hold for Strobe
Hold for program 0
Program
P
lay mode
Audio activation
on/off
Power
on/off
Remote
-
controlled Devi
ce select

www.IceLed.co.uk
IceLed ltd ZEN GUIDE v4
4
Z N Terminology
HSL Colour model
ZEN makes extensive use of the
HSL
colour model to provide easy access to a wide
range of attractive colours and effects This model specifies colour using three
components familiar to artists:
Hue
,
Saturation
and intensity
Level
Whenever ‘colour’ is mentioned in this guide, it should always be thought of as being
a particular combination of various levels of
hue
,
saturation
and
level
resulting in one
of the two million colours that ICELED light sources can produce – including pastel
shades, white and even black The following diagrams should make the role of each
component easy to recognise:
Hue
adjusting the value of
hue
shifts the colour along the visible spectrum e g from
magenta to blue
0% 100%
Saturation
for any given
hue
(e g blue in the example below) increasing the
amount of
saturation
produces a purer
hue
– or more vivid colour
0% 100%
Level
for any given combination of
hue
&
saturation
(e g pale blue in the example
below) increasing Level boosts the overall amount of light produced
0% 100%
In the above examples, the full control range is arbitrarily depicted as spanning from
0% to 100% This represents the lower and upper limits of the remote control range
during colour editing operations
Home Colours
In order to establish a particular lighting theme for
each program, all zones may be assigned individual
‘home’ colours in HSL format Home colours
provide a starting point for the various effects and
are set up in Program dit mode Each ZEN
controller holds a total of 44 home colours
Z N Operating Modes
Standby – ready for switch-on with remote control
Program Play – Zones lit according to program
Demonstration – programs played at random
Program dit – home colour and option definition
NOT
–
Levels
should normally be
kept at maximum except for when
deliberately dimming-down certain
zones or making them completely
dark
Lower
Saturation
settings result in
brighter, whiter, colours However,
some effects like the sweep function
will be unable to influence colours
with very low saturation To adjust
the
Hue
of such colours, first
increase the saturation so the hue
can be seen

www.IceLed.co.uk
IceLed ltd ZEN GUIDE v4
5
Basic operation
Press the orange power button to turn all Zones on or off
At switch-on the
most recently selected program
will be
restored Alternatively, press any numbered button to
activate the corresponding program directly In either case
ZEN enters Program Play mode and each Zone shows its
own programmed colours
Remote display
The remote display normally shows the active program
number but will also provide other useful information
depending on the mode of operation A blank display except
for small glowing dot indicates that the control unit is in
Standby mode and power consumption is reduced to a
minimum
Selecting programs
In addition to the number buttons 0-9 the and buttons labelled p can be used
to step sequentially through each of the 10 preset programs plus the ‘Lightning’
strobe effect The strobe effect differs from the other programs in ways that will be
described after the general descriptions Normally a smooth transition will be
generated between one program and the next Once the highest or lowest program
has been reached, the buttons will cease to step any further in that direction
Program recall
Each program recalls a number of private settings that can be adjusted to generate a
unique lighting arrangement Settings that apply to each individual Zone are preset
in Program dit mode while those equally applicable to all zones are adjusted ‘live’
in Program Play mode The following table summarises the settings recalled
whenever a new program is selected
Setting Zone 1 Zone 2 Zone 3 Zone 4
Adjusted
Home Colours
HSL HSL HSL HSL
Zone Options
Free UFO
Mute Lock
Free UFO
Mute Lock
Free UFO
Mute Lock
Free UFO
Mute Lock
In Program
dit mode
Sweep speed
Min–max
Colour Range
Manual, 1–9, unlimited, random
Audio effect
Level–hue–saturation
Beat divider
Pattern a–d,
1:1 1:2 1:4
Live
in
Program
Play mode
Demonstration mode
ZEN can be instructed to make a continuous sequence of random program
selections on its own A new random selection is initiated on each press of
the p<p button shown left If an audio trigger is present each new
random program will be selected in time with the music
If ZEN is in Standby when this button is pressed it will automatically switch on Any
other button-press immediately cancels Demonstration mode and restores manual
program selection
p
p

www.IceLed.co.uk
IceLed ltd ZEN GUIDE v4
6
Note
–
The Zones
will flash to warn
whenever high or
low adjustment
limits have been
reached
Live program adjustments
In Program Play mode the four vertical pairs of buttons
shown right can be used to make immediate changes to the
appearance of the lighting performance
Colour sweep speed
The rate at which colours are swept around their home
settings can be altered from slow to fast using the two ‘ramp’
buttons At the lowest setting sweeping is temporarily halted
at the colours on display
Colour range
The colour sweep can be adjusted to
include a wider or narrower range of
colours using the leftmost pair of
multi-function buttons If the range is
set to zero the ‘ramp’ buttons shown
above will shift the colour manually
instead of changing sweep speed
Available colour ranges
The Colour range buttons step up and down through the
ranges listed below The selected range applies to all zones
Ranges 1 to 9 restrict the colour sweep to varying percentages of the colour
spectrum starting from the home colour The sweep repeatedly cycles away from,
and returns to the hue of the home colour in 10% increments
All zones being swept will be
hue-shifted
relative to their
home colours
set in
Program dit mode This means that if all zones were preset to the same
home
colour
they would all continue to track together showing the same sweeping colour
If different
home colours
were preset in each zone then their relative offsets in
hue
will be maintained so that different colours would continue to be shown in each
zone
Remote
display
Colour range xample
Random colours
Unlimited colours
90% of spectrum
40 – 80%
30%
20%
10%
Manual colour selection ^Home colour
10 20 30 40 50 60 70 80 90 %
^Home colour
Colour
range
Unlimited
colours sweep
through the entire spectrum,
while random colours are
obtained from a ‘random
walk
’ around the spectrum
When selecting a colour
range the remote display
briefly shows
followed
by a letter or number from
the table on the left
After a few seconds
without any changes the
display returns to showing
the current Program
number
Similar letter/digit
sequences are used in
many other operations

www.IceLed.co.uk
IceLed ltd ZEN GUIDE v4
7
Audio activation
Audio activation is
toggled on and off with
each alternate press of
the loudspeaker button
The small dot on the remote
display lights brightly when audio
activation is enabled and blinks in
time with the internal beat
detector
Adjusting the audio effect
If zones are free to respond to
sound then the way they do so is
determined by the setting of the
Audio effect range
In the top 50% of the range each audio beat reduces the
saturation
of the
colour towards white The saturation effect becomes more pronounced the
further towards the maximum limit the setting is taken At 100% each beat
completely de-saturates the colour forcing it to white before settling back
to the amount of saturation defined by the
home colour
after the beat
While in this upper control region the remote display shows:
In addition to the saturation effect, around the centre of the range, every
beat also steps the
Hue
of each zone by a variable amount The size of this
step varies symmetrically either side of the centre of the range with the
50% position providing the biggest step This position also coincides with
zero change in both
Level
and
Saturation
and is identified with – on the
remote display The step in
Hue
falls off to zero below the 25% and above
the 75% points leaving only
Level
or
Saturation
affected by the audio beat
In the lower 50% of the range the audio beat increases the
Level
of each
zone pulsing it to the
home
colour
setting before fading back into darkness
until the next beat arrives Increasing the setting gradually raises the
minimum
Level
up to a point halfway through the control range at which
point no dimming will occur at all While in this lower control region the
remote display shows:
The audio effect can be disabled for individual
Zones in Program dit mode This might be
useful for setting up programs having particular
zones that are less distracting than others
Disabled zones may still respond to colour
sweeping if desired using the options described
on page 9
100%
75%
50%
25%
0%
Audio effect
range
Note
–
for a given program, the
chosen Audio effect applies
globally to all zones opting-
in for
sound activation Other
programs may be configured
with different effects to create a
variety of lighting schemes each
with their own distinct
appearance

www.IceLed.co.uk
IceLed ltd ZEN GUIDE v4
8
Audio beat divider
The triggering of audio effects can be modified by the beat divider setting Four
different trigger patterns can be selected (a b c d) and each pattern can be set to
respond to every beat, every second beat or every fourth beat
Program exceptions
Program 0 can be activated automatically by
an external circuit e g a switch operated by an
opening car door This only happens when ZEN
is in Standby mode so an opening door will not
override a program already in use Switching off
the unit with the remote control
when program
0 has been circuit activated
temporarily disables
this feature as it suggests that lights are not
automatically required Automatic operation is
restored the next time ZEN is switched on using
the remote control
Leaving the vehicle
If a program is active, selecting program 0 rather than switching-off before opening
the door and leaving the vehicle provides continuous ambient illumination Once
selected, program zero remains on until the enable input instructs it to switch off
This will be the case once the door has been opened and closed
Strobing
In order to prevent inadvertent operation the ‘Lightning’ strobe effect can only be
activated by holding down the p button The strobe responds to sound activation
and to the speed control When engaged the remote display shows
(‘Lightning’
strobes) To enter Program dit mode for the strobe hold down the p button
while the strobe program is active
Remote
Display
Trigger pattern
all zones respond simultaneously
effects alternate between zones 1&3, 2&4
effects alternate between zones 1&2, 3&4
each zone responds sequentially
Beat
divider
In the case of being switche
d
-
on
automatically by opening a car
door, program zero will remain on
for a short period after the door is
closed to provide an interior light
delay facility By sensing the supply
voltage, ZEN brings about an early
termination of this period when the
car engine is started or when
leaving the car after a journey

www.IceLed.co.uk
IceLed ltd ZEN GUIDE v4
9
In Program Play mode the audio effect buttons control the degree to which all
zones strobe together At the lowest setting zones flash independently in a random
sequence At higher settings zones tend towards flashing together
Program diting mode
Every program recalls its own set of
home colours –
one for each zone To edit the
colours for a particular program press and hold down the corresponding
program button until
appears on the remote display
This puts the controller into
Program
diting
mode for zone 1 and all zones freeze
on their
home colours
In this mode all the buttons shown below assume different
functions to those assigned in Program Play mode
Preset Hues
The two ‘ramp’ buttons quickly step through a
selection of pure Hues (Saturation and Level both set
to maximum) providing a useful starting point for
fine-tuning with the HSL buttons below
Zone Selection
The and buttons labelled p step up and down
through each of the four zones to be edited The remote
display shows
to
to confirm which zone has
been selected and all light sources connected to that
zone briefly blink in white to identify themselves as ready
for editing To access zones in any additional ZEN(s) see
details on page 13
Hue - Saturation - Level
The three pairs of multi-function buttons on the right adjust the
individual colour components as illustrated in the examples The
remote display shows which component is being changed by
temporarily flashing
or
on the remote display
Zone options
In addition to the HSL colour definition each zone has four private options
that determine how the zone reacts to colour changing influences In
Program diting mode the audio key cycles continuously through each
of the four available options with each successive press
A series of blinks from the zone being edited keeps track of the option selected for
that particular zone To select any of the four options shown in the table below,
repeatedly press the audio button until the corresponding number of blinks is seen
Blinks
1 Free Zone is free to colour sweep and react to sound
2 UFO As above but will be overridden by UFO if present
3 Mute Zone is colour swept only (doesn’t react to sound)
H S L

www.IceLed.co.uk
IceLed ltd ZEN GUIDE v4
10
4 Lock Zone remains fixed on home colours
xiting Program diting mode
To leave Program diting mode press the xit button shown to the left
Program Play is restored with the new home colours and options
Factory default settings
An arbitrary set of ‘Factory defaults’ are provided to allow the controller to be
demonstrated immediately following installation All programs can be edited to suit
individual requirements thereafter The following table gives an overview of the
default settings provided:
The full set of factory defaults shown above can be restored by holding down the 0
button while in Program dit mode for program 0 After several seconds ZEN will
automatically reset itself with the factory defaults in place This operation overwrites
all program settings so use with caution
Live Program adjustments
Home Colours & Options
Program
Sweep
speed
Colour
range
Audio
effect
Beat
divider
Zone
1
Zone
2
Zone
3
Zone
4
fast
Free Free Free Free
fast
UFO UFO UFO UFO
fast
Free UFO UFO UFO
medium
Mute Mute UFO UFO
medium
Free Free Free UFO
medium
Mute Mute Free Free
slow
Free Free Free Free
slow
Free Free Free Free
slow
Free Free Free Free
manual
Free Free Free Free
manual
Lock Lock Lock Lock

www.IceLed.co.uk
IceLed ltd ZEN GUIDE v4
11
Remote display
ECU
Installation
The complete kit consists of:
1 x ECU
1 x Remote display
1 x Remote control handset
Step 1: Install the CU
The ECU must not be exposed to moisture or excessive heat
so should therefore be located inside the car or luggage bay
– not outside or within the engine bay An ideal location
might be somewhere under the dashboard, with a short
route to the car battery The box should be secured to a flat
surface using the three short self-tapping screws provided
Ensure that the drilling of these holes will not damage wiring
or other equipment on the other side Care should also be
taken not to over-tighten these fixings
A fourth hole will be required nearby to attach the chassis return wire It is not
sufficient to use any of the case screws for this connection, as it needs to be fully
tightened in order to make a good connection to the metalwork Do not connect
either of the power wires yet
Step 2: Locate the remote display
The remote display unit plugs into a socket on the rear of the ECU
The display should be positioned
where the driver can see it and, as
it also receives infrared commands
from the remote handset, it should
be located at window level to allow
the handset to be operated from
outside the vehicle
An ideal place for the remote
display might be in the corner of the
dashboard where it meets the
windscreen
Step 4: Wiring the CU
The 3-way connectors terminating the red green and blue wires from the light
sources in each zone can be plugged into the appropriate zones These plugs can be
rearranged at any time to reassign the lights to different zones
Connections to the 12V supply should be made with the fuse temporarily
removed from its holder in the red lead.
The red + wire should be run directly
to the vehicle battery if possible, in order to maintain a permanent supply for
standby mode Other power ‘pick-up’ points may be suitable so long as they provide
a constant supply In either case the fuse holder must be located nearest the supply
end so that the fuse can be effective in protecting the wire all the way back to the
1 x Fused supply wire
1 x Chassis return wire
3 x Self-tapping screws for mounting ECU
1 x Self-tapping screw and washer for chassis return wire
Installation should be
carried out in the
following sequence
after first reading
through every step (this
will assist in locating
everything in the best
position)

www.IceLed.co.uk
IceLed ltd ZEN GUIDE v4
12
ECU To maintain protection, if this wire is to be shortened at all, it must be cut off at
the end furthest from the fuse
The ring terminal on the end of the short black wire needs to be firmly attached to
the vehicles metalwork using the self-tapping screw and serrated washer supplied
A good contact is essential here
If an external enable is to be used it can be connected now A switch connecting this
input to chassis when the door is open or a connection to the sidelight circuit are
typical examples of external enables Any small-gauge wire will be suitable for this
connection
Step 5: Powering-up and testing
Once the fuse and 12V plug are inserted the remote display should light up showing
a version number After a few seconds the display should clear down to just a
standby dot showing that the controller is ready Press the power button on the
remote handset to switch on the zones If the external enable was active during
power-up it will automatically switch to program 0 instead of entering standby mode
Adjusting the audio level
The ECU will automatically adapt to different sound levels over a wide range so no
adjustment should be necessary However a variable attenuator is provided at the
rear of the unit if the sound levels are unusually high This might be required if the
patterns do not respond well to the music
The attenuator is adjusted with a
small flat bladed screwdriver through
a hole in the case Turn the dial
clockwise to reduce sensitivity
Optional Line-level connections to ICE
Zone 1
R G B
Zone 2
R G B
Zone 3
R G B
Zone 4
R G B
Aux
E O I
12V
+ -
Suppl Voltage range 8V min ~ 18V max (60 Watts)
R
Red
wire to light source(s)
G Green wire to light source(s)
B Blue wire to light source(s)
+ 8-18VDC @ 5A max (<25mA standby)
- Chassis return
E External enable (Program 0 selection)
O Serial output (Expansion output)
I Serial input (UFO/Expansion input)

www.IceLed.co.uk
IceLed ltd ZEN GUIDE v4
13
A direct line-level connection can be made to In-Car Entertainment systems using the
optional link cable This automatically disables the internal microphone so ensuring
that music alone activates the light show – to the exclusion of all external sounds
The attenuator is still effective when a direct connection is used
Expanding the number of zones
Multiple ZENs can be linked together to act like one single controller with extra
zones All that is required is to run a wire from the ‘O’ terminal of one ZEN to the ‘I'
terminal of the next The first controller is the only one that should have a remote
display plugged in Additional controllers take their commands across the expansion
link This is also true of the line-in audio input (if used) – only the first device in the
chain needs to be wired to an audio source
Each additional controller requires its own connection to the 12VDC supply
diting expansion zones
In normal operating mode linked controllers all respond to the same program and
speed changes However in order to edit the
home colours
and
options
in zones
belonging to expansion controllers it is necessary to step from
controller to controller while in Program diting mode
To step from the ZEN at the start of the chain to the next
controller up press and hold the zone select up button
When the shift has been made, the first zone of the
expansion controller selected will blink identifying the new
range of zones that can be edited At this point the button
can be released Likewise, shifting back down can be
accomplished by keeping the down arrow button pressed instead
Press the xit button to leave Extended editing mode at any time
The following diagram illustrates how control is passed from controller to controller
using the method described above:
Audio
Enter
Program
diting
mode by
pressing and
holding
program
number
button
Z N#1
Step up and
down within
‘edit zones’
E1 to E4 with:
p
Hold down
to shift to next
controller up
Z N#2
Step up and
down within
‘edit zones’
E1 to E4 with:
p
Hold down
to shift to next
controller down
Hold down
to shift to next
controller up
Z N
#
Step up and
down between
‘edit zones
E1 toE4 with:
’
p
Hold down
to shift to next
controller down

www.IceLed.co.uk
IceLed ltd ZEN GUIDE v4
14
xpansion zone enable
Each additional ZEN may have its own enable input (E) wired to a separate circuit to
automatically switch to program 0 In this case only the four zones associated with
that particular controller will be activated Groups of zones can be ‘ganged together’
simply by wiring the same enable signal to each controller
Enable polarity
The default is for ZEN to switch to program 0 when the enable input is grounded It
is possible to re-program this so that connecting 12Volts to the enable turns it on
instead This might be required if ZEN is to operate automatically from the sidelight
circuit for example
To change polarity, the remote display must be plugged in
and either
or
on the remote handset should be
pressed within three seconds after connecting power to
ZEN The remote display first shows a version number
followed by a dot, then either 0 or 1 indicating active low
(ground) or active high (12V)
e g
version 6, active low
This can be changed to
active high
by pressing
on the
remote control handset within three seconds
The display will flash back the new setting e g
Linking-up with UFO
ZEN’s expansion input (I) can also be wired to the Interior data terminal (I) on UFO
Doing so allows zones to show the global ICELED colour generated from the under-
body pattern In this case any external audio input need only be connected to UFO
The signal is then passed from UFO to ZEN via the link ZEN still requires its own
remote display but may continue to be expanded as described above
Temporarily syncing Z N with UFO operations
When linked-up to UFO, ZEN can be set to obey program changes, sound
activation and on/off commands from the UFO remote control To enable
this first press the xit button while ZEN is the selected device Next,
press the device button for UFO on the universal remote and both UFO
and ZEN will respond to the same program changes etc together
Re-select ZEN as the device on the universal remote and operate it normally to
cancel synchronised operation
A udio
UFO
ZEN
ZEN expansion

www.IceLed.co.uk
IceLed ltd ZEN GUIDE v4
15
pecifications
Nominal supply voltage: 12 Volts DC (1)
Standby current drain: 0 02 Amps
Maximum load current: 5 Amps
Audio sensitivity: 54dB to 102dB
Data input: Any ICELED controller output
(1) Voltage range of between 8 and 18 Volts Reverse polarity and over-voltage
protection are built in
Resources
To see the full ICELED product range visit http://www iceled co uk the official
ICELED website
For more suggestions and advice visit http://iceled co uk/area51/ the official ICELED
user forums
Table of contents
Other ICELED Controllers manuals