iCES IBT-6 User manual

Model: IBT-6
User manual Speakertower with Bluetooth, FM radio and USB
Gebruiksaanwijzing Luidsprekertoren met Bluetooth, FM-radio en USB
Bedienungsanleitung Lautsprecherturm mit Bluetooth,
UKW-Radio und USB
Mode d’emploi - Colonne acoustique avec Bluetooth, radio FM et USB
Manual de usuario de la torre altavoz con Bluetooth, radio FM y USB

Index
English.............................................................................................................................................. 3
Nederlands .................................................................................................................................... 12
Deutsch.......................................................................................................................................... 22
Français.......................................................................................................................................... 31
Español .......................................................................................................................................... 41
Version 1.0

English
IBT-6
READ THIS INSTRUCTION MANUAL BEFORE OPERATING THE APPLIANCE. AND
SAVE IT FOR FUTURE REFERENCE.
Thank you for purchasing Tower Speaker
Getting started
Remove the equipment from the box.
Remove packaging and place inside the box to store for future reference and/or use
In the box
Tower speaker unit
Tower stand and screws to attach the unit
3.5mm Aux cable
Instruction manual
Remote control
Features
4 Stereo Speakers
Bluetooth® Connectivity
Aux Jack Included
Aux Cable Included
USB Port for charging
USB Port for playing MP3
SD card slot for playing MP3
FM radio
LED display
Safety instructions
When using electrical equipments basic safety precautions should always be followed
This equipment is not intended for use by persons (including children) with reduced
physical, sensory or mental capabilities or lack of experience or knowledge. They
should be given appropriate supervision and instructions to use the equipment by a
person responsible for their safety.
Ensure the equipment is not too close to heat emitting appliances or placed in
direct sunlight.

Check that the voltage indicated on the data plate corresponds with that of the
local network before connecting the equipment to the mains power supply.
Do not leave the equipment unattended while connected to the power supply
Do not immerse the equipment in water or any other liquids.
It is imperative to unplug the power cord after the equipment has been used,
before it is cleaned and while being repaired.
Close supervision is required when using this equipment near children.
Never leave the equipment within reach of children.
Repairs to electrical appliances should only be performed by qualified personnel.
Improper repairs may place the user and/or equipment at serious risk.
This equipment is intended for household use only and should not be used for
industrial or commercial purposes.
Do not operate this appliance with a damaged plug or cord, after a malfunction or
after being dropped or damaged in any way.
Do not use this equipment for anything other than its intended use.
This equipment must be placed on a stable, heat resistant surface.
Do not push objects into any openings as damage to the equipment and/or electric
shock may occur.
Do not use this product in wet or bad weather conditions.
This product is not a toy.
Do not play music at excessive levels especially near children.
Description of parts
Top panel
1. STANDBY
2. Mode
3. Mute
4. Volume control
5. LED display
6. Play/pause
7. Skip forward
8. Skip backward
Front
1. Speaker
2. Remote Sensor
(Point remote to the Remote Sensor)
Back panel
1. USB port for charging(5V 1A)
2. 3.5mm Aux-in Jack
3. SD card slot for playing MP3
4. USB port for playing MP3
5. FM antenna
6. AC Cable

Remote Control
**Point remote at middle of speaker**
1. STANDBY
2. USB/SD mode button
3. Mute button
4. Aux in button
5. FM radio button
6. Bluetooth button
7. Skip backward button
8. Play/Pause button
9. Skip forward
10. Scan button
11. CH-
12. CH+
13. Bass+ effect button
14. Bass- effect button
15. Treb+ effect button
16. Treb- effect button
17. Volume+ button
18. Volume- button

Setting up the speaker tower -Attaching the base
1. Take the tower body and base carefully out of the packaging.
2. Take the screws and washers out.
3. Attach the base to the body aligning the holes on the base with the holes on the
tower.
4. Screw the base onto the main unit.
5. Place the tower upright on the floor and it is now ready to use
Power setup
Connect the AC/DC adapter to the DC in socket on the speaker back panel and plug the
adaptor into the mains socket.
Using the remote control
The battery
To get your remote control working intially, pull the clear tab from
the battery compartment located at the bottom of the remote.
If your remote becomes intermittent or you find you have to move
closer the unit to operate, then probably the batteries need to be
replaced.
To replace the batteries, slide the holder out from the base of the
remote. Remove the battery and replace with a 3 volt Lithium
CR2025.
WARNING !
Do not ingest the battery , Chemical Burn Hazard
(The remote control supplied with) This product contains a coin/button cell battery.

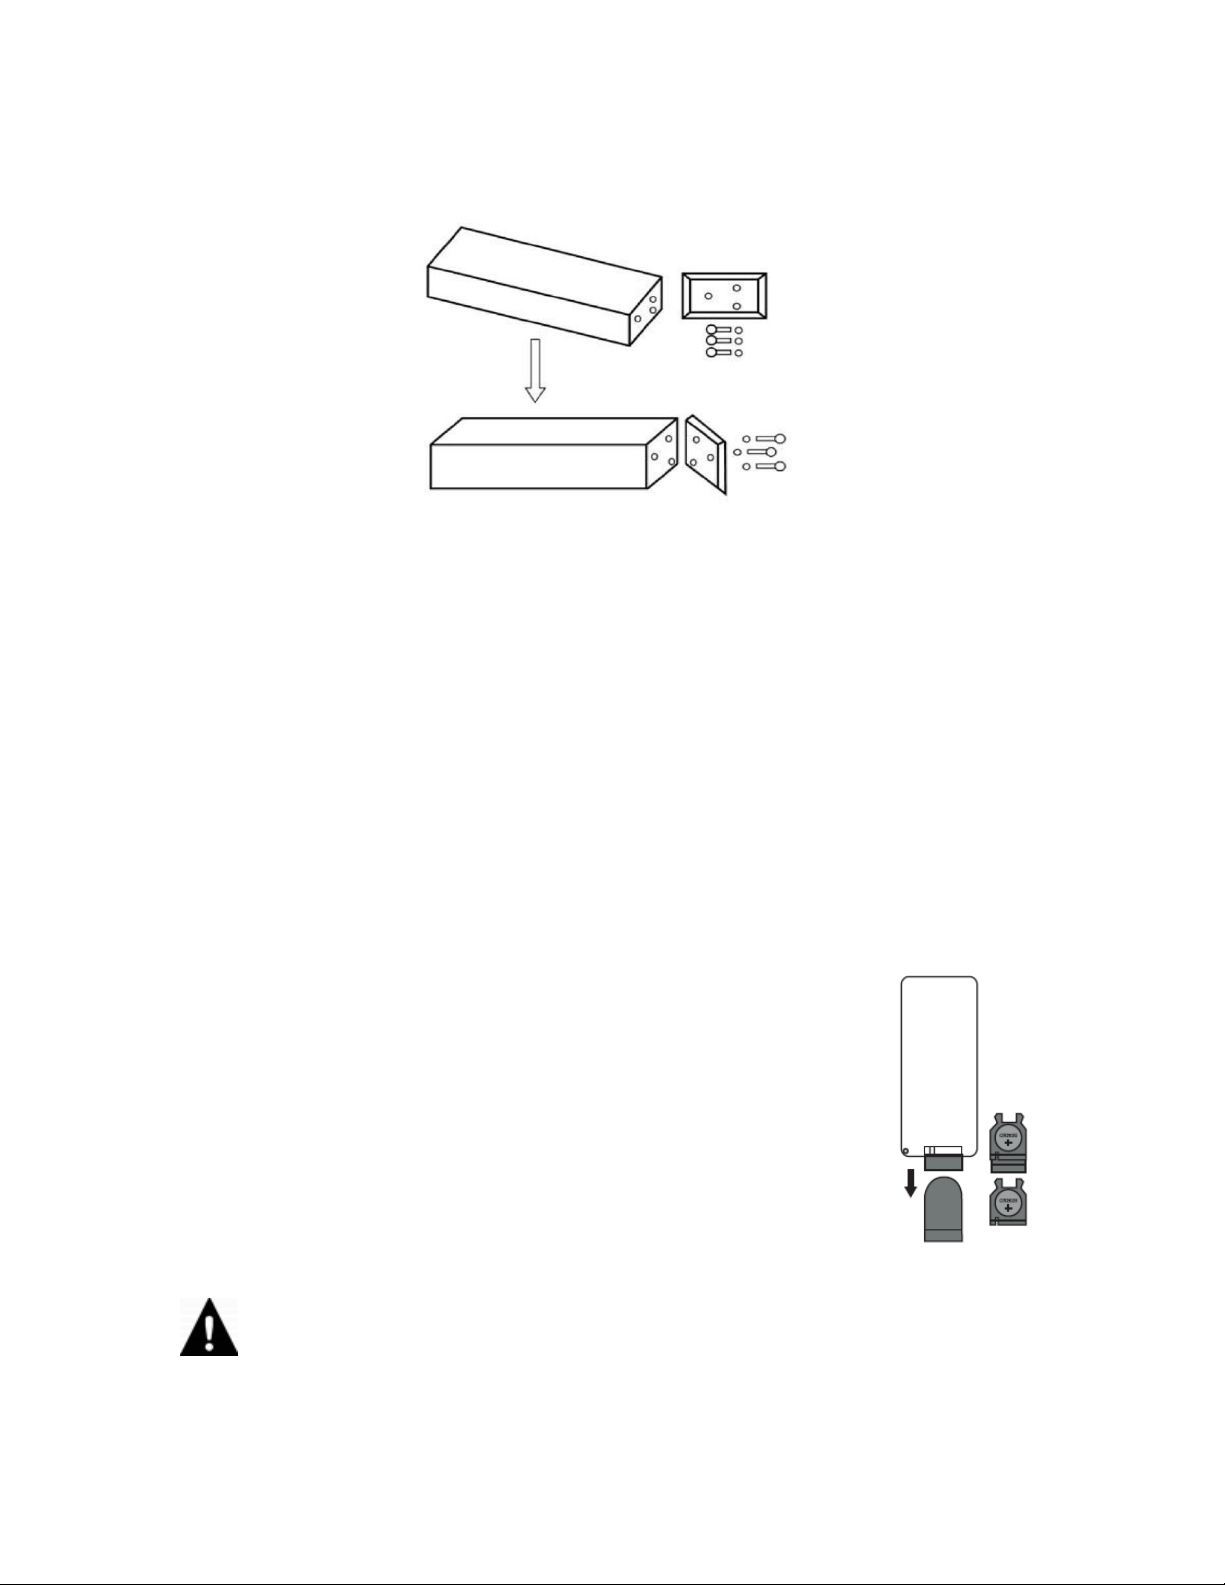
If the coin/button cell battery is swallowed, it can cause severe internal burns in just 2
hours and can lead to death . Keep new and used batteries away from children.
If the battery compartment does not close securely , stop using the product and keep it
away from the children. If you think batteries might have been swallowed or placed
inside any part of the body , seek immediate medical attention.
The batteries shall not be exposed to excessive heat such as sunshine , fire or the lake.
The apparatus shall not be exposed to dripping or splashing and that no objects filled
with liquids , such as vases , shall be placed on the apparatus. The MAINS plug or an
appliance coupler is used as the disconnect device, the disconnect device shall remain
readily operable.
Aux-In line in type
Requires a 3.5mm cable (included)
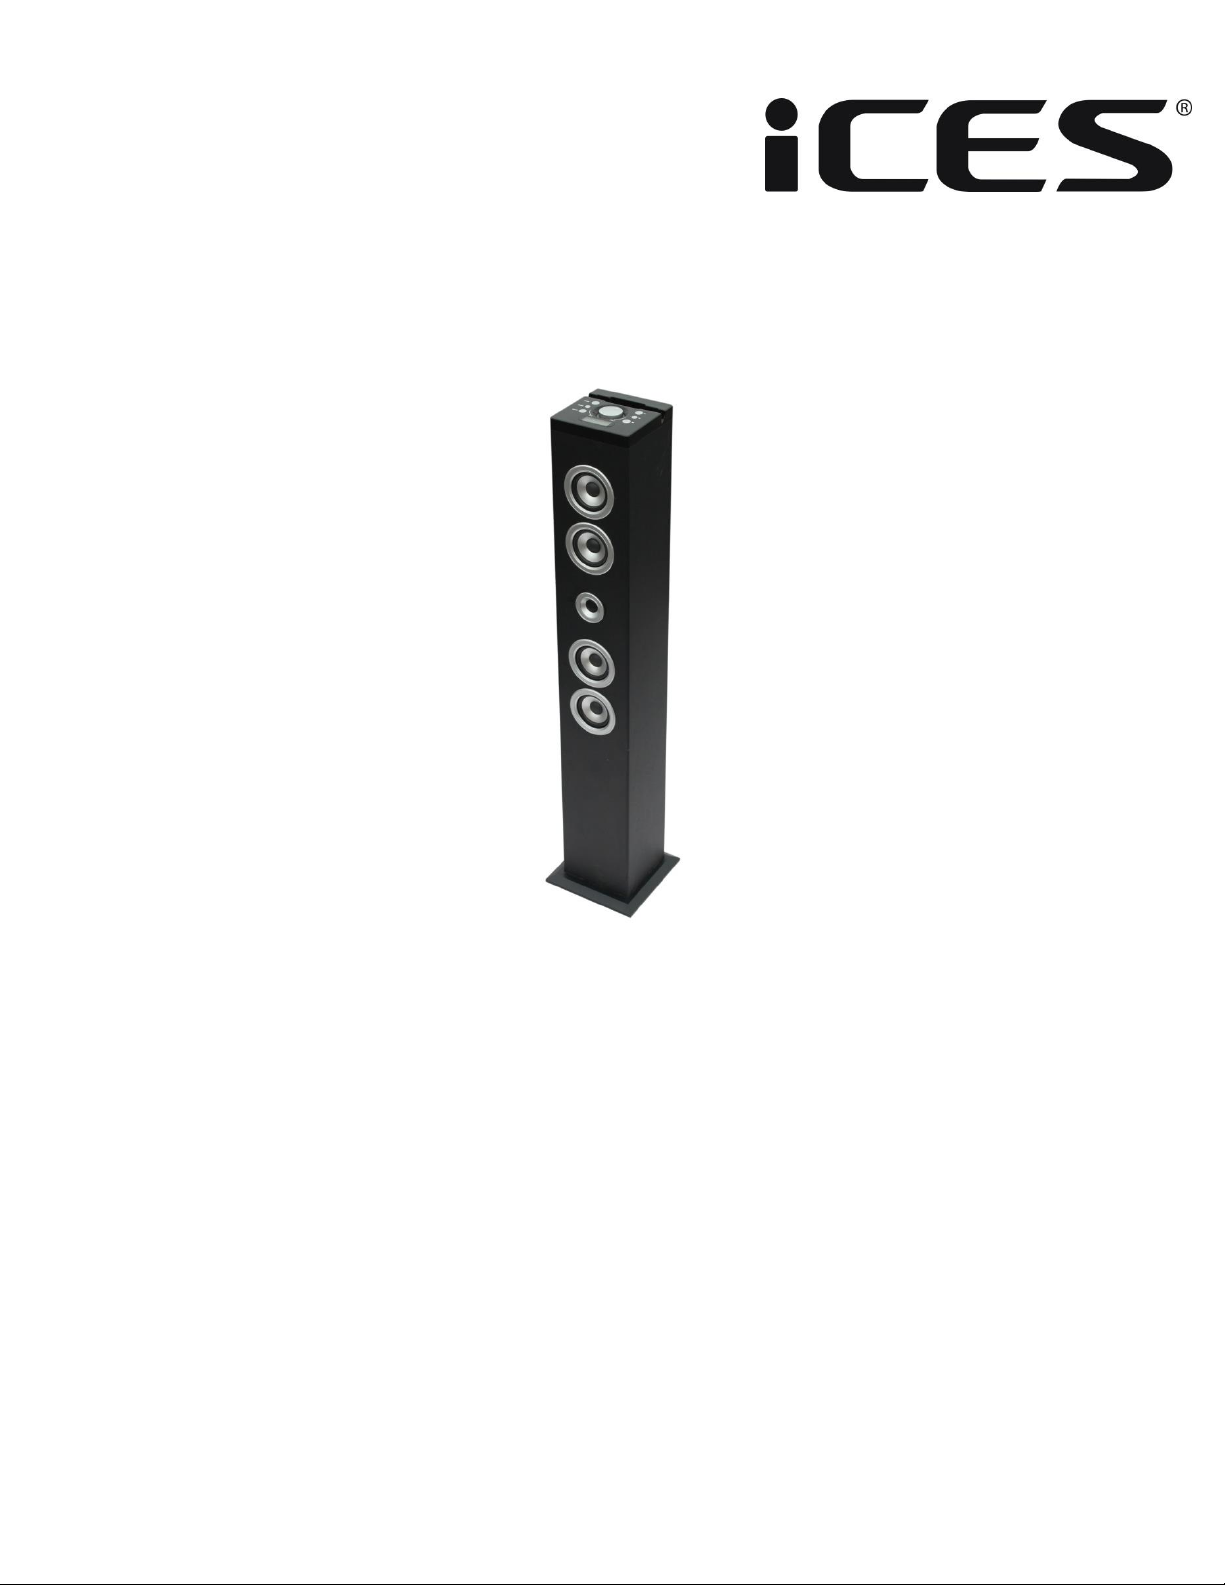
1. Connect a 3.5mm cable to the Aux-in jack at the rear. Connect the other end of the
3.5mm cable to an MP3 player or other audio source.
2. Press the “STANDBY”button to turn the unit on, press “MODE”button on the top
panel or press AUX on the remote control, to choose the Aux Mode.
3. Use the controls on the top panel to begin playing audio routed through the unit or
press “AUX” button on the remote.
Using Bluetooth
1. Power on the unit and press “MODE” button on the top panel to change to bluetooth
mode or press “BT” button on the remote control, the LED display will display “BT”.
2. The previous paired device will connect to speaker tower automatically when each
time changing to bluetooth mode.
3. Press play/pause button and hold for 10 seconds, after a beep tone, the tower
speaker is prepaired to be paired again.
4. Search “ICES IBT-6”and pair it, input the password “0000”if necessary.
5. If it still doesn't work, please reset the Bluetooth and follow above step again.
Notes:
1. When the Bluetooth icon on the display flashes, means the speaker is searching the
previous paired device.
2. Press play/pause button and hold for 10 seconds, the Bluetooth icon on the display
will flash fast, which means the speaker is ready for being paired.
3. After paired successfully, the Bluetooth icon on the display will be on.
USB port for charging
USB port for charging, does not support any media feature.
USB power output DC5V 1A.

USB port for playing MP3
1. Power on the unit and insert a USB Flash Drive (not supplied) into the USB port,
ensuring the plug is fully inserted at the correct way.
2. The tower will play music from the USB automatically or press “MP3” button on the
remote. The maximum size of Flash Drive that can be connected is 32GB max.
SD card slot for playing MP3
1. Insert an SD or MMC memory card (not supplied) into the memory card expansion
slot. Make sure it is inserted at the correct way.
2. The tower will play music from the SD card automatically or press “MP3” button at
the remote
Playing the FM radio
1. When the Tower is powered on, press “STANDBY”, then entering into the FM mode
automatically.
2. Ensure the FM Antenna has been fully extended and press “Mode”to adjust to “FM”
mode or press “FM”button on the remote.
3. Press the “Skip forward”and “Skip backward”to select the desired FM radio station.
Press “Skip forward” or “Skip backward” and hold, the unit will scan the radiostation,
and stop at the next one found one.
Programming & Playing of FM radio presets
1. Follow the steps for Playing the FM Radio.
2. Press “Scan”button on the remote to search and preset stations in memory, (i.e.
“P01” - this will blink on the display - and then the preset station frequency number
will show on the display).
3. Note: 20 FM stations can be set as preset.
4. To play the preset Radio stations, press the “CH-”or “CH+”buttons to cycle through
the preset FM radio stations.
Care of the appliance
Disconnect the appliance from the power source when cleaning.
If the unit becomes dusty, wipe it with a soft and dry duster. Use a soft cloth to clean
this appliance. Do not use any wax, polish sprays, or abrasive cleaners on the unit.
Caution
Never allow any water or other liquids to get inside the unit while cleaning. Dispose of
used batteries in an environmental-responsible manner. This product is not intended for

commercial use. Household use only.
The normal function of the product may be disturbed by strong Electro-Magnetic
Interference. If so, simply reset the product to resume normal operation by following
the instruction manual. In case the function could not resume, please use the product in
other location.
Trouble Shooting
Before taking the unit to be repaired, please check the following table when a problem
occurs. Consult your dealer or service center if the problem cannot be solved with the
following information.
Problem
Remedy
Power
System does not turn on or
does not respond to the
remote control.
- Make sure AC/DC power plug is connected to the wall
socket outlet properly and it has power.
- If this does not help, leave the unit unplugged before
seeking advice.
Remote control
No functions or short range.
- Insert new batteries.
- Aim remote directly towards the remote sensor
located in center of speaker
Pairing the product
Cannot pair successfully
- Check whether the speaker is in Off or searching
mode.
- Check whether there are other Bluetooth receivers
around your Bluetooth device. Turn them off to avoid
any disturbance. Attempt to pair again.
- You can click “Forget this device” and then re-pair it
again if required. Search for “ICES IBT-6”on the
Bluetooth device and pair it again.
Cannot play properly, the
music plays intermittently
Check whether the distance between the speaker and
your Bluetooth device is out of its working distance
(10m), or whether there are some obstacles blocking the
communication between the speaker and the Bluetooth
device. Move the speaker or the Bluetooth device to get
the best reception.
The sound is distorted
Check the volume setting on both the speaker and your
Bluetooth device and adjust the volume to a suitable
level.

SPECIFICATIONS
Power
AC~ 100-240V,50/60Hz, 40W
Operation temperature
0°C to + 40°C
Speakers
4 x 3” speakers + 1 x 4.5” speaker
Speaker output
2 x 10W
Subwoofer Speaker
1 x 25W
Aux-in 1/Aux Lead
3.5mm dia./3.5mm to 3.5mm Aux Lead
Remote Control
Battery 3V CR2025
Unpacked Weight
5.6 Kgs
Dimensions (Approx.)
Approx. 150x150x990mm
Frequency
2402-2480MHz
Transmission power
≦-3.325dBm
NOTE:
As a result of continual improvements, the design and specifications of the product
within differ slightly from the unit illustrated on the packaging.
Important note: If this unit will be opened, or accessed in any way by a non-official
service center, the warranty expires immediately.
This product operates at 2400 - 2483.5 MHz and is designated only to be used inside a
normal household environment. This product is suited for this purpose within all EU
counties.
Guarantee
ICES offers service and warranty in accordance with the European law, which means
that in case of repairs (both during and after the warranty period) you should contact
your local dealer.
Important note: It is not possible to send products that need repairs to ICES directly.
Important note: If this unit is opened or accessed by a non-official service center in any
way, the warranty expires.
This device is not suitable for professional use. In case of professional use, all warranty
obligations of the manufacturer will be voided.
Disclaimer
Updates to Firmware and/or hardware components are made regularly. Therefore some
of the instruction, specifications and pictures in this documentation may differ slightly
from your particular situation. All items described in this guide for illustration purposes
only and may not apply to particular situation. No legal right or entitlements may be
obtained from the description made in this manual.

Disposal of the Old Device
This symbol indicates that the relevant electrical product or battery
should not be disposed of as general household waste in Europe. To
ensure the correct waste treatment of the product and battery, please
dispose them in accordance to any applicable local laws of requirement
for disposal of electrical equipment or batteries. In so doing, you will
help to conserve natural resources and improve standards of
environmental protection in treatment and disposal of electrical waste
(Waste Electrical and Electronic Equipment Directive).
Service
For more information and helpdesk support, please visit www.ices-electronics.com
Lenco Benelux BV, Thermiekstraat 1a, 6361 HB Nuth, The Netherlands.

Nederlands
IBT-6
LEES VOORDAT U HET APPARAAT GEBRUIKT DEZE GEBRUIKSAANWIJZING
DOOR. EN BEWAAR HEM OM HEM LATER TE KUNNEN RAADPLEGEN.
Hartelijk dank voor de aanschaf van deze Luidsprekertoren
Hoe te beginnen
Haal de apparatuur uit de verpakking.
Verwijder al het verpakkingsmateriaal en bewaar dat in de doos voor later gebruik
en/of referentie.
In de doos
Luidsprekertoren
Torenbasis en schroeven om het apparaat te bevestigen
3,5 mm Aux-kabel
Gebruiksaanwijzing
Afstandsbediening
Kenmerken
4 Stereo luidsprekers
Bluetooth® verbinding
Aux-aansluiting inbegrepen
Aux-kabel inbegrepen
USB-poort voor opladen
USB-poort voor het afspelen van MP3
SD-kaartsleuf voor afspelen van MP3
FM-radio
Ledscherm
Veiligheidsinstructies
Bij het gebruik van elektrische apparatuur moeten de algemene voorzorgsmaatregelen
voor de veiligheid altijd worden opgevolgd.
Deze apparatuur is niet bestemd voor gebruik door personen (inclusief kinderen)
met beperkte fysieke, zintuiglijke of mentale vermogens of gebrek aan kennis of
ervaring. Zij moeten onder toezicht staan en aanwijzingen krijgen van een persoon
die verantwoordelijk is voor hun veiligheid.

Zorg ervoor dat u de apparatuur uit te buurt houdt van apparaten die hitte
uitstralen en plaats hem niet in direct zonlicht.
Controleer, voordat u de stekker in het stopcontact steekt, of de op het typeplaatje
aangegeven spanning overeenkomt met die van het lokale lichtnet.
Laat het apparaat niet onbeheerd achter, terwijl het is aangesloten op de
stroomvoorziening.
Dompel het apparaat niet onder in water of enige andere vloeistof.
Het is noodzakelijk om de stekker uit het stopcontact te halen, nadat de apparatuur
is gebruikt, voordat het wordt schoongemaakt en terwijl het wordt gerepareerd.
Wanneer de apparatuur in de buurt van kinderen wordt gebruikt, moet er direct
toezicht zijn.
Laat de apparatuur nooit binnen het bereik van kinderen.
Reparaties aan elektrische apparatuur mogen uitsluitend door gekwalificeerd
personeel worden uitgevoerd. Onjuist uitgevoerde reparaties kunnen de gebruiker
en/of de apparatuur blootstellen aan ernstige risico's.
Deze apparatuur is uitsluiten bestemd voor huishoudelijk gebruik en mag niet voor
industriële of commerciële doeleinden worden gebruikt.
Gebruik dit apparaat niet met een beschadigde stekker of kapot snoer, niet na een
storing of nadat het is gevallen of op andere wijze is beschadigd.
Gebruik deze apparatuur niet anders dan waarvoor hij is bestemd.
Dit apparaat moet op een stabiele, hittebestendige ondergrond worden geplaatst.
Duw geen voorwerpen in de openingen, omdat dit schade aan de apparatuur en/of
elektrische schokken kan veroorzaken.
Gebruik dit product niet in natte of slechte weersomstandigheden.
Dit product is geen speelgoed.
Speel geen muziek op overmatige geluidsniveaus af, in het bijzonder in de buurt van
kinderen.
Onderdelenbeschrijving
Bovenpaneel
1. STAND-BY
2. Modus
3. Demp
4. Volumeregeling
5. Ledscherm
6. Afspelen/Pauzeren
7. Volgende
8. Vorige

Voorkant
1. Luidspreker
2. Sensor afstandsbediening
(Richt de afstandsbediening op de sensor)
Achterpaneel
1. USB-poort voor opladen (5 V, 1 A)
2. 3,5 mm AUX-ingang
3. SD-kaartsleuf voor afspelen van MP3
4. USB-poort voor het afspelen van MP3
5. FM-antenne
6. Stroomkabel

Afstandsbediening
**Richt de afstandsbediening naar het
centrum van de luidspreker**
1. STAND-BY
2. USB/SD-bedieningstoets
3. Demptoets
4. Aux-intoets
5. FM-radiotoets
6. Bluetooth-toets
7. Vorige-toets
8. Afspelen/Pauzeren-toets
9. Volgende
10. Scantoets
11. Kanaal-
12. Kanaal+
13. Lage tonen+ effecttoets
14. Lage tonen- effecttoets
15. Hoge tonen+ effecttoets
16. Hoge tonen- effecttoets
17. Volume+ toets
18. Volume- toets
De luidsprekertoren installeren - de basis bevestigen
1. Neem de toren en de basis voorzichtig uit de verpakking.
2. Neem er de schroeven en ringen uit.
3. Bevestig de toren op de basis waarbij de gaten in de basis worden uitgelijnd op de
gaten in de toren.
4. Schroef de basis op de toren.
5. Zet de toren rechtop op de vloer, hij is klaar voor gebruik

Stroomaansluiting
Sluit de voedingsadapter aan op het achterpaneel van de luidspreker en steek de
stekker van de adapter in het stopcontact.
Afstandsbediening gebruiken
De batterij
Haal de kleefband van het batterijcompartiment aan de onderkant
van de afstandsbediening wanneer u de afstandsbediening in
gebruik neemt.
Als uw afstandsbediening begint te haperen, of als u steeds dichter
bij het apparaat moet gaan staan om de afstandsbediening te doen
werken, moeten de batterijen waarschijnlijk worden vervangen.
Schuif de houder uit de basis van de afstandsbediening om de
batterijen te vervangen. Verwijder de batterij en vervang deze door
een 3-volts Lithium CR2025.
WAARSCHUWING!
Batterij niet inslikken, risico op chemische
brandwonden
(De afstandsbediening meegeleverd met) Dit product bevat een munt/knoopcelbatterij. Als
deze knoopcelbatterij wordt ingeslikt, kan dit binnen slechts 2 uur tot ernstige interne
brandwonden en fataal letsel leiden.
Houd nieuwe en gebruikte batterijen buiten bereik van kinderen.
Als de batterijhouder niet goed kan worden gesloten, dient u het product niet meer te
gebruiken en buiten bereik van kinderen te houden.
Als u denkt dat batterijen zijn ingeslikt of binnenin een willekeurig lichaamsdeel terecht zijn
gekomen, dient u onmiddellijk medische hulp te zoeken.
De batterijen mogen niet worden blootgesteld aan teveel hitte zoals zonlicht, vuur, enz.
Stel het apparaat niet bloot aan druppels of spatten en plaats geen met vloeistof gevulde
voorwerpen op het apparaat, zoals een vaas.
De netstekker of aansluiting op het toestel wordt als hoofdschakelaar gebruikt en moet altijd
kunnen worden bediend.
Aux-In line-in-type
Vereist een 3,5 mm kabel (inbegrepen).
1. Sluit een 3,5 mm kabel aan op de Aux-in-aansluiting aan de achterzijde. Sluit het
andere uiteinde van de 3,5 mm kabel aan op een MP3-speler of andere audiobron.
2. Druk op de “STAND-BY” toets om het apparaat in te schakelen, druk op de “MODE”

toets op het bovenpaneel of druk op AUX op de afstandsbediening om de
Aux-modus te kiezen.
3. Gebruik de bedieningselementen op het bovenpaneel om audio af te spelen via het
apparaat of druk op de “AUX” toets op de afstandsbediening.
Bluetooth gebruiken
1. Schakel het apparaat in en druk op de “MODE” toets op het bovenpaneel om naar
de Bluetooth-modus te gaan of druk op de “BT” toet op de afstandsbediening, het
ledscherm zal dan “BT” weergeven.
2. Bij de overgang naar de Bluetooth-modus zal het vorige gekoppelde apparaat
automatisch met de luidsprekertoren verbinding maken.
3. Druk op de toets afspelen/pauzeren en houd deze gedurende 10 seconden
ingedrukt, nadat u een pieptoon hoort, is de luidsprekertoren klaar om opnieuw te
worden gekoppeld.
4. Zoek "ICES IBT-6" en koppel het; voer indien nodig het wachtwoord "0000" in.
5. Als het dan nog niet werkt, reset de Bluetooth en volg de bovenstaande stappen
opnieuw.
Opmerkingen:
1. Als het Bluetooth-pictogram op het scherm knippert, wil dit zeggen dat de
luidspreker zoekt naar het vorige gekoppelde apparaat.
2. Druk op de toets afspelen/pauzeren en houd deze gedurende 10 seconden
ingedrukt, het Bluetooth-pictogram op het scherm zal snel knipperen, dit wil zeggen
dat de luidsprekertoren klaar is om te worden gekoppeld.
3. Nadat het apparaat succesvol werd gekoppeld, zal het Bluetooth-pictogram op het
scherm verschijnen.
USB-poort voor opladen
USB-poort voor opladen ondersteunt geen mediafuncties.
USB-uitgangsvermogen DC 5 V 1 A.
USB-poort voor het afspelen van MP3
1. Schakel het apparaat in en steek een USB-flashdrive (niet inbegrepen) in de
USB-poort, zorg er hierbij voor de stekker volledig en correct in te steken.
2. De toren zal automatisch muziek afspelen van de USB, of druk op de “MP3” toets
op de afstandsbediening. De maximale grootte van Flash Drive die kan worden
aangesloten is 32 GB.
SD-kaartsleuf voor afspelen van MP3
1. Plaats een SD of MMC geheugenkaart (niet inbegrepen) in de geheugenkaartsleuf.
Zorg ervoor de kaart op de juiste wijze aan te sluiten.

2. De toren zal automatisch muziek afspelen van de SD-kaart, of druk op de “MP3”
toets op de afstandsbediening
De FM-radio afspelen
1. Wanneer de toren wordt ingeschakeld en op “STAND-BY” drukt, gaat u automatisch
naar de FM-modus.
2. Zorg ervoor dat de FM-antenne volledig uitgetrokken is en druk op de “MODE” toets
om naar “FM” modus te gaan of druk op de "FB” toets op de afstandsbediening.
3. Druk op “Volgende” en “Vorige” om het gewenste FM-radiozender te selecteren.
Druk op “Volgende” of “Vorige” en houd deze toets ingedrukt, het apparaat zal de
radiozenders scannen en stoppen wanneer de volgende wordt gevonden.
FM-stationgeheugens programmeren en afspelen
1. Volg de stappen van “De FM-radio afspelen”.
2. Houd de toets “Scan” op de afstandsbediening ingedrukt om naar stations te
zoeken en deze op te slaan in het geheugen (bijv. “P01” zal op de display knipperen
en vervolgens wordt de frequentie van het stationgeheugen weergegeven).
3. Opmerking: 20 FM-stations kunnen in het geheugen worden opgeslagen.
4. Om een opgeslagen stationgeheugen af te spelen, drukt u op de toets “CH-” of “CH+”
om de FM-stationgeheugens te doorlopen.
Het apparaat onderhouden
Haal de stekker uit de voedingsbron voordat u het apparaat reinigt.
Als het apparaat stoffig wordt, kunt u deze afvegen met een zachte en droge stoffer.
Gebruik een zacht doekje om dit apparaat te reinigen. Gebruik geen enkele soort was,
polijstmiddel of agressieve reinigingsmiddelen op het apparaat.
Let op
Laat tijdens reiniging geen water of andere vloeistoffen in het apparaat terechtkomen.
Dank verbruikte batterijen op milieuvriendelijke wijze af. Dit product is niet bestemd
voor commercieel gebruik. Uitsluitend voor huishoudelijk gebruik.
De normale functie van het product kan worden gestoord door sterke
elektromagnetische interferentie. Als dat gebeurt, volg dan de instructies van de
handleiding om het product te resetten, zodat de normale werking wordt hervat. In het
geval dat de functie niet kon hervatten, gebruik het product dan op een andere locatie.

Probleemoplossing
Wanneer er zich een probleem voordoet, raadpleeg dan, voordat u het apparaat ter
reparatie aanbiedt, de onderstaande tabel. Als het probleem met de onderstaande
informatie niet kan worden opgelost, raadpleeg dan uw dealer of servicecentrum.
Probleem
Oplossing
Stroomvoorziening
Het systeem schakelt niet in
of reageert niet op de
afstandsbediening.
- Zorg ervoor dat de AC/DC-stekker correct is
aangesloten op een werkend stopcontact.
- Als dit niet helpt, haal dan de stekker uit het
stopcontact voordat u advies inwint.
Afstandsbediening
Geen functies of kort bereik.
- Plaats nieuwe batterijen.
- Richt de afstandsbediening rechtstreeks op de sensor
voor de afstandsbediening, gelegen in het midden
van de luidspreker.

Het apparaat koppelen
Het koppelen lukt niet
- Controleer of de luidspreker is uitgeschakeld of in
zoekmodus.
- Controleer of er zich andere Bluetooth-ontvangers in
de buurt van uw Bluetooth toestel bevinden. Schakel
ze uit om storingen te vermijden. Probeer opnieuw te
koppelen.
- U kunt op “Forget this device” (Vergeet dit apparaat)
klikken en dan opnieuw koppelen indien nodig. Zoek
naar “ICES IBT-6” op het Bluetooth-apparaat en
koppel het opnieuw.
Kan niet goed afspelen, de
muziek speelt met
tussenpozen af.
Controleer of de afstand tussen de luidspreker en uw
Bluetooth-apparaat niet groter is dan het werkbereik
(10 m), of dat er obstakels zijn tussen luidspreker en het
Bluetooth-apparaat. Beweeg de luidspreker of het
Bluetooth-toestel om de beste ontvangst te krijgen.
Het geluid is vervormd
Controleer de volume-instelling op zowel de luidspreker
als uw Bluetooth-toestel en stel het volume op een
geschikt niveau in.
SPECIFICATIES
Stroomvoorziening
AC~ 100-240V,50/60Hz, 40W
Bedrijfstemperatuur
0 °C tot + 40 °C
Luidsprekers
4 x 3” luidsprekers + 1 x 4,5” luidspreker
Luidsprekervermogen
2 x 10W
Subwoofer-luidspreker
1 x 25W
Aux-in 1/Aux-kabel
3,5 mm dia./3,5 mm naar 3,5 mm Aux-kabel
Afstandsbediening
Batterij 3 V CR2025
Nettogewicht
5,6 kg
Afmetingen (ca.)
Ong. 150 x 150 x 990 mm
Frequentie
2402-2480MHz
Zendvermogen
≦-3,325dBm
OPMERKING:
Wegens onafgebroken verbeteringen, kunnen het ontwerp en de specificaties van het
product ietwat verschillen van het product afgebeeld op de verpakking.
Belangrijke opmerking: Als het apparaat wordt geopend, of er wordt toegang to
verkregen door een onbevoegd servicecentrum, dan vervalt de garantie onmiddellijk.
Dit product werkt op 2400 - 2483,5 MHz en is ontworpen om alleen te worden gebruikt
in een normale huishoudelijke omgeving. Dit product is geschikt voor dit doel binnen
alle EU-landen.
Table of contents
Languages:
Other iCES Speakers manuals
Popular Speakers manuals by other brands

B&C Speakers
B&C Speakers Woofer 12 PZ 32 Specifications

Qmadix
Qmadix QM-QI-Sound-BK user manual

JTS
JTS WA-88 EXA instruction manual

Jarv
Jarv BIG SHOT user manual

musikelectronic geithain
musikelectronic geithain RL933K1 Instructions for installation and use

Active Audio
Active Audio StepArray Technical manual