iDance XD200 User manual

Bluetooth Party System with Buit-in Light Show
PLEASE READ THIS USER MANUAL COMPLETELY BEFORE OPERATING THIS UNIT AND RETAIN THIS BOOKLET FOR FUTURE REFERENCE.
Thank you for purchasing iDance Audio System.
Instrucon Manual
Manuel De L’ullisateur
Gebruiksaanwijzing
English
Français
Dutch
..................... E1-E8
..................... FR1-FR8
..................... D1-D8
200

WHAT’S IN THE BOX
OVERVIEW
Contents
1.
2.
3.
iDance XD200 main unit
Power Adaptor (15V DC / 2A)
Instrucon Manual
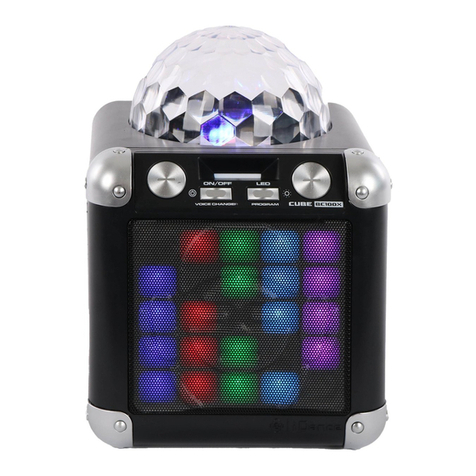
The iDance XD200 is a Wireless all-in-one DJ Party box System with an integrated mixer, which
accepts microphone, guitar, line-in audio, and stereo Bluetooth wireless audio up to 10 meters.
Only few simple steps to pair your device!!
The XD200 is perfect for DJ, house / pool / yard party, or for karaoke applicaons. Take your sound
with you on the go!!
Thank you, and congratulaons on your choice of iDance’s XD200 !
E1

WARNINGS
The lightning flash with arrow-
head symbol inside an equilateral
triangle is intended to alert User
of the presence of un-insulated "
hazardous voltage" within the
product’s enclosure, which may
be of sufficient magnitude to
induce a risk of electric shock to
persons.
The exclamaon mark inside an
equilateral triangle is intended to
alert user of the presence of
important operang and mainte-
nance (servicing) instrucons in
the literature accompanying the
product.
Please do not aempt to open the back cover or power adapter as opening or removing the covers
may expose you to dangerous voltage or other hazards, and it will also cause the restricted
servicing to be disabled. There are no user servicing components inside.
WARNING
E2
This digital apparatus does not exceed the Class B limits for radio noise emissions from digital
apparatus as set out in the Radio Interference Regulaons of Industry Canada. These limits are
designed to provide reasonable protecon against harmful interference in a residenal installaon.
WARNING
Reorient or relocate the receiving antenna.
Increase the separaon between the equipment and the receiver.
Connect the equipment into an outlet on a circuit different from that to which the receiver is
connected
Consult the dealer or an experienced radio/TV technician for assistance.
WARNING

Read these instrucons.
Keep these instrucons.
Heed all warnings.
Follow all instrucons.
Do not use this apparatus near water.
Clean only with dry cloth.
Do not block any venlaon openings. Install in accordance with the manufacturer’s
instrucons.
Do not install near any heat sources such as radiators, heat registers, stoves, or other
apparatus (including amplifiers) that produce heat.
Do not defeat the safety purpose of the polarized or grounding-type plug. A polarized plug
has two blades with one wider than the other. A grounding type plug has two blades and a
third grounding prong. The wide blade or the third prong are provided for your safety. If the
provided plug does not fit into your outlet, consult an electrician for replacement of the
obsolete outlet.
Protect the power cord from being walked on or pinched parcularly at plugs, convenience
receptacles, and the point where they exit from the apparatus.
Only use aachments/accessories specified by the manufacturer.
Use only with the cart, stand, tripod, bracket, or table specified by the manufacturer, or sold
with the apparatus. When a cart is used, use cauon when moving the cart/apparatus
combinaon to avoid injury from p-over. Portable Cart Warning
Unplug this apparatus during lightning storms or when unused for long periods of me.
Refer all servicing to qualified service personnel. Servicing is required when the apparatus
has been damaged in any way, such as power-supply cord or plug is damaged, liquid has been
spilled or objects have fallen into the apparatus, the apparatus has been exposed to rain or
moisture, does not operate normally, or has been dropped.
The apparatus shall not be exposed to dripping or splashing and no objects filled with liquids,
such as vases, shall be placed on the apparatus.
The baery shall not be exposed to excessive heat such as sunshine, fire or the like.
The MAINS plug is used as the disconnect device, which shall remain readily operable.
1.
2.
3.
4.
5.
6.
7.
8.
9.
10.
11.
12.
13.
14.
15.
16.
17.
IMPORTANT SAFETY INSTRUCTIONS
E3

Bluetooth wireless stereo audio streaming
Support A2DP Profiles for most smart phones / laptops
Line-In input (3.5 mm Stereo Mini Jack) for external music source
Microphone input (1/4" Jack)
Disco Ball with disco light effect.
6.5" Full range Driver X1
1.5” Tweeter driver X1
Included power adapter for unit AC power
FEATURES
E4
What’s in the box
Overview
Warning
Important safety instrucons
Features
Contents
Control Locaon
Control Locaon
General Operaons
Troubleshoong
Specificaons
..................................................................
..................................................................
.......................................................................
.......................................................................
.......................................................................
.......................................................................
.......................................................................
.......................................................................
.......................................................................
.......................................................................
.......................................................................
E1
E1
E2
E3
E4
E4
E5
E6
E7
E8
E8
CONTENTS

CONTROL LOCATION (1.1)
E5
FRONT Panel
REAR Panel
LED
ON /OF F
DISC O
LE D MO DE
1. AUTO MATI C
2. MUS ICS YN C
3. STR OBE
MA ST ER
LE VE L
MI N MAX
NORMA L
LO W HI GH
MI N MAX
MA X
MI N
MI C ECH O
MICTROP HO NE
LEVEL
US B CHA RG ER
STD BY
PAI RING
VO IC E
CHANG ER
1
2
3
4
56
7
8
9
10
11
HO LD TO
SE ARCH
GTR I N
MIC I N
MIC 2
AU DIO O UT
R L
DC IN MIC 1
AU X IN
13
12
15
14
16
17

USB Charger Output ( USB CHARGER)
You may connect your smartphone / tablet to this port for charging.
Note: charging cable is NOT included.
STD BY Buon
When unit is in standby mode, press this buon to turn on unit
When unit is ON, press and hold the buon to enter standby mode.
When unit is playing , short press the buon to turn off LED light show.
PAIRING & PLAY Buon
Press and hold this buon to reconnect Bluetooth connecon
Short press once to play Bluetooth music next file.
Short press twice to play Bluetooth music previous file
MICROPHONE LEVEL Knob
Turn this knob to adjust the microphone volume sound level.
MIC ECHO Knob
Turn this knob to adjust the echo sound effect.
LED LIGHT SHOW PANEL
BLUETOOTH / STANDBY Indicator
The indicator will light blue color when Bluetooth is successfully paired.
The indicator will flash blue color when Bluetooth start pairing.
The indicator will light red color when unit in standby mode.
LED ON / OFF Buon
Press to turn on /off disco ball light show
DISCO LED MODE Selector
Slide the switch to select different light effect for all light show.
VOLUME LEVEL Knob
Rotate the VOLUME knob to select sound level.
VOICE CHANGER Selector
You may change your microphone voice into beast (Low) or kid (Hi) by simply turn this knob
to High / Normal / Low.
DISCO BALL
Different color LED light show
DC IN Jack
Connect the power adapter to power up of XD200.
MIC 1 / 2 IN (1/4” Jack) Input
6.3mm unbalanced jack for connect microphone.
GTR IN (1/4” Jack) Input
This jack can take a 6.3mm unbalanced cable for guitar (or other Hi-Z instrument) input
AUDIO OUT (RCA Jack) Output
Use RCA cable to connect the external PA system to this master output for bigger sound. The
level of this output is controlled by the master volume knob.
LINE IN (Aux In / Audio Input) Input
Connect a music device (MP3 player etc.) to this socket with a 3.5mm audio cable. The
external device will sound from XD200 speaker.
1.
2.
3.
4.
5.
6.
7.
8.
9.
10.
11.
12.
13.
14.
15.
16.
17.
CONTROL LOCATION (1.2)
E6

GENERAL OPERATIONS
Power Adapter Connecon
Connecng Bluetooth to your Smartphone I Tablet
Power Management Funcon:
Rear of Main Unit
Connect the included adapter to main unit and plug the supplied adapter into standard AC wall
socket. Press the STD BY buon to turn on power. Hold the buon again turn unit to
standby mode.
Unit will automacally go to standby mode aer 15 minutes without sound output or operaon.
To resume operaon, simply press the STD BY buon to turn on unit
Notes:
If the adapter does not fit properly, turn it over and again. Do not force AC plug.
Remove the power adapter when the unit not operaon or unused for long periods of the me.
Press the STD BY buon to turn on, hold the PAIRING buon to connect your external Bluetooth device.
On your smartphone / Tablet, turn on Bluetooth and enable device scanning.
When XD200 is showed on the Bluetooth device list, select it to connect.
When both devices are successfully connected, you are ready to play music wirelessly from your device.
Press the PLAY buon to start music playback.
Press PREV/NEXT of external Bluetooth device to switch between music tracks.
Hold the PAIRING buon to reconnect other Bluetooth device.
E7
AC 100~240V 50/60Hz
STD B Y

TROUBESHOOTING
SPECIFICATIONS
If you have followed the instrucons and are having difficulty operang the unit, locate the
PROBLEM in the le column below. Check the corresponding POSSIBLE CAUSE AND SOLUTION
column to locate and fix the problem.
E8
PROBLEM
Noise on speaker output when
microphone is connected and turn on
XD200
Make sure your microphone or microphone cable is in good
condion, grounded and shielded. Internal gain of voice
processing could cause vibraon from poor ground noise.
The wireless Bluetooth distance of XD200 is about 7-l0
meter in open area. Below condions could block you
Bluetooth signal and please ensure you would get rid of
those:
Make sure no other device from your friend or family is
connected to XD200. When XD200 Bluetooth is connected,
press BLUETOOTH buon would stay ON. So make sure
XD200 indicang Bluetooth is ready to connect. Also make
sure your smartphone / tablet is located close to XD200
less than 2 meters when pairing.
Hold the BLUETOOTH buon to reconnect again.
Metal protecon on case for your phone/tablet
Metal or wall is blocking in between your phone / tablet
and XD200
Another Bluetooth device is working close toXD200
Ensure that the XD200 is powered ON
Check the master volume on the XD200
Check the volume level on paired Bluetooth device
Remove the power adapter and reconnect again.
Intermient Bluetooth music streaming
No sound on selected source
AC ADAPTER
SOUND SOURCE INPUT
Total Harmonic Distoron
Signal to Noise Rao
Speaker Size
Speaker Power Output
AC Input :AC~ 100-240V 50/60Hz
DC Output = 15V , 2000mA
Bluetooth, 1/4 ” Microphone, Aux-In
Below 10% at Standard Output
Over 45dB
6.5 ”Full range driver X1 + 1.5” Tweeter driver X1
100 Was
Specificaons are typical, individual units might vary. They are subject to connuous improvement without
noce and without incurring any obligaon.
Bluetooth cannot connect to XD200
POSSIBLE CAUSE AND SOLUTION
CE QUE CONTIENT LE CARTON
VUE D’ENSEMBLE
Contenu
1.
2.
3.
Appareil principal XD200 iDance
Adaptateur secteur (15V DC / 2A)
Manuel de l’ulisateur
Le XD200 de iDance est un système DJ Party sans fil tout en un avec mixeur intégré, qui accepte un
microphone, une guitare, un line-in audio et Bluetooth jusqu’à 10 mètre. Associez votre appareil en
quelques simples étapes !!
Le XD200 est parfait pour les DJ, à la maison, la piscine, en plein air ou pour le karaoké. Prenez
votre son partout avec vous !!!
Merci et félicitaon pour avoir choisi le XD200 de iDANCE !
FR1

AVERTISSEMENT
Le point d’exclamaon dans un
triangle équilatéral est desné à
alerter l’ulisateur de la présence
de maintenance dans le manuel
de l’ulisateur.
Le symbole de l’éclair avec une
flèche dans un triangle équilaté-
ral est desné à alerter
l’ulisateur de la présence de
tension dangereuse dans le
boier, qui peut être d’une
ampleur suffisante pour induire
un risque de choc électrique .
Veuillez ne pas ouvrir le couvercle arrière de l’appareil ou l’adaptateur secteur car l’ouverture ou le
retrait des couvercles peut vous exposer à des tensions dangeureuses ou autres dangers, et
annulera également votre garane. Il n’y a pas de pièce réparable à l’intérieur de l’appareil.
Remarque
Cet appareil numérique ne dépasse pas les limites de la classe B pour les émissions de bruit radio
des appareils numériques comme indiqué dans le règlement sur les interférences radio de
l’Industry Canada. Ces limites sont conçues pour fournir une proteon raisonnable contre les
interférences nuisibles dans une installaon résidenelle.
Remarque
Réorienter ou déplacer l’antenne de récepon.
Augmenter la distance entre l’équipement et le récepteur
Brancher l'équipement dans une prise sur un circuit différent de celui sur lequel le récepteur est
branché
Consulter le revendeur ou un technicien radio/TV expérimenté pour assistance.
Remarque
FR2

Lire les instrucons.
Garder les instrucons.
Tenir compte des averssements.
Suivre toutes les instrucons.
Ne pas uliser l’appareil près de l’eau.
Neoyer uniquement avec un chiffon sec.
Ne pas bloquer les ouvertures de venlaon. Installer en suivant les instrucons du fabricant.
Ne pas installer près des sources de chaleur tels que radiateur, four, ou tout autre appareil (y
compris les amplificateurs) qui produit de la chaleur.
Ne pas rerer la sécurité de la prise de terre. Une fiche polarisée possède deux lames dont
une est plus large que l'autre. Une prise de terre possède deux lames et une broche de terre.
La lame large ou la troisième broche est prévues pour votre sécurité. Si la fiche fournie ne
rentre pas dans votre prise, consultez un électricien pour faire remplacer la prise obsolète.
Ne pas piéner ou pincer le cordon d’alimentaon, en parculier au niveau des fiches, des
prises et où ils sortent de l’appareil.
Uliser uniquement les accessoires spécifiés par le fabriquant.
Uliser uniquement avec un chariot, un trépied, une console ou une table spécifié par le
fabricant, ou vendu avec l’appareil. Lorsqu’un chariot est ulisé, déplacer l’ensemble
chariot/appareil avec prudence afin d’éviter les blessures en cas de chutes.
Débrancher l’appareil pendant l’orage ou lorsqu’il n’est pas ulisé pendant une longue
période.
Confier toutes réparaons à un personnel qualifié. Une réparaon est nécessaire lorsque
l’appareil a été endommagé, cordon d’alimentaon ou la fiche endommagé, liquide renversé
ou objets tombés dans l’appareil, l’appareil a été exposé à la pluie ou à l’humidité, ne
fonconne pas normalement ou est tombé.
L’appareil ne doit pas être exposé à des goues ou à des éclaboussures et aucun objet rempli
de liquide, tels que vases, ne doit être posé sur l’appareil.
La prise secteur est ulisé comme un disposif de déconnexion et doit rester facilement
accessible.
L’appareil doit être connecté à une prise secteur avec prise de terre.
1.
2.
3.
4.
5.
6.
7.
8.
9.
10.
11.
12.
13.
14.
15.
16.
17.
INSTRUCTIONS IMPORTANTES DE SECURITE
FR3

Lecture audio sans fil en Bluetooth
Support Profiles A2DP pour la plupart des smartphones et tablees
Entrée AUX (3.5 mm en Mini Jack stéréo) pour les sources externes
Entrée Microphone (Jack 6.35mm)
Boule Disco avec effet de lumière Disco
6.5" Full range Driver X1
1.5” Tweeter driver X1
Adaptateur d’alimentaon inclus
CARACTERISTIQUES
FR4
CE QUE CONTIENT LE CARTON
VUE D’ENSEMBLE
AVERTISSEMENT
INSTRUCTIONS IMPORTANTES DE SECURITE
CARACTERISTIQUES
SOMMAIRE
EMPLACEMENT DES COMMANDES
FONCTIONNEMENT GENERAL
DEPANNAGE
SPECIFICATIONS
..................................................................
..................................................................
..................................................................
....................................................
.....................................................................
.....................................................................
..................................................................
..................................................................
.....................................................................
.....................................................................
.....................................................................
E1
E1
E2
E3
E4
E4
E5
E6
E7
E8
E8
SOMMAIRE

EMPLACEMENT DES COMMANDES
FR5
FRONT Panel
REAR Panel
LED
ON /OF F
DISC O
LE D MO DE
1. AUTO MATI C
2. MUS ICS YN C
3. STR OBE
MA ST ER
LE VE L
MI N MAX
NORMA L
LO W HI GH
MI N MAX
MA X
MI N
MI C ECH O
MICTROP HO NE
LEVEL
US B CHA RG ER
STD BY
PAI RING
VO IC E
CHANG ER
1
2
3
4
56
7
8
9
10
11
HO LD TO
SE ARCH
GTR I N
MIC I N
MIC 2
AU DIO O UT
R L
DC IN MIC 1
AU X IN
13
12
15
14
16
17

Sore USB (CHARGEUR USB)
Connectez votre smartphone/tablee sur ce port pour recharger votre baerie.
Remarque : Le cable de chargement n’est pas inclus.
Bouton STD BY
Lorsque l’appareil est en mode standby, appuyez sur ce bouton pour allumer l’appareil.
Lorsque l’appareil est allumé, appuyez et maintenez ce bouton pour entrer en mode standby.
Lorsque l’appareil est en mode lecture, faites un appuie court sur ce bouton pour arrêter le
jeux de lumière.
JUMELER UN APPAREIL & Bouton PLAY
Appuyez et maintenez enfoncé ce bouton pour reconnectez la connecon Bluetooth
Appuyez brièvement une fois pour jouer le morceau suivant en bluetooth
Appuyez brièvement deux fois pour jouer le morceau suivant.
Bouton MICROPHONE LEVEL
Tournez ce bouton pour régler le niveau de volume du microphone.
Bouton MIC ECHO
Tournez ce bouton pour régler l’effet echo
Panneau lumineux à LED
Indicateur BLUETOOTH / STANDBY
L’indicateur s’allumera en bleu lorsque le Bluetooth est associé.
L’indictaeur clignotera en bleu lorsque vous jumeler les appareils.
L’indicateur s’allume en rouge lorsque l’appareil est en mode standby.
Bouton LED ON / OFF
Pour allumer éteindre la lumière disco
Sélecteur de mode DISCO LED
Faites glisser le commutateur pour séleconner différents effets de lumières.
Bouton VOLUME LEVEL
Tournez le bouton VOLUME pour séleconner le niveau sonore
Sélecteur VOICE CHANGER
Vous pouvez modifier votre voix dans le microphone en grave/normal/aigus en tournant ce
bouton sur High /Normal/Low
DISCO BALL
Pour afficher les différentes couleurs
Entrée jack DC
Connectez l’adaptateur secteur pour alimenter le XD200.
Entrée MIC 1 / 2 IN (Jack 6.35mm)
Connectez ici votre microphone
Entrée Guitare (jack 6.35mm)
Connectez ici votre guitare ou un autre instrument.
Sore Audio (RCA Jack)
Ulisez un câble RCA pour connecter le système à cee sore principale pour un meilleur
son. Le niveau de cee sore est commandé par le bouton volume
Entrée Aux (Aux In / Audio Input)
Conntez un appareil de musique (lecteur MP3, etc.) à cee prise avec un câble audio 3.5mm.
Le son de l’appareil externe retent dans le haut-parleur du XD200.
1.
2.
3.
4.
5.
6.
7.
8.
9.
10.
11.
12.
13.
14.
15.
16.
17.
EMPLACEMENT DES COMMANDES
FR6

FONCTIONNEMENT GENERAL
Connecon de l’adaptateur secteur
Connectez le Bluetooth à votre Smartphone / Tablee
Foncon de geson de l’alimentaon :
Rear of Main Unit
Connectez l’adaptateur secteur à l’unité principale et à la prise de courant AC. Appuyez sur le
bouton STD BY pour allumer. Appuyez de nouveau pour mere l’appareil en veille
L’appareil passera automaquement en mode veille après 15 minutes sans opéraon. Pour
rallumer l’appareil, appuyez simplement sur le bouton STD BY
Remarques:
Si l’adaptateur secteur ne s’insère pas correctement, retournez-le et retournez le encore. Ne forcez pas.
Débranchez l’adaptateur secteur lorsque l’appareil n’est pas ulisé pendant une longue période.
Appuyez sur le bouton STD BY pour allumer l’appareil, maintenez le bouton PAIRING pour
connecter un appareil bluetooth externe.
Sur votre smartphone / Tablee, acvez le Bluetooth et faites une recherche d’appareil
Lorsque XD200 s’affiche, séleconnez le pour le connecter à votre appareil.
Lorsque les deux appareils sont associés, vous êtes prêt à écouter de la musique sans fil.
Appuyez sur le bouton PLAY pour démarrer la lecture.
Appuyez sur PREV/NEXT de l’appareil Bluetooth externe pour choisir le morceau.
Maintenez le bouton PAIRING pour connecter un autre appareil Bluetooth.
FR7
AC 100~240V 50/60Hz
STD B Y

DEPANNAGE
SPECIFICATIONS
Si vous avez suivi les instrucons et vous avez des difficultés à faire fonconner l’appareil, localisez
le problème dans la colonne de gauche ci-dessous. Vérifiez la colonne CAUSE ET SOLUTION
POSSIBLE correspondant à localiser et résoudre le problème.
FR8
PROBLEME
Bruit dans la sore du haut-parleur
lorsque le microphone est raccordé et
allumez le XD200
Assurez-vous que votre microphone ou câble de microphone
est en bon état, à la terre et à l’abri. Gain interne de traitement
de la voix pourrait provoquer des vibraons de bruit de fond.
La distance sans fil en Bluetooth du XD200 est d’environ
7-10m dans la zone ouverte.
Ci-dessous, les condions qui pourraient bloquer le signal
Bluetooth
Assurez-vous qu’aucun autre appareil de votre famille ou
un ami est connecté au XD200. Lorsque le bluetooth du
XD200 est connecté, appuyez sur la touche BLUETOOTH
resterai sur ON. aussi assurez vous aussi que votre
smartphone / tablee est situé à proximité du XD200 à
moins de 2 mètres lors du jumelage.
Maintenez le bouton BLUETOOTH pour vous reconnecter à nouveau.
Protecon métallique sur la coque de votre téléphone/tablee
Du métal ou un mur est entre votre téléphone / tablee et le
XD200.
Un autre disposif bluetooth fonconne près du XD200.
Assurez vous que le XD200 est sous tension.
Vérifiez le volume master du XD200
Vérifiez le niveau du volume du périphérique Bluetooth associé
Débranchez l’adaptateur secteur et reconnectez le.
La musique en bluetooth
fonconne par intermience
Pas de son sur la source
ADAPTEUR AC
ENTRÉE SOURCE
Total Distorsion harmonique
Signal to Noise Rao
Dimensions des enceintes
Puissance de sore des
AC Input :AC~ 100-240V 50/60Hz
DC Output = 15V , 2000mA
Bluetooth, Microphone 6.35mm, Aux-In
Inférieur à 10% à la sore
Over 45dB
6.5 ”Full range driver X1 + 1.5” Tweeter driver X1
100 Was
Les spécificaons sont typiques, les unités individuelles peuvent varier. Ils sont soumis à l’amélioraon
connue sans préavis et sans aucune obligaon.
Le bluetooth ne se
connecte pas au XD200
CAUSE ET SOLUTION POSSIBLE

WAT ZIT ER IN DE DOOS
OVERZICHT
Inhoud
1.
2.
3.
iDance XD200 hoofd unit
AC-DC Power Adapter (15V DC / 2A)
Gebruiksaanwijzing
De iDance XD200 is een draadloze All-In-One DJ Party Box systeem met een geïntegreerde mixer.
Het accepteert microfoon, gitaar, line-in audio- en draadloze stereo Bluetooth-audio tot 10 meter.
Een paar simpele stappen om uw apparaat te koppelen. Dankzij de ingebouwde disco verlichng,
kunt u door slechts een knop uw muziek vullen met licht!
De XD200 is ideaal voor DJ's/ thuis / zwembad / tuinfeestjes of voor karaoke toepassingen.
Hartelijk dank en gefeliciteerd met uw keuze van iDance's XD200.
D1

WAARSCHUWING
Het uitroepteken in een gelijkzijdige
driehoek is bedoeld om de gebruiker
alert te maken van de aanwezigheid
van belangrijke onderhouds-(dienst)
in de handleiding van het product.
De bliksemschicht met een pijl
symbool binnen een gelijkzijdige
driehoek is bedoeld om gebruikers te
waarschuwen van de aanwezigheid
van niet-geïsoleerde "gevaarlijke
spanning "in de behuizing van het
product, dat kan van voldoende
omvang leiden tot een risico op
elektrische schokken op personen.
Gelieve geen poging om de achterkant of de voedingsadapter te openen als het openen of
verwijderen van de deksels. Het kan u blootstellen aan gevaarlijke spanning of andere gevaren, en
het zal ook leiden tot gebrekkig onderhoud. Er zien geen te onderhouden onderdelen in.
NOTES/OPMERKING
Dit digitale apparaat overschrijdt niet de Klasse B-limieten voor stoorsignalen vanuit digitale
apparaten, zoals beschreven in de Radio Interference Regulaons van Industry Canada. Deze
limieten zijn ontworpen om redelijke bescherming tegen schadelijke storingen in een woonomgev-
ing te bieden.
NOTES/OPMERKING
Draai of verplaats de ontvangende antenne.
Vergroot de afstand tussen de apparatuur en de ontvanger.
Sluit het apparaat aan op een stopcontact, op een ander circuit dan dat waarop de ontvanger is
aangesloten.
Raadpleeg de dealer of een ervaren radio / tv-technicus voor hulp.
NOTES
D2

Lees deze instruces.
Bewaar deze instruces.
Neem alle waarschuwingen.
Volg alle instruces.
Niet in de buurt van water gebruiken.
Reinig alleen met een droge doek.
Blokkeer niet de venlaeopeningen. Installeer volgens de instruces.
Niet in de buurt van warmtebronnen zoals radiatoren, warmte-uitlaten, kachels of andere
apparaten (inclusief versterkers) die warmte produceren.
Maak de veiligheid van de gepolariseerde of geaarde stekker niet. Een gepolariseerde stekker
hee twee bladen, waarvan er een breder is dan de andere. Een geaarde stekker hee twee
pennen en een derde aardingspen. Het bredere blad of het derde uitsteeksel zijn er voor uw
veiligheid. Indien de meegeleverde stekker niet in uw stopcontact past, raadpleeg dan een
elektricien voor vervanging van het verouderde stopcontact.
Bescherm het net snoer zodat er niet overheen gelopen kan in het bijzonder bij stekkers,
stopcontacten en het punt waar ze het apparaat verlaten.
Gebruik alleen hulpstukken / accessoires die door de fabrikant zijn meegeleverd.
Gebruik alleen een karretje, standaard, staef, beugel of tafel die door de fabrikant wordt
verkocht met het apparaat. Wanneer u een karretje gebruikt, wees dan voorzichg bij het
verplaatsen van de kar / apparaten, waardoor u letsel door vallen dient te voorkomen.
Draagbare winkelwagen waarschuwing:
Ontkoppel dit apparaat jdens onweer of als het langere jd niet wordt gebruikt.
Laat al het onderhoud over aan gekwalificeerd personeel. Onderhoud is vereist wanneer het
apparaat is beschadigd, bijvoorbeeld als het net snoer of de stekker is beschadigd, vloeistof is
gemorst of voorwerpen in het apparaat, als het apparaat is blootgesteld aan regen of niet
normaal funconeert of is gevallen.
Het apparaat mag niet worden blootgesteld aan druppels of spaen en geen met water
gevulde voorwerpen, zoals vazen op het apparaat worden geplaatst.
De baerij mag niet worden blootgesteld aan overmage warmte, zoals zonlicht, vuur en
dergelijke.
De stekker moet u gebruiken om het apparaat uit te schakelen, die gemakkelijk bereikbaar
blij.
1.
2.
3.
4.
5.
6.
7.
8.
9.
10.
11.
12.
13.
14.
15.
16.
17.
Belangrijke veiligheidsinstruces
D3
Table of contents
Languages:
Other iDance Stereo System manuals

iDance
iDance CM3 User manual

iDance
iDance XD 101 User manual

iDance
iDance ACDC CLASSIC 3 User manual

iDance
iDance Groove 980 User manual

iDance
iDance MEGABOX 1000 User manual

iDance
iDance XD25 User manual

iDance
iDance Energy XD2 User manual

iDance
iDance PARTY BOX DJ301 User manual

iDance
iDance DISCO CUBE BC-100L User manual