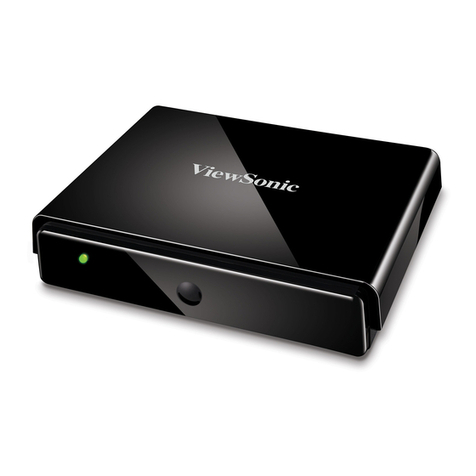
Ider RM2501 User manual

Page 1of 25
1.1 Important Statements
a). Users should be responsible for any substantial damages caused by improper
operation or misuse of non-original components.
b). All logos and registered trademarks used in this manual belong to the relevant
companies.
c). We own the right to modify the product function or standard without notification to
users.
d). We are not responsible for the data missing while using. Please back up a copy
for all your important data.
1.2 Warning
a) To prevent fire and electric shock, don’t expose the unit to the moist or rainy
places.
b) Don’t expose the unit to the places with high temperature, dust and vibration.
c) It is imperative that using the original accessories to power the unit. Other
accessories may cause damages.
d) Hard Disk is a delicate device and may be damaged by slight impact, so be
careful not to crash the unit.
e) Keep the unit away from magnetic devices, which may cause damage of the data
stored in the unit.
f) Do not use strong detergent while cleaning.
g) When the unit is not working properly, please contact professionals for repair.
1.3 Product Features
a) RMVB/RM play: support RM/RMVB movies playback on TV/Monitor.
b) movie play: support MPEG1(.MPG、.DAT),MPEG2(.VOB、AVI),MPEG4(.AVI、
DIVX、XVID、.MP4)
c) Music play: support MP3、WMA
d) Digital photo frame: support JPG/JPEG、BMP、TIFF, GIF. Support picture
slide-showing, rotation, zoom out/in; remove, background music playing.
e) Card reader: support SD/MMC/MS cards plug-and-play on the TV/Monitor.
Through USB2.0, it supports card reader by PC.
f) Portable HDD function: support 2.5” SATA hard drive and USB2.0 high speed.
g) Multiple choice of hard drive capacity: support 20 to 500G hdd capacity and
FAT32/NTFS HDD partition format.
h) Output interface: AV/VGA/YPbPr and OTG/HOST. Can be connected to TV,
Monitor, projector and stereo audio devices.
i) One key play: can one key play picture, music, movie and file.
j) File edit function: without PC, it is able to do file copy, delete, remove, rename,
etc.

Page 2of 25
k) Firmware update: support firmware update. Please check our relative website
for the new firmware.
l) PlayingTime slection: By pressing the number keys on the remote control, to select
the starting time where you watch the movie.
m) Break point function: When power off accidently, you can continue to watch from
where you left last time after power on again.
n) OTG/HOST: Can connect to U-Disk, MP3/4, Card reader, Mobile HDD, etc.
o) One key copy function.
1.4 Product layout
1. Voice up (+)
2. Stop/ return
3. Previous item
4. IR receiver
5. Next item
6. Play (long press to turn off power)
7. Voice down (-)
8、AV OUT:to connect TV/ Stereo audio devices/ earphone.
9、VGA:to connect monitor or projector
10. USB interface
11. OTG/host: to connect U-Disk, MP3/4, Card reader, Mobile HDD, etc.
12、DC+5V:

Page 3of 25
13. SD/MMC card slot.
1.5 Product installation:
(1) Screw off the case.
(2) Open the bottom cover
(3) Plug in the HDD to the connector
(4) Put on the bottom cover
(5) Screw on and installation finish.
(1) (2) (3)
(4) (5)

Page 4of 25
1.6 Remote controler
1.6.1 Layout image

Page 5of 25
1.6.2 Layout image
Playing key area
Return Back to previous menu
HOME Back to homepage menu
confirm stop
Move cursor rightward More cursor upward
Move cursor leftward Move cursor downward
Fast Backward
Previous item
Fast forward Next item
Function key area
Power on/off Mute on/off
setup To enter setup menu
OSD Display playing status and enter “file copy/delete” menu
16:9/4:3 4:3 or 16:9 screen display mode.
TV MODE TV mode setup, VGA、AV 、HDMI mode switchover
L/R Left/Right audio channel and stereo audio switchover.
Subtitle To turn on/off the subtitle. Press continuous two times to select the subtitle
size
Angle To rotate the picture by 90-degree angle
Zoom To zoom in & out the picture and movie.
STEP To play background music while photo slide showing. Press “ ” to
select different background music
Play/Pause To play/pause the movie, photo and music
Volume+ To volume up.
Volume-- To volume down.
VGA to setup the TV mode at VGA mode,Default 1024x768
YPbPr To setup the TV mode at YPbPr display mode. The default resolution is
1080i.
Preview To enter photo slide showing
Photo To enter 3 X 5 picture preview homepage
Music To enter music playlist menu
Movie To enter movie playlist menu
copy To copy memory card’s contents into the hard disk FAT32 partition.

Page 6of 25
1.6.3 Remote control Operation
a) Remove the battery cover in the back panel; install two of 1.5V dry battery into the
slot. If long time no use, please remove the battery.
b) Please operate the remote control within 7 meters and 60degrees’angle away
from the unit. The environment lightness can affect the remote control’s
working range.
c) The battery normally can be used for one year. Please change battery when
the remote control doesn’t work.
1.7 Start to use
1.7.1 To install the hard drive
Screw off the case and install 2.5inch SATA hard drive into SATA connector.After
then screw on the case. If you don’t need to install hard disk, pls use card slot to
plug-and-play a certain memory card.
1.7.2 To connect power
a). Please use DC5.6V power supply and make sure enough power Don’t use different
voltage, which may damage the unit.
b). Don’t put object on the product while it is working.
c). Don’t cut off the power while the unit is still working. Otherwise it may cause serious
damagement to the hard drive. Please make sure the unit is on standby mode
before cutting off the power.
d). It still consumes a little power when the unit stays in standby mode.
1.7.3 To connect to PC USB
Connect the HDD player to the computer by USB2.0 cable. Now the hdd player
works as external hard disk and can be managed by computer Window software,
capable of downloading files from internet or from your computer. Under Windows

Page 7of 25
2000/XP,there is an icon to identify the product ‘s hard drive on the
right bottom of the desktop
Note :When the product is connected to PC, it is no need to connect 5.6V DC
power supply.
1.7.4 To plug in SD/MMC/MS cards
The product supports memory card plug-and-play on TV and can also be used as a
card reader to edit the contents on PC. Pls plug the card into the slot in right way
carefully. Don’t force to plug in, otherwise it will cause damages to the card or card
slot。Under Windows 2000/XP,there is an icon to identify the memory
card on the right bottom of the desktop
1.7.5 To format Hard drive
If the hard disk is the first time to be connected to computer, the hard disk has to be
formated first. In windows 2000/xp system, use the disk manage of my computer to
format HDD.
Please follow the below operation steps as below:
a). On the start menu or desktop, click ” my computer” with right button and select
“manage”.

Page 8of 25
b) There appears a Computer Management dialogue window, click Disk
Management, the on NEW-VOL(X:) click right button to select “format”
c). There prompts a new dialogue window ,Select “execute quick format”, click OK to
confirm.
d) Then appears a Warning dialogue window , select OK to confirm. Now you can see
NEW-VOL(X:) formatting.

Page 9of 25
e) After finishing formatting, you can see NES-VOL(X:) Healthy.
Note: The hard disk that we used in unit can be formated by both FAT32/NTFS.
1.7.6 To disconnect from PC
Under Windows 2000/XP, pls click the disk icon on the right bottom of
the desktop to saftely disconnect from PC. When it prompts out a safely delete remark
window, then you can plug off the product from the PC.
1.7.7 To connect to power
Connect the unit to DC+5.6V power supply by the power adaptor. When the red
led turns on, it starts working.
1.7.8 To connect to TV.
Plug the red, yellow and white composite video line into the TV back panel sockets.
Then plug the other end of AV line into the unit’s AV socket. Please set the unit as
AV mode by pressing <AV/VGA>key of the remote control and TV should be set as
“Video” mode.

Page 10 of 25
1.7.9 to connect to Monitor
Plug the computer VGA cable into the unit’s VGA socket. You can connect the
earphone or audio line to the unit AV output to enjoy music. Please set the unit in
VGA mode by pressing <AV/VGA>key of the remote control.
1.7.10 AV(TV)&VGA(Monitor) mode switchover
Press <AV/VGA>key of the remote control to switchover between AV and VGA
mode. When it is connected to TV, pls choose AV mode, otherwise VGA mode
whehn connected to Monitor.

Page 11 of 25
1.8 To use software system
1.8.1 System initialization
When the system boots up, a JPG logo will be shown. Meanwhile, on OSD layer, it
will show user the
“LOADING …” information. At the background, the system will initialize devices.
.
1.8.2 Devices selection
This is the “Home screen” or the top level menu screen. After initializing the system, it will
show user the
device selection screen. If no device is inserted, the highlight is on the SETUP option.
If there is a USB device inserted in the board, it will highlight the USB icon. If more than
one USB
devices are inserted in, it will highlight the first inserted device.

Page 12 of 25
1.8.3 Media play selection
After you select one device (or volume) and press OK to enter into, it will show the mode
selection screen.
There are four modes: Movie, Music, Photo and File. The default highlighted icon is Movie.
The user can use LEFT/RIGHT to switch between different modes. Press OK or PLAY to
enter into
different mode. Pressing PLAY will start playing the first movie, pressing OK will go into
the next screen
level. MBX will let the user enter into each mode no matter the device has such media files
or not.

Page 13 of 25
1.8.4 Photo Thumbnail screen
1) When the user select the photo mode, the 3X5 pictures mode will be shown in one
screen, with all the pictures of different files searched out in this partion or the memory
card . There are 15 pictures on every page . A camera icon at the top-left of the screen is to
indicate the photo screenpage.
At the top-right of the screen, it shows the current page and total page information. At the
bottom of the photos, it will show current highlighted photo’s file name and the created or
revised date information as following :
2) Press directional key to highlight a picture and press “ok” key to confirm to enter full
screen display. Photo slide-showing will start automatically. Press next/previous key to turn
up last or next page.
3) while playing a single picture, press “OSD/EDIT” key to call up the info bar. The info bar
includes some quick launch buttons: Previous, play/pause, next, rotate, stop, zoom and
filename of the current photo. Info bar
will time-out and disappear after 10 seconds if no key is pressed.

Page 14 of 25
4) Zoom in the current photo . Rate is x2 x4 x8 1x (normal). Change to Pause
mode. User can move the photo with UP/DOWN/RIGHT/LEFT buttons. Rotate the current
photo. 90° play with “rotate” button.
5) User can enjoy the music when the pictures are playing. When the pictures are playing,
press “play/pause” button, the picture change to pause, then press “music’ button to switch
on or off the background music. Press “VOL+” , “VOL-“ button to adjust the Volum, also
can choose mute button.
1.8.5 Music screen
1) starts to perform music playback when user selects Music mode in the Mode Selection
screen
All (only) the music files will be listed in the playlist at the left of the screen. The right side
of the screen is
mostly informational of the current song. Pressing PLAY/OK will start playing the selected
music;
pressing UP/DOWN for navigation inside file list, etc.
When it is in stop mode, the progressive bar will not be shown. It will only show the file info
at the right of
the screen.
When it is playing, whatever the repeat mode is, if the user press Next or Previous key, it
will go to the
next or previous song and start to play it. The repeat mode will be keeped.
The first 7 songs will be shown, when it read the external devis

Page 15 of 25
If the song is more than 7, the next page will be automaticlly shown, as the follwing picture:
2) A music icon will be shown at the top-left corner of the screen. And current directory
path of the song being played is shown. Users can UP/DOWN key to traverse the file list to
choose the right song to play, A status bar is displayed below the visualization display.
Status consists of the current play mode and
current “play time” are displayed.
The song information area is below the status bar. It consists of information like song title,
artist, album,
genre and file type.
Press the key “ return”, it will go back the the last operation mode or back to the home
page.
1.8.6 Movie Preview screen
User selects the Movie icon (from the Mode Selection screen) to get to the Movie Preview
screen.
1) All (only) the movie files will be listed in the playlist at the left of the screen. A movie file
list will be shown on the OSD. The first 7 films will be shown, when it read the external
devis or hard disk.
If the films number is more than 7, the next page will be automaticlly shown, E.X:

Page 16 of 25
2) The user can highlight a movie inside the playlist by using the UP/DOWN key to
traverse the file list.
Movie preview is started if a file is highlighted for at least 3 seconds. User can select the
movie (OK or
PLAY) to play in full screen mode.
The right side of the screen consists of, movie preview icon, and file information display.
The preview window will play the movie that is being highlighted.
The movie information area is below the status bar. It consists of information like file size,
video type, and
movie length.
3) At the mode of preview, the film is mute, so the user cannot adjust the volume.
4) When the user select a video file and confirm, the film will be shown. Press “ OSD” key,
the information status bar of the operation will be shown beow the screen like PREVIOUS ,
FB, PLAY/PAUSE, FF, NEXT, PAUSE, ZOOM, and It also includes the current play time,
E.X.

Page 17 of 25
5) Steps to play subtitle:
Put the srt format subtitle file under the same folder of the movie. Then press”
OSD/EDIT” key to call up the status bar. Press right directional key to select the icon ,
and press “confirm” key. The subtitle will display at the bottom of the screen.
6) Break point function:
When power off accidently, you can continue to watch the movie watching rom where you left
last time. This function works after at least 1min’s playing. The system can memorize total 5 media
files’s stop point. If over 5 media files, it will automatically cancel the 1st file’s stop point memory.
To turn off this function, press “ left” key on the remote controler while the file is playing. Then it
will restart to play from the begiining.
1.8.7 Navigation screen
The File Navigation screen is designed for users to examine the content of the storage
device (e.g. HDD
or camera or Flash drive), performance file manipulation .
1) When the user selects File mode icon and press OK, it will switch to the File
Navigation screen.
Press UP/DOWN to move the cursor. Information related to this file is shown when it is
highlight on the
file list. Press the key to confirm, the file start to be played.
2) The photo, song, film, file list will be shown on the left of the file management window. If
the external device or HD is inserted, 7 files name will be shown . The attribute of the file is
being selected will be shown on thr right ot the window, like file name, file size, the format
of file, the author of the file ect.

Page 18 of 25
A、The steps for copy:
If the user wants to do copy/delete, press the “right”key to select the target file. Press
“OSD/EDIT” key to call up the copy/delete menu. When the menu is on, the focus is
moved to the right side of the screen. Press the UP/DOWN key to move the cursor to
select Copy.
“Copy to” string will be shown.
Current path info will be shown below the “Copy to” String.
Move the cursor to root destination folder and press “right” key to call up the
sub-destination file. The destination file list will be shown below the path info.
Copying status info will be shown.
“Finished” status info will be shown.
After copying it, it will show “Finished”. Press the OK to turn off the submenu and go back
to the file list.

Page 19 of 25
B. The steps for deleting files
1) In file list screen, press menu to select Copy/Delete function. Select Delete to delete
current highlighted
file.
Let the user confirm if want to delete this file.
.
2) Select “delete” with up/down keys and confirm . It will show the directory path for
delete, confirm with【√】, concell deleting with【×】. If the user wants to delete more than
3 files, the preview window on the right will only show the directory path of the first and the
last file.
3) After deleting, it will show “ finish’ and go back to the file list. The highlight will be on the
first file of the current folder.

Page 20 of 25
1.8.8 Software upgrading.
Steps:
1) Through PC USB, copy the software file to the ROOT Destination folder or in the memory
cards.
2) Connect the unit to TV or monitor, enter into “ file screen” page and select the software file,
press “confirm” .
Then on right of the window, there is a dialogue window to let the user to choose ”【√】” or ”
【×】”.
Press“【√】”, to start upgrading. Press ”【×】” to cancel.
3) While upgrading, it tells the processing status on right of the window. Once done, the unit will
restart automatically.
Note: While upgrading, don’t cut off the power or it will cause damagment to the product.
1.8.9 Set-up screen.
User can set up as you like.
First, Press “set-up” on the remote controller to enter into the software set-up mode. The
menu of different function will be shown on the window. User can choose the basic menu
with UP/DOWN buttons, choose the menu and sub- menu with right/left buttons,
confirm with “OK’ button. Exit with “return” button, to back to the software menu.
Items and Options
Language: English, Chinese (default)
Slideshow duration: 3s, 5s (default), 15s, 1mins, 15mins, 1hour
This manual suits for next models
1
Table of contents
