IDS HYYP User manual

IDS HYYP
Installation Checklist
1.HYYP Installation Checklist
1.1. Firmware Version
Check the firmware version of the IDS X-Series panel by holding down the * key
until it beeps, then press the * key again.
For the HYYP App to work the IDS X-Series panel must be version 2.52 or higher.
1.2. X-Series Wiring
Connect the provided serial cable from the serial connector on the X-series panel to the serial
connector on the HYYP Hub.
Tip: The red wire on the X-Series panel should be closest to the panel’s heat sink.
1.3. X-Series Programming
All required programming is done in installer programming.
Enter Installer Code [9][9][9][9][*]
Go to location 196 [1][9][6][*]
Enter any six digit code [1][2][3][4][5][6][*]
(This is to authorise the HYYP serial connection)
Go to location 61 [6][1][*]
(This is the partition’s account code: 61 –Partition 1; 62 –Partition
2; 63 –Partition 3…)
Enter the account code issued by the control room [1][2][3][4][*]
Exit installer programming [#]

1.4. Wiring to 805 Interface
The HYYP unit connects to the IDS 805 Key-bus Interface via a serial cable, the Interface then
connects to the 805 panel via the keypad bus as a second keypad. The LED on the interface
board, will come on when the module has power and has received a valid clock pulse from the
IDS805 alarm panel.
The serial connection between the HYYP Hub and the IDS 805 Key-bus Interface is shown in
the image above.
1.5. Interface Board Jumpers
The interface board has 3 jumpers to enable/disable certain hardware.
Jumper 1: Configures what device the interface is connected to. Keep on for HYYP.
Jumper 2: Enables zone 2 on the interface board. (Reports as zone 10 )
Jumper 3: Enables zone 1 on the interface board. (Reports as zone 9 )
Jumper 3 2 1
1.6. HYYP Hub LEDs
LED 1 –Transmission LED flashes when communicating with the network.
LED 2, 3, 4 –Signal Strength. All 3 is strong signal, 2 & 3 is fair signal and just 2 is poor signal.
LED 5 –APN LED indicates connection to the platform. (This must be on)
5 4 3 2 1 Antenna
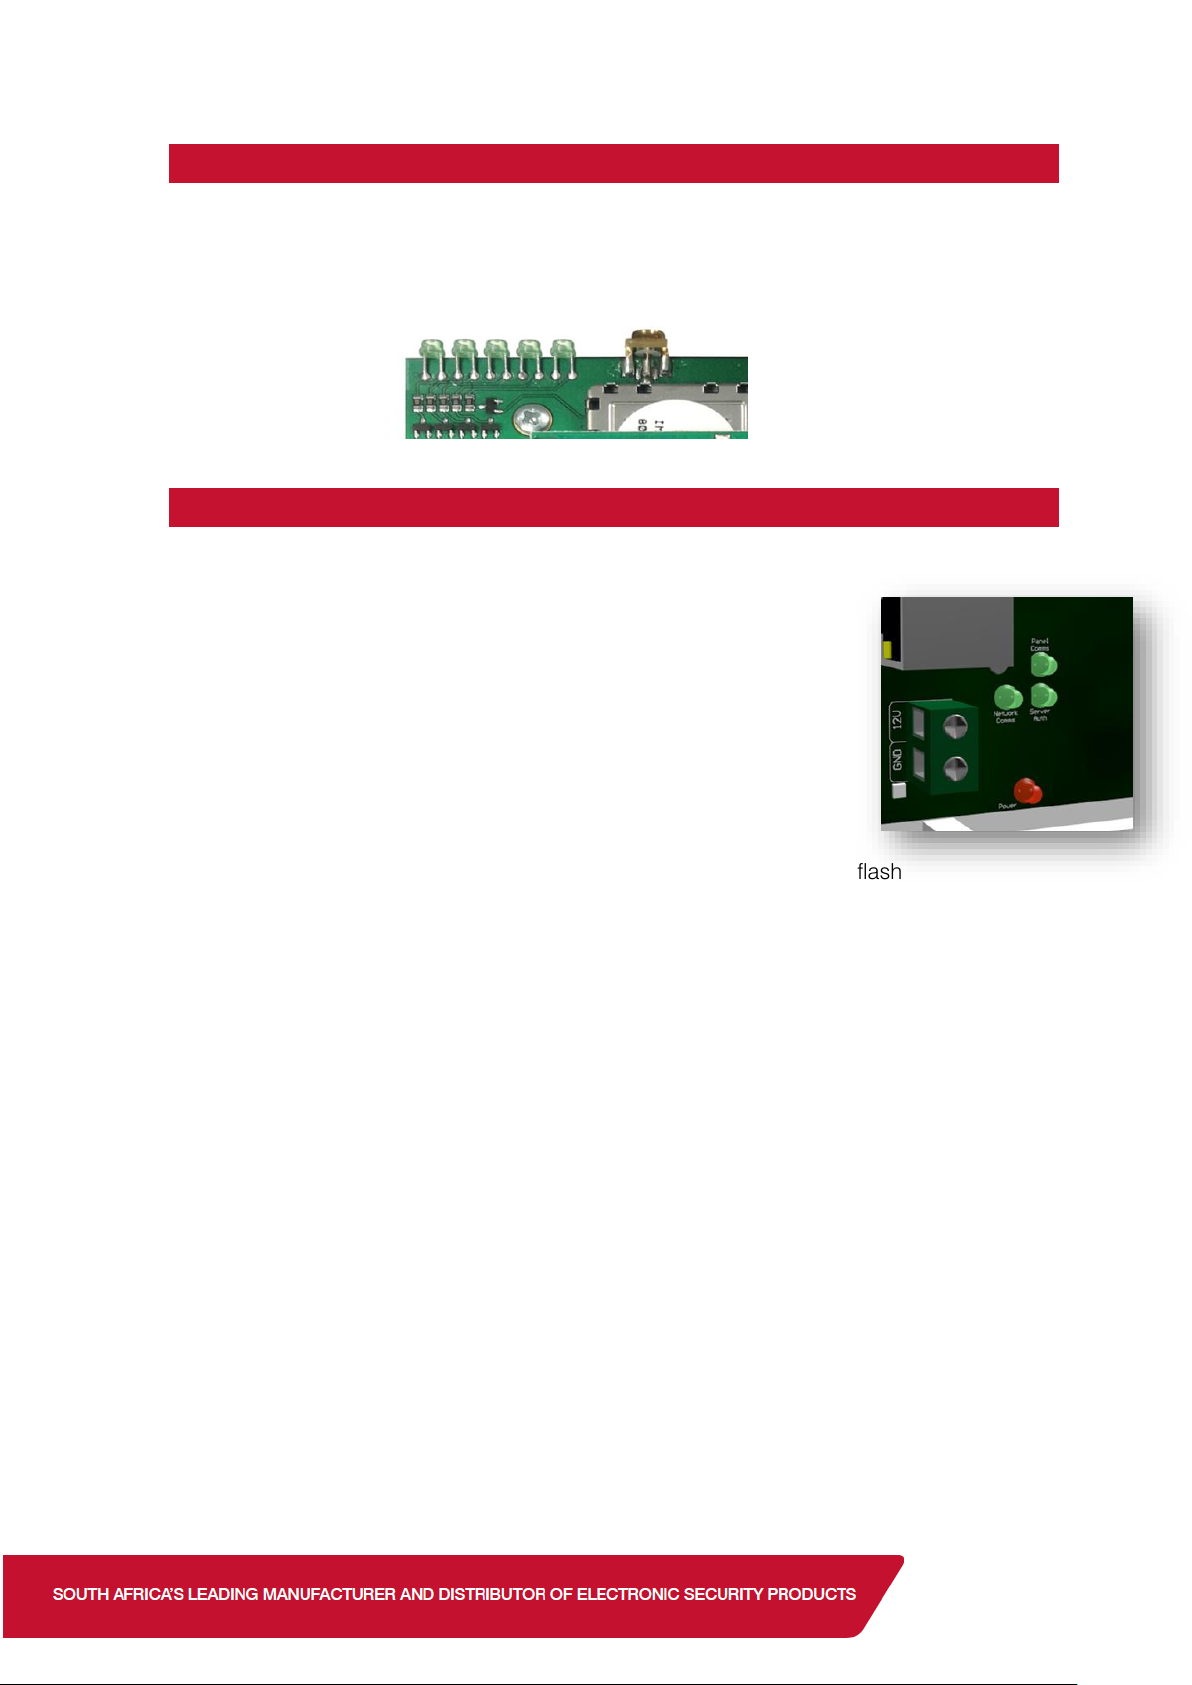
1.7. HYYP IP Connect LEDs
The HYYP IP Connect Module has 4 LEDs that you can use to view its status.
Power LED –On when the HYYP IP Connect Module has sufficient power.
Panel Comms LED –Flashes when communicating with the X-Series
Panel.
Network Comms LED –Flashes when communicating on the network.
Server Auth LED –On when connected to the HYYP platform.
On power up the Network Comms and Server Auth LEDs will flash
together, and once it has made a successful connection to the HYYP
platform the Server Auth LED will stay on and the Network Comms LED will flash
when it’s communicating on the network.
If the Server Auth and Network Comms LEDs continue to flash the same number then there is
an error on the HYYP IP Connect Module. You can determine the error by the amount of times
the LEDs flash.
See error numbers below:
1 –System error –
Replace unit.
2 –Can’t initialise Ethernet port. –
Router not connected.
3 –Can’t get IP address from DHCP server. –
Router not supplying IP Address.
4 –Can’t connect to the Time server. –
Isn’t connected to the internet.
5 –Unable to log on to the HYYP platform.
6 –Unable to register on the HYYP platform.
Remember:
When using the IP Connect you must go back to location 196 and enter * when asked to press
sync button.
2.HYYP Home App
With HYYP Home you have remote access to monitor and control your home or business
anywhere, anytime, in real time.
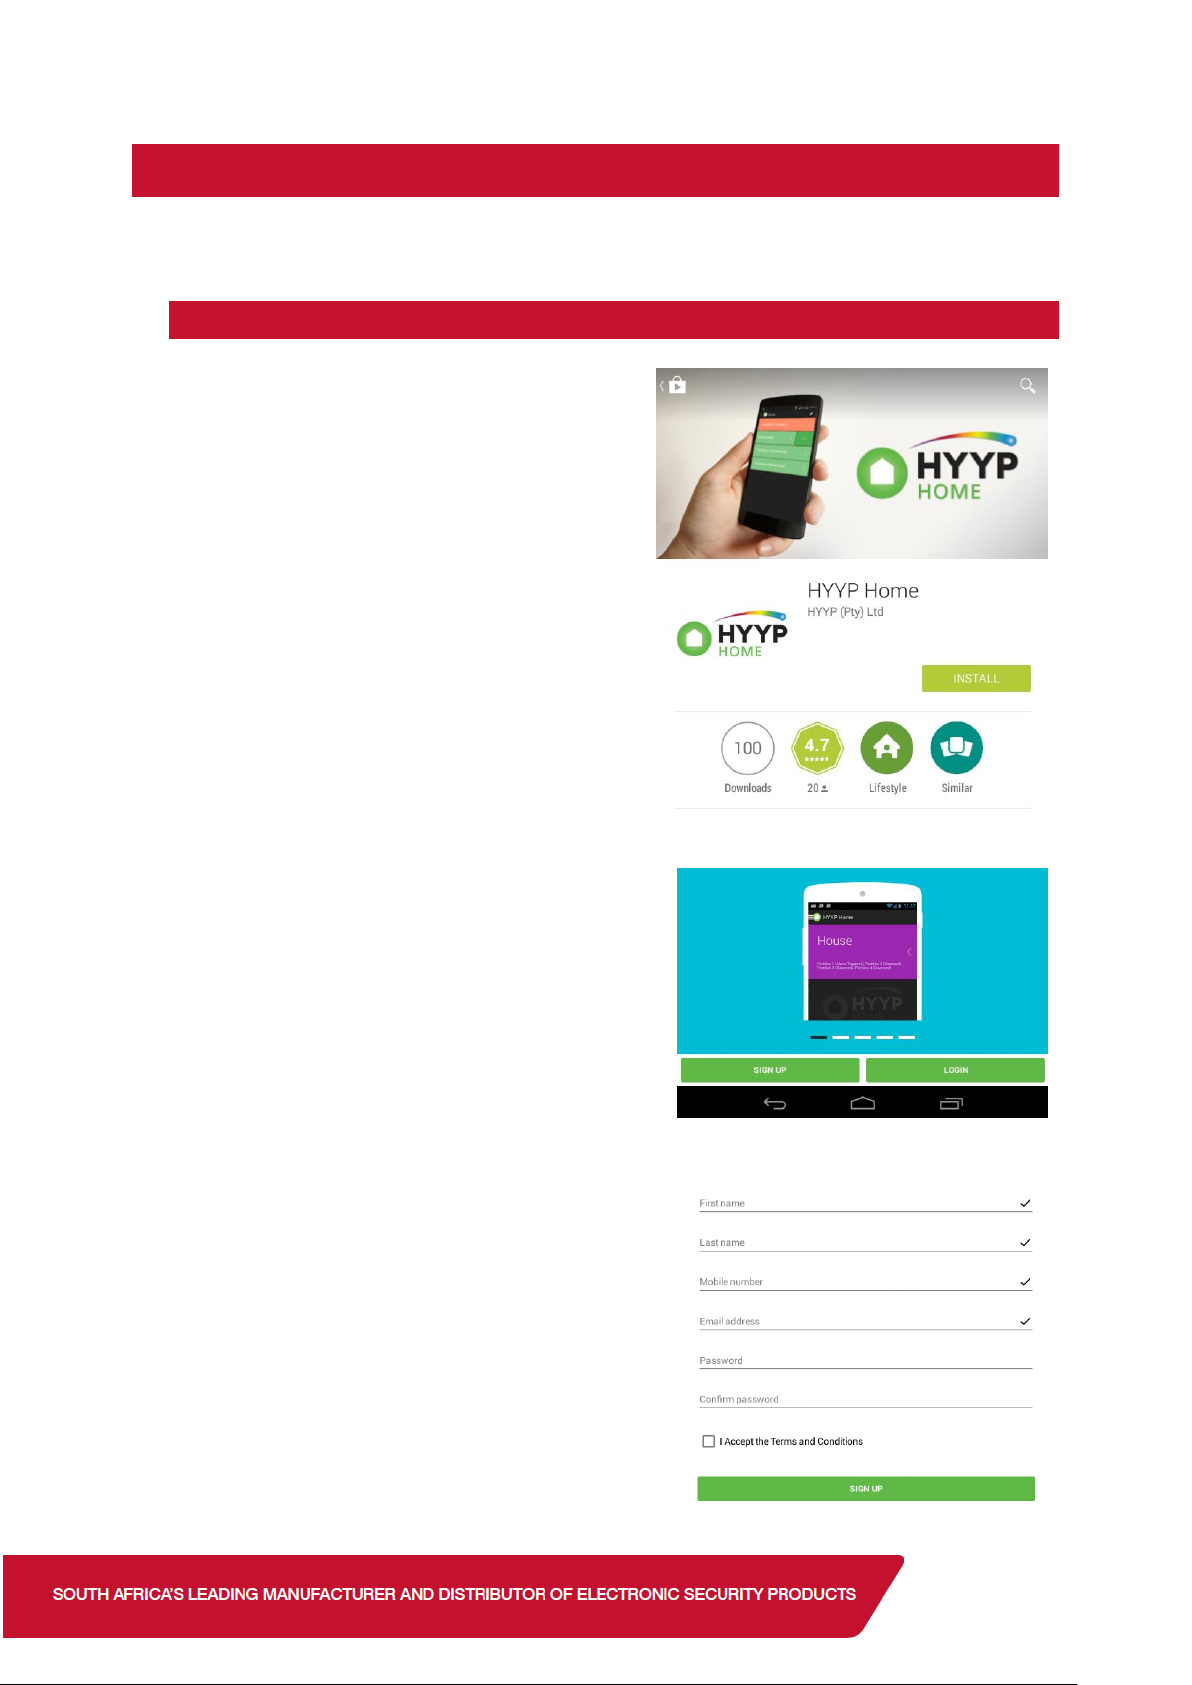
2.1. Installing the HYYP Home App
To install the HYYP Home App go to the Google
Play Store and search for HYYPHome. And click
install.
Once installed open the HYYPHome App, the first
time you open the app you will be asked to sign up,
or login if you have already registered.
Click ‘Sign Up’ to register and activate a device to the
app.
Fill in your details, accept the terms and conditions
and click sign up.
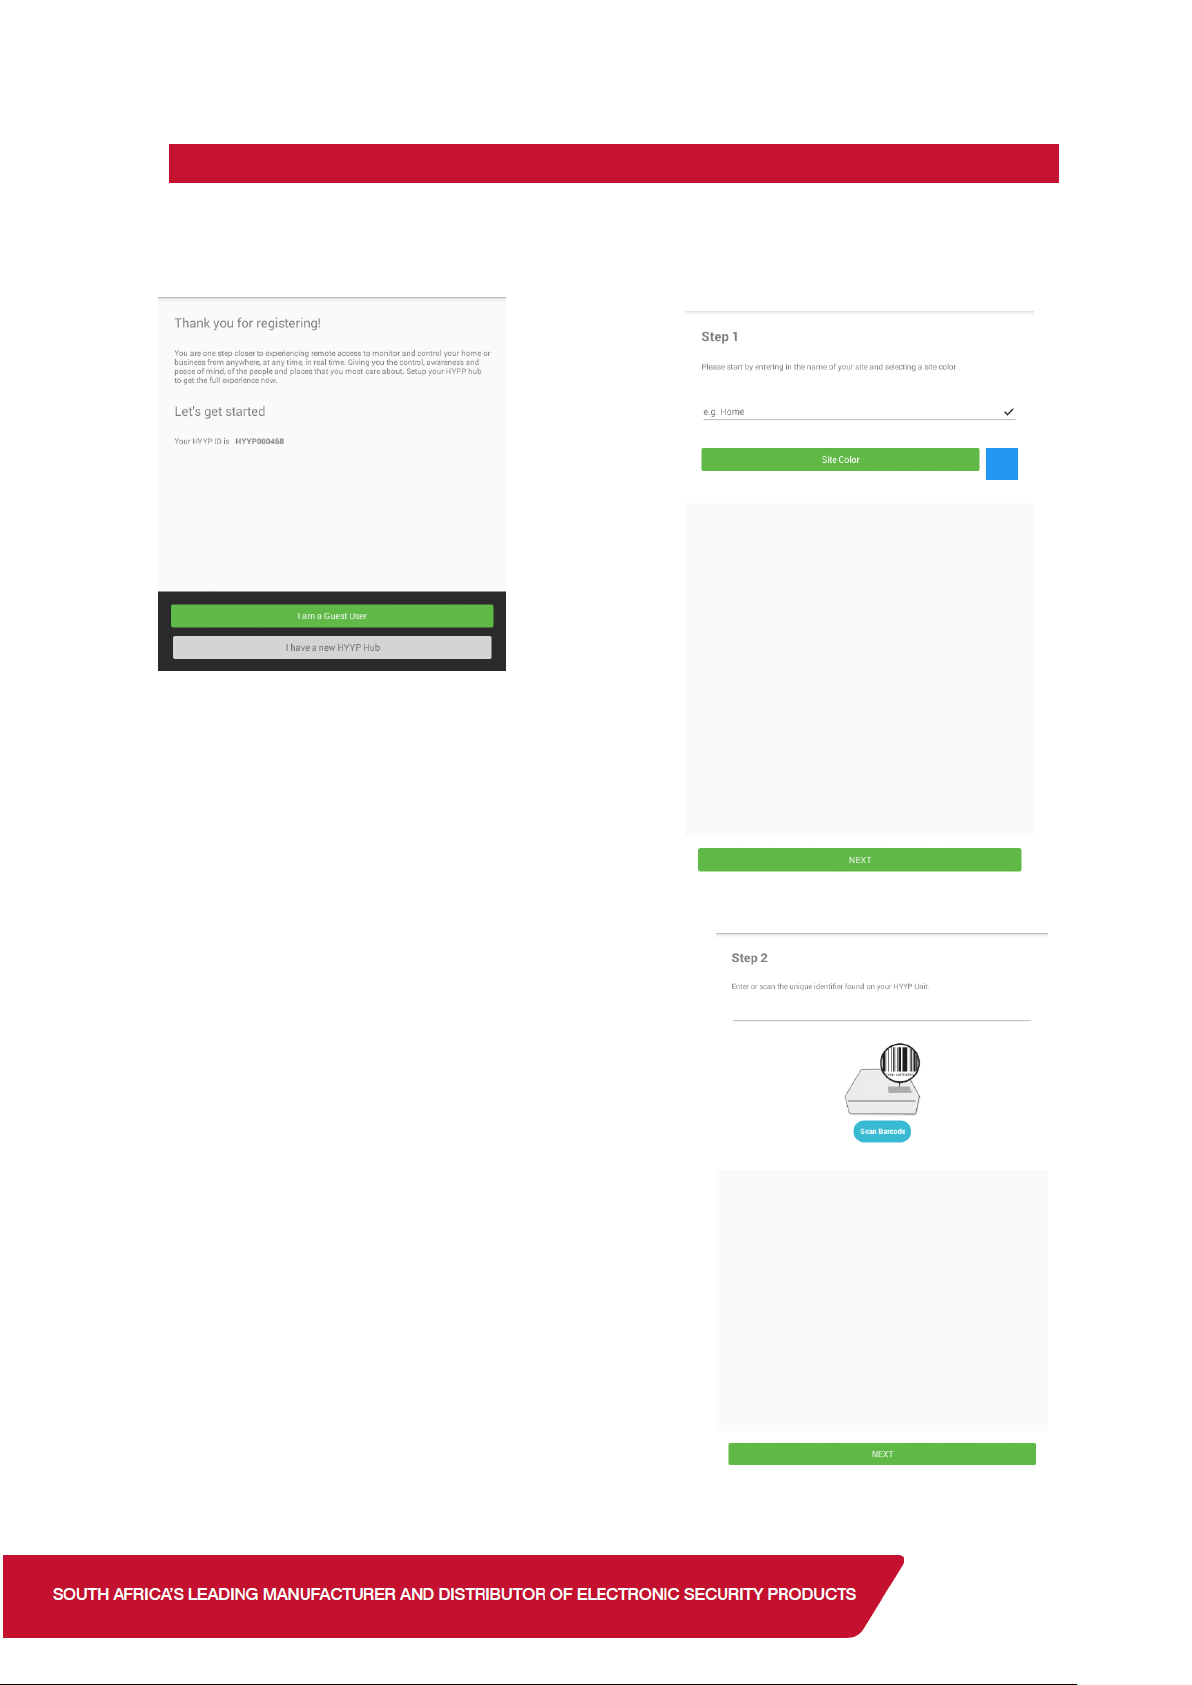
2.2. Adding a site
Once registered you will be given a HYYP ID and asked if you have a HYYP Hub to connect.
Click ‘I have a new HYYP Hub’.
Give your HYYP Hub a name and choose a site colour.
The site colour will help distinguish between multiple
sites.
Click ‘Next’.
Enter the HYYP Hub IMEI number or scan the unique
barcode on the HYYP Hub.
Click ‘Next’.

Press the sync button on the HYYP Hub.
When using the IP Connect you must go back to location
196 and enter * when asked to press sync button.
Fill in details of where the HYYP Hub is installed.
Click ‘Next’.
Your HYYP Hub has successfully been synced with the HYYP
Home app.
Click ‘Done’.

3.Error Codes
3.1. Error 205
Error code 205 indicates an invalid user. Someone else has been made master user of that
HYYP hub.
3.2. Error 206
Error code 206 indicates that the hub is busy. When the HYYP hub is connected to a panel it
sends all the panels data to the app server, this can take up to 10 minutes. Wait 10 minutes
before trying again.
*Check the panel version is 2.52 or higher and that there are no blank zone names.
3.3. Error 207
Error 207 indicates the commands time stamp is outdated. This could be due to the network
delaying the message.
3.4. Error 208
Error 208 indicates that communication to the panel has timed out. This often happens if the
serial code hasn’t been set. Set the serial code in location 196.
3.5. Error 210
Error 210 indicates the panel has rejected the serial code. Try programming the serial code
again in location 196. Make sure the HYYP Hub is connected to the panel when the serial code
is programmed.
Table of contents


