Idylis AC-2125 User manual

1
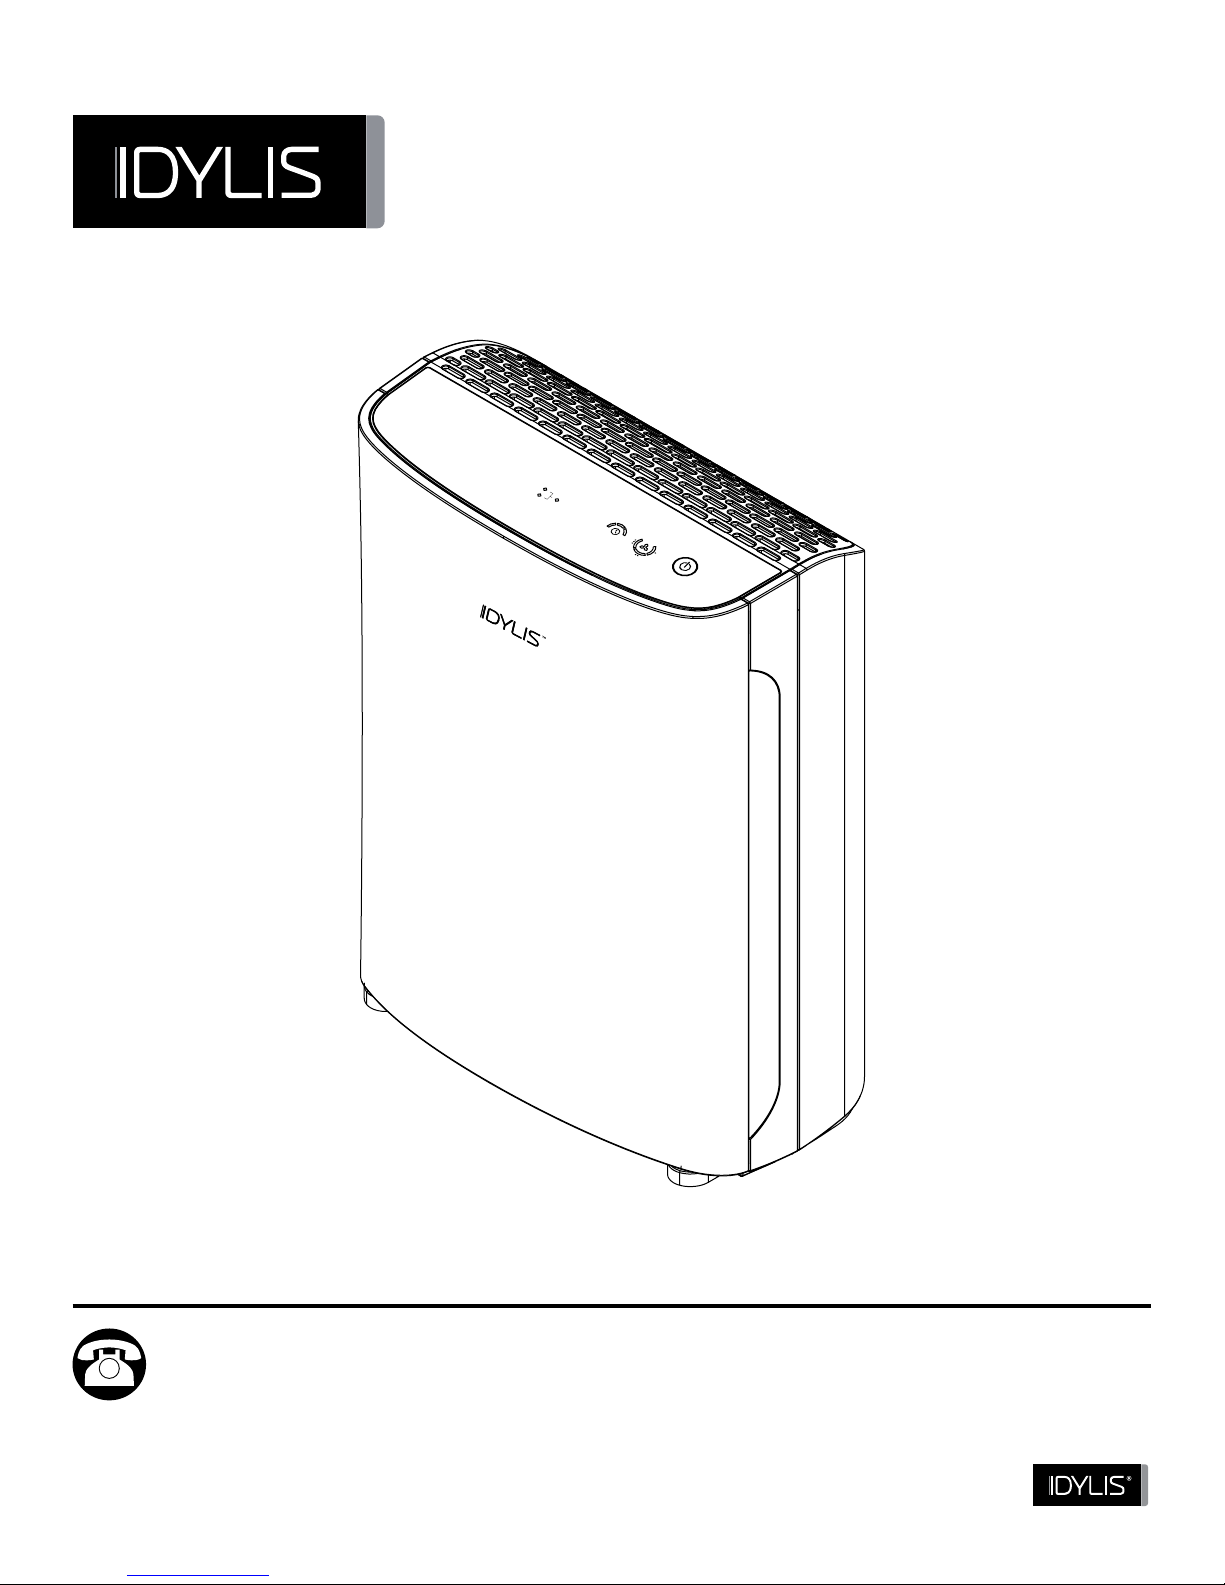
AIR PURIFIER
ITEM #0561196, #0561211
MODEL AC-2125, AC-2123
Français p. 15
IDYLIS® is a registered trademark
of LF, LLC. All Rights Reserved.
Questions, problems, missing parts? Before returning to your retailer, call our customer
service department at 1-800-643-0067, 8 a.m. - 6 p.m., EST, Monday - Thursday,
8 a.m. - 5 p.m., EST, Friday.
AB14355
reset
change
Carbon
Filter
change
HEPA Filter
2
4
8
Lowes.com
®
Español p. 29

2
TABLE OF CONTENTS
PRODUCT SPECIFICATIONS
Package Contents............................................................................................................... 3
Safety Information ...............................................................................................................4
Controls and Display ............................................................................................................ 5
Preparation ..........................................................................................................................5
AssemblyInstructions.............................................................................................................6
Operating Instructions ........................................................................................................ 8
Care and Maintenance ....................................................................................................... 10
Troubleshooting..........................................................................................................................11
Warranty......................................................................................................13
SPECIFICATIONS
Model: AC-2125
Rated Voltage: 120 V ~ 60 Hz
Power Consumption: 67 W
Product Insulation Class: Grade 2 Device
Dust Collection Method: HEPA Filter
Product Dimensions: 12.2 in. x 8.9 in. x 17.3 in.
Product Weight: 8.77 lbs.
SPECIFICATIONS
Model: AC-2123
Rated Voltage: 120 V ~ 60 Hz
Power Consumption: 80 W
Product Insulation Class: Grade 2 Device
Dust Collection Method: HEPA Filter
Product Dimensions: 15 in. x 9.89 in. x 20.2 in.
Product Weight: 12.3 lbs.
Lowes.com
3
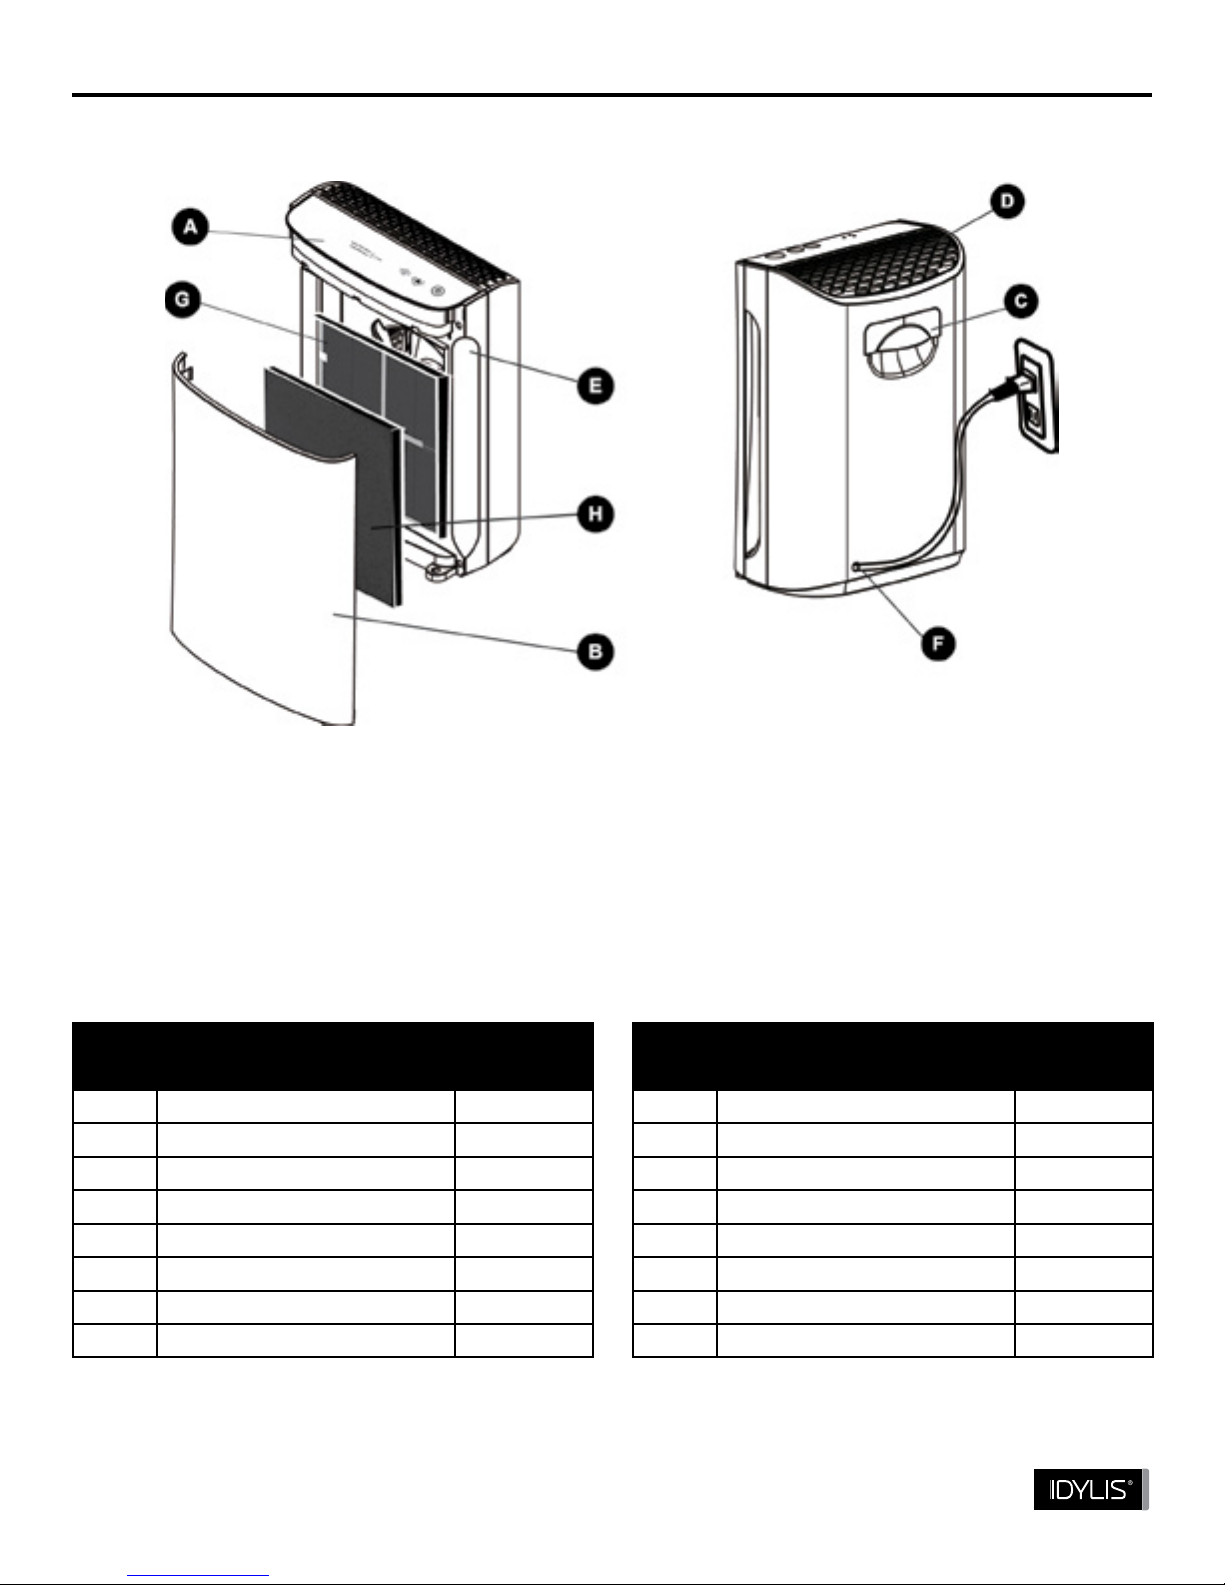
PACKAGE CONTENTS
K
AC-2125
PART DESCRIPTION QUANTITY
A Controls/Display Panel 1
B Front Cover 1
C Handle 1
D Air Outlet 1
E Air Inlet 1
F Power Cord 1
G HEPA Filter 2
H Carbon Pre-Filter 2
Lowes.com
AC-2123
PART DESCRIPTION QUANTITY
A Controls/Display Panel 1
B Front Cover 1
C Handle 1
D Air Outlet 1
E Air Inlet 1
F Power Cord 1
G HEPA Filter 1
H Carbon Pre-Filter 1

4
SAFETY INFORMATION
WARNING
Please read and understand this entire manual before attempting to assemble, operate or install
the product.
1. Do not place product where water splashes can occur. Electric shock and breakdown may
occur as a result.
2. Do not let children play with or climb on product.
3. Do not spray any ammable materials such as insecticides or fragrances around the prod-
ucts, otherwise re may occur or product performance may deteriorate.
4. To reduce the risk of electric shock, this product has a polarized plug (one blade is wider than
the other) as a safety feature. This plug will t into a polarized outlet only one way. If the plug
does not t fully into the outlet, reverse the plug. If it still does not t, contact a qualied elec-
trician. DO NOT attempt to defeat or override this safety feature.
5. Do not operate any air purier with a damaged cord or plug.
6. To reduce the risk of re or electric shock, do NOT use this fan with any solid-state speed
control device.
7. Do not place product in direct sunlight, otherwise deformation or discoloration may occur.
8. Do not install the product on a sloped oor. Do not exert excessive shock on the product.
9. Replace lters in accordance to the lter replacement cycle or when lter change indicator is
on.
10.Install the air purier at least 6 ft. 7 in. away from electronic appliances such as TV, otherwise
radio interference may occur.
11. Place the air purier in an area that is out of the reach of children.
1. Connect the power plug to a dedicated electrical outlet for 120 V ~ 60 Hz.
2. Do not use an adapter or an extension cord.
3. Do not attempt to repair or modify the power cord.
4. Remove the power plug from the electrical outlet before any repair, inspection,
cleaning or parts replacement.
5. Do not disconnect the power by pulling the cord or remove the plug from the outlet
repeatedly.
6. Do not severely bend the power cord or place any heavy objects on it.
7. If the power cord is damaged, do not try to repair it yourself.
8. Clean dust off power cord before using. Do not wipe with a volatile material.
9. Do not insert nger or body in the inlets or the air outlets. Physical injury or product
malfunction may occur as a result.
10.Operate indoors only.
11. Don’t operate the product without any lters inside the product.
READ AND SAVE THESE INSTRUCTIONS
Lowes.com
5
PREPARATION
Before beginning assembly of product, make sure all parts are present. Compare parts with package
contents list. If any part is missing or damaged, do not attempt to assemble the product.
Always remove the lter bag before installation.
The unit is for residential, indoor use only.
Remove power plug from the socket when not in use.
Insert lters back into the product.
reset
change Carbon Filter
change HEPA Filter
2
4
8
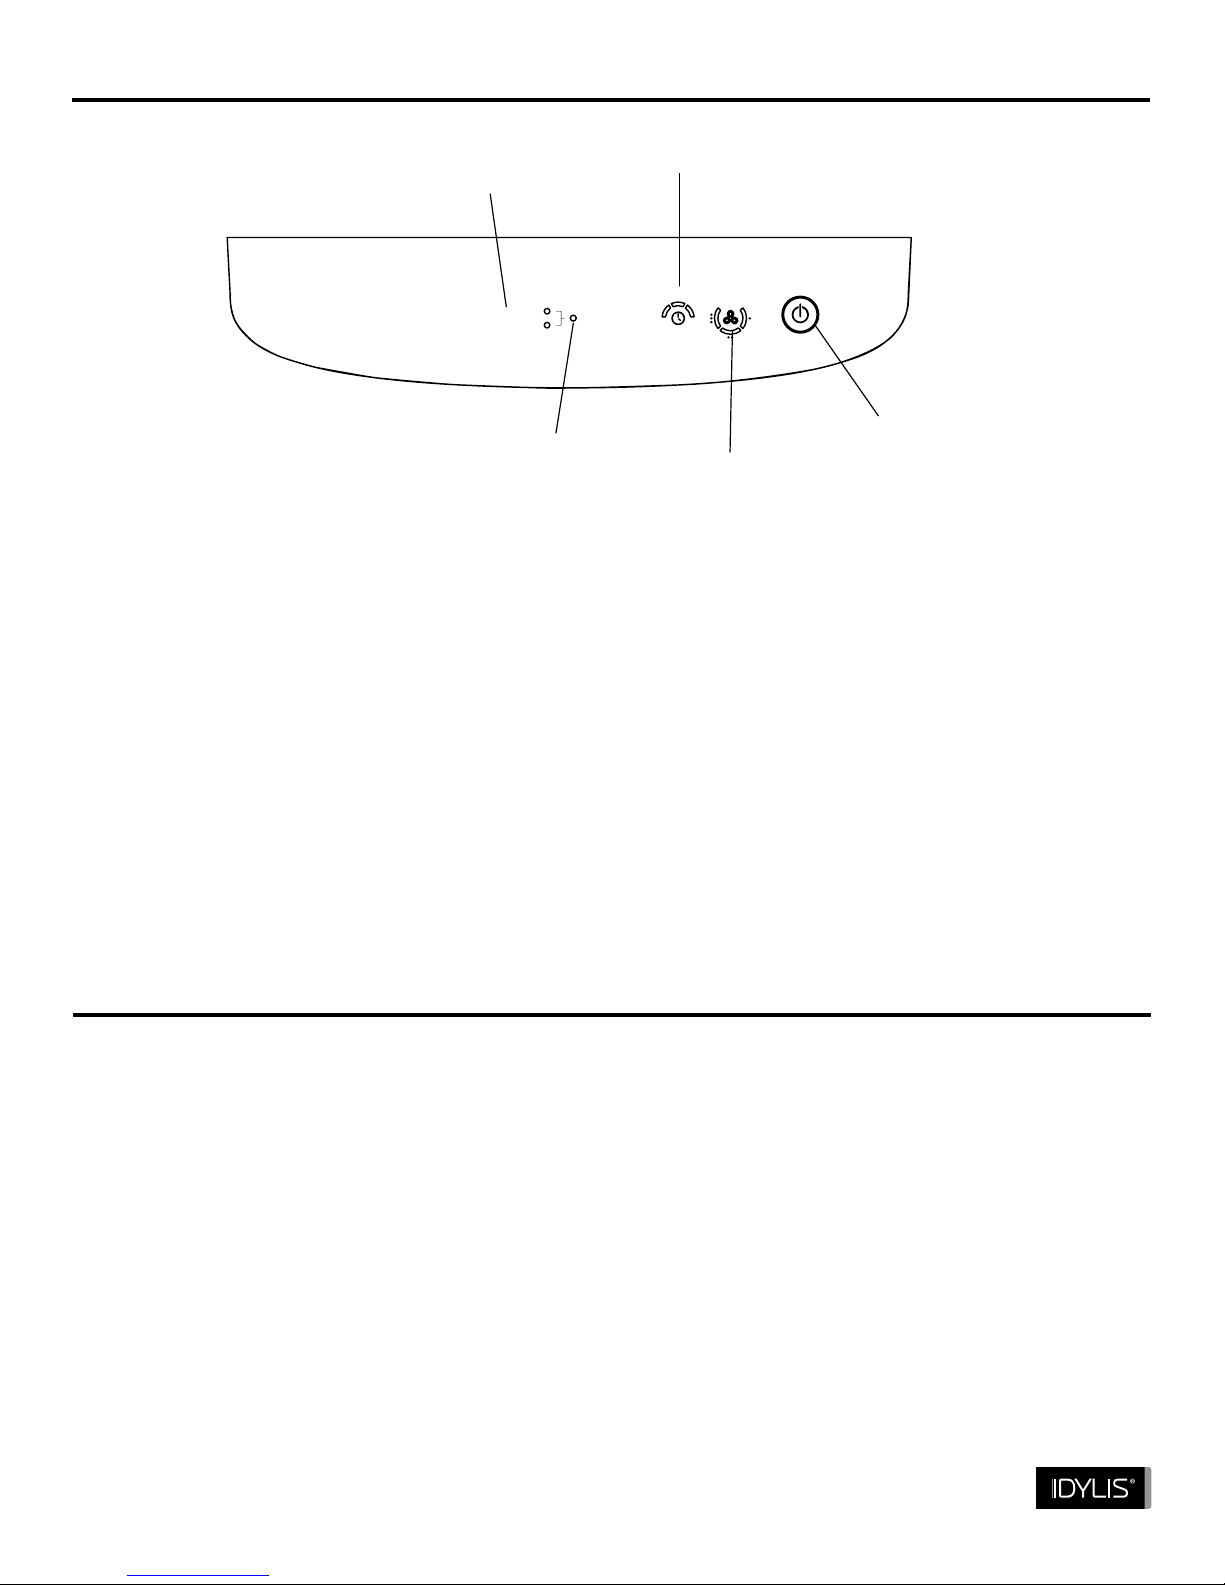
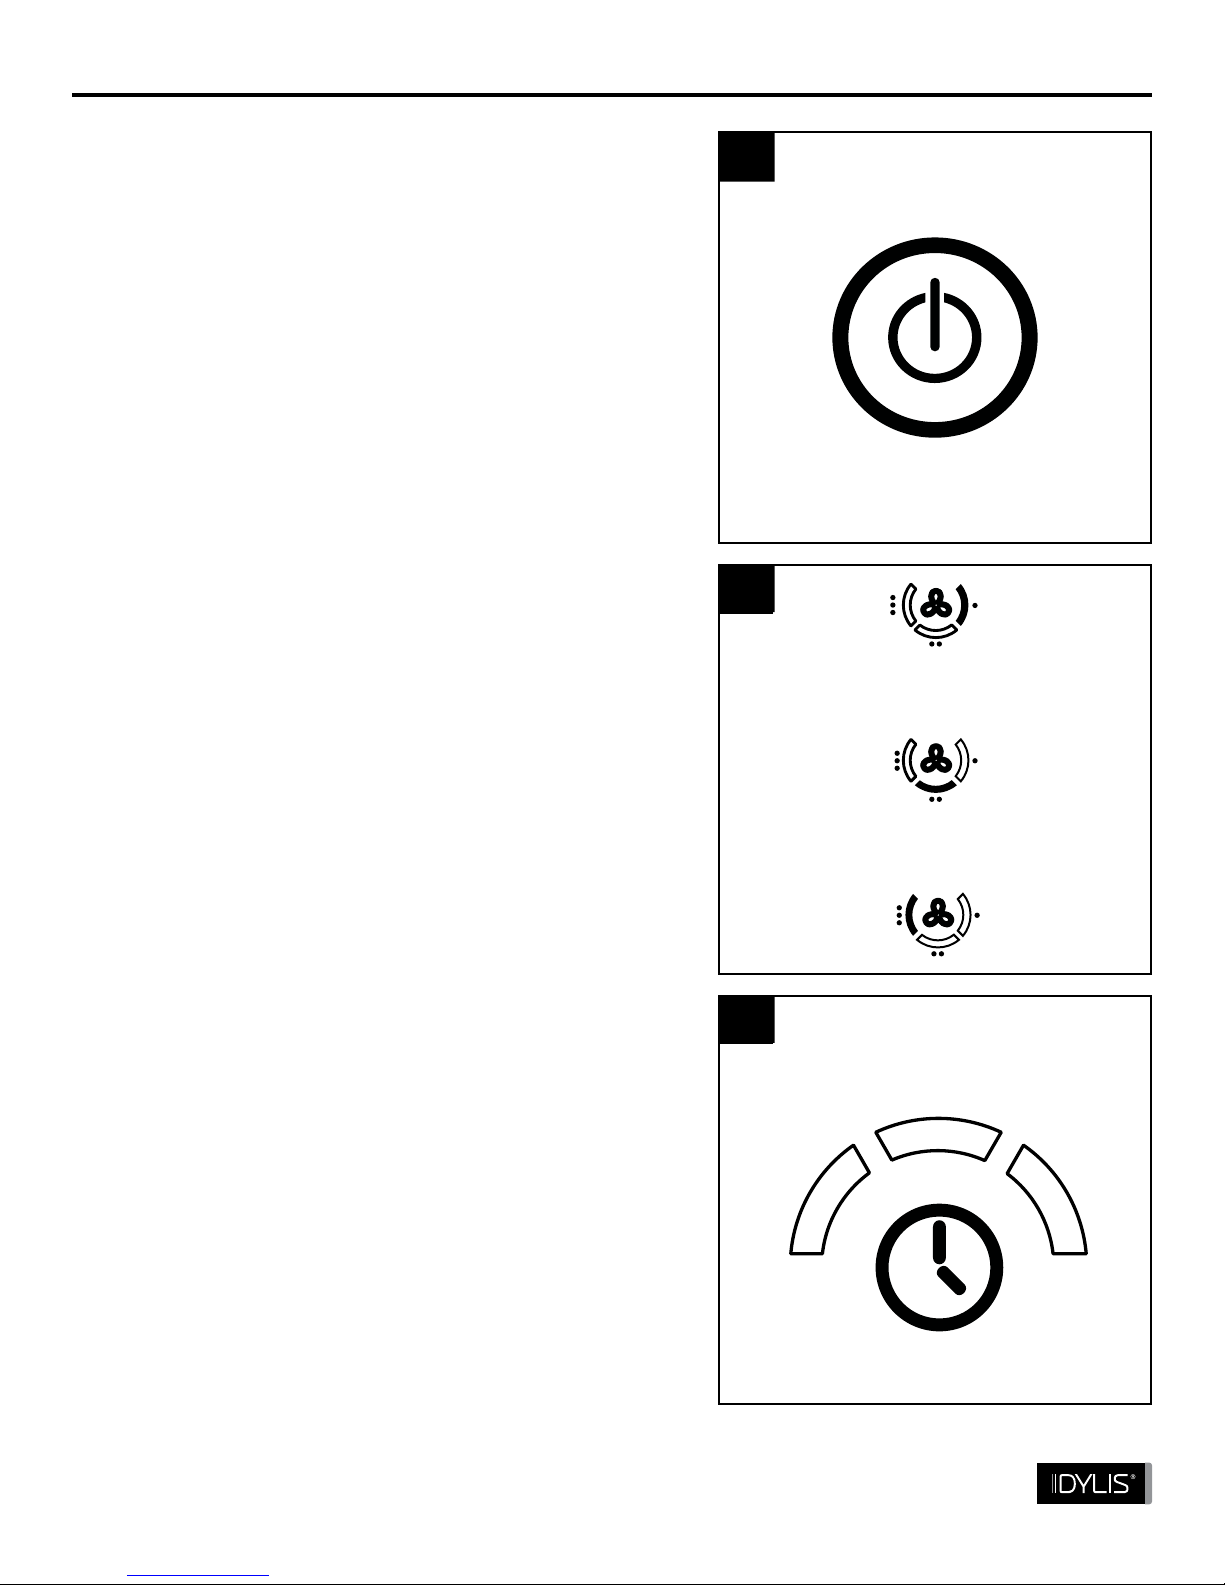
Power button
Filter Reset button Fan Speed
Timer
Filter Change Indicator
Power Button: Turns unit ON or OFF
Fan Speed: Illuminated to show the selected airow fan speed. LOW - MED - HIGH
Timer Button: When the timer button is pressed, the desired operation time can be selected in the
order: “2 hour, 4 hour, 8 hour.”
Filter Reset Button: Resets the unit for operation. Button must be pressed after lter replacement
and after changing the carbon pre-lter.
Filter Change Indicator: Illuminated indicating lter change is needed for either HEPA or CARBON
lter.
Lowes.com
CONTROLS AND DISPLAY
6
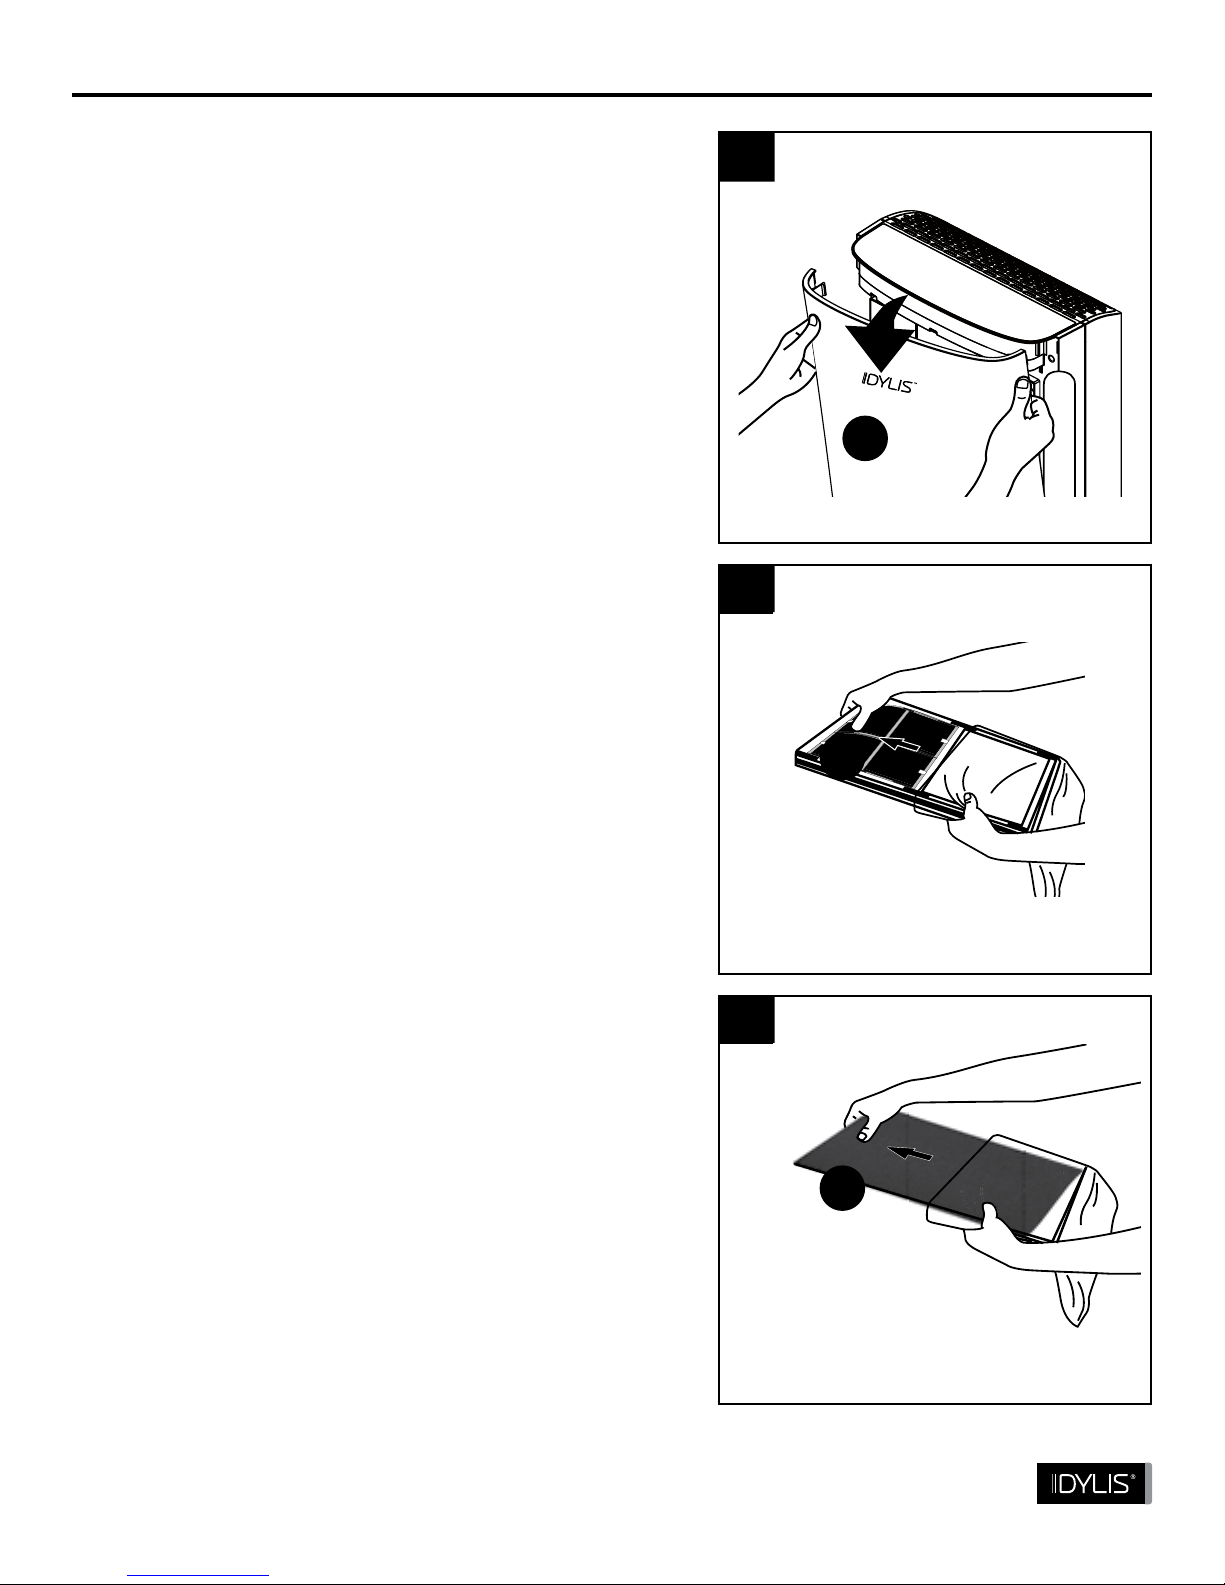
ASSEMBLY INSTRUCTIONS
1. Open by pulling the top off the front cover (B).
2. Remove the lter bag from HEPA lters (G).
1
2
B
Lowes.com
FRONT
G
3. Remove the lter bag from the carbon pre-lter
(H) and rest the carbon pre-lter directly on the
HEPA lter (G).
FRONT
3
H
7
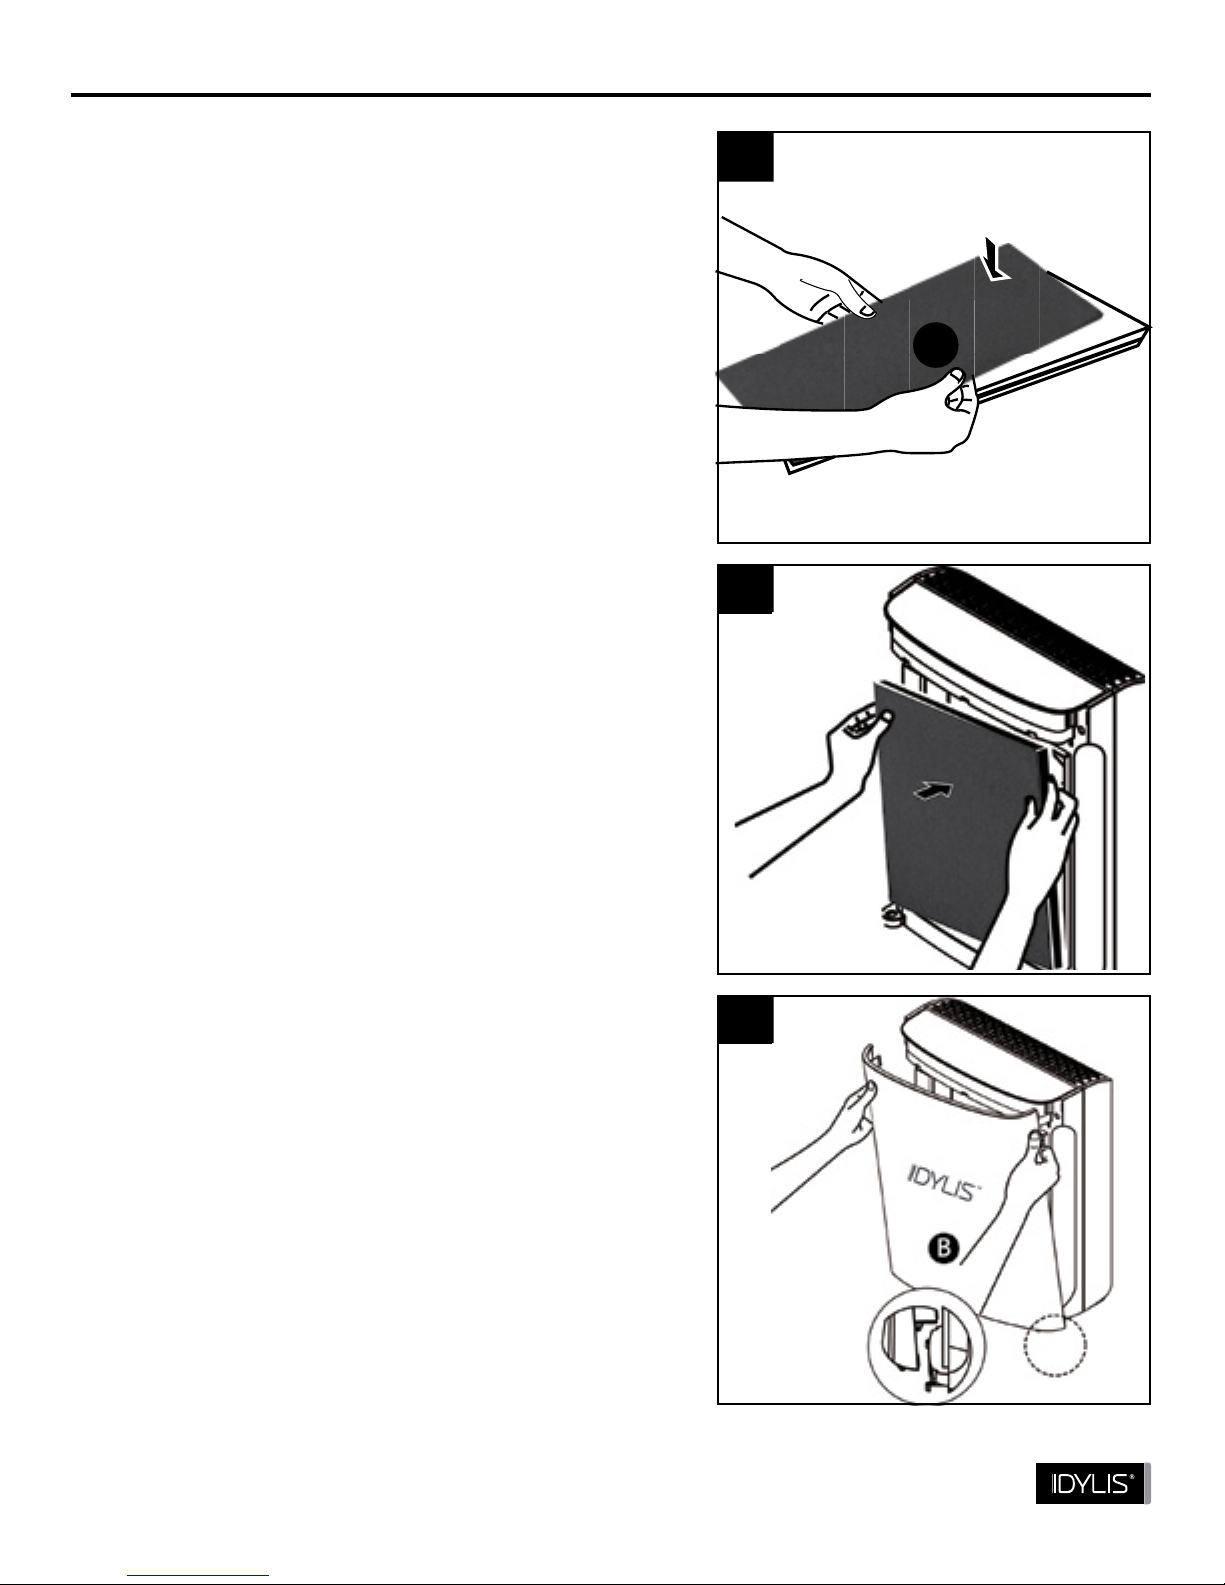
ASSEMBLY INSTRUCTIONS
4. Secure by pressing the carbon pre-lter (H)
against the fastening materials of the lter frame.
5. Insert lters back into the product.
4
5
Lowes.com
6. To reinstall the front cover (B), place the bottom
tabs on the front cover into the slots at the bottom
of the unit. Push the top of the front cover (B)
toward the unit until the front cover (B) locks into
place.
6
H
8
OPERATING INSTRUCTIONS
Power Button
Press the power button to turn on the unit.
Speed Mode
1. Low speed - Recommended for use when soft
background noise is unwanted.
2. Medium speed - Typical usage setting.
Soft background noise is not an issue.
3. High speed - Use when quick, efcient results to
a room’s air quality are desired.
1
2
Lowes.com
Timer Mode
Press the TIMER button to select from 3 timer
modes: “2 hour – 4 hour - 8 hour.” The unit
automatically shuts off when the selected time is
reached.
3
2
4
8
9
OPERATING INSTRUCTIONS
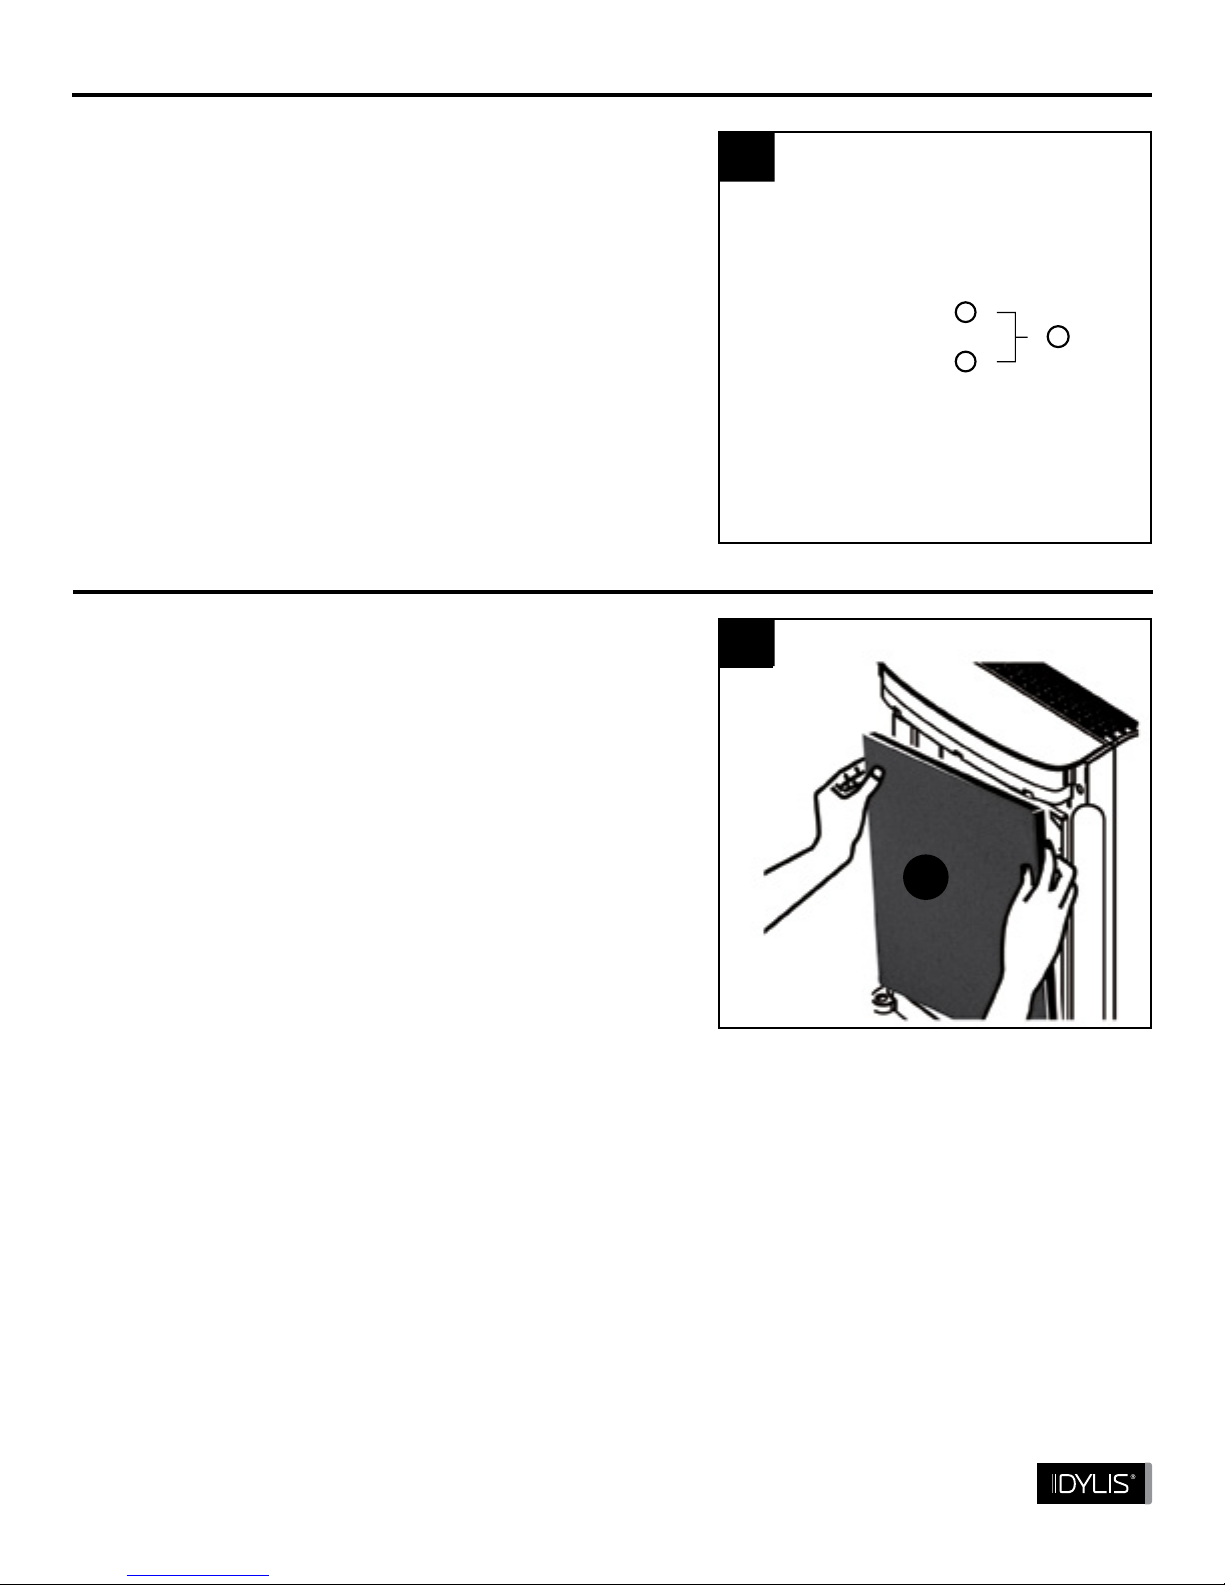
Filter Reset
When the “CHANGE” lter icon light is on, replace
the designated lter (HEPA or CARBON), and
press the “FILTER RESET” button with a pointed
tool. Hold the reset button down for 3 seconds to
reset. The unit will beep when the reset is complete
The “FILTER RESET” button works only when the
“CHANGE” lter icon light is on.
1. Open the front cover (B). Remove the carbon
pre-lter (H) and separate the lter frame.
4
1
Lowes.com
CARE AND MAINTENANCE - REPLACING THE CARBON PRE-FILTER
Reset
Change Carbon Filter
Change HEPA Filter
H

2. Remove the replacement carbon pre-lter from
the packaging. 2
CARE AND MAINTENANCE - REPLACING THE CARBON PRE-FILTER
3. Cut the replacement carbon pre-lter to the
proper size using the lter frame as a guide. 3
4. Rest the new carbon pre-lter (H) directly on the
HEPA lter (G). Secure by pressing the carbon pre-
lter (H) against the fastening materials of the lter
frame. With the power to the unit on, press the lter
replacement Reset button with a pointed tool.
4
FRONT
H
H
H
10
Lowes.com

11
CARE AND MAINTENANCE - CLEANING THE UNIT
1. Remove the front cover (B) and clean with a soft,
dry cloth or brush. Use a soft, damp cloth if need-
ed. Do not use abrasive materials.
2. Use a dry, soft cloth to clean the product body.
1
2
B
Lowes.com

12
CARE AND MAINTENANCE - REPLACING THE HEPA FILTER
1. Open the front cover and remove the HEPA lter.
Separate from the lter frame. Remove the HEPA
lters (G) by pulling on the tabs on the side of the
lters.
2. Remove the bag from the new HEPA lters (G)
(not included) and insert into the lter frame with
the non-woven fabric facing the front.
1
2
G
Lowes.com
FRONT
G
3. Reattach the carbon pre-lter (H) to the HEPA
lters (G) and close the front cover. With power to
the unit on, press the FILTER RESET button with a
pointed tool.
3
B
13
CARE AND MAINTENANCE: FILTER REPLACEMENT CYCLES
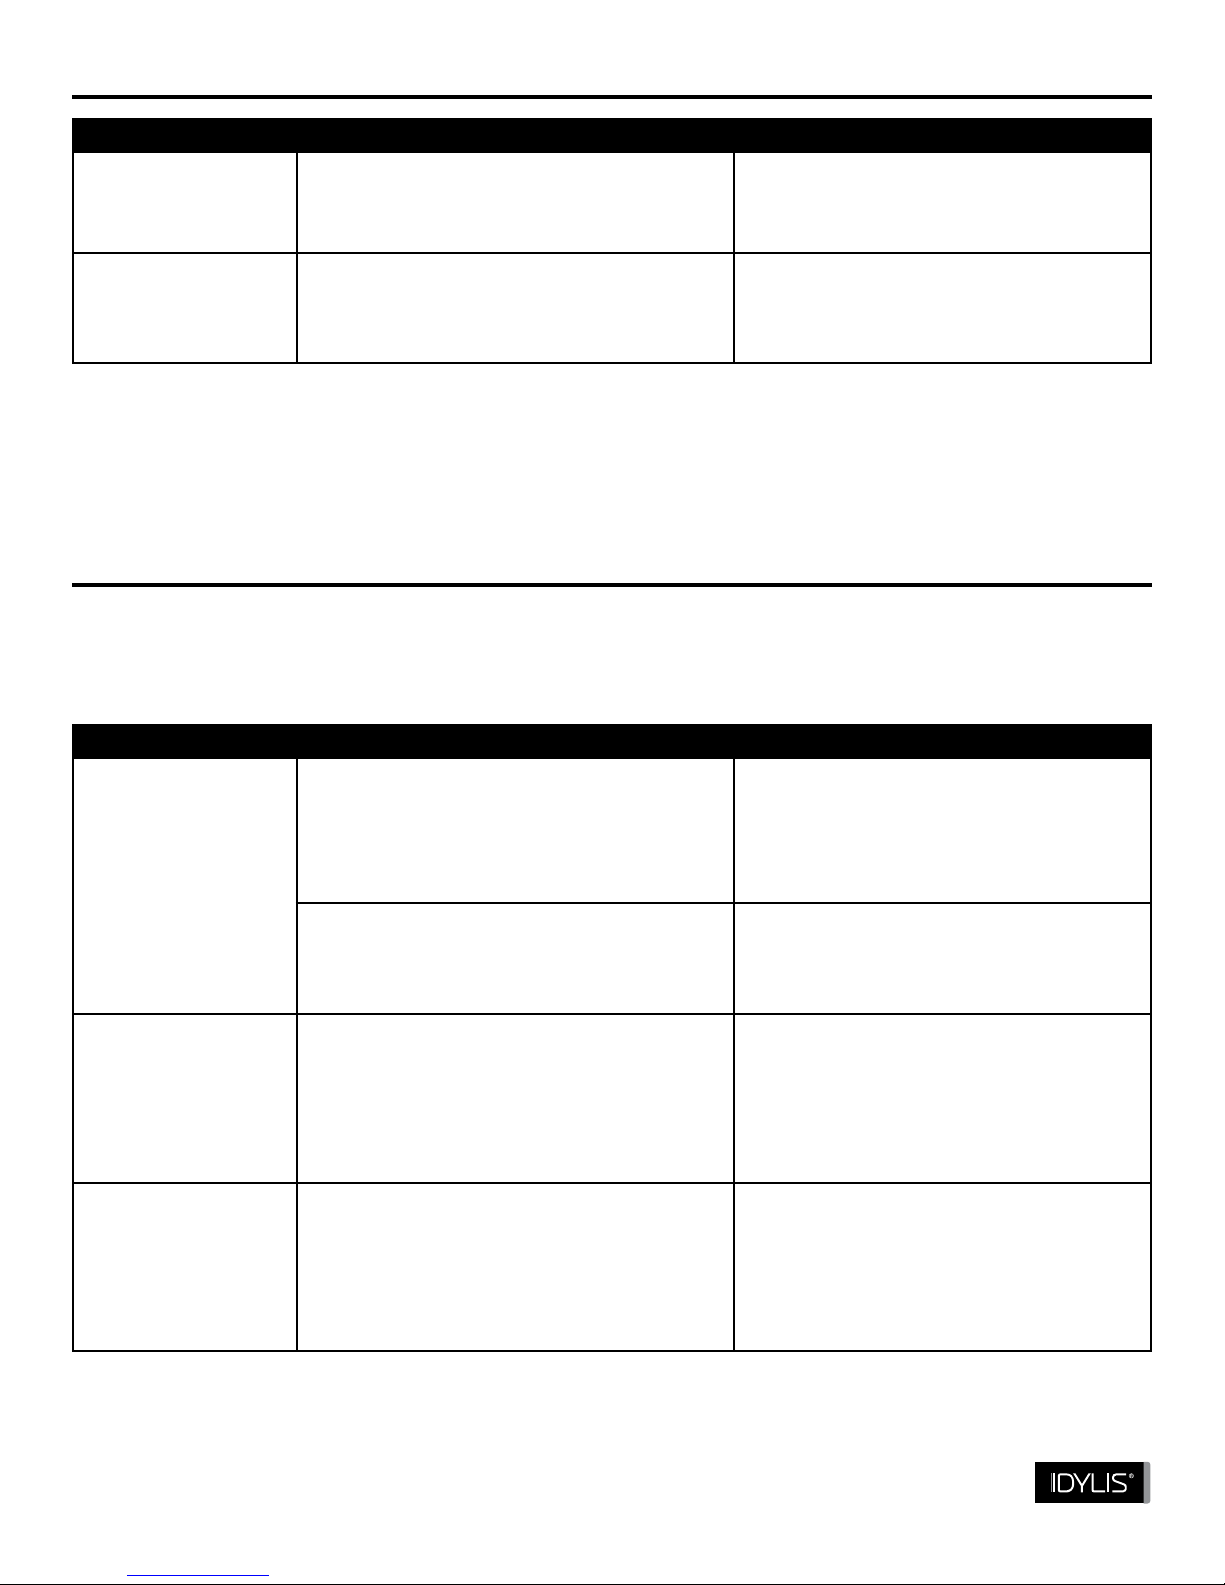
TROUBLESHOOTING
PROBLEM POSSIBLE CAUSE CORRECTIVE ACTION
No air is blowing.
The power cord is not connected. Connect the power cord to an electric
outlet for 120 V ~ 60 Hz.
Are the display panel lights off? Press the power button and then
select the desired function.
The airow speed
is signicantly
weaker than
before.
The lter needs to be replaced. Check the lter replacement
cycles and then replace the lter if
necessary.
An unpleasant odor
is emitted from the
unit.
The lter needs to be replaced. Check the lter replacement
cycles and then replace the lter if
necessary.
FILTER CLEAN/CHANGE CYCLE CLEAN/REPLACE
Carbon Pre-lter Every 6 months Replace
HEPA Filter Every 12 months with proper care and
maintenance
Replace
Lowes.com
Each service life is based on 12-hour use per day.
The recommended lter replacement cycles may differ depending on the operation environment.
The recommended lter replacement cycles are according to proper care and maintenance in a
normal environment.
In some cases, problems can be solved easily without the help from the customer service department
just by checking the following. If the problem still persists after you check the following, then contact
the customer service department.

14
WARRANTY
Lowes.com
THREE YEAR LIMITED WARRANTY:
This Three Year Warranty coverage starts from date of original purchase and applies to the Motor and
Electronic parts.
This product is warranted to be free from defects in material or workmanship as noted above for Five
Year from date of original purchase.
This limited warranty does not cover lters which are expendable parts that can wear out in normal
use within the warranty period. This limited warranty is void if instructions for changing lters are not
followed in a timely manner.
This limited warranty does not cover any defect or damage resulting from improper use of this
product. READ ALL INSTRUCTIONS BEFORE OPERATING THIS PRODUCT.
This limited warranty is void if the product has been misused or attempts have been made to repair it.
This product is not repairable. Do not attempt to repair it.
Return a defective product with proof of purchase to the store from which it was purchased for free
repair or replacement at the seller’s option.
This warranty gives you specic legal rights; you may have additional legal rights which vary from
State to State.
REPLACEMENT PARTS LIST
PART DESCRIPTION PART #
HCarbon Pre-lter Filter U
G Model AC-2123 HEPA Filter Filter D
G Model AC-2125 HEPA Filter Filter (B) x2
For replacement parts, call our customer service department at 1-800-643-0067, 8 a.m. - 6 p.m.,
EST, Monday - Thursday, 8 a.m.- 5 p.m., EST, Friday.
Printed in China
IDYLIS® is a registered trademark
of LF, LLC. All Rights Reserved.
15
ÉPURATEUR D’AIR
ARTICLE #0561196, #0561211
MODEL AC-2125, AC-2123
IDYLIS® est une marque de commerce déposée
de LF, LLC. Tous droits réservés.
Des questions, des problèmes, des pièces manquantes? Avant de retourner l’article
au détaillant, appelez notre service à la clientèle au 1 800 643-0067, entre 8 h et 18 h
(HNE), du lundi au jeudi, ou entre 8 h et 17 h (HNE) le vendredi.
reset
change
Carbon
Filter
change
HEPA Filter
2
4
8
Lowes.com
®

16
TABLE DES MATIÈRES
CARACTÉRISTIQUES DU PRODUIT
Contenu de l’emballage....................................................................................................... 3
Consignes de sécurité .........................................................................................................4
Commandes et afchage ................................................................................................... 5
Préparation .......................................................................................................................... 5
Instructions pour l’assemblage......................... ...................................................................6
Mode d’emploi .....................................................................................................................8
Entretien.............................................................................................................................10
Dépannage..........................................................................................................................11
Garantie......................................................................................................13
CARACTÉRISTIQUES
Modèle : AC-2125
Tension nominale : 120 V ~ 60 Hz
Consommation d’énergie : 67 W
Classe d’isolation du produit :
appareil de classe 2
Méthode de captage de la poussière : ltre HEPA
Dimensions du produit : 30,99 cm x 22,61 cm x
43,94 cm
CARACTÉRISTIQUES
Modèle : AC-2123
Tension nominale : 120 V ~ 60 Hz
Consommation d’énergie : 80 W
Classe d’isolation du produit :
appareil de classe 2
Méthode de captage de la poussière : ltre HEPA
Dimensions du produit : 38,1 cm x 25,12 cm x
51,31 cm
Lowes.com

17
CONTENU DE L’EMBALLAGE
K
AC-2125
PIÈCE DESCRIPTION QUANTITÉ
A Panneau de commandes 1
B Panneau avant 1
C Poignée 1
D Sortie d’air 1
E Entrée d’air 1
F Cordon d’alimentation 1
G Filtre HEPA 2
H2
Lowes.com
AC-2123
PIÈCE DESCRIPTION QUANTITÉ
A Panneau de commandes 1
B Panneau avant 1
C Poignée 1
D Sortie d’air 1
E Entrée d’air 1
F Cordon d’alimentation 1
G Filtre HEPA 1
H1

18
CONSIGNES DE SÉCURITÉ
AVERTISSEMENT
Assurez-vous de lire et de comprendre l’intégralité du présent manuel avant de tenter d’assem-
bler, d’utiliser ou d’installer l’article.
1. Ne placez pas l’appareil dans un endroit où de l’eau risque de gicler. Un choc électrique ou
une panne pourrait survenir.
2. Ne laissez pas les enfants grimper sur cet article ni le manipuler.
3. Ne vaporisez pas de substances inammables telles que des insecticides ou des par-
fums près de l’appareil, car elles pourraient causer des incendies ou une détérioration du
fonctionnement du produit.
4. Cet article est muni d’une che polarisée (une lame est plus large que l’autre) an de réduire
les risques de choc électrique. Cette che ne peut être branchée sur une prise polarisée que
dans un sens. Si la che ne peut être branchée sur la prise, essayez dans l’autre sens. Si elle
ne s’insère toujours pas, faites appel à un électricien qualié. NE tentez PAS de contourner
cette mesure de sécurité.
5. N’utilisez jamais un épurateur d’air dont le cordon ou la che sont endommagés.
6. An de réduire les risques d’incendie ou de choc électrique, n’utilisez PAS cet article avec un
appareil électronique de réglage de vitesse.
7. Ne placez pas l’article directement à la lumière du soleil, sinon il pourrait se déformer ou se
décolorer.
8. Ne l’installez pas sur un plancher incliné. Évitez de faire subir tout choc excessif à l’appareil.
9. Remplacez les ltres conformément aux cycles de remplacement des ltres ou lorsque le
voyant CHANGE FILTER s’allume.
10.Installez l’épurateur d’air à au moins 2,01 m des appareils électroniques, comme le téléviseur,
car il pourrait causer des interférences aux fréquences radio.
11. Rangez l’épurateur d’air dans un endroit hors de la portée des enfants.
1. Branchez le cordon d’alimentation sur une prise de courant réservée de 120 V et 60 Hz.
2. N’utilisez pas d’adaptateur ni de rallonge électrique.
3. Ne tentez pas de réparer ni de modier le cordon d’alimentation.
4. Débranchez le cordon d’alimentation de la prise de courant avant de procéder à toute
réparation ou inspection, à tout nettoyage ou au remplacement de pièces.
5. Ne coupez pas l’alimentation électrique en tirant sur le cordon d’alimentation et ne le
débranchez pas à répétition de la prise.
6. Ne pliez pas exagérément le cordon d’alimentation ou ne le placez pas sous des objets
lourds.
7. Ne tentez pas de réparer vous-même le cordon d’alimentation s’il est endommagé.
8. Si de la poussière colle au cordon d’alimentation, essuyez-le bien avant d’utiliser l’appareil.
Ne l’essuyez pas avec une substance volatile.
9. N’insérez pas votre doigt ou une partie de votre corps dans les prises ou les sorties d’air.
Vous pourriez vous blesser ou nuire au fonctionnement du produit.
10.Utilisez uniquement cet article à l’intérieur.
11. Ne faites pas fonctionner l’appareil s’il n’y a pas de ltre à l’intérieur.
Lowes.com
VEUILLEZ LIRE ET CONSERVER CES INSTRUCTIONS.

19
PRÉPARATION
Avant de commencer l’assemblage de l’article, assurez-vous d’avoir toutes les pièces. Comparez le
contenu de l’emballage avec la liste des pièces. S’il y a des pièces manquantes ou endommagées,
ne tentez pas d’assembler l’article.
Retirez toujours l’emballage du ltre avant l’installation.
L’appareil est conçu uniquement pour une utilisation résidentielle à l’intérieur.
Débranchez le cordon d’alimentation de la prise lorsque vous n’utilisez pas l’appareil.
Réinsérez les ltres dans l’appareil.
reset
change Carbon Filter
change HEPA Filter
2
4
8
Interrupteur : permet de mettre en marche et d’éteindre l’appareil.
Vitesse du ventilateur : le voyant s’allume pour indiquer le réglage de vitesse choisi. FAIBLE –
MOYENNE – ÉLEVÉE
Bouton de la minuterie : en appuyant sur ce bouton, vous pouvez sélectionner le temps de
fonctionnement : 2 heures, 4 heures et 8 heures.
Bouton Reset : réinitialise l’appareil an de le mettre en marche. Vous devez appuyer sur le bouton
après avoir changé le ltre et le préltre au charbon.
Indicateur de changement de ltre : le voyant s’allume lorsqu’il est nécessaire de remplacer les
ltres HEPA ou au charbon.
Lowes.com
COMMANDES ET AFFICHAGE
Indicateur de changement de ltre
Minuterie
Bouton Reset Vitesse du ventilateur
Interrupteur

20
INSTRUCTIONS POUR L’ASSEMBLAGE
1. Pour ouvrir l’appareil, tirez sur le haut du pan-
neau avant (B).
2. Retirez le ltre HEPA (G) de l’emballage.
1
2
B
Lowes.com
FRONT
G
3. Retirez l’emballage du préltre au charbon (H)
et placez ce dernier directement sur le ltre HEPA
(G).
FRONT
3
H
This manual suits for next models
1
Table of contents
Languages:
Other Idylis Air Cleaner manuals


