IGA ODP 100 User manual

User Manual ODP 100
October 2004

IGA Manufactures Association User Manual ODP 100
10/2004 2

IGA Manufactures Association User Manual ODP 100
1General................................................................................................................4
1.1 Introduction .................................................................................................. 4
1.1.1 Front View............................................................................................. 4
1.1.2 User Buttons and Status-LED ............................................................... 5
1.1.3 Rear View ............................................................................................. 6
1.2 Installation .................................................................................................... 6
1.2.1 Driver Installation .................................................................................. 7
1.2.2 Uninstall .............................................................................................. 10
1.2.3 Driver update....................................................................................... 12
1.3 Software ODP Manager ............................................................................. 15
1.4 Printer Calibration....................................................................................... 16
1.5 Printer Driver .............................................................................................. 17
1.5.1 Menu Window ..................................................................................... 17
1.5.2 Menu Print Setups............................................................................... 18
1.5.3 Information for Print Quality and Media type settings.......................... 19
2Maintenance and Cleaning ..............................................................................21
2.1 Lubrication Of Shafts.................................................................................. 21
2.2 Maintenance ODP 100 – Ink Debree Exhaust System.............................. 22
2.2.1 Required Parts and Tools: .................................................................. 22
2.2.2 Description Filter Pad Replacement:................................................... 22
2.3 Maintenance ODP 100 Ink Fleece.............................................................. 26
2.3.1 Required Parts and Tools ................................................................... 26
2.3.2 Description Ink Fleece Replacement................................................... 26
3Troubleshooting ...............................................................................................32
3.1 The HP 6122 print engine shows an error.................................................. 32
3.2 No Serial Connection With COM Port (Line doesn’t rotate)........................ 33
3.3 Printer-LED’s are on or flashing ................................................................. 34
3.3.1 Functions Of LED’s ............................................................................. 34
3.3.2 Print Cartridge-Status LED on or flashing ........................................... 34
3.3.3 Resume-LED flashing ......................................................................... 34
3.3.4 Power-LED flashing ............................................................................ 35
3.3.5 All LED’s are flashing .......................................................................... 35
4Ink Cartridges ...................................................................................................35
4.1 Checking Print Cartridge Status ................................................................. 35
4.1.1 The Print Cartridge Status - LED......................................................... 35
4.2 Ink Cartridges............................................................................................. 37
4.2.1 Print Cartridge Selection ..................................................................... 37
4.3 Replacing Print Cartridges ......................................................................... 38
4.4 Maintaining Print Cartridges ....................................................................... 39
4.5 Refilling of Print Cartridges......................................................................... 39
5Maintaining The Printer Body..........................................................................40
5.1 Printer Case Exterior .................................................................................. 40
5.2 Printer Interior ............................................................................................ 40
5.3 Printer Cradle Rod...................................................................................... 40
5.4 Handling And Storage ................................................................................ 40
6Technical Data ..................................................................................................41
10/2004 3

IGA Manufactures Association User Manual ODP 100
1 General
Description:
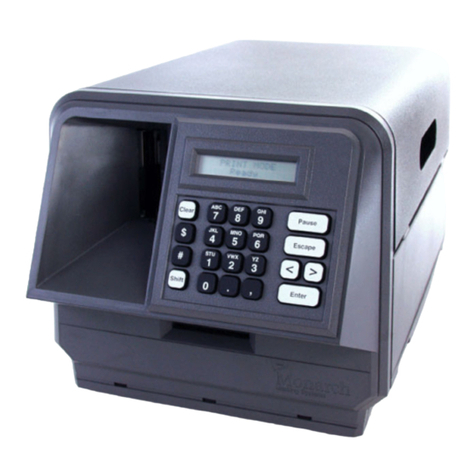
The ODP 100 is an CD/DVD ink jet printer based on the HP DeskJet 6122 paper
printer.
The ODP 100 processes printable CDs or DVDs coated for ink jet color.
The ODP 100 can be used as a manual system as well as an integrated system
inline with various autoloading systems like the IGA Gamma, the IGA Delta and
others.
System Requirements:
The PC that runs the ODP needs to USB ports (USB 1.1 or USB 2.0). If only one
USB port is available, a USB-hub is required.
The ODP 100 operates with Windows 2000 or Windows XP
Important !!!
Due to the inkjet – technology used in this printer, debree from ink and aerosol is
travels through the interior of the system. The ODP100 uses an advanced exhaust
system to keep the debree away from the mechanical parts and guide it to a
removable filter. This filter has to be replaced every 6 printer cartridges. Additional
frequent maintenance like lubricating the tray shafts & cleaning the interior of the
printer as well as cleaning of the decoder wheel and the decoder strip is required.
System Requirements:
The PC that runs the ODP needs to USB ports (USB 1.1 or USB 2.0). If only one
USB port is available, a USB-hub is required.
The ODP 100 operates with Windows 2000 or Windows XP
1.1 Introduction
1.1.1 Front View
Front cover to
access cartridges and
printer mechanics
User Buttons and
Status-LED
Media Tray
10/2004 4

IGA Manufactures Association User Manual ODP 100
1.1.2 User Buttons and Status-LED
With the user buttons the ODO100 can be switched on and off and a print job can be
aborted or restarted. The Status-LED’s indicate the status of power, ink level, etc.
Cancel Button
Cartridge Status - LED
Resume Button and LED
Power Button and LED
Cancel Button
By pressing the Cancel Button you Stop the current print job.
Print Cartridge Status - LED
The Print Cartridge Status LED blinks when a cartridge needs to be replaced or
requires maintenance as well as when the front cover is open.
Resume Button and - LED
The Resume Button blinks in case of a general error.
Power Button and - LED
With the Power Button you can switch the printer on and off. After pressing it takes a
couple of seconds until the printer becomes ready. The Power LED blinks when print
data is being processed.
10/2004 5

IGA Manufactures Association User Manual ODP 100
1.1.3 Rear View
Power Connector
Exhaust System
Cover,
Filter Access
USB-Connector
1.2 Installation
Operation:
The ODP is connected to is PC with a USB cable.
To operate the ODP a special software is required, which needs to be active
permanently .
This software, called ‘ODP Manager’ controls all the mechanical functions of the
ODP, like the opening and closing of the tray.
How to connect the ODP 100 to the PC:
Connect the ODP to 220V (110V) with the power cable.
Connect USB connector with the USB cable to the PC’s USB port.
The Plug&Play function of Windows recognises automatically the new printer.
The driver file (‘lsg6122.inf’) is available on the printer’s driver CD and can be
installed by loading this CD into the PC’s CD-drive.
The Plug&Play function of Windows recognises automatically the new USB device.
The driver file (‘ftdiport.inf’ and ‚ftdibus.inf’) is available on the printer’s driver CD and
can be installed by loading this CD into the PC’s CD-drive.
The driver installs a new serial COM port to the PC. The additional electronic board
inside the ODP is controlled by this serial port.
10/2004 6

IGA Manufactures Association User Manual ODP 100
1.2.1 Driver Installation
After connecting the printer, you have to open the Printer Dialog with
Start ⇒Settings ⇒Printers.
Double click on „Add Printer“
10/2004 7

IGA Manufactures Association User Manual ODP 100
Press onto the „Next“ button
Now, choose „Local Printer“ and click onto the „Next“ button.
10/2004 8

IGA Manufactures Association User Manual ODP 100
Choose a free USB port and press the „Next“ button.
USB001 Virtual printer port
Select „Have Disk“, search for the driver path, continue with “Next” and “Finish” the
Installation.
Please reboot your PC,
to make sure that the installation will be finished!
10/2004 9

IGA Manufactures Association User Manual ODP 100
1.2.2 Uninstall
Before Uninstall, you must reboot your PC,
to make sure that the Operating System will not hold and block any
of the files, which are used by the driver.
Blocked files can not be deleted and will produce errors, if a install a new driver.
All programs have to be closed, also the ODP Manager.
Close the ODP Manger, when he will start automatically after reboot.
First, open the Control Panel with Start ⇒Settings ⇒Control Panel.
10/2004 10

IGA Manufactures Association User Manual ODP 100
Double click on the „Add/Remove Programs“ Icon..
Search for the Program LSK ODP 100, and remove it.
LSK ODP 100
10/2004 11

IGA Manufactures Association User Manual ODP 100
1.2.3 Driver update
Please download the latest ODP 100 driver from our website: www.lsk.de
Before Uninstall, you must reboot your PC,
to make sure that the Operating System will not hold and block any
of the files, which are used by the driver.
Blocked files can not be deleted and will cause errors, if a new driver will be installed.
All programs have to be closed, also the ODP Manager.
Close the ODP Manger, when he will start automatically after reboot.
Open the Printer Dialog with Start ⇒Settings ⇒Printers.
10/2004 12

IGA Manufactures Association User Manual ODP 100
Open the printer properties.
Search for the button „New Driver“ inside the properties and click on it.
10/2004 13

IGA Manufactures Association User Manual ODP 100
Start the Add Printer Wizard with the button „Next“.
Select „Have Disk“, search for the driver path, continue with “Next” and “Finish” the
Installation.
Please reboot your PC,
to make sure that the installation will be finished!
10/2004 14

IGA Manufactures Association User Manual ODP 100
1.3 Software ODP Manager
During the installation of the driver files, the software ‚ODPManager.exe is
automatically copied to the directory: SYSTEM32.
During the driver installation, the program “ODPManager.exe“ will be copied into the
directory: SYSTEM32. (C:\WINNT\SYSTEM32\ODPManager.exe).
This software is required to operate the ODP 100 and has to be active all the time
while using the printer.
Because of that a link has to be created to you ‚Autorun’ directory, to start the ODP
manager automatically when starting the PC.
Communication status Printer status: B=Busy; C=Tray closed/CD in
I=Tray closed; O=Tray out
Open Tray
Close Tray
Ink Level
(? – Before the first print)
Ink Level, when the printer
should stop printing.
Quit ODP Manager
Store Calibration Values Print Window Margins
Program status Tray offset
After the start of the ODP managers the standard dialog window appears.
In the top left corner, you may see whether your printer is connected to the PC and
can be used.
The OPD manager automatically scans all USB ports to find out which port is
connected to the ODP.
Right next to the COM port indicator appears a little rotating line when the serial
connection is ready.
When this little line does not rotate, you need to check your serial connection.
For possible causes, please look up chapter ’Errors’.
Down left you may see the current values of your printer calibration.
They can be altered with the arrow keys and the button ‘Set Margins’.
Find a detailed procedure description in chapter ’Printer Calibration’.
10/2004 15

IGA Manufactures Association User Manual ODP 100
The two top buttons are used to open and close the printer tray.
If discs are manually loaded into the printer, the tray has to be closed by using the
“Close Printer Tray“ button. Starting the print without the tray closed, will cause an
error condition.
.
1.4 Printer Calibration
With the installation of the drivers automatically the files “ODP_calprint.prn“ and
“ODP_calprint.cdr“ are copied to the directory C:\WINNT\SYSTEM32\ .
Both files contain a graphic fort he calibration of the ODP 100.
50 50
40 40
30 30
30 30
40 40
50 50
50 40 30
50 40 30
30 40 50
30 40 50
Decrease
To p Ma r g i n
verringern
Increase
To p Ma r gi n
vergrößern
Increase
Left Margin
vergrößern
Decrease
Left Margin
verringern
100 Steps = 1 mm
100 Schritte = 1mm
By printing this graphic onto a CD, the printer calibration can be easily checked.
With the help of the ODP Manager the calibration values Left Margin and Top Margin
can be adjusted by using the arrow key.
The new values have to be stored by pressing the button “Set Margins / Offset“.
100 steps alters the print position by 1 mm.
The Tray Offset adjusts the opening distance of the tray and calibrates for a correct
function of the CD clamping mechanism.
100 steps alters the opening distance by 1mm.
The tray is calibrated in the factory and needs to be readjusted only if required due to
technical changes.
10/2004 16

IGA Manufactures Association User Manual ODP 100
Corel Draw Template for the ODP 100:
With the installation of the drivers automatically the Corel Draw file
“ODP_Vorlage.cdr“is copied to the directory C:\WINNT\SYSTEM32\ .
This file contains a template to generate print files fort he ODP100 with Corel Draw.
1.5 Printer Driver
The printer driver directs the request to print to the printer. The print data is modified
and send to printer. Several adjustment are possible. To achieve good print results
certain tests with various setups for the various media surfaces are necessary. The
printer driver uses known Windows design menu windows and a couple of special
windows.
1.5.1 Menu Window
Start Window of the ODP100
Printer Driver – General Menu
Start Window of the ODP100
Printer Driver Extended – These Setups
should be used for proper operation.
10/2004 17

IGA Manufactures Association User Manual ODP 100
1.5.2 Menu Print Setups
These setups are altering the
print quality and print speed.
For various media surfaces
various setups are required.
Menu Features – for altering amount of ink and drying time.
Menu Color – for adjusting saturation, brightness and colour.
Menu Mask Settings – for
adjustment of sizes and
geometric forms.
Menu Maintenance :
- Testprint
- Clean Print Cartridge
- Display Ink Level Of Cartridges
10/2004 18

IGA Manufactures Association User Manual ODP 100
1.5.3 Information for Print Quality and Media type settings.
Table of possible Print Quatilty and Media type combinations:
Photo Quality
(Only the Colour
cartridge will be used)
Premium Quality Standard Quality
Fast Normal --- --- Test prints and
very simple texts
Normal
Best
Optimised for Photos
and unicoloured
backgrounds.
Optimised for
graphics and text.
Optimised for simple
graphics and simple
text.
4800 * 1200
Optimized
dpi.
Highest resolution for
Photos and unicoloured
backgrounds.
--- ---
For print images, which contains photos and graphics, „Photo Quality“ should be
chosen.
Print images with a unicoloured background, should also printed with “Photo Quality”,
even when the print image contains graphics.
Printing in greyscale, should be made in Premium or Standard quality.
Additionally, you have to activate the setting “Print in Grayscale“
in the dialog “Color”.
10/2004 19

IGA Manufactures Association User Manual ODP 100
For printing with the black cartridge only, you have to activate the setting
„Black Only“ in the dialog „Color“.
If a print mode uses only one cartridges, the other cartridge will not be used, but
became also empty, because of the cleaning mechanism of the printer.
To avoid wasting ink, you can use an empty cartridge for the unused cartridge.
This means, that you can use an empty black cartridge in „Photo Quality“
and an empty colour cartridge while printing in “Black Only” mode.
10/2004 20
Table of contents

