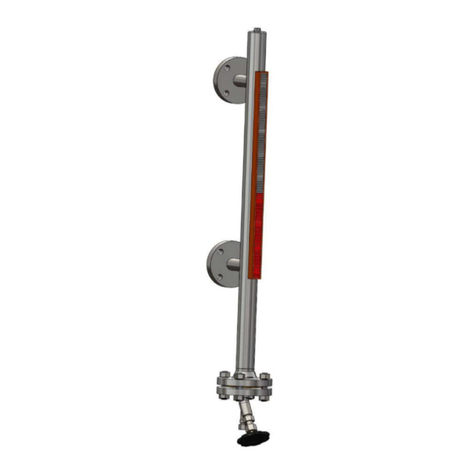
Igema BA14 User instructions

Edition 11/2020
D-07-B-50203-EN-00
ASSEMBLY and OPERATING MANUAL
BA14 / RBA24 / RBA34
Water level controller and limiter

2
Product philosophy
Thank you for placing your trust in IGEMA and deciding in favour of one of our
high-quality products.
For more than 100 years, measuring and control systems have been developed,
produced and sold worldwide under the IGEMA brand name.
“Steam is our passion” and we offer you the entire programme for the safe and
economic operation of your plants, especially in the steam and condensate sector.
Please read the installation and operating instructions carefully to ensure a safe and
reliable operation.
In addition to the information on installation and operation, you will also find important
information on maintenance, care, safety and value retention of your measuring and
control system.

3
Table of Contents
1. Important safety instructions............................................................................ 6
1.1 Symbols used in these instructions ............................................................... 6
1.2 Intended use of the device ............................................................................ 7
1.3 Safety at work................................................................................................ 8
1.4 Safety instructions for this device.................................................................. 9
1.5 Exclusion of liability ....................................................................................... 9
2. Contents of packing........................................................................................... 9
3. Important information...................................................................................... 10
3.1 Intended use................................................................................................ 10
4. Explanations..................................................................................................... 10
4.1 System description...................................................................................... 10
4.2 Function....................................................................................................... 10
5. Technical data.................................................................................................. 11
5.1 Versions ...................................................................................................... 11
5.2 Type of connection...................................................................................... 12
5.3 Materials...................................................................................................... 12
5.4 Application limits.......................................................................................... 12
5.5 Corrosion resistance.................................................................................... 12
5.6 Identification plate / Marking........................................................................ 12
6. Construction..................................................................................................... 13

4
Table of Contents (cont.)
7. Assembly.......................................................................................................... 14
7.1 Version with flange...................................................................................... 14
7.2 Version with welding end............................................................................. 14
7.3 Heat treatment of weldseams...................................................................... 14
7.4 Drain piping................................................................................................. 14
8. Electrical connection....................................................................................... 15
8.1 Wiring diagram ............................................................................................ 15
8.2 Connection magnetic switch........................................................................ 16
8.3 Technical data magnetic switch................................................................... 16
8.4 Insulation of electrical components.............................................................. 16
9. Commissioning................................................................................................ 17
9.1 Commissioning of unit together with the boiler............................................ 17
9.2 Commissioning of unit if boiler is already in operating condition ................. 17
10. Operation monitoring ...................................................................................... 18
10.1 Purging of connection lines ......................................................................... 18
10.2 Function test................................................................................................ 18
11. Maintenance ..................................................................................................... 19
11.1 Opening of standpipe .................................................................................. 19
11.2 Closing of standpipe.................................................................................... 19
11.3 Check or exchange of float device .............................................................. 20
11.4 Tightening torques....................................................................................... 20

5
Table of Contents (cont.)
12. Drain valve........................................................................................................ 21
12.1 Construction ................................................................................................ 21
12.2 Assembly..................................................................................................... 22
13. Spare parts....................................................................................................... 25
14. Decommissioning............................................................................................ 26
15. Declaration of Conformity............................................................................... 27

6
1. Important safety instructions
KEEP THESE INSTALLATION AND OPERATING INSTRUCTIONS IN A SAFE PLACE!
Commissioning as well as maintenance and repair work may only be carried out by qualified
persons in compliance with the installation instructions given in this operating manual. The
correct installation, commissioning, maintenance and operation of the device presupposes that
the person in charge is familiar with measurement and control systems and complies with the
general installation and safety instructions. In addition, the correct and intended use of tools
and the handling of safety devices must be ensured. Unqualified persons must not be assigned
the above tasks!
IGEMA GmbH accepts no liability for damage to property or personal injury caused by
unqualified persons or by failure to observe these installation and operating instructions. If no
sufficiently qualified person can be found, IGEMA GmbH can be commissioned with the
installation/maintenance.
1.1 Symbols used in these instructions
In the following installation and operating instructions, safety instructions are marked with the
following symbols:
Danger
This symbol and signal word refer to a potentially
hazardous situation which could result in death or
injuries if ignored.
Caution electrical voltage
This symbol and signal word indicate live parts
with an immediate danger of death from electric
shock.
Caution hot
This symbol with a signal word indicates a
potentially hazardous situation that can result in
severe burns and scalds all over the body.

7
Caution
This symbol and signal word refer to a potentially
hazardous situation which could result in
personal injury, property and environmental
damage if ignored.
Caution
This symbol and signal word refer to a potentially
hazardous situation which could result in damage
to the equipment if ignored.
Info
This symbol indicates useful information and
recommendations as well as measures that will
prolong the value of your measuring and control
system.
1.2 Intended use of the device
Use these installation and operating instructions, the identification on the rating
plate (see 5.6) and the technical data sheet to check whether the device is
suitable for the intended use/application. The device complies with the
requirements of the European Pressure Equipment Directive 2014/68/EU.
The device may only be used to indicate fill levels on containers.
The maximum values of the pressure and temperature range of the device must be checked
before installation. If the maximum allowable operating values of the device are lower than
those of the system on which it is to be installed, protective instruments for the device, such
as pressure reducers or similar, must be provided to avoid limit situations. The device may
only be used in accordance with the information in these installation and operating instructions
or for the parameters and applications agreed in the supply contract. (see rating plate, 5.6)
The operator of the direct water level indicator is obliged to familiarise himself on the
compatibility of the medium and the device. In case of doubt, contact the relevant installation
manager or site manager.
The correct installation position, alignment and flow direction of the device must be observed!
Before installing the IGEMA product on boilers or containers, it is essential to remove all
protective covers and, if necessary, the protective film from rating plates and sight glasses.
Caution

8
1.3 Safety at work
Before installation or carrying out maintenance work on the device, safe access
must be ensured and a secure working area with sufficient lighting must be
defined and marked out. Always use lifting equipment for heavy loads!
Before starting any work, carefully check which liquids or gases are or have been in the
pipeline. (flammable substances, irritating substances, substances hazardous to health) When
opening or dismantling the device, residues of the medium can escape. Subsequent fumes
are also possible in unpressurized and cold systems. Use designated PPE such as safety
goggles and respiratory protection!
Special attention must be paid to the condition of the environment around the installation or
maintenance site. Be aware of e.g.: potentially explosive atmospheres, lack of oxygen in tanks
and pits, dangerous gases/liquids, extreme temperatures, hot surfaces, firehazard (e.g. during
welding) and moving machine and system components. Protect yourself from excessive noise
by taking the required protective measures.
For all maintenance work or new installations, on new or existing boilers or vessels, it is
imperative to check thatthe boiler or vessel has been depressurised and that the pressure has
been safely reduced to atmospheric pressure. In principle, no system should be regarded as
unpressurized even if indicated by pressure measuring devices such as pressure gauges or
sensors. When releasing the pressure, make sure that no persons are in the release area.
Carefully check whether you and/or other persons in the vicinity need PPE to protect yourself
from external influences such as high and low temperatures, radiation, noise, danger to eyes,
loose objects that can fall down or chemicals.
There is always a risk of injury when handling large and/or heavy equipment. Observe the load
handling regulation as a minimum requirement for working with loads. Avoid handling the
device with your own physical force, e.g. by lifting, pulling, carrying, pushing or supporting it,
especially to prevent back injuries. Use lifting equipment to move heavy and bulky equipment
in accordance with Article 1, Section 2 of the German Load Handling Regulation
(LasthandhabV).
Under normal operating conditions the surface of the device can become very
hot! Under the maximum operating conditions, the surface temperature can
exceed 350°C. After shutting off or, if necessary, shutting down the boiler, wait
until the temperature has normalized to room level. To avoid the risk of burns
and scalds, always use PPE including safety goggles!
Danger
Caution
hot!

9
1.4 Safety instructions for this device
These installation and operating instructions are an integral part of the device
and must be forwarded to the responsible departments "Goods inward,
Transport, Installation, Commissioning and Maintenance". They must be kept in
such a way that the technical staff have access to these documents at all times.
If the device is passed on to a third party, these installation and operating
instructions must also be included in the national language of the third party.
Avoid shocks and hard contact during transport, as this can lead to damage. During
intermediate storage, the device must be kept dry and secured against damage.
When servicing the unit, make sure to use sharp-edged internal parts and avoid shards of
broken glass. There is a risk of cutting hands and arms! Always wear work gloves when
changing packing, valve seat and valve plug.
For units with a dead weight of 30 kg or more, the customer must provide adequate support
(e.g. via a spring suspension device, etc.). This can be attached to the holding strap/eyelet on
the device.
When returning goods to IGEMA GmbH, the applicable safety and environmental laws
according to GGVSEB [German ordinance on the national and international carriage of
dangerous goods by road, rail, and inland waterways] must always be observed. If there are
any risks to health or the environment due to residues or the device has a mechanical defect
this must be indicated when returning the device and the necessary precautionary measures
must be taken. If the returned goods are devices that have come into contact with or contain
hazardous substances, a safety data sheet must be enclosed, and the goods must be clearly
marked. In addition, the hazardous substance must be reported to the logistics service
provider.
Pay attention that the magnetization of the permanent magnets in the unit
is not changed!
Avoid magnetic fields close to the units!
1.5 Exclusion of liability
IGEMA GmbH Mess- und Regelsysteme will assume no liability if the above regulations,
instructions and safety precautions are not observed and followed. If they are not expressly
listed in the installation and operating instructions, changes to an IGEMA device are carried
out at the risk of the user.
The magnetic switch may not be opened.
Each warranty claim expires if the test seal is damaged.
2. Contents of packing
The unit is delivered as complete unit.
Caution
Caution

10
3. Important information
3.1 Intended use
Float switch RBA24/34, BA14:
The float switch type RBA24/34 can be used as two-point water level controller or limiter
without special design for steam generators.
The float switch type BA14 can only be used as water level limiter without special design.
The product corresponding to the EU 2014/68/EU.
Applied standards as per EN 13445 / EN 12952 / EN 12953 / AD 2000 or ASME-Boiler.
Type
EC type-examination registration number
BA14
Z-D-002-10439/14-Rev.2
RBA24,34
Z-D-002-10440/14-Rev.2
4. Explanations
4.1 System description
The float switch (different versions) is used to control or to limit the level of containers and
steam generators.
4.2 Function
The unit works according to the physical law of the communicating tubes.
The water level controller or limiter is a float actuated unit where the transmitter magnet
connected with the float via the float rod actuates the magnetic switches located inside of the
switch housing without direct contact.

11
5. Technical data
5.1 Versions
BA14, RBA24
IP54/65
RBA34
IP54
RBA34
IP65
Switch ranges:
Range of adjustment
W [mm]
BA 14
40
RBA 24
100
150
RBA 34
250
350
450
550
650
750
Dimensions A, Z:
Type
Dim. Z [mm]
Dim [mm]
A1
A2
BA14, RBA24
A-D+550
PS [bar]
32
80
32
80
RBA34, IP54
A-D+550
BA14,
RBA24/34
112
152
140
RBA34, IP65
A-D+600
but min. 2W+525
Valves:
Valve
Type
Drain valve
AV500, AV520, AV580, A8550

12
5.2 Type of connection
Standard : flanges according to DIN or ASME
On request : welding end or socket welding
according to DIN or ASME
5.3 Materials
Components in contact with the medium and pressure-holding components are made of C
steel according to DIN or ASME.
5.4 Application limits
5.5 Corrosion resistance
The safety of the unit is not influenced by corrosion if it is used as intended
5.6 Identification plate / Marking
The following data are indicated on the identification plate:
* marking depending on the realization
A Date of manufacture + Order number
B Type of unit
C Max. allowable pressure
D Max. allowable temperature
E Nominal pressure (not listed)
F Nominal diameter
Max. allowable pressure PS
[bar]
32
50
80
Max. allowable temperature TS
[°C]
239
265
296

13
6. Construction
BA14, RBA24
IP54 IP65
Legende
(1) Switch housing
(2) Magnetic switch
(3) Transmitter magnet
(4) Transmitter tube
(5) Thread bolt
(6) Hex nut
(7) Upper part
(8) Sealing ring
(9) Transmitter tube cap
(10) Retaining spring
(11) Float rod
(12) Float
(13) Standpipe
(14) Drain valve
(15) Drain connection
(16) Connection stud
(17) O-ring
(18) O-ring
(19) O-ring
RBA34
IP54 IP65

14
7. Assembly
Connect shutoff valves (W+D) only with horizontally orientated spindle;
the flow direction ““ on the valves (W+D) has to point out into the
direction of the standpipe (13)!
Connect unit free of tension with switch housing (1) turned upwards to
the boiler studs equipped with shutoff valves.
Pay attention that the height of the LWL mark on the standpipe of the unit
corresponds to the one of the boiler!
7.1 Version with flange
•Respect installation position!
•Remove protection capsfrom connectionflanges. Caps only serveas transport protection.
•Ensure that sealing surfaces are clean and undamaged.
•Use sealing material as per EN1514 and screws as per DIN2510 or DIN974 (material
1.7709).
•Mount float switch.
7.2 Version with welding end
•Respect installation position!
•Remove protection caps. Caps only serve as transport protection.
•Assembly only with welding process 111 (manual arc welding) and 141 (tungsten inert
gas welding).
7.3 Heat treatment of weldseams
Supplementary temper tests of weldseams are not required!
7.4 Drain piping
•Check connection drain valve (14) / standpipe (13) and re-tighten if necessary.
•Mount drain piping on drain valve (15).
Ensure that drain piping has free outlet to atmosphere and is protected
from pressure peaks!
•Close valves.
Caution
Caution

15
8. Electrical connection
Only skilled and qualified personnel may carry out the electrical
connection according to the wiring diagram!
Respect the instructions of the VDE (Association for Electrical, Electronic
& Information Technologies) and of the local network operators for the
installation to be provided by the customer!
Only use cables that are suitable for the operating range!
Observe the switching time of the magnetic switch when designing a
safety circuit. Adhere to basic and reliable safety principles as per
DIN EN ISO 13849 for electrical components.
8.1 Wiring diagram
Connection wires:
brown yellow
white green
Identification arrow
We recommend to use customary RC combinations or a suitable varistor
(e.g. 0,1 μF/100Ω) as inductive consumer to extend the contact life of the magnetic switch.
Resistance value (Ω) and power rating (W) depend on customer indications.
We suggest to use silicon cables free of acetic acid for the further connection cable in the
area „connecting housing inside“.
Caution

16
8.2 Connection magnetic switch
•Open switch housing (1) and remove foam cushions between transmitter tube (4) and
magnetic switch(es) (2).
•The magnetic switches are already rigidly mounted inside of the switch housing and
electrically connected to the terminals.
The magnetic switch can be connected optionally as breaker, maker or change-over
contact. Switch base is marked with an arrow.
•If the switch is correctly mounted, the arrow should point downwards.
•Carry out electrical connection.
•Finally ensure that no cable gets in contact with hot elements.
8.3 Technical data magnetic switch
Kind of contact
bistable
Contacts
1 breaker / 1 maker
Connection wire
1 x 0,5 mm² (16 x ø 0,2) –Cu tinned / PTFE
Wire length L
200 mm
Max. perm. temperature
-70°C bis +260°C
Type
Switching voltage U
Switching current I
Max. power UxI
M130-K
250 VAC
1 A
150 VA
M130-KS
24 VAC
0,065 A
1,5 VA
24 VDC
0,008 A
0,12 VA
Type
Article-No.
Contakt material
M130-KG
15-01122
Silber-Palladium AgPd 70/30 massiv,
hard-gold plated AuCo 4-6µm
8.4 Insulation of electrical components
Electronic and electrotechnical components must not be insulated.
These products must not exceed the maximum permissible temperature.
Otherwise, the components will be destroyed and will cause total failure.
If the devices and other associated electronic components will be
isolated, this is at your own risk.
IGEMA GmbH assumes no liability for damage caused by the insulation
of the device and its components
Caution

17
9. Commissioning
Caution! Danger of scalding!
Beware, the device is hot during commissioning and operation!
9.1 Commissioning of unit together with the boiler
Check specifications of material, pressure and temperature!
•Close drain valve (14) (see sketch chapter 5).
•Fully open shutoff valves (W+D).
•Check position of magnetic switch (2) in operating condition and adjust the height if
necessary.
•The magnetic switch (2) must be correspondingly affixed onto the transmitter tube (4).
9.2 Commissioning of unit if boiler is already in operating condition
•Close drain valve (14) (see sketch chapter 5).
•Slowly open shutoff valve (W) followed by shutoff valve (D).
•Check position of magnetic switch (2) in operating condition and adjust the height if
necessary.
•The magnetic switch (2) must be correspondingly affixed onto the transmitter tube (4).
Danger

18
10. Operation monitoring
A separate purging of the connection lines including standpipe is
demanded for float switches.
10.1 Purging of connection lines
•Close shutoff valves (W+D) (see sketch chapter 5).
•Slowly open drain valve (14) and drain water of standpipe.
•Slightly open shutoff valve D and close after approx. 2 seconds.
•Slightly open shutoff valve W and close after approx. 2 seconds.
•Close drain valve (14).
•Slightly open shutoff valves W+D (standpipe is filled now).
•Fully open shutoff valves W+D after the standpipe is filled.
10.2 Function test
A function test is prescribed for float switches. Tests extend and delays
must be specified between operator, boiler manufacturer and local
expert.
•Close shutoff valves (W+D) (see sketch chapter 5).
•Slowly open drain valve (14) and drain water.
•The float device sinks now under LWL and the magnetic switch is actuated.
The prescribed function test is finished.
•Close drain valve (14).
•Slowly open shutoff valve W and then shutoff valve D.
Caution
Caution

19
11. Maintenance
Before carrying out maintenance works or a chemical cleaning of the
boiler, close shutoff valves of the unit.
Ideally insert blind flanges on the flange connection of the boiler studs.
Check state of the unit during boiler revision, especially float (12), float
device (11, 12) with transmitter magnet (3), magnetic switch (2) and
corresponding shutoff devices.
A deformed float rod impairs the function.
11.1 Opening of standpipe
For disassembling, the plant must be pressureless!
Wait until the unit has cooled!
•Close valves (W+D) (see sketch chapter 5).
•Open drain valve (14) and drain unit.
•Caution during disassembly! Residual medium may escape and further evaporation is
possible.
•Unfasten bolting (5, 6).
•Remove upper part (7) upwards. Observe that the float rod (11) is not deformed.
11.2 Closing of standpipe
•Check sealing surfaces of flanges.
•Mount upper part of the unit with installed float device using a new sealing (8). Observe
that the float rod (11) is not deformed.
•Tighten bolting (5, 6) in several steps using successively opposite diagonal tightening
until the tightening torque Md max indicated in the table of chapter 10.4 is reached.
•Carry out commissioning (see chapter 8).
Vorsicht
Gefahr

20
11.3 Check or exchange of float device
•Open standpipe (see chapter 10.1)
•Unfasten transmitter tube cap (9) via retaining spring (10).
•Remove float rod (11) with float (12) from transmitter tube (4) and check.
•Replace deformed or corroded parts.
•Insert complete float device (11, 12) into transmitter tube (4).
•Place transmitter tube cap (9) on transmitter tube (4) and secure with retaining spring
(10).
•Close standpipe (see chapter 10.2). Take care that float rod (11) is not deformed!
11.4 Tightening torques
All. pressure
PS
[bar]
Tightening torque
Md →Mdmax [Nm]
in steps
1
2
3
4
5
6
32
40
65
90
115
145
-
80
80
110
140
170
195
210
This manual suits for next models
2
Table of contents
Other Igema Measuring Instrument manuals
