iHome IH-W350DB User manual

user manual
IH-W350DB
IH-W351DW
MyLife webcam pro
5.0 megapixel max resolution Congratulations on the purchase of your
new MyLife webcam pro. This product
comes with a limited lifetime warranty.
Before using your product, please thoroughly
read and follow the instructions inside this
manual.
If you still need help, see the back page for
other support options.
If you want to know more about our
products, visit us online at
www.life-works.com.
system requirements
Windows• ®XP Service Pack 2 or
Windows Vista®
USB port (a USB 2.0 port is required for•
optimal performance)
CD-ROM drive•

your package should contain
2
user manual
(in your hands right now)
ArcSoft PhotoImpression®
,
VideoImpression®and
driver installation CD
MyLife webcam pro
user manual contents
features•2
yournewwebcam•3
installsoftware•3
connecthardware•4
useyourwebcam•5
capturevideo•5
capturestillshots•9
productoperatingtips•10
troubleshooting•10
user manual
.
features
5.0 megapixel maximum resolution•
motion tracking•
3× digital zoom•
ts most desktop and notebook•
monitors

3
your new webcam
You must install the driver software beforenotef
connecting your webcam to your computer.
manual
focus ring snapshot
button
spring loaded
mounting legs
microphone
install software
to install the webcam driver
Insert the installation CD into your computer. On the1.
screen that appears, click install driver.
MyLife webcam pro
www.life-works.com
2008© LifeWorks Technology Group LLC.
iHome™ is a trademark of SDI Technologies Inc.
used under license.
Model # IH-W350DB/IH-W351DW
exit
ArcSoft VideoImpression®ArcSoft PhotoImpression®
install driver
An2. InstallShield Wizard dialog box displays. Click Next.
After the driver has been installed, an3. InstallShield
Wizard Complete dialog box displays. Click Finish.
The main software installation screen displays again.

4
to install included webcam applications
On the main software installation screen, click the1.
application you want to install: ArcSoft VideoImpression
or ArcSoft PhotoImpression.
MyLife webcam pro
www.life-works.com
2008© LifeWorks Technology Group LLC.
iHome™ is a trademark of SDI Technologies Inc.
used under license.
Model # IH-W350DB/IH-W351DW
exit
ArcSoft VideoImpression®ArcSoft PhotoImpression®
install driver
Select a language and click2. OK.
An3. InstallShield Wizard dialog box displays. Click Next.
Click Yes to accept the license agreement. Click Next to
accept the default installation location.
A4. Select Program Folder dialog box displays. Click
Next.
After the application nishes installing, an5. InstallShield
Wizard Complete dialog box displays. Click Finish.
The main software installation screen displays again.6.
Repeat the above steps to install the other application. Click
exit on the main software installation screen when done.
When the USB PC Camera Setup Complete dialog box
displays, choose to restart your computer now and click
OK.
connect hardware
Connect the USB cable to a USB port on your computer.1.
connect to a
USB port on
your computer
Place the webcam on a desk or mount it on your2.
computer monitor or other convenient object by opening
the legs of the webcam base.

5
or close to secure it
on your monitor
adjustable legs extend
to keep the
webcam steady
on a at surface
Mount the webcam approximately 3 ft. (1 m) fromnotef
where you sit at your computer. This ensures the picture is
not distorted and that the microphone can easily pick up
your voice.
use your webcam
You can start using your webcam immediately for video
conferencing with one of the many video conferencing
services available over the internet. Additional features
are available through the ArcSoft VideoImpression and
PhotoImpression software applications.
capture video
Click1. Start > All Programs > ArcSoft VideoImpression 2 >
VideoImpression 2 to open the Video Start Page. Click
Create a New Video.
A second page displays. Click2. Capture From Device.

6
The record dialog box displays. If you want to change3.
the video settings, zoom, turn on face tracking or use
special effects, click Settings (see “change video settings”
on page 7).
Click the record button.
A4. Save As dialog box displays. Type a name for the
video, change the other options as desired, then click
Start capturing.
The webcam begins recording. Click the5. stop button to
stop recording. Click DONE when nished.

7
The main ArcSoft VideoImpression window displays. Here
you can organize your photos and videos, and create video
projects. Click Help > Basics for a basic introduction to
using the software.
change video settings
To change video settings and access other webcam settings,
click Settings in the record dialog box (see “capture video”
on page 5).
The webcam properties dialog box displays.
Here you can change image, video and camera settings.

8
zoom
Your webcam can zoom in as much as 3×. To change the
zoom level when using ArcSoft VideoImpression:
Click1. Settings in the record dialog box (see “change
video settings” on page 7).
The2. webcam properties dialog box displays. Select the
Zoom tab.
Select3. Enable Zoom, then click and drag the Zoom slider
to change the zoom level.
Use the arrow controls to move the zoom window within4.
the full camera image.
Click5. OK.
turn on face tracking
Face tracking keeps the camera on a person’s face without
mechanically moving the camera if the person moves
around in the chair.
To turn on face tracking:
Click1. Settings in the record dialog box (see “change
video settings” on page 7).
The2. webcam properties dialog box displays. Select the
Zoom tab.
Select3. Enable Face Tracking.
Click4. OK.

9
use special effects
A number of effects can be applied to the video. To apply
an effect:
Click1. Settings in the record dialog box (see “change
video settings” on page 7).
The2. webcam properties dialog box displays. Select the
Effects tab.
Select an effect or image frame.3.
Click4. OK.
capture still shots
Click1. Start > All Programs > ArcSoft PhotoImpression 5 >
PhotoImpression 5 to open the Photo Start Page. Click
Video.
The2. Capture Image from Video dialog box displays.
Click Live to show the video feed from the camera, then
click Capture to take a photo.

10
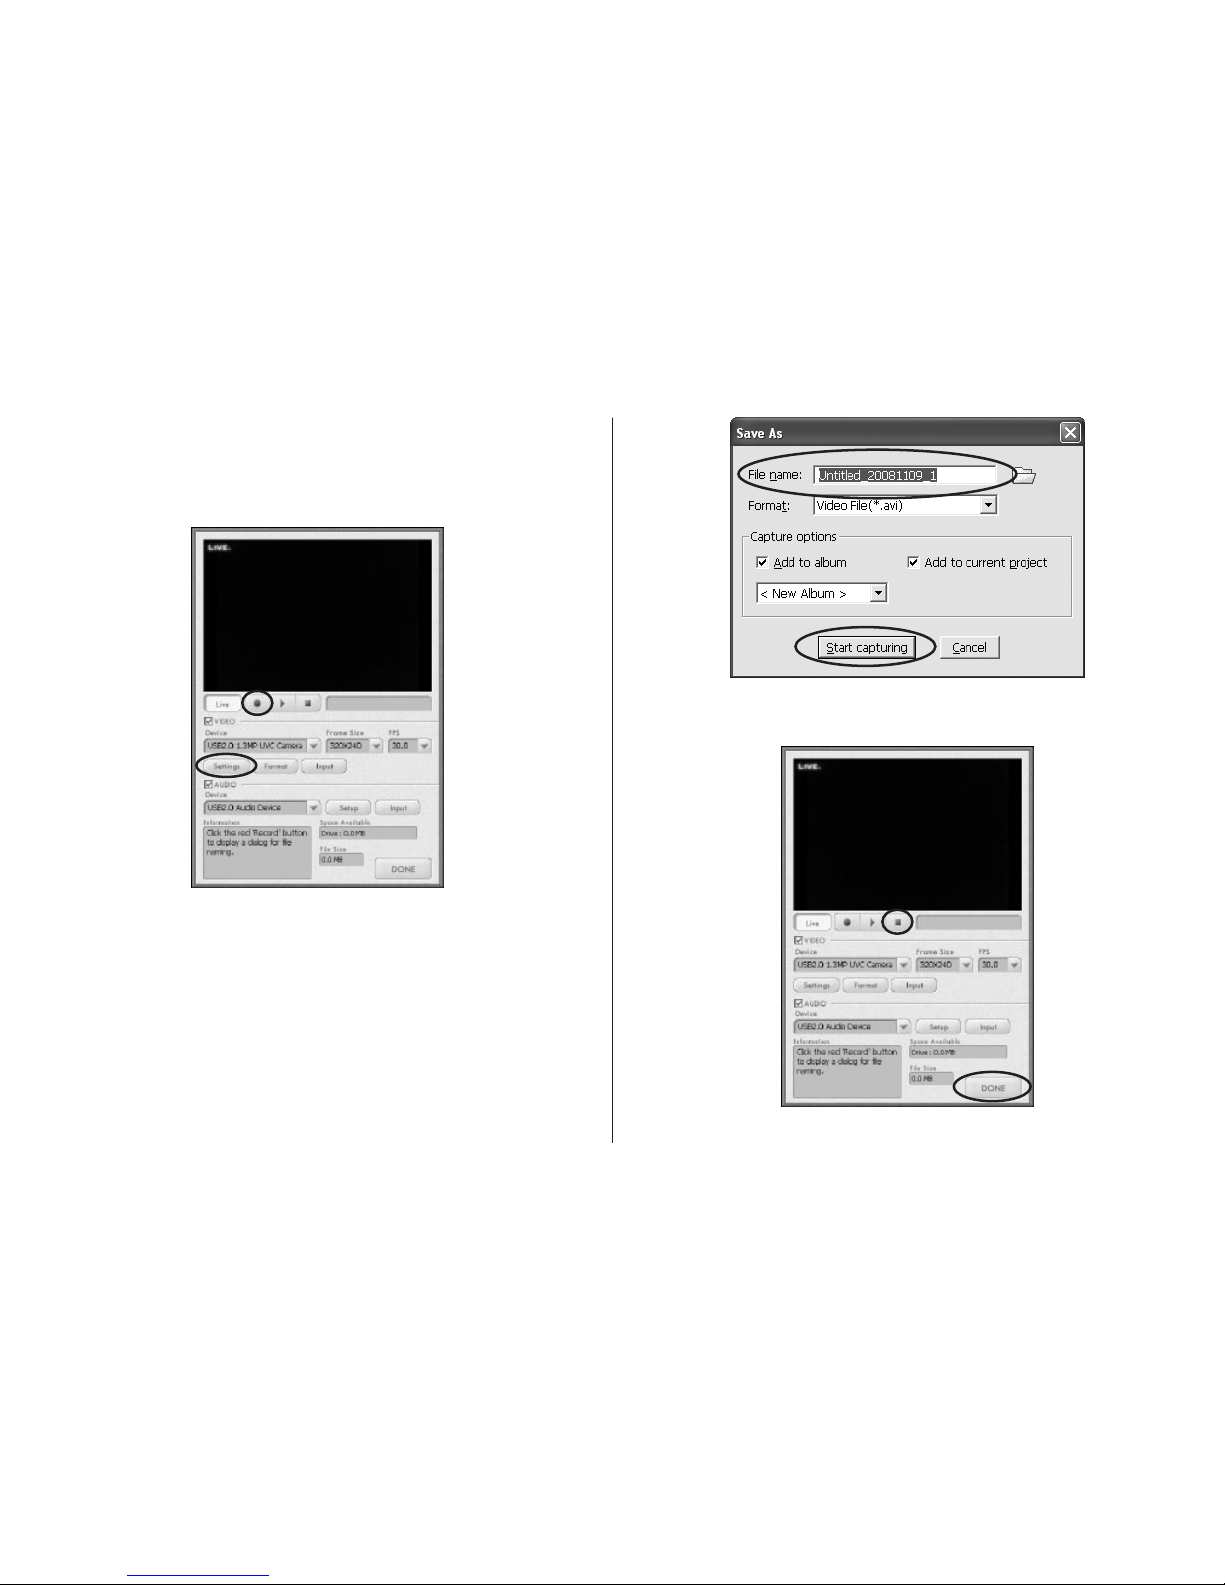
Click3. Done when nished.
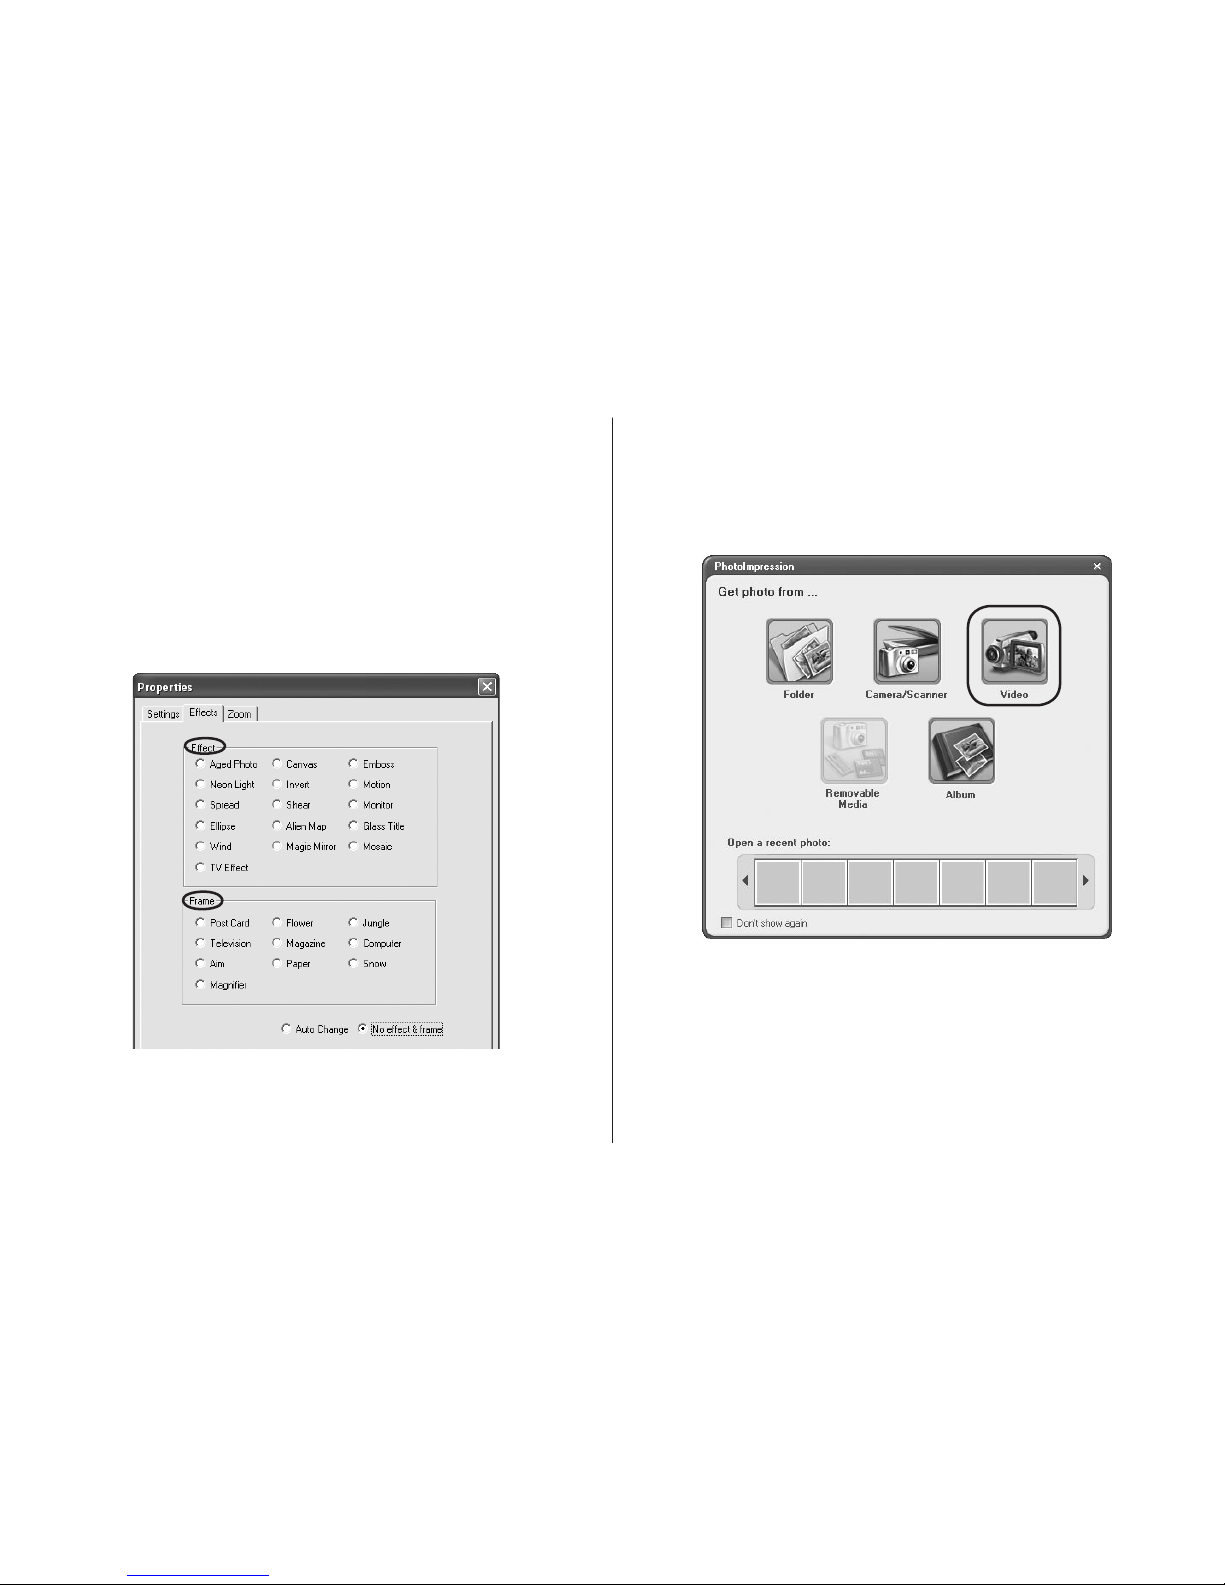
The main ArcSoft PhotoImpression window displays. Here
you can capture more photos, enhance and modify your
photos, create photo projects and print photos. Click Help >
Help for more details on how to use the application with
your webcam.
product operating tips
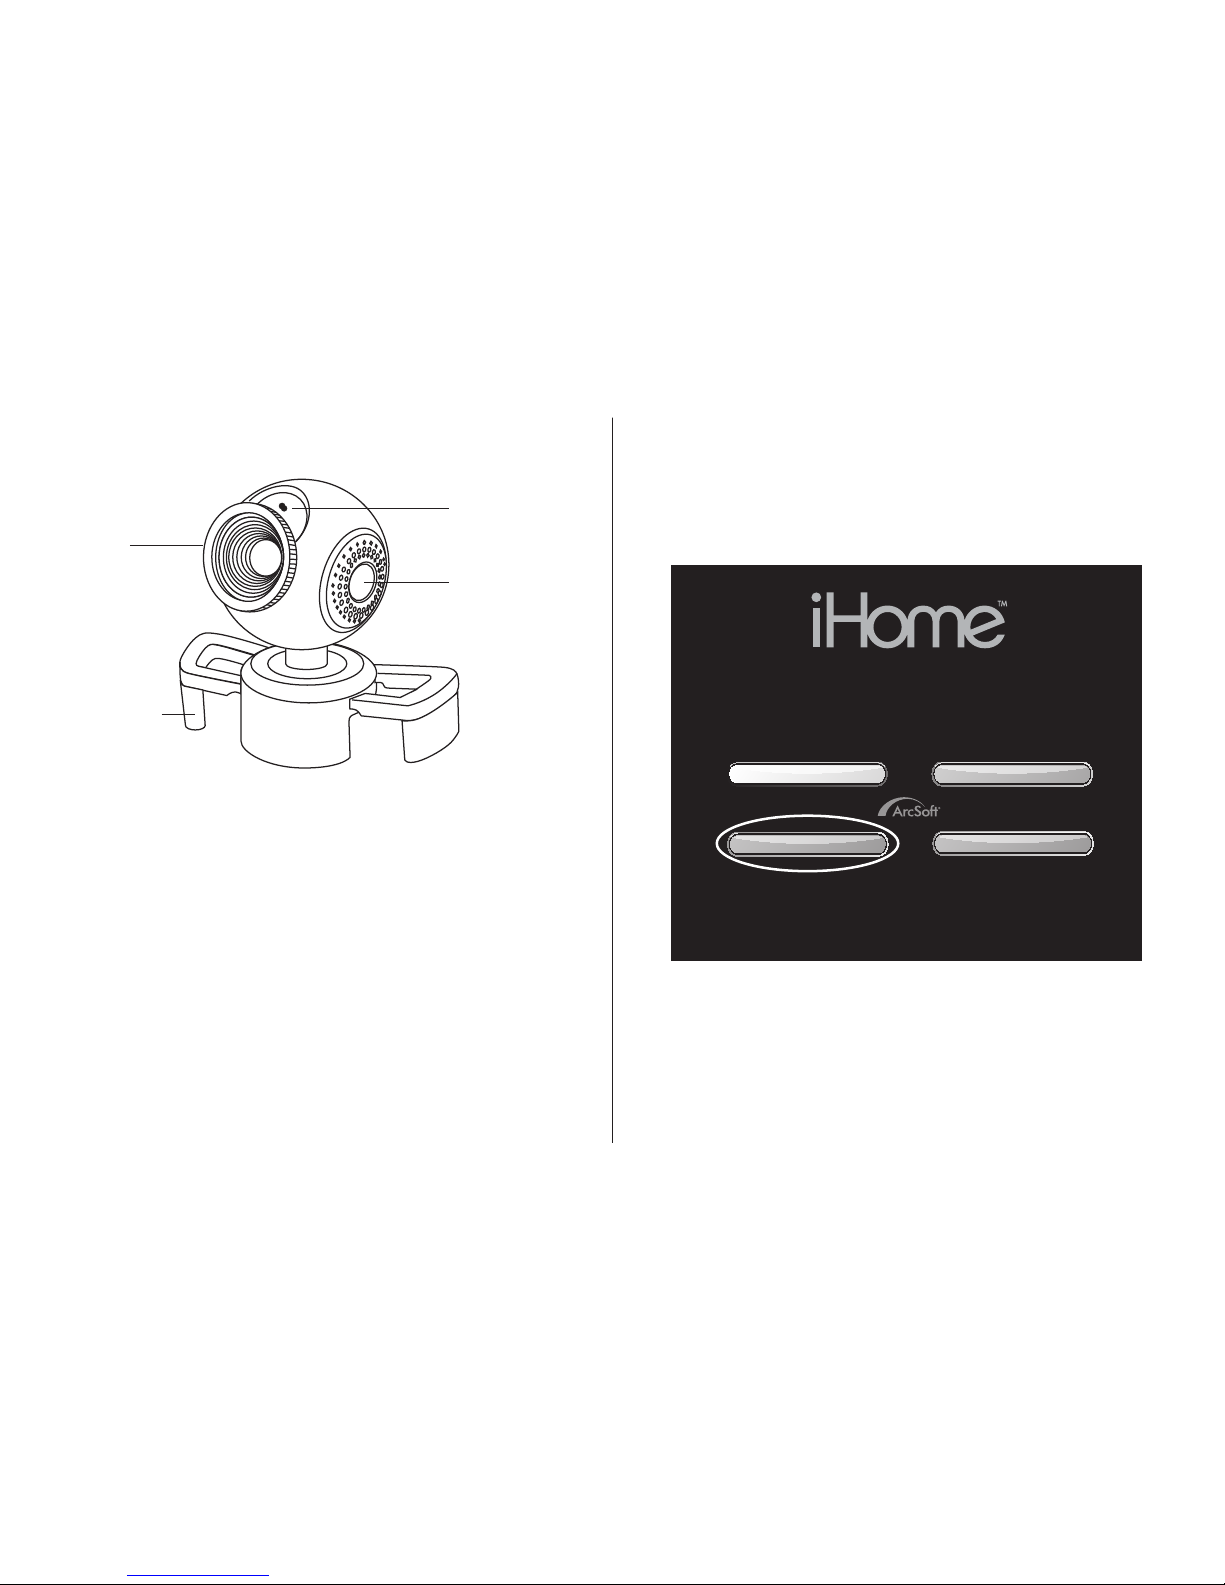
Turn the ring on the front of the webcam to manually•
focus the image.
Press the button on the side of the webcam to take a•
still shot or start a video capture (depending on which
applications are installed on your computer).
Click• Help > Basics in ArcSoft VideoImpression for a
basic introduction to using the software. Click Help >
Help for more detailed information on how to use the
application with your webcam.
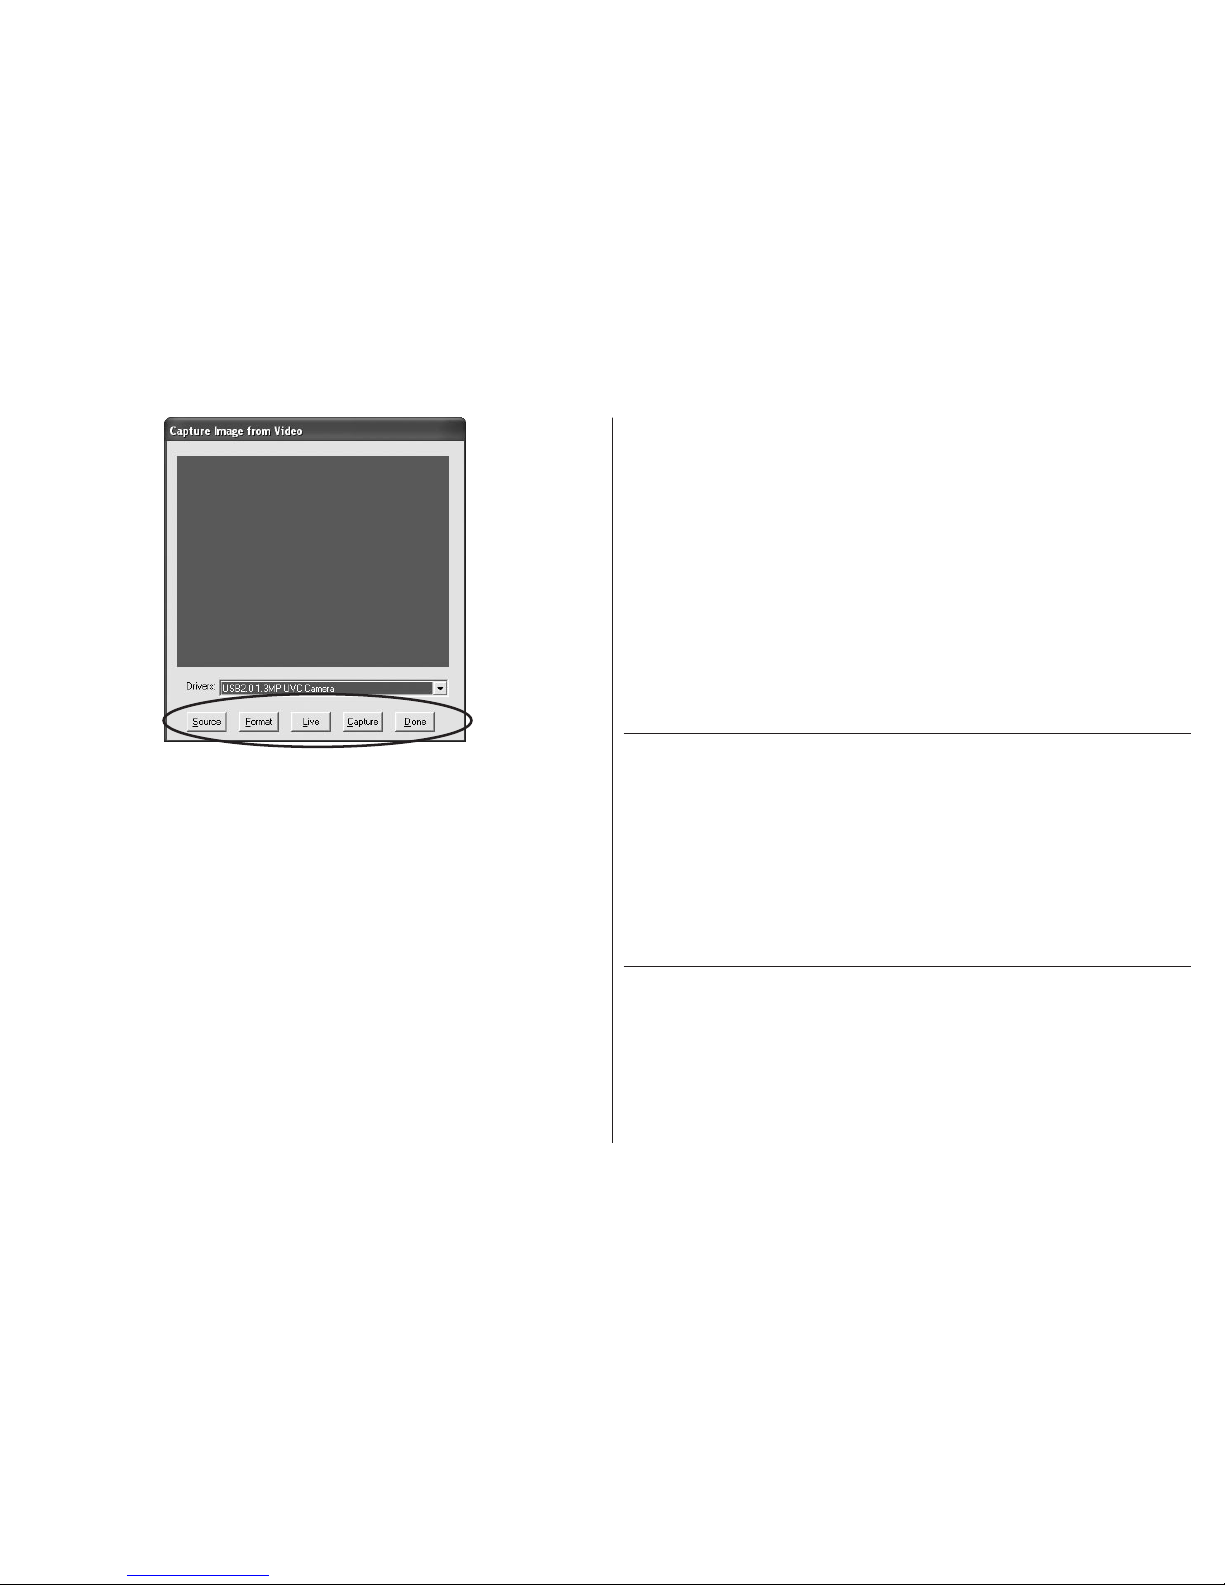
Click• Help in ArcSoft PhotoImpression for more details on
how to use the application with your webcam.
troubleshooting
situation try this
no video is
displayed
Check that the webcam is connected to the•
computer.
Use a different USB port.•
Connect the webcam to a USB port on the•
computer, not a USB hub.
Uninstall and reinstall the driver. To uninstall•
the driver, click Start > Control Panel > Add
or Remove Programs, select MyLife Webcam
Pro and click Change/Remove.
video stutters
or stops
Disconnect and reconnect the webcam.•
Ensure the webcam is connected to a USB•
2.0 port (not a slower USB 1.1 port).

FCC Statement
This device complies with part 15 of FCC Rules. Operation
is subject to the following two conditions: (1) this device
may not cause harmful interference, and (2) this device must
accept any interference received, including interference
that may cause undesired operation. This equipment has
been tested and found to comply with the limits for a Class
B digital device, pursuant to part 15 of FCC Rules. These
limits are designed to provide reasonable protection against
harmful interference when the equipment is operated in a
residential installation. This equipment generates, uses, and
can radiate radio frequency energy and, if not installed and
used in accordance with the instruction guide, may cause
harmful interference to radio communications. However,
there is no guarantee that interference will not occur in a
particular installation. If this equipment does cause harmful
interference to radio or television reception, which can be
determined by turning the equipment off and on, the user is
encouraged to try to correct the interference by one or more
of the following measures:
Reorient or relocate the receiving antenna.•
Increase the separation between the equipment and•
the receiver.
Connect the equipment into an outlet on a circuit•
different from that to which the receiver is connected.
Consult a service representative for help.
Properly shielded and grounded cables and connectors
must be used in order to comply with FCC emission limits.
LifeWorks is not responsible for any radio or television
interference caused by using other than recommended
cables and connectors or by unauthorized changes or
modications to this equipment. Unauthorized changes or
modications could void the user’s authority to operate the
equipment.
Responsible party:
LifeWorks Technology Group LLC
1412 Broadway
New York, NY 10018
Tested To Comply With FCC Standards
FOR HOME OR OFFICE USE
Warning
Improper setup, use and care of this product can increase
the risk of serious injury,death or device damage. Read
and keep this guide and all other printed guides for future
reference. For updated guides or replacements, go to
www.life-works.com
Do Not Attempt Repairs
Do not attempt to take apart, open, repair, service or
modify the device(s). Doing so may risk electric shock or
other hazard. Evidence of any attempt to open or modify
the device, including any peeling, puncture or removal of
labels, will void the Limited Lifetime Warranty.

technical support
for technical support please visit
www.life-works.com
or call (877) LIFE-540
(877-543-3540)
lifetime warranty
for warranty information, please visit
www.life-works.com/warranty
Printed in China
© 2008 LifeWorks Technology Group LLC.
iHome™ is a trademark of SDI Technologies Inc. used
under license.
Windows Vista®is a registered trademark or trademark of
Microsoft Corporation in the United States and/or other
countries.
All other brands and logos are trademarks of their
respective companies.
for model number(s)
IH-W350DB IH-W351DW
document version number 0811-0
This manual suits for next models
1
Table of contents
Other iHome Webcam manuals