Ikan beholder EC1 User manual

1
3-axis Handheld Gimbal
Stabilizer
Beholder
EC1
V1.0 2016.07
Instruction Manual
Encoders

2
Table of Contents
Introduction
–About the EC1 3
–Features 4
Product Description
–What’s Included 5
–Parts Diagram 6
–Charging the batteries 7
–Installing the battery holder 8
–Camera Installation and Balance 9
Getting to Know the EC1
–Powering On 14
–Modes of Operation (Profiles) 15
–OLED Display 16
–Extensions 16
Compatible Camera Models
–List of supported cameras 17
Camera Working Angles
–Operable camera angles 17
Precautions and Safety
–Precautions 19
–Safety 20
Copyright
–Copyright/Trademark Statement 21
Product Specifications
–Technical specifications 22
Frequently Asked Questions
–FAQ 23

3
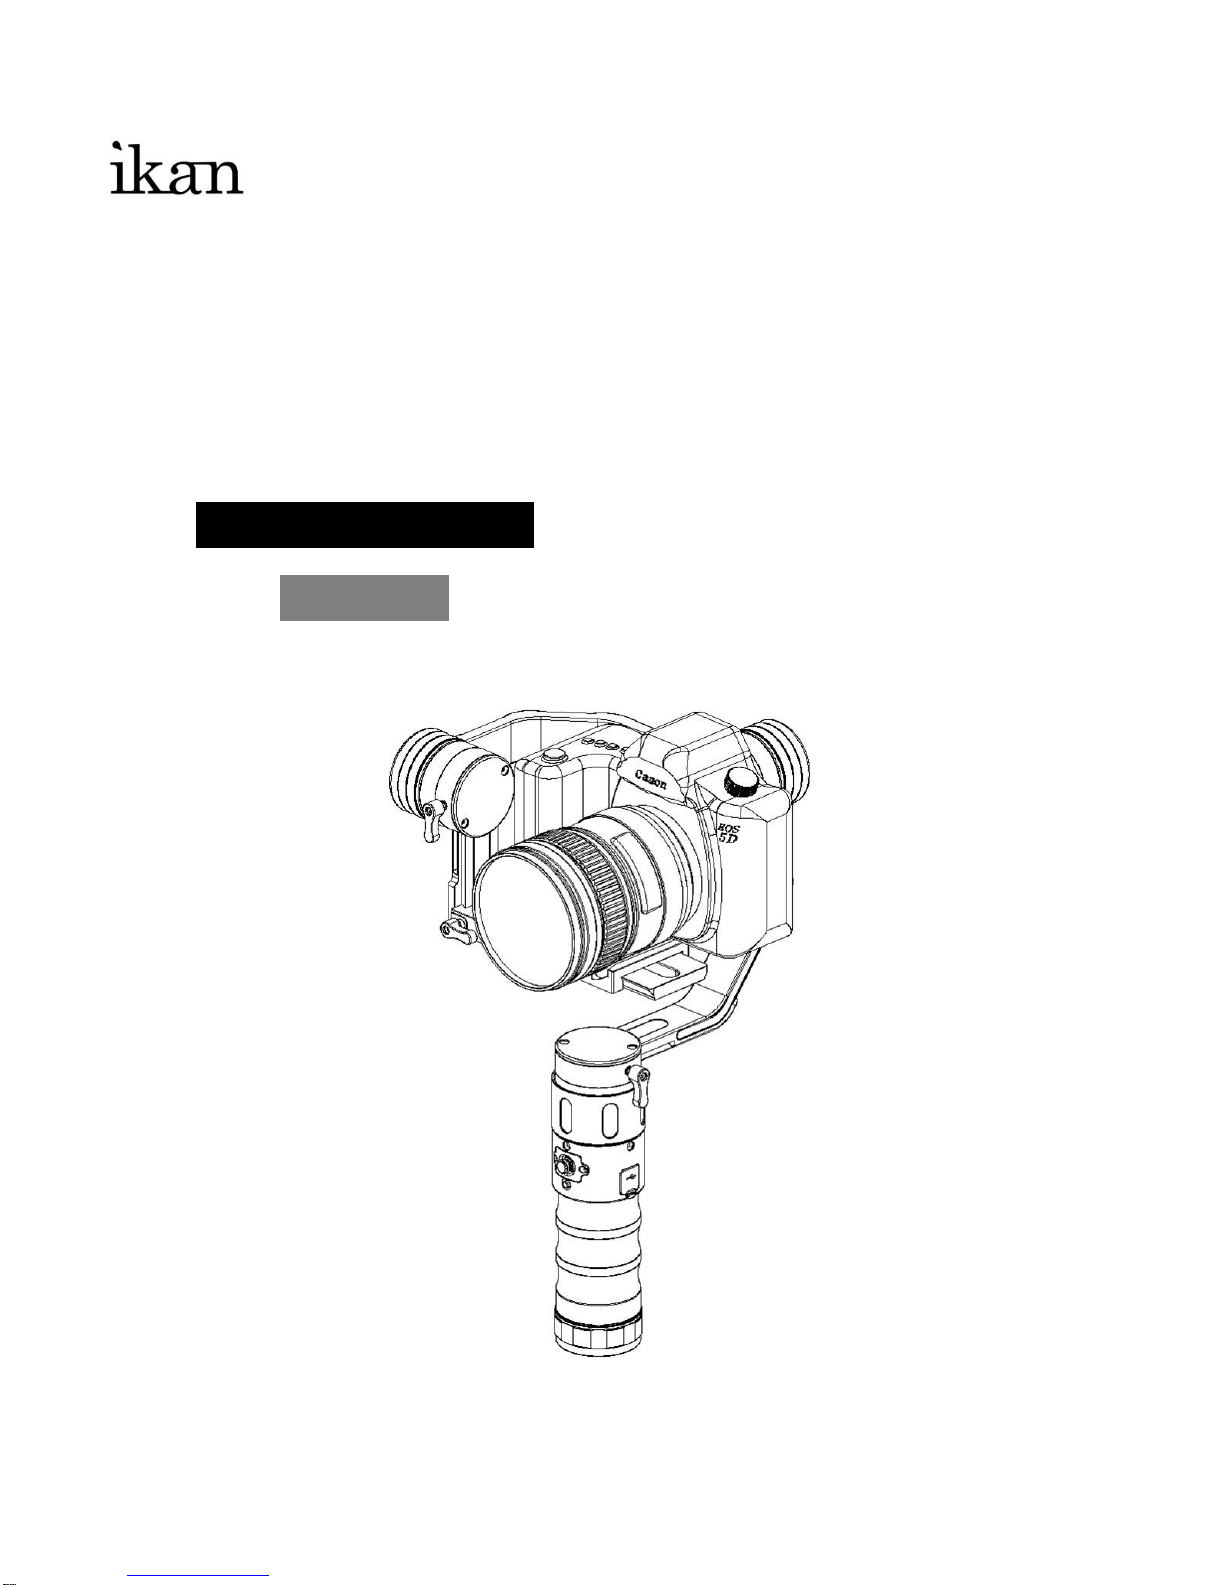
Beholder EC1 –3-Axis handheld gimbal stabilizer
The Beholder EC1 is the newest upgrade to the popular gimbal Beholder DS1. It is designed
specifically for professional filmmakers looking for a single handheld stabilizer for a large range of
medium and small cameras. The EC1 makes it simple and easy to get outstanding stable footage.
Beholder EC1 is the first to use the 32bit motor encoder. It features adjustable curved arms and
also adds an innovative pitch double adjustment that allows customers to use a large variety of camera
sizes, from small mirrorless to large DSLR cameras.
Whether filming fast-paced actions or aiming for high or low-angle shots, this device will help
you correct shakes or swaying and will balance and smooth the picture in order to achieve professional
grade image stabilization.
Beholder EC1 is lightweight and easy to use and can be carried in the supplied case or a small
photographer bag. EC1 can be widely used in movies, professional wedding films, and other
applications. EC1 uses a 32-bit electronic board system that has several profiles for multiple shooting
modes, which are easy to select by simply pressing a key. Beholder EC1 is shipped “ready to use” and
does not require software changes in order to handle your camera. The encoder technology is built-in for
faster system responsiveness, greatly improving the accuracy and stability at any angle, without having
to switch modes manually.
EC1 allows the camera to rotate 360 degrees on all axes using slip-ring technology while
removing rotation blockers used in previous versions to prevent wire twisting. It supports external remote
control (wired or wireless), allowing you to extend the handle and mount directly onto a rocker arm to
achieve high angle shots, boom moves, dolly shots, a smooth and seamless transition from high to low
mode and also time-lapse photography. Beholder EC1 supports firmware upgrades for further software
optimization.
EC1 has a standby time of 20 hours, while the built-in self-luminous OLED screen displays real-
time power usage, allowing users to better understand the product’s electricity consumption in a timely
manner in order to charge the battery. The OLED screen also displays the profile selected, allowing
users to clearly understand the shooting mode currently in use.
WARNING
To reduce fire or shock hazard, do not expose the unit to rain or moisture.
About the EC1 ▲

4
▲
Features
Beholder EC1 features
Dimensions: 360x184x79mm
Compatibility: Mirrorless & DSLR Cameras up to 5 lbs
Main Features:
•
32-bit controller with motor control units (MCUs) and 12bit Encoder system
•
OLED screen display for power and batterylevel
•
OLED screen display for Profile Mode andjoystick
•
3-axis gimbal stabilizer and 4-axis toolless design
•
3-axis 360° Pitch, Roll, Yaw (nolimitation)
•
Quick-release plate compatible with Manfrotto577
•
4-way joystick to control the pitch and rollangle
•
3x 3.7v 18650 Detachable Rechargeablebatteries
•
Battery with an operation time of up to 20hours
•
One 3/8" screw hole in the handle bottom and one 1/4" hole on the side for mounting accessories like
a monitor or microphone
•
Increase the precision of stabilization by applying FOC-specificcompensations
•
Five pre-configured profiles including Lock, Pan-Follow, Follow, 3-Axis Follow, and Level Roll, Pitch to
Horizon
•
Prevents motors from losing synchronization and skippingsteps
•
Auto-Invert-Mode (all profiles can also be used in this condition)
•
Bluetooth module for remote control (notincluded)
•
2.4g wireless joystick module for remote control (notincluded)
•
Supported temperature accelerometercalibration
•
Adaptive PID-algorithm for preventing vibrations in wideangles
•
ACC low-pass filter to improve stability
•
Provides information about frame angle and angle of the camera relative to the frame
•
Five user-configurable modes of operation with a toggle button
•
Option to adjust camera position withhands
•
Low voltage protection for integratedbattery
•
Can significantly decrease power consumption by using field-oriented control strategy to drive motors
•
Sound alerts for mode change andcalibration
•
Increases instant torque

5
▲
What’s Included
After you’ve received the product and before you use it, please check whether the package
contains all the items in the following inventory. If any item is missing, please get in touch with
the dealer to resolve the situation.
EC1 body (Fig. A)
1. 3x 18650 batteries
2. Battery holder with USB chargingport
3. 1/4 screw for camera quick release plate
4. Quick release plate compatible with Manfrotto577
5. M4 screw long, mounted in pitch armbase
6. M4 screw short, mounted in pitch arm /motor
7. Battery compartment cap
8. M3 screw for quick release base locking
9. M4 screw short, mounted in yaw arm /motor
10. Yaw motor
11. M4 screw short, mounted in roll arm /motor
12. Roll motor
13. Pitch motor
14. Quick release locking base
15. 4-way joystick controller
16. OLED information screen
17. M3 screw for base balancing

6
▲
Parts Diagram
In thebox
Fig A. Beholder EC1 parts

7
▲
Charging the Batteries
Battery charging and inserting
For best performance, please use ikan IB-18650-26 batteries. The LED indicator will turn red
while charging and green if the batteries are fully charged.
Connect the battery holder (Fig. 1) to the USB power supply before the batteries are installed in
the holder. The LED will turn green to indicate the USB power can be used. Disconnect the battery
holder and insert the three batteries. Connect the battery holder to the charger again. The LED indicator
will turn red to indicate the batteries have started to charge. If less than three batteries are placed in the
battery holder, the indicator light displays green to indicate that charging has not started. The battery
holder can only charge all three batteries atonce.
Note: The battery holder can only be used as a charger stand temporarily. When the battery
LED indicator turns green to indicate the completion of charging, the batteries are only charged to 80%
of the battery capacity. For 100% charge, please buy a professional charge adapter or use ikan’s ICH-
SC4 smart charger.
The battery holder charge time is 3-4 hours.
Fig. 1. Battery holder and 3x 18650 batteries
WARNING
When using the battery holder as a charger, the USB power supply must meet the minimum
requirements.
The common USB port may not supply enough power to charge the batteries. A USB adapter
rated at a minimum of 2.5A/12.5W or more may be needed.
Recommendations
•
It is recommended to use a dedicatedcharger like the ikan ICH-SC4.
•
If the product is not used for a long time, charge the batteries up to 70% of their capacity and
store them in a cool,dryplace.
•
If you need more batteries, try to purchase ikan IB-18650-26-3PK official batteries or other
reliable batteries with a protection circuit to avoid overcharging and damaging the batteries.
Using damaged or different capacity batteries may result in failing to start up the Beholder
EC1.
•
Hint: Currently, the maximum capacity of an 18650 battery is 3500mah. Try to avoid fake
suppliers advertising a hugecapacity.

8
▲
Installing the battery holder
Instructions to use the battery holder
Mount the 18650 batteries with the negative electrode of the battery (-) towards the spring
(Fig. 2). Push the three 18650 batteries inward.
Fig. 2. Inserting batteries into the battery holder
Install the battery holder into the battery compartment with the two electrical terminals toward the
direction of insertion (Fig. 3).
Fig. 3. Inserting the battery holder into gimbal handle
WARNING
Before starting the gimbal, make sure the camera is properly mounted on the stabilizer and
perfectly balanced.

9
▲
Camera Installation and Balance
Instructions to install the camera
STEP 1
Mount the camera quick release
•
Remove the quick release plate from thegimbal.
•
Attach the quick release plate to the camera (Fig. 4). Be careful not to twist it too tight at this point.
•
Make sure the quick release plate direction is facing forward toward thelens.
Fig. 4. The camera is attached to the quick release plate
WARNING
Before installing the camera and adjusting the balance, remove the camera lens cover, attach
the lens hood, and insert a memory card and camera batteries, as well as any other
accessories. The camera should be fully ready to shoot.

STEP 2
10
Install the camera on gimbal base
•
Install the camera with quick release mounted into the Beholder EC1 bottom mount base (Fig. 5).
•
Slightly adjust the position of the camera into the base until you find a horizontal balance.
•
Shift the camera as close to the pitch motor as possible. Use the base plate positioning if needed.
•
Tighten the thumbscrews.
•
Use a screwdriver to tighten the 1/4 quick release screw.
Fig. 5. Mounting the camera to gimbal base

11
STEP 3
Adjust the gimbal roll –left and right balance
•
Release the roll thumb screw (Fig.6).
•
Slide the roll arm left or right until the camera finds a balance position and doesn’t lean left or right.
•
In case more space is needed on either side, loosen the quick release base and slide the camera to
the desired direction, fix the base in place, then readjust the rollarm.
Fig. 6. Roll balance adjustment

12
STEP 4
Adjust the gimbal pitch - up and down balance
•
Release the pitch thumb screw (Fig.7).
•
Move the pitch/tilt arm up and down, until the camera stays in place at any lens angle.
•
If needed, readjust the camera in quick release base back and forth until horizontal balance is found.
•
Repeat up and down balancing to find perfect angularbalance.
•
Tighten the thumbscrews.
Fig. 7. Pitch balance adjustment

13
STEP 5
Adjust the gimbal yaw –forward and backward balance
•
Loosen the yaw motor left thumb screw (Fig.8).
•
Tilt the gimbal handle 45 degrees forward.
•
Move the yaw arm to the left side or to the right side at 90 degrees and observe the direction it tends
to move when released.
•
If the yaw arm tends to go up/backward, then the gimbal is front heavy: move the yaw arm back
slightly and repeat the side test.
•
If the yaw arm tends to move down/forward, it means the gimbal is back heavy: move the yaw arm
slightly forward and repeat the sidetest.
•
When in balance, the yaw arm should stay at any position around the handle when the handle is tilted
forward.
•
Tighten the thumbscrews.
Fig. 8. Yaw balance adjustment
Recommendations
•
After adjusting the camera installation, check that each knob is fully tightened.
•
Do not overtighten the screw wrench to avoid stripping the screw.
•
For a very small camera and lens, if you cannot reach the balance as per above steps, then try
to reposition the camera on the quick release in step 1. Repeat steps 1-5 otherwise a different
camera/lens combo is required.
TIP
Beholder EC1 uses the latest 32-bit systems, a multi-processor technology and inductive motor
technology, with greatly improved torque. Therefore, it's able to start and level the camera if it
is out of balance, but for shot stability, battery life and power saving, we strongly recommend
you find the best balance first and then power the gimbal on and shoot the video.

14
▲
Power ON
Starting the gimbal in default profile
•
Press the power button for one solid second to power the gimbal on (Fig. 9 [2]).
•
The gimbal will start in followmode.
•
Use the 4-way joystick (Fig. 9 [1]) to control the camera tilt and pan direction. Push the joystick up or
down for tilting up and down. Push the joystick to the left or to the right to pan the camera left or right.
Fig. 9. Gimbal joystick
TIP
Make sure the batteries are fully charged before starting the gimbal.
Adjust the gimbal and camera position before use. Beholder EC1 uses the latest 32-bit
encoding technology and can start up in any direction and at any angle.

15
▲
Modes of Operation (Profiles)
Switching the gimbal to different modes of operation (profiles)
•
Press the mode button one time, which is located under the OLED screen (Fig. 9 [3]) to enter Lock
Mode (Profile 1): camera will hold the direction and not follow, pan, ortilt.
•
Press the mode button twice to enter Pan-Follow Mode (Profile 2): gimbal follows pan and holds the
tilt position.
•
Press the mode button three times to enter Follow Mode (Profile 3): camera follows the tilt and pan
directions.
•
Press the mode button four times to enter 3-Axis Follow Mode (Profile 4).
•
Press the mode button five times in a row to get to Profile 5: level roll and bring the pitch to the horizon.
•
Press the mode button and hold for six seconds to calibrate the gyro.
Fig. 10. Manual setting on the roll angle
TIP
Any of the profiles can be set to hold a specific angle or position manually. Take the camera
with one hand and hold it in the desired position for 2 seconds. The system will automatically
save the desired angle (Fig. 10).

16
▲
OLED display
Description of OLED display functions
Boot up interface with company
logo
Charge:
85% to 100%
65% to 85%
45% to 65%
30% to 45%
10% to 30%
10% or less
joystick right direction
joystick left direction
joystick tilt up
joystick tilt down
profile1: Press mode button once: Lock mode
profile2: Press mode button twice: Pan Follow mode
profile3: Press mode button three times: Follow mode
profile4: Press mode button four times: 3-Axis Follow mode
profile5: Press mode button five times: Level Roll, Pitch to Horizon
Note: Press and hold the mode button for 6 seconds to start gyro
calibration
Extensions and extra features
•
3/8 standard screw holes, connecting rods 1/4 or 3/8 turn screws sold separately.
•
Mini USB for controlling the gimbal via wiredjoystick
•
Handle screw for an external monitor and microphone, lights,etc.
•
Genuine universal quick release plate Manfrotto 577 series, such as 501PL, 701,
etc. 50mm width Quick Edition
Extra features ▲

17
▲
Compatible cameras
Compatible camera models
•
Beholder EC1 supports lighter than 2KG (including lenses) DSLR or mirrorless cameras
•
List of supportedcameras:
•
DSLR: Canon 6D / 5D / 7D
• Mirrorless: A6300, A7R2, A7S + 24- 70 / 16- 35, GH4 + 12- 35, GH3 + 14- 140 and so on.
•
Compact cameras: RX100, LX100
Handheld camera angle range
Fig. 11. Camera working angles
Gimbal working angles ▲

18
▲
Mount modes
Mounting options
Beholder EC1 supports two camera mounting options: Roll arm to the left or roll arm to the right
of the center (Fig. 12). The right side is useful if your camera has a flip screen.
Fig. 12 Camera mount –left side or right side roll arm

19
▲
Precautions
Things to consider before use
Beholder EC1 is shipped from the factory with perfect calibration. However, after a long period of
unuse or if the temperature difference is too large, it may cause the gyro to drift automatically or to tilt
during use.
Gyro Correction: Place the Beholder EC1 horizontally on the table, power on the gimbal and
press and hold the menu button for 6 seconds. The system automatically enters the gyroscope
calibration mode. The motors lose power for 5 seconds. After that, the automatic system calibration is
complete and the stabilizer can resume normal use.
Note:
1. During the calibration process, hold the gimbal handle on the table as stable as possible.
2. The mini USB port is designed only for a wired joystick and can't be used for charging.
3. In order to obtain a better shooting experience in the use of EC1 when shooting, avoid any
collision and do not use excessive force.

▲
Safety
20
Important safety instructions
1. Do not get too close to a magnetic field or a source of extreme heat and fire.
2. Using and storing this product under high temperature and humidity, water, or in a highly corrosive
environment can cause the device to have internal failure.
3. Protect the power cord to avoid trampling or backlog, particularly at plugs, sockets and other parts.
4. Do not use an incompatible power supply, charger or batteries that may cause a fire, explosion or
other hazard. Use only manufacturer-approved equipment and matching accessories to meet safety
standards. Other types of accessories may cause problems with the product, or a safety incident.
5. When not using the product for a long period of time, please remove the battery, wrap it in dust-
proof packaging and place it in a dryenvironment.
6. Do not use the device during a thunderstorm or it may result in equipment malfunction or risks being
struck by lightning.
7. Do not expose the battery to excessive heat in the environment, such as sunlight, fire or similar
factors.
8. Do not expose this appliance to dripping or splashingliquids.
9. Do not place conductive objects at the battery holder electrical terminal, or in contact with the
battery ends, in order to avoid short-circuiting the battery or getting burns and other physical injuries
due to the battery overheating.
10. Do not expose the battery near any heat sources such as sunlight, heaters, microwave, oven, stove,
radiator, or other instruments that produce heat (including amplifiers).
11. If the battery is used improperly, there may be an explosion hazard. In order to reduce the risk of fire
or burns, do not disassemble, crush, puncture, short external connections, expose to heat or throw
in fire.
12. If the batteries leak, do not allow the liquid to come in contact with the skin or eyes. If the liquid does
come in contact with the skin or eyes, wash affected area with water immediately and go to the
hospital for medical treatment.
13. If battery discoloration, deformation, abnormal heat, or other phenomena occurs, please stop using
and replace the battery.
14. WARNING: CHOKING HAZARD - This product may contain small equipment and parts. Keep the
device and its accessories out of reach of children as they may damage the device or swallow small
parts.
15. Dispose of used batteries in accordance with localregulations.
Other manuals for beholder EC1
2
Table of contents
Other Ikan Camera Accessories manuals

Ikan
Ikan PT4500-SDI-P2P-TK User manual

Ikan
Ikan ID 500 User manual

Ikan
Ikan Saga SX7 User manual

Ikan
Ikan PT2500 User manual

Ikan
Ikan TRD Beholder MS1 User manual

Ikan
Ikan ELE-TRIFLY User manual

Ikan
Ikan TRD Beholder MS1 User manual

Ikan
Ikan AC106S User manual

Ikan
Ikan Beholder MS-PRO User manual

Ikan
Ikan PT4500-P2P-TK User manual

Ikan
Ikan RECOIL-UGK User manual

Ikan
Ikan PT4500-TM-PEDESTAL User manual

Ikan
Ikan PT4500-SDI-P2P User manual

Ikan
Ikan iLED-MA User manual

Ikan
Ikan HB160-GC User manual

Ikan
Ikan PT-ELITE-PRO2 User manual

Ikan
Ikan PD1 User manual

Ikan
Ikan PT4700S-TRIPOD User manual

Ikan
Ikan FLY-X3 User manual

Ikan
Ikan PT2000 User manual