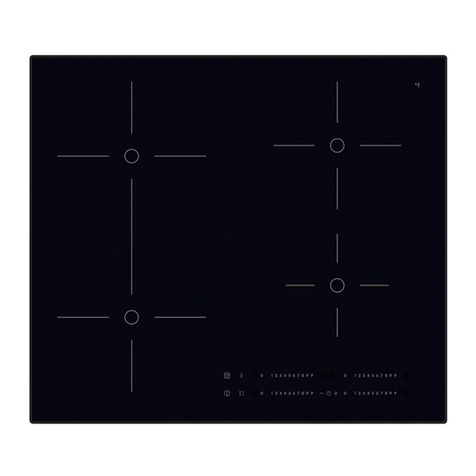
IKEA FÖRDELAKTIG User manual

GB
FÖRDELAKTIG


ENGLISH 4
2
1345
Please refer to the last page of
this manual for the full list of IKEA
appointed Authorized Service
Centre and relative national phone
number

4
ENGLISH
Contents
Safety information
For your safety and correct operation of the
appliance, read this manual carefully before
installation and use. Always keep these instructions
with the appliance even if you move or sell it. Users
must fully know the operation and safety features of
the appliance.
Induction systems of these hobs meet the requirements
of EMC standards as well as the EMF Directive and
should not interfere with other electronic devices. Heart
pacemakers users or other electronic implants users
should clarify with their medical doctor or with the
manufacturer of the implants whether these devices
The wire connection has to be done by special-
ized technician. Before proceeding with electrical
connection please refer to Chapter ELECTRICAL
CONNECTION.
For appliances with supply cords, the arrangement of
the terminals, or the length of the conductors between
the cord anchorage and the terminals, shall be such that
the current carrying conductors become taut before
the earthing conductor if the cord slips out of the cord
anchorage.
Safety information 4
General information 9
Electrical connection 12
Product description 15
Indicators 15
Control Panel 16
Cooking zone control panel 18
Extractor control panel 19
Cookware guidance 20
Daily use 21
Troubleshooting 23
Power Management 24
Hob Extractor Technical Data 25
Extractor Energy efficiency 26
Hob Energy efficiency 27
Rating Plate 27
Environment concerns 28
IKEA GUARANTEE 28

5
ENGLISH
• The manufacturer will not be held liable for any
damages resulting from incorrect or improper
installation.
• Check that the mains voltage corresponds to that
indicated on the rating plate fixed to the inside of the
product.
• Means for disconnection must be incorporated in the
fixed wiring in accordance with the wiring rules.
• For Class I appliances, check that the domestic power
supply guarantees adequate earthing.
• Connect the extractor to the exhaust flue through
an adequate pipe. Please refer to the purchasable
accessories shown in the installation manual (if circular
pipe: minimum diameter 120 mm). The route of the flue
must be as short as possible.
• Connect the product to the power net by using an
omnipolar switch.
• Regulations concerning the discharge of air have to be
fulfilled.
• Do not connect the extractor appliance to exhaust ducts
carrying combustion fumes (boilers, fireplaces, etc.).
• If the extractor is used in conjunction with non-electrical
appliances (e.g. gas burning appliances), a sufficient
degree of aeration must be guaranteed in the room in
order to prevent the backflow of exhaust gas. When the
cooker appliance is used in conjunction with appliances
supplied with energy other than electric, the negative
pressure in the room must not exceed
0,04 mbar to prevent fumes being drawn back into the
room by the cooker appliance.
• The air must not be discharged into a flue that is used
for exhausting fumes from appliances burning gas or
other fuels.

6
ENGLISH
• If the supply cord is damaged, it must be replaced
from the manufacturer or its service agent or similarly
qualified person in order to avoid a hazard.
• Connect the plug to a socket complying with current
regulations, located in an accessible place.
• With regards to the technical and safety measures to be
adopted for fume discharging it is importat to closely
follow the regulations provided by the local authorities.
WARNING: Before installing the appliance, remove
the protective films.
• Use only screws and small parts in support of the
appliance.
WARNING: Failure to install the screws or fixing
device in accordance with these instructions may
result in electrical hazards.
• Do not look directly at the light through optical devices
(binoculars, magnifying glasses…).
• Cleaning and user maintenance shall not be made by
children without supervision.
• Children should be supervised to ensure that they do
not play with the appliance.
• This appliance is not intended for use by persons
(including children) with reduced physical, sensory
or mental capabilities, or lack of experience and
knowledge, unless they have been given supervision or
instruction concerning use of the appliance by a person
responsible for their safety.
• This appliance can be used by children aged from 8
years and above and persons with reduced physical,
sensory or mental capabilities or lack of experience
and knowledge if they have been given supervision or
instruction concerning use of the appliance in a safe

7
ENGLISH
way and understand the hazards involved. Children
shall not play with the appliance.
WARNING: The appliance and its accessible parts
become hot during use.
Care should be taken to avoid touching heating elements.
Children less than 8 years of age shall be kept away
unless continuously supervised.
• Clean and/or replace the Filters after the specified time
period (Fire hazard). See paragraph Care and Cleaning.
• There shall be adequate ventilation of the room when
the appliance is used at the same time as appliances
burning gas or other fuels (not applicable to appliances
that only discharge the air back into the room).
WARNING:
appliance to avoid the possibility of electric shock.
• Do not switch on a device if the surface is cracked or
there is a damage to the material thickness.
• Do not touch the appliance with wet parts of the
body.
• To clean the product a steam cleaner is not to be
used.
• Metallic objects such as knives, forks, spoons and lids
should not be placed on the hob surface since they
can get hot.
•
and do not rely on the pan detector.
WARNING: Unattended cooking on a hob with fat or
blanket.
CAUTION: The cooking process has to be supervised.

8
ENGLISH
A short term cooking process has to be supervised
continuously.
• The appliance is not intended to be operated by
means of an external timer or separate remote-control
system.
WARNING:
cooking surfaces.
• Ensure that the device is installed in a way that allows
to disconnect it from the power supply, with a contact
opening distance (3 mm) that ensures complete
disconnection in category III overvoltage conditions.
• Ensure that the device is not exposed to atmospheric
agents (rain, sun).
• Ensure that the ventilation of the appliance is in
accordance with the manufacturer‘s instructions.

9
ENGLISH
General recommendations
• Never use scouring pads, steel wool, muriatic
acid or other products which could scratch or
mark the surface.
• For safety reasons, do not clean the appliance
with steam blasters or high-pressure cleaners.
• Foods that accidentally fall or settle on
the surface, on the functional or aesthetic
elements of the hob must not be eaten.
Cabinet requirements
• The cooking hob is intended to be built into
the worktop above a kitchen cabinet of 800
mm width or more.
•
and standards for low voltage installations
observed.
•
materials and veneered wood) must be
assembled with heat-resistant adhesives (min.
85°C): Unsuitable materials and adhesives can
result in warping and detachment.
•
room for the electrical connections of the
appliance. Suspended kitchen cabinets above
the appliance must be installed at a distance
that provides enough room for comfortable
working process.
• The use of hard wood decorative borders
around the worktop behind the appliance is
allowed, in this case the minimum distance
remains as indicated on the installation
illustrations.
• Positioning and dimensions of the cut-out for
built-in appliance is shown in the illustration
below. The measurements shown are
only valid if the following condition is met:
worktop overhang to cabinet front is 35mm.
• Minimum distance between built-in appliance
and any cabinet above it is 500mm.
490+2 mm
773+2 mm
555 mm
18 - 40mm
General information
Min. 500 mm
• To prevent leakage of liquid between the
edge of the hob and the countertop, place
the adhesive seal provided along the entire
outer edge of the hob before assembly.
Please refer to Assembly Instruction.
Use
• The extractor appliance has been designed
exclusively for domestic use to eliminate
kitchen smells.
• Never use the appliance for purposes other
than for which it has been designed.
• Deep fat fryers must be continuously
monitored during use: overheated oil can
burst.
• Do not operate the appliance with an
external time switch or a separate remote
control system.
• The appliance shall not be installed behind a
decorative door in order to avoid overheating.
• To avoid damaging the appliance, do not
climb onto the appliance.
• To avoid damaging the silicon grouting, do
not put hot cookware on the frame.
• Do not cut or prepare food on the surface
or drop hard objects onto it. Do not drag
cookware across the surface.


10
ENGLISH
Care and Cleaning
supply before carrying out any maintenance work.
Charcoal Filter
•
assembly instruction) can be regenerated.
washed and regenerated every 3-4 months
(or more frequently if the hood is subject to
intensive use), up to a Max. of 8 regeneration
cycles (in case of particularly intensive use it
is recommended that you do not exceed 5
the service (see table in the end of booklet)
Regeneration procedure:
• Wash in the dishwasher at a MAX
temperature of 70° or hand wash in hot
water without using abrasive sponges (do not
use detergents!).
• Dry in the oven at a MAX temperature of
70° for 2 hours (it is recommended to read
carefully the user manual and the assembly
instruction of the oven of your own).
Cast iron grid
• Do not wash in a dishwasher. Clean the
Grid with hot water and neutral soap,
without using abrasive sponges (do not use
detergents!).
Grease Filters
•
according to below time intervals, to maintain
good performance of the hood and to
excessive grease build-up.
•
months of operation, or more frequently for
particularly heavy usage, and can be washed
in a dishwasher.
Overflow (upper) is part of the grease filter and
must be checked after each cooking or whenever
liquid has bee spilled on the hob. Rinse under
warm water and remove food to prevent smell
and lime scale.
Water collector
For a standard use is recommended to check
and emptying the collector every two weeks.
• Remove the drawer before checking the
water collector regularly, especially after a
large amount of liquid has been spilled.
Release the lock (1) and pull the water
collector down (2) then wash with warm
water or in the dishwasher.
1
2

11
ENGLISH
Cleaning the appliance
• Clean the appliance after every use in order
to prevent food residues from burning on.
Cleaning dried-on and burnt-on dirt requires
• To clean everyday dirt, use a soft cloth or
sponge with water and a suitable cleaning
agent. Follow the manufacturer‘s advice with
regard to cleaning agents. We recommend
using protective cleaning agents.
• Remove encrusted dirt, e.g. from milk that
has boiled over, with a glass ceramic hob
scraper while the hob is still warm. Please
follow the manufacturer‘s advice with regard
to the scraper.
• Remove sugary foods, such as marmalade,
that have boiled over with a glass ceramic
hob scraper while the hob is still warm.
Otherwise, this could damage the glass
ceramic surface.
• Remove melted plastic with a glass ceramic
hob scraper while the hob is still warm.
Otherwise, this could damage the glass
ceramic surface.
• Remove limescale stains using a small
amount of lime-dissolving solution, e.g.
vinegar or lemon juice, when the hob has
cooled down. Then clean again with a damp
cloth.

12
ENGLISH
Electrical connection
WARNING: All electrical connections
must be made by an authorised
installer.
• Before making the connections, check
that the rated voltage of the appliance
indicated on the rating plate corresponds
to the mains power supply. The rating
hob.
• Only use original components supplied
by the spare parts service.
• The appliance is not equipped with a
network cable. Purchase the correct one
from a specialist dealer.
• If the cables are damaged, replace with
original spare parts cables. Contact the
call center of your IKEA store.
Caution! Do not solder any wires!
13
Warning Strips
Warning strips show that specialist should do the connecting water, gas and electricity:
The electricity installation
specialist.
The gas installation specialist.
The water installation
specialist.
Electrical connection
• Follow the connection diagram (on the under
side of the product).
• This appliance has a Y-type connection and
needs mandatory sleeves. According to IEC
regulations use for one-phase connection:
mains cable 3 x 4 mm², for two-phase
connection: mains cable 4 x 2.5 mm² and for
three-phase connection: mains cable 5 x 2.5
mm². External cable diameter: min 8 mm -
max 12 mm. Please respect specific national
regulations in the first priority.
• The connection terminals can be accessed by
removing the junction box cover.
• Check that the domestic power supply
characteristics (voltage, maximum power
and current) are compatible with those of the
appliance.
• Connect the appliance as shown in the
diagram (in compliance with reference
standards in force nationally for mains
voltage).

13
ENGLISH
110
104
Completamente
adesiva
1,5 Nm
991.0583.751_03
D00005831_02 AA-2175903-3
PE PE
L3
N
220-240V ~ 1+N+GND 380-415V ~ 2+N+GND 380-415V ~ 3+N+GND
LN
1
3
5
4
L1
L3
NPE
L2L1
220V - 240V
220V - 240V
220V - 240V 220V - 240V
2
1
3
5
4
2
1
3
5
4
2
220V - 240V
220V - 240V
Connection diagram product side
Insert the shunts
110
104
Completamente
adesiva
1,5 Nm
991.0583.751_03
D00005831_02 AA-2175903-3
PE PE
L3
N
220-240V ~ 1+N+GND 380-415V ~ 2+N+GND 380-415V ~ 3+N+GND
LN
1
3
5
4
L1
L3
NPE
L2L1
220V - 240V
220V - 240V
220V - 240V 220V - 240V
2
1
3
5
4
2
1
3
5
4
2
220V - 240V
220V - 240V
between the
screws as shown
110
104
Completamente
adesiva
1,5 Nm
991.0xxx.xxx_01
D0000xxxx_00 AA-2175903-3
PE
PE
L3 N
220-240V ~ 1+N+GND 380-415V ~ 2+N+GND 380-415V ~ 3+N+GND
L1 N
1
3
5
4
L1 L3
NPE
L2L1
220V - 240V
220V - 240V
220V - 240V 220V - 240V
2
1
3
5
4
2
1
3
5
4
2
220V - 240V
220V - 240V

14
ENGLISH
Color Connection
220-240V ~ 1+N+GND 380-415V ~ 2+N+GND 380-415V ~ 3+N+GND
BLACK -L3 L3
BROWN L1 L1 L2
BLUE (GREY) - - L1
LIGHT BLUE N N N
YELLOW/GREEN GROUND
BRIDGE
Connection diagram home side
LBlack or brown
NBlue
Yellow / Green
L1 Brown
L2 Black
NBlue
Yellow / Green
L1 Brown
L2 Black
N1 Blue
N2 Blue
Yellow / Green
ENGLISH 12
Connection diagram home side
LBlack or brown
NBlue
Yellow / Green
L1 Brown
L2 Black
NBlue
Yellow / Green
L1 Brown
L2 Black
N1 Blue
N2 Blue
Yellow / Green
ENGLISH 12
Connection diagram home side
LBlack or brown
NBlue
Yellow / Green
L1 Brown
L2 Black
NBlue
Yellow / Green
L1 Brown
L2 Black
N1 Blue
N2 Blue
Yellow / Green
ENGLISH 12

15
ENGLISH
Product description
Single cooking zone (220 x 185 mm) 2100W, with Booster 3700W
Control Panel
6
Extractor
+ Bridge cooking area (220 x 370 mm) 3700W
6
Pan detection
Every cooking zone is equipped with pan
detection. The pan detection recognises
cookware with a magnetisable base that is
suitable for use with induction hobs.
If the cookware is removed during operation or
unsuitable cookware is used, the display near
.
If there is no cookware placed on the cooking
zone during the pan detection time of 10
seconds:
after 10 seconds.
- The display of each cooking zone shows .
Residual heat indicator
an “H” remains illuminated on the panel as long
as there is a risk of burns.
Indicators

16
ENGLISH
Control Panel
Hob extractor ON/OFF.
Press to turn ON. Press again to turn OFF.
By default, when the Hob extractor is turned on the hood is in
automatic mode and the led will turn on.
Touch (press) the selection bar to deactivate automatic mode and
work with the extractor fan in manual mode.
The led
Activating the Timer
Press and hold the button for 5 seconds, the hood will be in delay
mode with a preset timer of 15 min.
The delay indicator led on the hood will turn on .
Press and hold the button again for 5 seconds to deactivate the
delay.
pressed), while the display
The countdown is not visible, the visual feedback is the led .
Select the Cooking zone to set an independent timer.
This is a countdown, which can be set for each cooking zone, even
simultaneously.
At the end of the set period the cooking zones will automatically
shut down and an acoustic signal informs of it.
Activation/Regulation of the hob timer:
Press button several times to select the cooking zone you want to
activate.
The relative icon on the cooking zone will light up.
When the desired cooking zone is selected, regulate the duration of
the timer:
Press + to increase the automatic shutdown time.
Press - to decrease the automatic shutdown time.

17
ENGLISH
Stop&Go / Recall
This function allows any function active on the hob to be suspended
/ restarted, bringing the cooking power to zero. Press to activate,
press again and slide the slider shown (close to the pause function
) all the way from left to right to deactivate.
Note: If after 10 minutes, the Pause function is not deactivated, the
This function allows all the hob settings to be recovered, in the event
of accidental shutdown.
Activation:
- Turn the hob back on.
- Press within 6 seconds.
Increase/Decrease the timer for cooking zone.
+
Locking/unlocking the hob
Allows the hob settings to be locked to prevent accidental tampering,
leaving the functions that have already been set active. Repeat the
operation to deactivate.
Key Lock. Touch and simultaneously for a few seconds.

18
ENGLISH
Cooking zone control panel
Cooking zone position indicator.
The cooking zones are able to work in combination, creating a single
zone with the same power level. Front master and back secondary
cooking zones. To activate the Bridge function: touch simultaneously
the 2 bar and the symbol lights up.
With the selection bar of the master zone it is possible to select the
power level.
To deactivate the bridge function simply repeat the same activation
procedure.
Cooking zone selection.
Increase/Decrease power level.
Supplementary power feature which remains active for 10 minutes,
after which the temperature returns to the level 9.
Touch and scroll along the Selection bar and activate the Power
Booster.
The power booster level is shown on the display of the selected zone
with the symbol .
Temperature Manager activation. The display shows .
Melting at 42°C
Keep Warm at 74°C
Slow Cooking at 92°C
Bridge zone between two cooking zones activated.
Power Booster activated.

19
ENGLISH
Extractor control panel
Extractor fan selection
Increase/Decrease extraction speed (power)
Activation/Deactivation of automatic function (by default auto-
matic mode is active).
When the selection bar of the cooker hood is touched (pres-
sed), the automatic mode deactivates and works with the
extractor fan in manual mode.
To re-activate the automatic mode press button and the
led will light up to indicate that the hood is working in
this mode.
mode).
Activatecharcoallter reminder
Press for 5 sec the button
it is switched on, the symbol
and the symbol
Since that time the lit icon will show when it is necessary to
.
is always
enabled.
Resettingactivatedcarbonodourltersaturation
press and hold 5 sec the button - The grease led will turn
press and hold 5 sec the button - The odour led will turn
Set the speed BOOST
This speed is timed to run for 5 minutes. At the end of this
time, the system returns automatically to the speed that was
set before.

20
ENGLISH
Cookware guidance
What pots to use
Only use pots and pans with bottom made
from ferromagnetic material which are
suitable for use with inductions hobs:
• cast iron
• enamelled steel
• carbon steel
• stainless steel (although not all)
• aluminium with ferromagnetic coating or
ferromagnetic plate
To determine if a pot or pan is suitable,
check for the symbol (usually stamped on
the bottom). You can also hold a magnet to
the bottom. If it clings to the underside, the
cookware will work on an induction hob.
To ensure optimum efficiency, always
use pots and pans with a flat bottom that
distributes the heat evenly. If the bottom
is uneven, this will affect power and heat
conduction.
How to use
Minimum diameter of pot/pan base for the
different cooking areas
To ensure that the hob functions properly,
the pot must cover one or more of the
reference points indicated on the surface of
the hob, and must be of a suitable minimum
diameter. Always use the cooking area that
best corresponds to the diameter of the
bottom of the pan.
Cooking
zone
Cookware diameter
[mm]
Ø Min.
(recommended)
Ø Max.
(recommended)
All 145 mm 180 mm
Empty or thin-based pots/pans
Do not use empty or thin-based pots/pans
on the hob as it will not be able to monitor
the temperature or turn off automatically if
the temperature is too high, damaging the
pan or the hob surface. If this occurs, do not

touch anything and wait for all components
to cool down.
If an error message appears, refer to
“Troubleshooting”.
Hint/tips
Noise during cooking
When a cooking area is active, it may hum
briefly. This is a characteristic of all induction
cooking zones and does not impair the
function or life of the appliance. The noise
depends on the cookware used. If it causes
considerable disturbance, it may help to
change the cookware.
Normal operating noises of the induction
hob
lnduction technology is based on the
generate heat directly on the bottom of
cookware. Pots and pans may cause a variety
of noises or vibrations depending on how
they are manufactured.
These noises are described as follows:
Low humming (like a transformer)
This noise is produced when cooking at a
high heat level. lt is based on the amount of
energy transferred from the cooktop to the
cookware. The noise ceases or quiets down
when the heat level is reduced.
Quiet whistling
This noise is produced when the cooking
vessel is empty. lt ceases once liquids or food
are placed in the vessel.
Crackling
This noise occurs with cookware comprised
of various materials layered one upon the
other. lt is caused by the vibrations of the
The noise occurs on the cookware and can
vary depending on the amount of food or
liquid and the cooking method (e.g., boiling,
simmering, frying).
Loud whistling
This noise occurs with cookware comprised
Other manuals for FÖRDELAKTIG
2
This manual suits for next models
1
Table of contents
Other IKEA Hob manuals

IKEA
IKEA TILLREDA User manual

IKEA
IKEA VALBILDAD User manual

IKEA
IKEA OTROLIG User manual

IKEA
IKEA FRAMTID HGC4T User manual

IKEA
IKEA GRUNDAD User manual

IKEA
IKEA VALBILDAD User manual

IKEA
IKEA VILSTA User manual

IKEA
IKEA KOLSTAN 805.594.66 User manual

IKEA
IKEA MATMÄSSIG User manual

IKEA
IKEA LUFTIG User manual
Popular Hob manuals by other brands

Electrolux
Electrolux EHL6740FOK user manual

Blaupunkt
Blaupunkt 5GB91250AU Instructions for installation and use

Hotpoint Ariston
Hotpoint Ariston KBH 6000 IX 1 manual

ETNA
ETNA KIF470 Series Instructions for use

Smeg
Smeg SE2931ID Instructions for fitting and use

Electrolux
Electrolux EKC6700 Instruction book