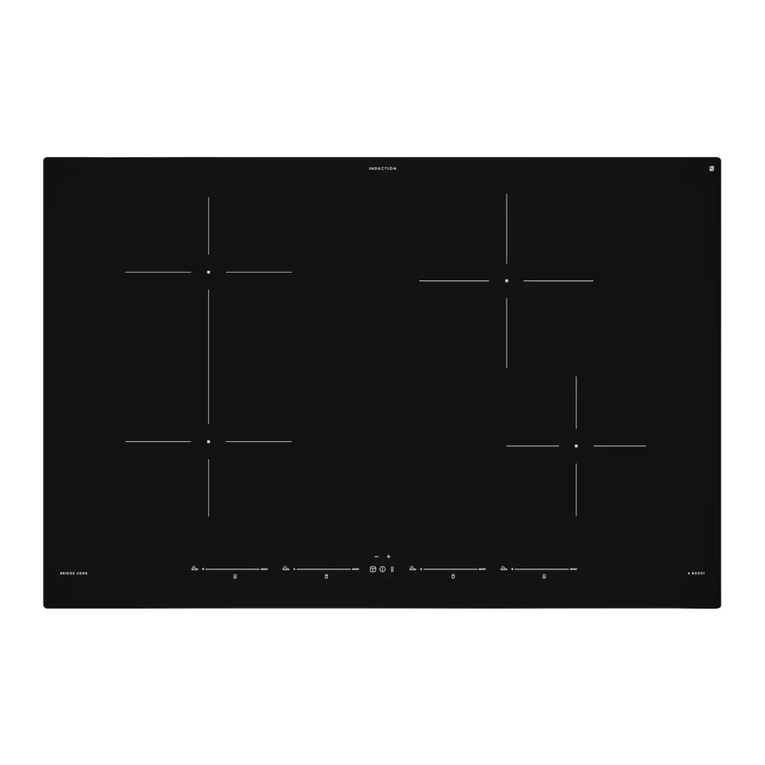
IKEA SMAKLIG User manual

SMAKLIG GB
DE
FR
NL
DK
NO
FI
SE
CZ
ES
IT
HU
PL
LV
LT
PT
RO
SK
BG
HR
GR
RS
SI
TR
RU
ET
IS


ENGLISH 6
DEUTSCH 8
FRANÇAIS 10
NEDERLANDS 12
DANSK 14
NORSK 16
SUOMI 18
SVENSKA 20
ČESKY 22
ESPAÑOL 24
ITALIANO 26
MAGYAR 28
POLSKI 30
LATVISKI 32
LIETUVIŲ 34
PORTUGUÊS 36
ROMÂNĂ 38
SLOVENČINA 40
БЪЛГАРСКИ 42
HRVATSKI 44
ΕΛΛΗΝΙΚΑ 46
SRPSKI 48
SLOVENŠČINA 50
TÜRKÇE 52
РУССКИЙ 54
EESTI 56
ÍSLENSKA 58

F0E7
ENGLISH
12
Environmental concerns
WARNING! Ensure that the appliance
is switched o and disconnected from
the power supply before performing any
maintenance operation; never use steam
cleaning equipment - risk of electric shock.
Do not use abrasive or corrosive
products, chlorine-based cleaners or pan
scourers.
DISPOSAL OF PACKAGING MATERIALS
The packaging material is 100% recyclable and is marked with
the recycle symbol
with the wiring rules and the appliance must
be earthed in conformity with national electrical
safety standards.
Do not use extension leads, multiple sockets
or adapters. The electrical components must not
be accessible to the user after installation. Do not
use the appliance when you are wet or barefoot.
Do not operate this appliance if it has a damaged
power cable or plug, if it is not working properly,
or if it has been damaged or dropped.
If the supply cord is damaged, it must
be replaced with an identical one by the
manufacturer, its service agent or similarly
qualified persons in order to avoid a hazard -
risk of electric shock.
WARNING: Do not locate multiple portable
socket-outlets or portable power supplies at the
rear of the appliance.
CLEANING AND MAINTENANCE
WARNING: Ensure that the appliance is
switched off and disconnected from the power
supply before performing any maintenance
operation; never use steam cleaning equipment -
risk of electric shock.
Do not use abrasive or harsh cleaners such
as window sprays, scouring cleansers, flammable
fluids, cleaning waxes, concentrated detergents,
bleaches or cleansers containing petroleum
products on plastic parts, interior and door liners
or gaskets. Do not use paper towels, scouring
pads, or other harsh cleaning tools.
DISPOSAL OF PACKAGING MATERIALS
The packaging material is 100% recyclable and is marked with the
recycle symbol . The various parts of the packaging must therefore
be disposed of responsibly and in full compliance with local authority
regulations governing waste disposal.
DISPOSAL OF HOUSEHOLD APPLIANCES
This appliance is manufactured with recyclable or reusable materials.
Dispose of it in accordance with local waste disposal regulations.
For further information on the treatment, recovery and recycling
of household electrical appliances, contact your local authority, the
collection service for household waste or the store where you purchased
the appliance. This appliance is marked in compliance with European
Directive 2012/19/EU, Waste Electrical and Electronic Equipment (WEEE).
By ensuring this product is disposed of correctly, you will help prevent
negative consequences for the environment and human health. The
symbol on the product or on the accompanying documentation
indicates that it should not be treated as domestic waste but must be
taken to an appropriate collection centre for the recycling of electrical
and electronic equipment.
ENERGY SAVING TIPS
To guarantee adequate ventilation follow installation instructions.
Insufficient ventilation at the back of the product increases energy
consumption and decreases cooling efficiency.
Frequent door opening might cause an increase in Energy consumption.
The internal temperature of the appliance and the Energy Consumption
may be affected also by the ambient temperature, as well as location of
the appliance. Temperature setting should take into consideration these
factors. Reduce door opening to minimum.
When thawing frozen food, place it in the refrigerator. The low
temperature of the frozen products cools the food in the refrigerator.
Allow warm food and drinks to cool down before placing in the
appliance.
Positioning of the shelves in the refrigerator has no impact on the
efficient usage of energy. Food should be placed on the shelves in such
way to ensure proper air circulation (food should not touch each other
and distance between food and rear wall should be kept).
You can increase storage capacity of frozen food by removing baskets
and, if present, Stop Frost shelf.
Do not worry about noises coming from the compressor which are
normal operation noises.
. The various parts of the packaging must
therefore be disposed of responsibility and in full compliance
with local authority regulations governing waste disposal.
DISPOSAL OF HOUSEHOLD APPLIANCES
This appliance is manufactured with recyclable or reusable
materials. Dispose of it in accordance with local waste disposal
regulations. For further information on the treatment, recovery
and recycling of household electrical appliances, contact your
local authority, the collection service for household waste or
the store where you purchased the appliance. This appliance
is marked in compliance with European Directive 2012/19/EU,
Waste Electrical and Electronic Equipment (WEEE). By ensuring
this product is disposed of correctly, you will help prevent
negative consequences for the environment and human health.
The symbol on the product or on the accompanying
documentation indicates that it should not be treated as
domestic waste but must be taken to an appropriate collection
center for the recycling of electrical and electronic equipment.
ENERGY SAVING TIPSs
Make the most of your hot plate’s residual heat by switching it
o a few minutes before you nish cooking.
The base of your pot or pan should cover the hot plate
completely; a container that is smaller than the hot plate will
cause energy to be wasted.
Cover your pots and pans with tight-tting lids while cooking
and use as little water as possible. Cooking with the lid o will
greatly increase energy consumption.
Use only at-bottomed pots and pans.
DECLARATION OF CONFORMITY
This appliance meets the Eco Design requirements of European
Regulations n. 66/2014 in conformity to the European standard
EN 60350-2.
n
Electrical connection
Electrical connection must be made before connecting the
appliance to the electricity supply.
Installation must be carried out by qualied personnel who
know the current safety and installation regulations. Specically,
installation must be carried out in compliance with the
regulations of the local electricity supply company.
Make sure the voltage specied on the data plate located on the
bottom of the appliance is the same as that of the home.
Regulations require that the appliance be earthed: use
conductors (including the earth conductor) of the appropriate
size only. Power cord is approved accoding to Standard IEC/EN
60335-2-6.
Manufacturer
Ikea of Sweden AB - SE - 343 81 Älmhult, Sweden
SERVICE
PLER8
00
220-240 V ~ 50-60 Hz
7,2 kW
HB I84F
1806
F101090
HB I84F
869991010900
901806030988
I.C.SN
802080988
769991010902
The technical information are situated in the rating plate on the
bottom side of the appliance.
230V 2L 2N ~
IE
T
L1
N+T N+T
N+T
L3
220-240V 3 ~
BE
230V 2L 2N ~
IE
T
L1
N+T
N+T
N+T
L3
220-240V 3 ~
BE
230V 2L 2N ~
IE
T
L1
N+T N+T
N+T
L3
220-240V 3 ~
BE
230V 2L 2N ~
IE
T
L1
N+T N+T
N+T
L3
220-240V 3 ~
BE
L1 = R : black
L2 = S : brown
N = N : blue
N = T : blue (grey)
= E : yellow / green
L1 = R : black
L2 = S : brown
N = N : blue
N = T : blue (grey)
= E : yellow / green
L1 = R : black
L1 = S : brown
N = N : blue
N = T : blue (grey)
= E : yellow / green
L1 = R : black
L2 = S : brown
N = N : blue
N = T : blue (grey)
= E : yellow / green

Min. 100 mm
Max 145 mm
Min. 150 mm
Max 210 mm
Min. 120 mm
Max 180 mm
Min. 120 mm
Max 340x200 mm
1x
x
Min 150
Max 210
Min 120
Max 200
Min 200
Max 375
Min 100
Max 150
0
0
TREVLIG
SMAKLIG
MANUAL
www.ikea.com
MANUAL
www.ikea.com
SMAKLIG

6
1Symbols of Automatic functions
2Cooking level selected
3
4Scroll keypad
5Booster
6
7Bridge+Mode
8Timer control
9Cooking time indicator
10 Activation of Automatic Functions
11 OK/Key lock button
12 Pause
13 Zone active Led
14 Timer Led
15 Timer symbol
Control panel
AControl panel
BCooking zones: 1, 2, 3, 4
Product description
3 4 5 9 152
0
0
0
0
7 12
6 11
13 14
10
1 1
81 1
Pot incorrectly positioned or missing
This symbol appears if the pot is not suitable for induction
cooking, is not positioned correctly or is not of an appropriate
size for the cooking zone selected. If no pot is detected within 30
HResidual heat
If the display shows “H“, the cooking zone is still hot. When the
0
0
0
0
B
A
3
4
2
1
ENGLISH
CAUTION: Never cover the control panel with cookware or any
other objects otherwise the product could enter in protection mode.
To restore the working condition of the product, remove the cookware
and wait at least 10 seconds before using the product.
In the cooking zones close to the control panel, pots and pans must
be kept inside the markings and centered within the cooking zones.
When grilling or frying, is it recommended to use the rear cooking
zones.
Daily use
POSITIONING
First Use
POWER LIMITATION
At the time of purchase, the hob is set to the maximum possible
power. Adjust the setting in relation to the limits of the electrical
system in your home as described in the following paragraph.
NOTE: in case of activation of the max power level of 2.5 kW,
some features with more power demand will be not available.
To set the power of the hob:
Once you have connected the device to the mains power supply,
you can set the power level within 60 seconds.
Press the timer “+“ button for at least 5 seconds. The display
shows PL
Press the button until the last power level selected appears.
PL 2.5kW 4.0 kW 6.0 kW 7.2 kW
P
L
2.
5
4.
0
6.
0
7.
2
Use the “+“ and “-“ buttons to select the desired maximum
power consumption of the hob. The levels available are:
.
The power level selected will stay in the memory even if the
power supply is interrupted.
To download the full version visit www.ikea.com

7
Functions
BRIDGE
+
MODE
By selecting the “Bridge
+
Mode“ button, you can combine two
cooking zones and use them at the same power by covering the
entire surface with a large pot or partially with a round/oval pot.
The function always remains on and, when using only one pot,
can be moved over the entire area. In this case, both left-hand
oval or rectangular pots or with pan supports.
To activate/deactivate the bridge + zone press the bridge
+
button
AUTOMATIC FUNCTIONS
Place the pot in position and select the cooking zone.
Press the automatic functions button. “A“ will appear on the
display.
The indicator for the special feature available for the cooking
zone will light up.
indicator will start blinking, waiting for the ok. The power level
To deactivate the automatic functions, press the “0“ button.
• Melting
This function allows you to bring food to the ideal
temperature for melting and to maintain the condition of the
food without risk of burning. This method is ideal, as it does
not damage delicate foods such as chocolate, and prevents
them from sticking to the pot.
•
•
it from the power supply.
• If alphanumeric codes appear on the display when the hob is
switched on, consult the following table for instructions.
Please note: The presence of water, liquid spilled from pots or
any objects resting on any of the hob buttons can accidentally
activate or deactivate the control panel lock function.
Troubleshooting
Display code Description Possible causes Solution
No Code You cannot activate or operate
the hob.
There is residual water or
stains on the control panel.
Clean and dry the control panel.
No Code The display does not react to the
touch.
Part of the display is covered
or the pots are placed too near
to the display.
Remove the objects. Move the
pots away from the display. If the
problem persists wait 10 seconds.
F0E1 Cookware is detected but it is
not compatible with requested
operation.
The cookware is not well
positioned on the cooking
zone, or it is not compatible
with one or more cooking
zones.
remove the F0E1 code and restore
the functionality of the cooking
zone. Then, try to use the cookware
F0E7 Wrong power cord connection The power supply connection
is not exactly as indicated in
“ELECTRICAL CONNECTION“
paragraph.
Adjust the power supply connection
according to “ELECTRICAL
CONNECTION“ paragraph.
F0EA
because of excessively high
temperatures.
The internal temperature of
electronic parts is too high.
Wait for the hob to cool down
before using it again.
F0E2, F0E4, F0E6,
F0E8, F0EC, F1E1, F6E1,
F7E5, F7E6, F2E1
Disconnect the hob from the power supply.
Wait a few seconds then reconnect the hob to the power supply.
If the problem persists, call the service centre and specify the error code that appears on the display.
e.g. The hob does not allow a special
function to be activated.
The power regulator limits the
power levels in accordance
with the maximum value set
for the hob.
See paragraph “Power
management”.
e.g.
Induction hobs may whistle or creak during normal operation.
These noises actually come from the cookware and are linked to the
characteristics of the pan bottoms (for example, when the bottoms are
made from dierent layers of material or are irregular).
These noises may vary according to the type of cookware used and to
the amount of food it contains and are not the symptom of something
wrong.
SOUNDS PRODUCED DURING OPERATION
TROUBLESHOOTING
• Check that the electricity supply has not been shut o.
• If you are unable to turn the hob o after using it, disconnect it from the
power supply.
• If alphanumeric codes appear on the display when the hob is switched on,
consult the following table for instructions.
Please note: The presence of water, liquid spilled from pots or any
objects resting on any of the hob buttons can accidentally activate or
deactivate the control panel lock function.
DISPLAY CODE DESCRIPTION POSSIBLE CAUSES SOLUTION
F0E1
Cookware is detected but it is not
compatible with requested operation.
The cookware is not well positioned on
the cooking zone, or it is not compatible
with one or more cooking zones.
Press On/O button twice to remove the
F0E1 code and restore the functionality
of the cooking zone. Then, try to use the
cookware with a dierent cooking zone, or
use dierent cookware.
F0E7
Wrong power cord connection. The power supply connection is not
exactly as indicated in “ELECTRICAL
CONNECTION“
paragraph
.
Adjust the power supply connection
according to “ELECTRICAL CONNECTION“
paragraph
.
F0EA
The control panel switches o because
of excessively high temperatures.
The internal temperature of electronic
parts is too high.
Wait for the hob to cool down before using
it again.
F0E2, F0E4, F0E6,
F0E8, F0EC, F1E1,
F6E1, F7E5, F7E6
Disconnect the hob from the power supply.
Wait a few seconds then reconnect the hob to the power supply.
If the problem persists, call the service centre and specify the error code that appears on the display.
d E
[when the hob is off]
The hob does not switch heat up.
The functions do not come on.
DEMO MODE on.
Follow the instructions in the “DEMO
MODE“ paragraph.
e.g.
:
The hob does not allow a special
function to be activated.
The power regulator limits the power
levels in accordance with the maximum
value set for the hob.
See paragraph "Power management".
e.g.
[
Power level lower than
level requested
]
The hob automatically sets a minimum
power level to ensure that the cooking
zone can be used.
The power regulator limits the power
levels in accordance with the maximum
value set for the hob.
See paragraph "Power management".
AFTERSALES SERVICE
In order to receive a more complete assistance, please register your
product on www.indesit.com/register.
BEFORE CALLING THE AFTER-SALES SERVICE:
1. See if you can solve the problem by yourself with the help of the
suggestions given in the TROUBLESHOOTING.
2. Switch the appliance o and back on again to see if the fault persists.
IF AFTER THE ABOVE CHECKS THE FAULT STILL OCCURS, GET IN
TOUCH WITH THE NEAREST AFTER-SALES SERVICE.
To receive assistance, call the number shown on the warranty booklet or
follow the instructions on the website www.indesit.com.
When contacting our Client After sales service, always specify:
• a brief description of the fault;
• the type and exact model of the appliance;
XXXXXXXXXXXXXXX
XXXXXXXXXXXXXXXXXXXXXX
Made in X
Type: XXXMod.: XXX01 XXXX XXX XXXXXXX XXXX XXXXX
XXXXXXXXXXXXXXXXXXXX
XXXXXXXXXXXXXXXXXXXXXXXXXXXXXXXXXXXXXXXXXXXXXXXXXXXXXXXXXXXXXXXXXXXXXXXXX
• the service number (number after the word Service on the rating
plate). The service number is also indicated on the guarantee
booklet;
• your full address;
• your telephone number.
If any repairs are required, please contact an authorized after-sales
service (to guarantee that original spare parts will be used and repairs
carried out correctly).
In the case of ush-mounted installation, call the After Sales Service to
request assembly of screws kit 4801 211 00112.
400011415253
EN
[Power level lower
than level requested]
The hob automatically sets a
minimum power level to ensure
that the cooking zone can be
used.
The power regulator limits the
power levels in accordance
with the maximum value set
for the hob.
See paragraph “Power
management”.
ENGLISH
To download the full version visit www.ikea.com
• Keep Warm
This feature allows you to keep your food at an ideal
temperature, usually after cooking is complete, or when
reducing liquids very slowly. Ideal for serving foods at the
perfect temperature.
• Simmering
This function is ideal for maintaining a simmering
temperature, allowing you to cook food for long periods
with no risk of burning. Ideal for long-cooking recipes (rice,
sauces, roasts) with liquid sauces.
• Boiling
This function allows you to bring water to the boil and keep it
boiling, with lower energy consumption.
About 2 litres of water (preferably at room temperature)
should be placed in the pan, and left uncovered. In all cases,
users are advised to monitor the boiling water closely, and
check the amount of water remaining regularly.
NOTE: in case of activation of the power management at 2.5kW,
boiling function will not be available.

8
1Symbole für automatische Funktionen
2Ausgewählte Garstufe
3Kochzone abschalten
4Scroll-Bedienelement
5Booster-Funktion
6Ein/Aus
7Funktion Bridge+
8Timer-Einstellung
9Timer-Anzeige
10 Aktivierung Automatikfunktionen
11 Taste OK/Tastensperre
12 Pause
13 LED aktive Kochzone
14 Timer-LED
15 Timersymbol
Bedienfeld
ABedienfeld
BKochzonen: 1, 2, 3, 4
Produktbeschreibung
Falsches Kochgeschirr oder kein Kochgeschirr
Dieses Symbol erscheint, wenn das Topfgeschirr nicht für
Induktionsherde geeignet ist, wenn es nicht richtig aufgestellt
ist oder wenn es nicht die richtige Größe hat. Wird innerhalb von
30 Sekunden nach Auswahl kein Topf erkannt, so schaltet sich
die Kochzone wieder aus.
HRestwärme
Wird auf dem Display H angezeigt, so ist die Kochzone noch
heiß. Erst nach Abkühlen der Kochzone erlischt die Anzeige.
DEUTSCH
Täglicher Gebrauch
POSITIONIERUNG
Erster Gebrauch
LEISTUNGSBEGRENZUNG
Zum Zeitpunkt des Kaufs ist das Kochfeld auf die maximal
mögliche Leistung eingestellt. Passen Sie die Einstellung
entsprechend den Begrenzungen der Stromversorgung in Ihrem
Haus an, wie im nachstehenden Absatz beschrieben.
HINWEIS: Wenn die maximale Leistungsstufe von 2,5
kW aktiviert wird, sind bestimmte Funktionen mit mehr
Leistungsbedarf nicht verfügbar.
Einstellung der Kochfeldleistung:
Nachdem das Gerät an die Netzversorgung angeschlossen
wurde, können Sie die Leistungsstufe innerhalb von 60
Sekunden einstellen.
Die Timer-Taste „+“ mindestens 5 Sekunden drücken. Auf der
Anzeige erscheint PL
Drücken Sie die Taste , bis die zuletzt aktivierte Leistungsstufe
erscheint.
PL 2.5kW 4.0 kW 6.0 kW 7.2 kW
P
L
2.
5
4.
0
6.
0
7.
2
Wählen Sie den gewünschten maximalen Stromverbrauch des
Kochfelds mit den Tasten „+“ und „-“ aus. Folgende Stufen sind
verfügbar: 2,5 kW – 4,0 kW – 6,0 kW – 7,2 kW. Drücken Sie zur
Bestätigung die Taste .
Die ausgewählte Leistungsstufe bleibt auch bei einer
Unterbrechung der Stromversorgung gespeichert.
To download the full version visit www.ikea.com
3 4 5 9 152
0
0
0
0
7 12
6 11
13 14
10
1 1
81 1
0
0
0
0
B
A
3
4
2
1
ACHTUNG: Das Bedienfeld niemals mit Kochgeschirr oder
anderen Gegenständen bedecken, andernfalls könnte das Produkt in
den Sperrmodus übergehen. Um die Funktionsfähigkeit des Produkts
wiederherzustellen, entfernen Sie das Kochgeschirr und warten Sie
mindestens 10 Sekunden, bevor Sie das Produkt verwenden.
In den Kochzonen in der Nähe des Bedienfeldes sind Töpfe und
Pfannen innerhalb der Markierungen und zentriert innerhalb der
Kochzonen zu positionieren.
zu verwenden.

9
DEUTSCH
Funktionen
FUNKTION BRIDGE
+
Mit der Taste „Funktion Bridge
+
“ können Sie zwei Kochzonen
miteinander kombinieren und diese mit der gleichen Leistung
nur teilweise mit einem runden/ovalen Topf abzudecken. Die Funktion
bleibt stets an, und wenn nur ein Topf verwendet wird, kann dieser
über den gesamten Bereich verschoben werden. In diesem Fall kann
ein beliebiges der beiden linken Schieber-Tastenfelder benutzt werden.
Ideal zum Kochen mit ovalen oder rechteckigen Töpfen oder mit
Topfträgern.
Drücken Sie zur Aktivierung/Deaktivierung der Zone bridge+ die Taste
bridge
+
.
AUTOMATIKFUNKTIONEN
Stellen Sie den Topf auf das Kochfeld und wählen Sie die Zone aus.
Drücken Sie die Taste Automatikfunktionen. Auf dem Display erscheint
„A“.
Die Anzeige für die Spezialfunktion, die für die Kochzone verfügbar ist,
leuchtet auf.
Drücken Sie zur Bestätigung die Taste „OK“, sonst beginnt die spezielle
Funktionsanzeige zu blinken und wartet auf das OK. Die Leistungsstufe
für die Spezialfunktion ist voreingestellt und kann nicht geändert
werden.
Drücken Sie die Taste „0“, um die Automatikfunktionen zu deaktivieren.
• Schmelzen
Lebensmittel werden auf die ideale Temperatur zum Schmelzen
gebracht und bewahren ihre Eigenschaften ohne Gefahr
Um die Vollversion herunterzuladen, besuchen Sie www.ikea.com
• Sicherstellen, dass der Strom nicht ausgefallen ist.
• Lässt sich das Kochfeld nach dem Gebrauch nicht ausschalten,
muss es von der Stromversorgung getrennt werden.
• Erscheinen am Display nach dem Einschalten des Kochfelds
alphanumerische Codes, prüfen Sie diese und die
entsprechenden Anweisungen in der unten aufgeführten Tabelle.
Hinweis: Wasser, aus Kochgeschirr verspritzte Flüssigkeit oder
Gegenstände irgendwelcher Art können die versehentliche
Aktivierung oder Deaktivierung der Bedienfeldsperre
verursachen.
Probleme lösen
Displaycode Beschreibung Mögliche Ursachen Abhilfemaßnahme
Kein Code Sie können das Kochfeld nicht
einschalten oder verwenden.
Auf dem Bedienfeld sind
Wasserrückstände oder
Flecken.
Reinigen und trocknen Sie das Bedienfeld
ab.
Kein Code Das Display reagiert nicht auf
Berührungen.
Das Display ist teilweise
Bedeckt oder die Töpfe sind zu
nahe am Display positioniert.
Entfernen Sie die Gegenstände. Entfernen
Sie die Töpfe vom Display. Sollte die
Störung weiterhin bestehen, warten Sie 10
Sekunden.
F0E1 Das Topfgeschirr wird erkannt, ist
aber nicht mit dem angeforderten
Betrieb kompatibel.
Das Kochgeschirr ist nicht gut
auf der Kochzone positioniert
oder nicht kompatibel
mit einer oder mehreren
Kochzonen.
Drücken Sie zweimal die Ein-/Ausschalttaste,
um den F0E1-Code zu löschen und den Betrieb
der Kochzone wiederherzustellen. Versuchen
Sie anschließend, das Kochgeschirr auf einer
anderen Kochzone zu verwenden, oder
verwenden Sie anderes Kochgeschirr.
F0E7 Falscher Anschluss des Netzkabels Der Netzanschluss entspricht
nicht genau den Angaben im
Absatz „ANSCHLUSS AN DAS
STROMNETZ“.
Verwenden Sie einen Netzanschluss, der
den Angaben im Absatz „ANSCHLUSS AN
DAS STROMNETZ“ entspricht.
F0EA Das Bedienfeld schaltet wegen
Überhitzung ab.
Die interne Temperatur der
elektronischen Komponenten
ist zu hoch.
Warten Sie vor dem Gebrauch ab, bis sich
das Kochfeld abgekühlt hat.
F0E2, F0E4, F0E6,
F0E8, F0EC, F1E1, F6E1,
F7E5, F7E6, F2E1
Trennen Sie den Herd von der Stromversorgung.
Einige Minuten warten, anschließend das Kochfeld erneut an die Stromversorgung anschließen.
Sollte das Problem weiterhin bestehen, das Servicezentrum kontaktieren und den Fehlercode angeben, der auf
dem Display erscheint.
Beispiel: Das Kochfeld lässt keine
Aktivierung einer Sonderfunktion
zu.
Der Leistungsregler
begrenzt die Leistungsstufen
entsprechend dem für
das Kochfeld eingestellten
Maximalwert.
Siehe Absatz „Leistungsmanagement“.
Beispiel:
Induction hobs may whistle or creak during normal operation.
These noises actually come from the cookware and are linked to the
characteristics of the pan bottoms (for example, when the bottoms are
made from dierent layers of material or are irregular).
These noises may vary according to the type of cookware used and to
the amount of food it contains and are not the symptom of something
wrong.
SOUNDS PRODUCED DURING OPERATION
TROUBLESHOOTING
• Check that the electricity supply has not been shut o.
• If you are unable to turn the hob o after using it, disconnect it from the
power supply.
• If alphanumeric codes appear on the display when the hob is switched on,
consult the following table for instructions.
Please note: The presence of water, liquid spilled from pots or any
objects resting on any of the hob buttons can accidentally activate or
deactivate the control panel lock function.
DISPLAY CODE DESCRIPTION POSSIBLE CAUSES SOLUTION
F0E1
Cookware is detected but it is not
compatible with requested operation.
The cookware is not well positioned on
the cooking zone, or it is not compatible
with one or more cooking zones.
Press On/O button twice to remove the
F0E1 code and restore the functionality
of the cooking zone. Then, try to use the
cookware with a dierent cooking zone, or
use dierent cookware.
F0E7
Wrong power cord connection. The power supply connection is not
exactly as indicated in “ELECTRICAL
CONNECTION“
paragraph
.
Adjust the power supply connection
according to “ELECTRICAL CONNECTION“
paragraph
.
F0EA
The control panel switches o because
of excessively high temperatures.
The internal temperature of electronic
parts is too high.
Wait for the hob to cool down before using
it again.
F0E2, F0E4, F0E6,
F0E8, F0EC, F1E1,
F6E1, F7E5, F7E6
Disconnect the hob from the power supply.
Wait a few seconds then reconnect the hob to the power supply.
If the problem persists, call the service centre and specify the error code that appears on the display.
d E
[when the hob is off]
The hob does not switch heat up.
The functions do not come on.
DEMO MODE on.
Follow the instructions in the “DEMO
MODE“ paragraph.
e.g.
:
The hob does not allow a special
function to be activated.
The power regulator limits the power
levels in accordance with the maximum
value set for the hob.
See paragraph "Power management".
e.g.
[
Power level lower than
level requested
]
The hob automatically sets a minimum
power level to ensure that the cooking
zone can be used.
The power regulator limits the power
levels in accordance with the maximum
value set for the hob.
See paragraph "Power management".
AFTERSALES SERVICE
In order to receive a more complete assistance, please register your
product on www.indesit.com/register.
BEFORE CALLING THE AFTER-SALES SERVICE:
1. See if you can solve the problem by yourself with the help of the
suggestions given in the TROUBLESHOOTING.
2. Switch the appliance o and back on again to see if the fault persists.
IF AFTER THE ABOVE CHECKS THE FAULT STILL OCCURS, GET IN
TOUCH WITH THE NEAREST AFTER-SALES SERVICE.
To receive assistance, call the number shown on the warranty booklet or
follow the instructions on the website www.indesit.com.
When contacting our Client After sales service, always specify:
• a brief description of the fault;
• the type and exact model of the appliance;
XXXXXXXXXXXXXXX
XXXXXXXXXXXXXXXXXXXXXX
Made in X
Type: XXXMod.: XXX01 XXXX XXX XXXXXXX XXXX XXXXX
XXXXXXXXXXXXXXXXXXXX
XXXXXXXXXXXXXXXXXXXXXXXXXXXXXXXXXXXXXXXXXXXXXXXXXXXXXXXXXXXXXXXXXXXXXXXXX
• the service number (number after the word Service on the rating
plate). The service number is also indicated on the guarantee
booklet;
• your full address;
• your telephone number.
If any repairs are required, please contact an authorized after-sales
service (to guarantee that original spare parts will be used and repairs
carried out correctly).
In the case of ush-mounted installation, call the After Sales Service to
request assembly of screws kit 4801 211 00112.
400011415253
EN
[Leistungsstufe
niedriger als die
geforderte Stufe]
Das Kochfeld stellt automatisch
eine Mindestleistungsstufe ein,
um sicherzustellen, dass die
Kochzone verwendet werden
kann.
Der Leistungsregler
begrenzt die Leistungsstufen
entsprechend dem für
das Kochfeld eingestellten
Maximalwert.
Siehe Absatz „Leistungsmanagement“.
Lebensmittel wie Schokolade nicht beschädigt und verhindert,
dass sie am Topf kleben.
• Warmhalten
Diese Funktion hält die Speisen auf einer idealen Temperatur, in
der Regel nach dem Garen oder um Flüssigkeiten langsam zu
reduzieren. Ideal zum Servieren von Speisen bei der perfekten
Temperatur.
• Sieden
Diese Funktion ist ideal, um eine geringe Kochtemperatur
aufrechtzuerhalten, um Speisen über längere Zeit zu garen ohne
Gefahr des Anbrennens. Ideal für Rezepte mit langer Garzeit (Reis,
• Kochen
Diese Funktion bringt Wasser bei geringerem Energieverbrauch zum
Kochen.
Es sollten etwa 2 Liter Wasser (vorzugsweise mit Zimmertemperatur)
in den Topf gegeben und nicht abgedeckt werden. In allen Fällen
wird den Benutzern empfohlen, das kochende Wasser genau zu
überwachen und die verbleibende Wassermenge regelmäßig zu
kontrollieren.
HINWEIS: Wenn das Leistungsmanagement auf 2,5 kW eingestellt
wurde, ist die Kochfunktion nicht verfügbar.

10
1Symboles des fonctions automatiques
2Niveau de cuisson choisie
3Arrêt zone de cuisson
4Clavier déroulant
5Surpuissance (Booster)
6Marche/Arrêt
7Mode Bridge+
8Commande minuterie
9Indicateur de temps de cuisson
10 Activation de fonctions automatiques
11 Touche OK/ Key Lock (Blocage touches)
12 Pause
13 Led Zone active
14 Led minuterie
15 Symbole minuterie
Panneau de commande
APanneau de commande
BFoyers : 1, 2, 3, 4
Description de produit
Casserole mal positionnée ou absente
Ce symbole apparaît si la casserole n’est pas adaptée à la
cuisson par induction, n’est pas positionnée correctement ou
n’est pas de la taille appropriée pour le foyer sélectionné. Si
table de cuisson s’éteint.
HChaleur résiduelle
Si la lettre H est visible sur l’écran, la zone est encore chaude.
Pour télécharger la version complète, visitez www.ikea.com
FRANÇAIS
3 4 5 9 152
0
0
0
0
7 12
6 11
13 14
10
1 1
81 1
0
0
0
0
B
A
3
4
2
1
Usage quotidien
POSITIONNEMENT
Première utilisation
LIMITATION ÉNERGIE
Au moment de l’achat, la table est réglée à la puissance
maximale. Ajuster le réglage relativement aux limites du
système électrique dans votre maison comme décrit au
paragraphe suivant.
: en cas d’activation du niveau de puissance
maximum de 2,5 kW, quelques caractéristiques avec une
demande en puissance supérieure ne seront pas disponibles.
Pour régler la puissance de la table de cuisson :
Après avoir branché l’appareil au réseau électrique, il est
possible de programmer le niveau de puissance dans les
60 secondes qui suivent.
Appuyez sur la touche de minuterie «+» pendant au moins
PL
Appuyez sur le bouton jusqu’à ce que le dernier niveau de
puissance sélectionné apparaisse.
PL 2.5kW 4.0 kW 6.0 kW 7.2 kW
P
L
2.
5
4.
0
6.
0
7.
2
Utilisez les boutons «+» et «-» pour sélectionner la
consommation électrique maximale souhaitée de la table de
cuisson. Les niveaux disponibles sont : 2,5 kW – 4,0 kW – 6,0 kW
.
Le niveau de puissance sélectionné restera en mémoire même si
l’alimentation électrique est coupée.
ATTENTION : Ne jamais couvrir le panneau de commande avec
un accessoire de cuisine ou tout autre objet, autrement le produit
pourrait se mettre en mode de protection. Pour rétablir la condition
de fonctionnement du produit, enlever l’accessoire de cuisine et
attendre au moins 10 secondes avant d’utiliser le produit.
Dans les zones de cuisson proches du panneau de commande, les
poêles et les casseroles doivent être maintenues à l’intérieur des
marquages et centrées dans les zones de cuisson.
Lors de grillades ou de friture, il est recommandé d’utiliser les zones
de cuisson arrière.

11
FRANÇAIS
Pour télécharger la version complète, visitez www.ikea.com
Fonctions
MODE BRIDGE+
En sélectionnant le bouton « Bridge+Mode », vous pouvez
combiner deux zones de cuisson et les utiliser à la même
puissance en couvrant toute la surface avec une grande
casserole ou partiellement avec une casserole ronde/ovale. La
fonction reste toujours allumée et, lors de l’utilisation d’une
seule casserole, elle peut être déplacée sur toute la zone.
Dans ce cas les deux claviers gauches peuvent être utilisés
ou rectangulaires ou avec des supports de casseroles.
Pour activer/désactiver la zone bridge +, appuyez sur le bouton
bridge+
FONCTIONS AUTOMATIQUES
Placez la casserole en position et sélectionnez la zone de
cuisson.
Appuyez sur la touche des fonctions automatiques. « A »
apparaîtra sur l’écran.
Le témoin pour la fonction spéciale disponible pour la zone de
cuisson s’allumera.
le témoin de fonction spéciale commencera à clignoter, en
attendant le ok. Le niveau de puissance pendant la fonction
Pour désactiver les fonctions automatiques, appuyez sur le
bouton « 0 ».
• Fusion
Cette fonction vous permet d’amener les aliments à la
température idéale pour les faire fondre et maintenir leur
condition sans risque qu’ils ne brûlent. Cette méthode est
idéale car elle respecte les aliments délicats (comme le
chocolat) et leur évite d’attacher.
• Maintien au chaud
Cette fonction vous permet de maintenir vos aliments à
la température idéale, habituellement une fois la cuisson
terminée, ou lors de la réduction de liquides très lentement.
Idéal pour servir les aliments à la parfaite température.
• Frémissement
Cette fonction est idéale pour maintenir une température de
frémissement, vous permettant de cuire pendant de longues
périodes sans risque de brûler. Idéal pour les recettes à
cuisson longue (riz, sauces, rôtis), avec des sauces liquides.
• Ébullition
Cette fonction vous permet de porter l’eau à ébullition et de
la maintenir en ébullition, avec une consommation d’énergie
inférieure.
Environ 2 litres d’eau (de préférence à température
ambiante) doivent être placés dans la casserole, sans
couvercle. Dans tous les cas, les utilisateurs sont informés
quantité d’eau restante régulièrement.
: en cas d’activation de la gestion de puissance à
2,5 kW, la fonction ébullition ne sera pas disponible.
• Contrôlez que l’alimentation électrique n’a pas été coupée.
• Si vous ne parvenez pas à éteindre la table de cuisson après
l’avoir utilisée, débranchez-la à partir de l’alimentation électrique.
•
codes alphanumériques, consultez le tableau suivant pour les
instructions.
Veuillez noter : De l’eau, du liquide ayant débordé des casseroles
ou tout objet posé sur les commandes peuvent provoquer
l’activation ou la désactivation accidentelles du verrouillage du
bandeau de commandes.
Dépannage
DESCRIPTION Causes possibles Solution
Pas de Code Vous ne pouvez pas activer ou
utiliser la plaque de cuisson.
Il reste de l'eau ou des taches
sur le panneau de commande.
Nettoyer et sécher le panneau de
commande.
Pas de Code L'écran ne réagit pas au toucher. Une partie de l'écran est
recouverte ou les casseroles
sont placées trop près de
l'écran.
Enlever les objets. Éloigner les
casseroles de l'écran. Si le problème
persiste, attendre 10 secondes.
F0E1 Les ustensiles sont détectés mais
ne sont pas compatibles avec
l'opération requise.
L'ustensile n'est pas bien
positionné sur la zone de
cuisson ou n'est pas compatible
avec une ou plusieurs zones de
cuisson.
Appuyez sur le bouton Marche/arrêt deux
fois pour éliminer le code F0E1 et rétablir la
fonctionnalité de la zone de cuisson. Puis,
essayez d'utiliser l'ustensile de cuisson avec
F0E7 Mauvais raccordement du câble
électrique
Le raccordement de
l'alimentation électrique n'est pas
exactement comme indiqué au
paragraphe « BRANCHEMENT
ÉLECTRIQUE ».
Ajustez le raccordement de
l'alimentation électrique selon
le paragraphe « BRANCHEMENT
ÉLECTRIQUE ».
F0EA Le panneau de commande
s'éteint en raison de températures
excessivement élevées.
La température interne des
pièces électroniques est trop
élevée.
Patientez que la table de cuisson
refroidisse avant de la réutiliser.
F0E2, F0E4, F0E6,
F0E8, F0EC, F1E1, F6E1,
F7E5, F7E6, F2E1
Débranchez la table.
Attendez quelques secondes, puis rebranchez la table de cuisson à l'alimentation électrique.
par ex. La plaque de cuisson ne permet
pas d'activer une fonction
spéciale.
Le régulateur de puissance
limite les niveaux de puissance
conformément à la valeur
maximale réglée pour la
plaque de cuisson.
Voir le paragraphe « Gestion de la
puissance ».
par ex.
Induction hobs may whistle or creak during normal operation.
These noises actually come from the cookware and are linked to the
characteristics of the pan bottoms (for example, when the bottoms are
made from dierent layers of material or are irregular).
These noises may vary according to the type of cookware used and to
the amount of food it contains and are not the symptom of something
wrong.
SOUNDS PRODUCED DURING OPERATION
TROUBLESHOOTING
• Check that the electricity supply has not been shut o.
• If you are unable to turn the hob o after using it, disconnect it from the
power supply.
• If alphanumeric codes appear on the display when the hob is switched on,
consult the following table for instructions.
Please note: The presence of water, liquid spilled from pots or any
objects resting on any of the hob buttons can accidentally activate or
deactivate the control panel lock function.
DISPLAY CODE DESCRIPTION POSSIBLE CAUSES SOLUTION
F0E1
Cookware is detected but it is not
compatible with requested operation.
The cookware is not well positioned on
the cooking zone, or it is not compatible
with one or more cooking zones.
Press On/O button twice to remove the
F0E1 code and restore the functionality
of the cooking zone. Then, try to use the
cookware with a dierent cooking zone, or
use dierent cookware.
F0E7
Wrong power cord connection. The power supply connection is not
exactly as indicated in “ELECTRICAL
CONNECTION“
paragraph
.
Adjust the power supply connection
according to “ELECTRICAL CONNECTION“
paragraph
.
F0EA
The control panel switches o because
of excessively high temperatures.
The internal temperature of electronic
parts is too high.
Wait for the hob to cool down before using
it again.
F0E2, F0E4, F0E6,
F0E8, F0EC, F1E1,
F6E1, F7E5, F7E6
Disconnect the hob from the power supply.
Wait a few seconds then reconnect the hob to the power supply.
If the problem persists, call the service centre and specify the error code that appears on the display.
d E
[when the hob is off]
The hob does not switch heat up.
The functions do not come on.
DEMO MODE on.
Follow the instructions in the “DEMO
MODE“ paragraph.
e.g.
:
The hob does not allow a special
function to be activated.
The power regulator limits the power
levels in accordance with the maximum
value set for the hob.
See paragraph "Power management".
e.g.
[
Power level lower than
level requested
]
The hob automatically sets a minimum
power level to ensure that the cooking
zone can be used.
The power regulator limits the power
levels in accordance with the maximum
value set for the hob.
See paragraph "Power management".
AFTERSALES SERVICE
In order to receive a more complete assistance, please register your
product on www.indesit.com/register.
BEFORE CALLING THE AFTER-SALES SERVICE:
1. See if you can solve the problem by yourself with the help of the
suggestions given in the TROUBLESHOOTING.
2. Switch the appliance o and back on again to see if the fault persists.
IF AFTER THE ABOVE CHECKS THE FAULT STILL OCCURS, GET IN
TOUCH WITH THE NEAREST AFTER-SALES SERVICE.
To receive assistance, call the number shown on the warranty booklet or
follow the instructions on the website www.indesit.com.
When contacting our Client After sales service, always specify:
• a brief description of the fault;
• the type and exact model of the appliance;
XXXXXXXXXXXXXXX
XXXXXXXXXXXXXXXXXXXXXX
Made in X
Type: XXXMod.: XXX01 XXXX XXX XXXXXXX XXXX XXXXX
XXXXXXXXXXXXXXXXXXXX
XXXXXXXXXXXXXXXXXXXXXXXXXXXXXXXXXXXXXXXXXXXXXXXXXXXXXXXXXXXXXXXXXXXXXXXXX
• the service number (number after the word Service on the rating
plate). The service number is also indicated on the guarantee
booklet;
• your full address;
• your telephone number.
If any repairs are required, please contact an authorized after-sales
service (to guarantee that original spare parts will be used and repairs
carried out correctly).
In the case of ush-mounted installation, call the After Sales Service to
request assembly of screws kit 4801 211 00112.
400011415253
EN
[Niveau de puissance
inférieur au niveau
requis]
La plaque de cuisson règle
automatiquement un niveau
de puissance minimum pour
s'assurer que le foyer peut être
utilisé.
Le régulateur de puissance
limite les niveaux de puissance
conformément à la valeur
maximale réglée pour la
plaque de cuisson.
Voir le paragraphe « Gestion de la
puissance ».

12
1Symbolen van automatische functies
2Geselecteerd bereidingsniveau
3Kookzone uit
4Schuifbalk
5Booster
6Aan/Uit
7Brug+-modus
8Bediening kookwekker
9Indicatie bereidingsduur
10 Inschakeling van automatische functies
11 OK/vergrendeltoets
12 Pauze
13 Ledlampje zone actief
14 Ledlampje kookwekker
15 Symbool kookwekker
Bedieningspaneel
ABedieningspaneel
BKookzones: 1, 2, 3, 4
Productbeschrijving
De pan is verkeerd geplaatst of er is geen pan
Dit symbool verschijnt als de pan niet geschikt is voor een
inductiekookplaat, als hij niet correct is geplaatst of geen
geschikte afmetingen heeft voor de geselecteerde kookzone.
geregistreerd, dan wordt de kookzone uitgeschakeld.
HRestwarmte
Als ‘H’ wordt weergegeven op het display is de kookzone nog
heet. Wanneer de kookzone afkoelt, gaat het display uit.
Ga naar www.ikea.com om de volledige versie te downloaden
NEDERLANDS
3 4 5 9 152
0
0
0
0
7 12
6 11
13 14
10
1 1
81 1
0
0
0
0
B
A
3
4
2
1
Dagelijks gebruik
PLAATSING
Eerste gebruik
VERMOGEN BEPERKING
Op het moment van de aankoop is de kookplaat ingesteld op
het maximale vermogen. Regel de instelling op basis van de
limieten van de elektrische huisinstallatie zoals beschreven
wordt in de volgende paragraaf.
OPMERKING: als een maximaal vermogen van 2,5 kW wordt
ingesteld, zijn sommige functies die meer vermogen nodig
hebben niet beschikbaar.
Het vermogen van de kookplaat instellen:
Zodra het apparaat op het elektriciteitsnet is aangesloten, kunt
u het vermogen binnen 60 seconden instellen.
Druk minimaal 5 seconden op de “+”-toets van de kookwekker.
Het display toont PL
Druk op de toets tot het laatst geselecteerde vermogen
verschijnt.
PL 2.5kW 4.0 kW 6.0 kW 7.2 kW
P
L
2.
5
4.
0
6.
0
7.
2
Gebruik de toetsen “+” en “-” om het gewenste
maximumvermogen van de kookplaat te selecteren.
De beschikbare niveaus zijn: 2,5 kW - 4,0 kW - 6,0 kW - 7,2 kW.
Bevestig door op te drukken.
Het geselecteerde vermogen blijft ook bij stroomuitval in het
geheugen.
LET OP!: Bedek het bedieningspaneel nooit met kookgerei
of andere voorwerpen, om te vermijden dat het product in de
beveiligingsmodus zou gaan. Om het product weer in werking te
zetten, verwijdert u het kookgerei en wacht u minstens 10 seconden
alvorens het product te gebruiken.
In de kookzones dicht bij het bedieningspaneel moeten potten en
pannen binnen de markeringen gehouden worden, gecentreerd
binnen de kookzones.
Bij grillen of frituren is het raadzaam de achterste kookzones te
gebruiken.

13
NEDERLANDS
Ga naar www.ikea.com om de volledige versie te downloaden
Functies
BRUG+-MODUS
Met de toets “Brug+-modus” kunt u twee kookzones combineren
en op hetzelfde vermogen gebruiken door het hele oppervlak te
bedekken met een grote pan of een gedeelte ervan met een ronde/
ovale pan. De functie blijft altijd aan staan en als er slecht één pan
wordt gebruik, kan deze verplaatst worden over de gehele zone.
In dit geval kunnen beide scrolltoetsenborden links onverschillig
gebruikt worden. Ideaal om te koken met ovale of rechthoekige
pannen of met pansteunen.
Druk op de toets Bridge+om de brugzone in- of uit te schakelen
AUTOMATISCHE FUNCTIES
Plaats de pan en selecteer de kookzone.
Druk op de toets automatische functies. “A” verschijnt op het
display.
Het lampje voor de beschikbare speciale functie voor de kookzone
gaat branden.
Druk op “OK” om te bevestigen. Zo niet, begint het lampje te
knipperen en wacht op bevestiging. Het vermogensniveau tijdens
de speciale functie is vooraf ingesteld en kan niet worden gewijzigd.
Druk op de toets “0” om de automatische functies uit te schakelen.
• Smelten
Met deze functie kunt u etenswaren op de ideale
smelttemperatuur brengen zonder dat ze aanbranden. Deze
methode is ideaal, omdat delicate voedingsmiddelen zoals
chocolade niet worden aangetast en niet aan de pan blijven
plakken.
• Controleer of er geen stroomuitval is.
• Als u er niet in slaagt de kookplaat na gebruik uit te
schakelen, de stekker uit het stopcontact trekken.
• Als bij de inschakeling van de kookplaat op het display
alfanumerieke codes worden weergegeven, dient u volgens
onderstaande tabel te handelen.
Let op:
pannen of eventuele objecten op de toetsen van de kookplaat
kunnen leiden tot het per abuis activeren of deactiveren van de
toetsenblokkeringsfunctie.
Storingen verhelpen
Displaycode Beschrijving Mogelijke oorzaken Oplossing
Geen Code U kunt de kookplaat niet activeren
of bedienen.
Er is resterend water
of vlekken op het
bedieningspaneel.
Maak het bedieningspaneel schoon
en droog.
Geen Code Het display reageert niet op
aanraking.
Een deel van het display is
afgedekt of de potten zijn te
dicht bij het display geplaatst.
Verwijder de voorwerpen. Verplaats
de potten weg van het display. Als
het probleem aanhoudt, wacht dan
10 seconden.
F0E1 Er is kookgerei gedetecteerd
maar deze is niet geschikt voor de
ingestelde bereiding.
Het kookgerei is niet goed op
de kookzone geplaatst of is
niet compatibel met een of
meer kookzones.
Druk twee keer op de toets Aan/Uit
om de code F0E1 te verwijderen en
de functionaliteit van de kookzone te
herstellen. Probeer vervolgens het
kookgerei op een andere kookzone te
gebruiken of gebruik ander kookgerei.
F0E7 Verkeerde aansluiting van het
netsnoer
De stroomaansluiting is niet
exact zoals aangegeven in
de paragraaf "ELEKTRISCHE
AANSLUITING".
Pas de stroomaansluiting aan
volgens de paragraaf "ELEKTRISCHE
AANSLUITING".
F0EA Het bedieningspaneel wordt
uitgeschakeld door te hoge
temperaturen.
De interne temperatuur van
de elektronische onderdelen is
te hoog.
Wacht tot de kookplaat is afgekoeld
voordat u hem weer gebruikt.
F0E2, F0E4, F0E6,
F0E8, F0EC, F1E1, F6E1,
F7E5, F7E6, F2E1
Koppel de kookplaat los van de netvoeding.
Wacht een aantal seconden en sluit de kookplaat weer op de netvoeding aan.
Neem contact op met het servicecentrum als het probleem zich blijft voordoen en vermeld de foutcode
die op het display verschijnt.
b.v. De kookplaat activeert geen
speciale functie.
De vermogenregelaar beperkt
de vermogenniveaus op basis
van de maximale waarde
ingesteld voor de kookplaat.
Zie de paragraaf
"Vermogensregeling".
b.v.
Induction hobs may whistle or creak during normal operation.
These noises actually come from the cookware and are linked to the
characteristics of the pan bottoms (for example, when the bottoms are
made from dierent layers of material or are irregular).
These noises may vary according to the type of cookware used and to
the amount of food it contains and are not the symptom of something
wrong.
SOUNDS PRODUCED DURING OPERATION
TROUBLESHOOTING
• Check that the electricity supply has not been shut o.
• If you are unable to turn the hob o after using it, disconnect it from the
power supply.
• If alphanumeric codes appear on the display when the hob is switched on,
consult the following table for instructions.
Please note: The presence of water, liquid spilled from pots or any
objects resting on any of the hob buttons can accidentally activate or
deactivate the control panel lock function.
DISPLAY CODE DESCRIPTION POSSIBLE CAUSES SOLUTION
F0E1
Cookware is detected but it is not
compatible with requested operation.
The cookware is not well positioned on
the cooking zone, or it is not compatible
with one or more cooking zones.
Press On/O button twice to remove the
F0E1 code and restore the functionality
of the cooking zone. Then, try to use the
cookware with a dierent cooking zone, or
use dierent cookware.
F0E7
Wrong power cord connection. The power supply connection is not
exactly as indicated in “ELECTRICAL
CONNECTION“
paragraph
.
Adjust the power supply connection
according to “ELECTRICAL CONNECTION“
paragraph
.
F0EA
The control panel switches o because
of excessively high temperatures.
The internal temperature of electronic
parts is too high.
Wait for the hob to cool down before using
it again.
F0E2, F0E4, F0E6,
F0E8, F0EC, F1E1,
F6E1, F7E5, F7E6
Disconnect the hob from the power supply.
Wait a few seconds then reconnect the hob to the power supply.
If the problem persists, call the service centre and specify the error code that appears on the display.
d E
[when the hob is off]
The hob does not switch heat up.
The functions do not come on.
DEMO MODE on.
Follow the instructions in the “DEMO
MODE“ paragraph.
e.g.
:
The hob does not allow a special
function to be activated.
The power regulator limits the power
levels in accordance with the maximum
value set for the hob.
See paragraph "Power management".
e.g.
[
Power level lower than
level requested
]
The hob automatically sets a minimum
power level to ensure that the cooking
zone can be used.
The power regulator limits the power
levels in accordance with the maximum
value set for the hob.
See paragraph "Power management".
AFTERSALES SERVICE
In order to receive a more complete assistance, please register your
product on www.indesit.com/register.
BEFORE CALLING THE AFTER-SALES SERVICE:
1. See if you can solve the problem by yourself with the help of the
suggestions given in the TROUBLESHOOTING.
2. Switch the appliance o and back on again to see if the fault persists.
IF AFTER THE ABOVE CHECKS THE FAULT STILL OCCURS, GET IN
TOUCH WITH THE NEAREST AFTER-SALES SERVICE.
To receive assistance, call the number shown on the warranty booklet or
follow the instructions on the website www.indesit.com.
When contacting our Client After sales service, always specify:
• a brief description of the fault;
• the type and exact model of the appliance;
XXXXXXXXXXXXXXX
XXXXXXXXXXXXXXXXXXXXXX
Made in X
Type: XXXMod.: XXX01 XXXX XXX XXXXXXX XXXX XXXXX
XXXXXXXXXXXXXXXXXXXX
XXXXXXXXXXXXXXXXXXXXXXXXXXXXXXXXXXXXXXXXXXXXXXXXXXXXXXXXXXXXXXXXXXXXXXXXX
• the service number (number after the word Service on the rating
plate). The service number is also indicated on the guarantee
booklet;
• your full address;
• your telephone number.
If any repairs are required, please contact an authorized after-sales
service (to guarantee that original spare parts will be used and repairs
carried out correctly).
In the case of ush-mounted installation, call the After Sales Service to
request assembly of screws kit 4801 211 00112.
400011415253
EN
[Vermogenniveau
lager dan gewenst
niveau]
De kookplaat stelt automatisch
een minimaal vermogenniveau in
om het gebruik van de kookzone
te garanderen.
De vermogenregelaar beperkt
de vermogenniveaus op basis
van de maximale waarde
ingesteld voor de kookplaat.
Zie de paragraaf
"Vermogensregeling".
• Warmhouden
Met deze functie kunt u etenswaren op de ideale temperatuur
langzaam in laten koken. Ideaal om het voedsel op een perfecte
temperatuur te serveren.
• Sudderen
Deze functie is ideaal om etenswaren te laten sudderen, zodat
deze over een lange periode kunnen worden bereid zonder
aanbranden. Ideaal voor langere bereidingen (rijst, sauzen,
braadstukken) met bijbehorend vocht.
• Koken
Met deze functie kunt u water aan de kook brengen en laten
doorkoken met minder energieverbruik.
Doe ongeveer 2 liter water (bij voorkeur met
kamertemperatuur) in de pan, en zet er geen deksel op. In alle
gevallen worden gebruikers geadviseerd om het kokende water
goed in het oog te houden en de resterende hoeveelheid water
regelmatig te controleren.
OPMERKING: Als de vermogensregeling op 2,5 kW is ingesteld, is
de functie ‘koken’ niet beschikbaar.

14
1Symboler for Automatiske funktioner
2Valgt tilberedningsniveau
3Slukket kogezone
4Rulletastatur
5Booster
6Tænding/slukning
7Tilstanden Bridge+Mode
8Timerstyring
9Tilberedningsvarighedens indikator
10 Aktivering af Automatiske funktioner
11 Knappen OK/Tastaturlås
12 Pause
13 Kontrollampen Aktiv zone
14 Timerkontrollampe
15 Timersymbol
Betjeningspanel
ABetjeningspanel
BKogezoner: 1, 2, 3, 4
Produktbeskrivelse
Ukorrekt anbragt eller manglende gryde
Dette symbol vises hvis gryden ikke er velegnet til
induktionstilberedning, hvis den ikke er anbragt korrekt eller
hvis den ikke har den rette størrelse til den valgte kogezone.
Hvis der ikke registreres en gryde inden for 30 sekunder efter
markeringen, slukker kogezonen.
HRestvarme
Hvis displayet viser “H”, er kogezonen stadig varm. Når
kogezonen køler ned, slukker displayet.
Besøg www.ikea.com for at downloade den fulde version
DANSK
3 4 5 9 152
0
0
0
0
7 12
6 11
13 14
10
1 1
81 1
0
0
0
0
B
A
3
4
2
1
Daglig brug
PLACERING
Før ibrugtagning
KRAFTBEGRÆNSNING
På købstidspunktet er kogesektionen indstillet til den maksimalt
for el-systemet i dit hjem, som beskrevet i det efterfølgende
afsnit.
BEMÆRK
rådighed.
Når man har forbundet anordningen til ledningsnettet kan
Tryk på knappen “+“ i mindst 5 sekunder. Displayet viser PL
Tryk på knappen
visualiseres.
PL 2.5kW 4.0 kW 6.0 kW 7.2 kW
P
L
2.
5
4.
0
6.
0
7.
2
Brug knapperne “+“ og “-“ til at markere det ønskede maksimale
4,0 kW – 6,0 kW – 7,2 kW. Bekræft ved at trykke på .
selvom strømforsyningen afbrydes.
ADVARSEL: Tildæk aldrig betjeningspanelet med kogegrej
eller andre genstande da produktet ellers kan skifte til
beskyttelsestilstanden. Fjern kogegrejet og vendt i mindst 10
sekunder, før du bruger produktet, for at genetablere produktets
arbejdstilstand.
I kogezonerne ved siden af betjeningspanelet skal potter og pander
holdes inden for afmærkninger og anbragt centreret i kogezonerne.
Det anbefales at bruge de bagerste kogezoner, når man griller eller
steger.

15
DANSK
Besøg www.ikea.com for at downloade den fulde version
Funktioner
TILSTANDEN BRIDGE+MODE
Man kan kombinere to kogezoner ved at markere knappen
“Bridge+
I dette tilfælde kan begge de venstre rulletastaturer anvendes
uden forskel. Ideel til tilberedning med ovale eller rektangulære
gryder eller med gryderister.
Tryk på knappen bridge+for at aktivere/inaktivere bridge +
zonen
AUTOMATISKE FUNKTIONER
Placér gryden i den rette position og vælg kogezonen.
Tryk på knappen automatiske funktioner. “ A “ vises på displayet.
Indikatoren til kogezonens disponible specialfunktion vil tænde.
Tryk på knappen “ok“ for at bekræfte; i modsat fald vil
er forindstillet og kan ikke ændres under en specialfunktion.
Tryk på knappen “0“ for at slå automatfunktionerne fra.
• Smeltning
Denne funktion giver mulighed for at bringe maden op på
den ideelle temperatur til smeltning og for at opretholde
madens tilstand, uden risiko for at den brænder på. Denne
metode er ideel da den ikke beskadiger sarte fødevarer, så
som chokolade, og forebygger at de klæber fast på gryden.
• Kontrollér, at der ikke er strømafbrydelse.
• Hvis der ikke kan slukkes for kogesektionen efter brug, skal
stikket straks tages ud af stikkontakten.
• Indhent oplysninger og anvisninger i den nedenstående tabel,
hvis displayet viser alfanumeriske koder, når der tændes for
kogesektionen.
Bemærk: Vand på pladen, spildt væske fra en gryde, eller
genstande, der hviler på tasterne, kan eventuelt aktivere eller
inaktivere betjeningspanelets låsning.
Vist kode Beskrivelse Mulige årsager Løsning
Ingen kode Du kan ikke aktivere eller bruge
kogesektionen.
Der er vandrester eller pletter
på betjeningspanelet.
Rengør betjeningspanelet og tør
det igen.
Ingen kode Displayet reagerer ikke på
berøringen.
En del af displayet er tildækket
eller gryderne er placeret for
tæt på displayet.
Flyt genstandene væk. Flyt gryderne
væk fra displayet. Vent i 10 sekunder
hvis problemet varer ved.
F0E1 Kogegrejet er registreret, men
det er ikke kompatibelt med den
ønskede handling.
Kogegrejet er ikke anbragt
korrekt på kogezonen eller det
er ikke kompatibelt med en
Tryk to gange på knappen On/
genetablere kogezonens funktion.
Prøv herefter at bruge kogegrejet
på en anden kogezone, eller at
bruge andet kogegrej.
F0E7 Forkert tilsluttet strømkabel Strømkablets tilslutning er ikke
udført i overensstemmelse
med anvisningerne i afsnittet
“ELEKTRISK TILSLUTNING“.
Tilpas strømforsyningens tilslutning
i overensstemmelse med afsnittet
“ELEKTRISK TILSLUTNING“.
F0EA Betjeningspanelet slukker, når
temperaturen bliver for høj.
Temperaturen i de indre
elektroniske komponenter er
for høj.
Vent til kogesektioner er afkølet, før
den bruges igen.
F0E2, F0E4, F0E6, F0E8,
F0EC, F1E1, F6E1, F7E5,
F7E6, F2E1
Fjern strømforsyningen til kogesektionen.
Vent et par sekunder og slut herefter kogesektionens strømforsyning til igen.
Kontakt servicecenteret og angiv fejlkoden, der vises på display, hvis problemet varer ved.
f.eks. Kogesektionen tillader ikke
aktivering af en specialfunktion.
i overensstemmelse med
den maksimale værdi, der er
indstillet for kogesektionen.
f.eks.
Induction hobs may whistle or creak during normal operation.
These noises actually come from the cookware and are linked to the
characteristics of the pan bottoms (for example, when the bottoms are
made from dierent layers of material or are irregular).
These noises may vary according to the type of cookware used and to
the amount of food it contains and are not the symptom of something
wrong.
SOUNDS PRODUCED DURING OPERATION
TROUBLESHOOTING
• Check that the electricity supply has not been shut o.
• If you are unable to turn the hob o after using it, disconnect it from the
power supply.
• If alphanumeric codes appear on the display when the hob is switched on,
consult the following table for instructions.
Please note: The presence of water, liquid spilled from pots or any
objects resting on any of the hob buttons can accidentally activate or
deactivate the control panel lock function.
DISPLAY CODE DESCRIPTION POSSIBLE CAUSES SOLUTION
F0E1
Cookware is detected but it is not
compatible with requested operation.
The cookware is not well positioned on
the cooking zone, or it is not compatible
with one or more cooking zones.
Press On/O button twice to remove the
F0E1 code and restore the functionality
of the cooking zone. Then, try to use the
cookware with a dierent cooking zone, or
use dierent cookware.
F0E7
Wrong power cord connection. The power supply connection is not
exactly as indicated in “ELECTRICAL
CONNECTION“
paragraph
.
Adjust the power supply connection
according to “ELECTRICAL CONNECTION“
paragraph
.
F0EA
The control panel switches o because
of excessively high temperatures.
The internal temperature of electronic
parts is too high.
Wait for the hob to cool down before using
it again.
F0E2, F0E4, F0E6,
F0E8, F0EC, F1E1,
F6E1, F7E5, F7E6
Disconnect the hob from the power supply.
Wait a few seconds then reconnect the hob to the power supply.
If the problem persists, call the service centre and specify the error code that appears on the display.
d E
[when the hob is off]
The hob does not switch heat up.
The functions do not come on.
DEMO MODE on.
Follow the instructions in the “DEMO
MODE“ paragraph.
e.g.
:
The hob does not allow a special
function to be activated.
The power regulator limits the power
levels in accordance with the maximum
value set for the hob.
See paragraph "Power management".
e.g.
[
Power level lower than
level requested
]
The hob automatically sets a minimum
power level to ensure that the cooking
zone can be used.
The power regulator limits the power
levels in accordance with the maximum
value set for the hob.
See paragraph "Power management".
AFTERSALES SERVICE
In order to receive a more complete assistance, please register your
product on www.indesit.com/register.
BEFORE CALLING THE AFTER-SALES SERVICE:
1. See if you can solve the problem by yourself with the help of the
suggestions given in the TROUBLESHOOTING.
2. Switch the appliance o and back on again to see if the fault persists.
IF AFTER THE ABOVE CHECKS THE FAULT STILL OCCURS, GET IN
TOUCH WITH THE NEAREST AFTER-SALES SERVICE.
To receive assistance, call the number shown on the warranty booklet or
follow the instructions on the website www.indesit.com.
When contacting our Client After sales service, always specify:
• a brief description of the fault;
• the type and exact model of the appliance;
XXXXXXXXXXXXXXX
XXXXXXXXXXXXXXXXXXXXXX
Made in X
Type: XXXMod.: XXX01 XXXX XXX XXXXXXX XXXX XXXXX
XXXXXXXXXXXXXXXXXXXX
XXXXXXXXXXXXXXXXXXXXXXXXXXXXXXXXXXXXXXXXXXXXXXXXXXXXXXXXXXXXXXXXXXXXXXXXX
• the service number (number after the word Service on the rating
plate). The service number is also indicated on the guarantee
booklet;
• your full address;
• your telephone number.
If any repairs are required, please contact an authorized after-sales
service (to guarantee that original spare parts will be used and repairs
carried out correctly).
In the case of ush-mounted installation, call the After Sales Service to
request assembly of screws kit 4801 211 00112.
400011415253
EN
end det påkrævede
niveau]
Kogesektionen indstiller automatisk
sikre at kogezonen kan bruges.
i overensstemmelse med
den maksimale værdi, der er
indstillet for kogesektionen.
• Hold varm
Denne funktion giver dig mulighed for at holde madens
ideelle temperatur, sædvanligvis efter at have fuldført
tilberedningen, eller hvis safterne skal koges meget
langsomt ind. Ideel til servering af fødevarer ved den
perfekte temperatur.
• Simmering
Denne funktion er ideel til at holde maden simrende, så den
kan stå i lang tid, uden risiko for at den brænder på. Ideel til
opskrifter, der kræver lang tilberedning (ris, saucer, stege)
• Kogning
Denne funktion tillader at bring vand i kog og holde det
kogende, med et lavere energiforbrug.
Der skal hældes cirka 2 liter vand (helst ved stuetemperatur)
i panden uden låg. Under alle omstændigheder bør
brugeren altid overvåge det kogende vand og jævnligt
kontrollere mængden af tilbageværende vand.
BEMÆRK: funktionen kogning står ikke til rådighed hvis

16
1
Symboler til de automatiske funksjonene
2Valgt kokenivå
3Kokesonen er slått av
4Bla på tastaturet
5Booster
6På/Av
7Bro+Modus
8Timer kontroll
9Indikator for tilberedningstid
10 Aktivering av Automatiske Funksjoner
11 OK/Tastesperre
12 Pause
13 Led for aktiv sone
14 Timer Led
15 Timer symbol
Betjeningspanel
ABetjeningspanel
BKokesoner: 1, 2, 3, 4
Produktbeskrivelse
Kjelen er ikke riktig plassert eller mangler
Dette symbolet kommer til syne dersom kjelen ikke er egnet for
induksjonstilberedning, dersom den ikke er plassert riktig eller
dersom størrelsen på kjelen ikke er egnet for størrelsen for valgt
kokesone. Dersom ingen kjele registreres i løpet av 30 sekunder
fra valget ble tatt, slår kokesonen seg av.
HGjenværende varme
Dersom display viser “H“, er kokesonen fortsatt varm. Når
kokesonen avkjøles, slår displayet seg av.
Besøk www.ikea.com for å laste ned hele versjonen
NORSK
3 4 5 9 152
0
0
0
0
7 12
6 11
13 14
10
1 1
81 1
0
0
0
0
B
A
3
4
2
1
Daglig bruk
PLASSERING
Første gangs bruk
KRAFTBEGRENSNING
Når du kjøper platetoppen er den innstilt på maksimal
begrensningene i det elektriske systemet i hjemmet ditt slik det
er beskrevet i avsnittet nedenfor.
MERK
ikke er tilgjengelige.
Når du har koplet apparatet til hovedstrømforsyningen, kan du
Trykk på timerens “+“ knapp i minst 5 sekund. Display viser PL
Trykk på
PL 2.5kW 4.0 kW 6.0 kW 7.2 kW
P
L
2.
5
4.
0
6.
0
7.
2
Bruk knappene “+“ og “-“ for å velge ønsket maksimal
2.5 kW – 4.0 kW – 6.0 kW – 7.2 kW. Bekreft ved å trykke .
strømforsyningen opphører.
OBS: Dekk aldri til kontrollpanelet med kokekar eller andre
gjenstander, produktet kan settes i beskyttelsesmodus. For å
gjenopprette arbeidstilstanden for produktet, fjern kokekarene og
vent i minst 10 sekunder før du tar i bruk produktet.
I kokesonene nær kontrollpanelet, må gryter og panner plasseres
innenfor merkene og plasseres sentralt på kokesonene.
Vi anbefaler at du benytter kokesonene bak når du griller eller steker.

17
NORSK
Besøk www.ikea.com for å laste ned hele versjonen
Funksjoner
BRO
+
MODUS
Ved å velge knappen “Bro
+
Modus“, kan du kombinere to
rund/oval kjele. Funksjonen vil alltid stå på og, når en bruker kun
begge de venstre rulletastaturene benyttes om hverandre. Ideell
for tilberedning med ovale eller rektangulære kjeler eller med
grytestøtter.
For å aktivere/deaktivere broen + sone trykk på bro
+
knappen
AUTOMATISKE FUNKSJONER
Plasser kjelen i riktig posisjon og velg kokesonen.
Trykk på knappen for automatiske funksjoner. “ A “ vil vises på
display.
Indikatoren for spesialfunksjonen som er tilgjengelig for
kokesonen vil tennes.
Trykk på “ok“ knappen for å bekrefte, eller vil spesialfunksjonens
spesialfunksjonen fungerer er forhåndsinnstilt og kan ikke endres.
For å deaktivere de automatiske funksjonene, trykk på knappen
“0“ knappen.
• Smelting
Denne funksjonen tillater deg å bringe maten til den ideelle
temperaturen for smelting og opprettholde matens tilstand
uten å risikere at maten brenner seg. Denne metoden er
ideell, siden den ikke forringer delikat mat som sjokolade og
hindrer at disse matvarene fester seg til bunnen av kjelen.
• Kontroller at strømmen ikke er avslått.
• Hvis du ikke kan slå av platetoppen etter bruk, kobler du fra
strømmen.
• Hvis det kommer opp alfanumeriske koder på displayet når
under.
Merk: Hvis det er sølt vann eller væske fra kjelene eller det
ligger gjenstander på platetoppens knapper, kan dette føre til at
låsen til kontrollpanelet utilsiktet aktiveres eller deaktiveres.
Feilsøking
Display-kode Beskrivelse Mulige årsaker Løsning
Ingen kode Du kan ikke aktivere eller bruke
platetoppen.
Det ligger igjen vann eller det
Gjør rent og tørk kontrollpanelet.
Ingen kode Displayet reagerer ikke når det
tas på.
Deler av displayet er dekket
eller kjelene er plassert for
nær displayet.
Fjern gjenstandene. Fjern kjelene
fra display. Vent i 10 sekund dersom
problemet vedvarer.
F0E1 Kjelen er registrert men den er
ikke kompatibel med operasjonen
som skal utføres.
Kjelen er ikke riktig plassert på
kokesonen, eller den er ikke
kokesoner.
Trykk på knappen På/Av for å
fjerne F0E1 koden og gjenopprett
kokesonens funksjon. Prøv deretter
å benytte kokekaret med en annen
kokesone, eller bruk annet kokekar.
F0E7 Feil kobling av strømledningen Koblingen av strømledningen
er ikke nøyaktig slik det er
indikert i avsnittet “ELEKTRISK
KOBLING“.
strømforsyningen i samsvar med
avsnittet “ELEKTRISK KOBLING“.
F0EA Kontrollpanelet slår seg av pga.
svært høye temperaturer.
De interne temperaturene i
elektronikken er for høy.
Vent til komfyrtoppen er avkjølt før
du bruker den igjen.
F0E2, F0E4, F0E6,
F0E8, F0EC, F1E1, F6E1,
F7E5, F7E6, F2E1
Koble apparatet fra strømtilførselen.
Vent i noen få sekunder før du kopler komfyrtoppen til kraftforsyningen.
display.
f.eks. Platetoppen tillater ikke at en
spesialfunksjon aktiveres.
maksimale verdien som er stilt
inn for platetoppen.
f.eks.
Induction hobs may whistle or creak during normal operation.
These noises actually come from the cookware and are linked to the
characteristics of the pan bottoms (for example, when the bottoms are
made from dierent layers of material or are irregular).
These noises may vary according to the type of cookware used and to
the amount of food it contains and are not the symptom of something
wrong.
SOUNDS PRODUCED DURING OPERATION
TROUBLESHOOTING
• Check that the electricity supply has not been shut o.
• If you are unable to turn the hob o after using it, disconnect it from the
power supply.
• If alphanumeric codes appear on the display when the hob is switched on,
consult the following table for instructions.
Please note: The presence of water, liquid spilled from pots or any
objects resting on any of the hob buttons can accidentally activate or
deactivate the control panel lock function.
DISPLAY CODE DESCRIPTION POSSIBLE CAUSES SOLUTION
F0E1
Cookware is detected but it is not
compatible with requested operation.
The cookware is not well positioned on
the cooking zone, or it is not compatible
with one or more cooking zones.
Press On/O button twice to remove the
F0E1 code and restore the functionality
of the cooking zone. Then, try to use the
cookware with a dierent cooking zone, or
use dierent cookware.
F0E7
Wrong power cord connection. The power supply connection is not
exactly as indicated in “ELECTRICAL
CONNECTION“
paragraph
.
Adjust the power supply connection
according to “ELECTRICAL CONNECTION“
paragraph
.
F0EA
The control panel switches o because
of excessively high temperatures.
The internal temperature of electronic
parts is too high.
Wait for the hob to cool down before using
it again.
F0E2, F0E4, F0E6,
F0E8, F0EC, F1E1,
F6E1, F7E5, F7E6
Disconnect the hob from the power supply.
Wait a few seconds then reconnect the hob to the power supply.
If the problem persists, call the service centre and specify the error code that appears on the display.
d E
[when the hob is off]
The hob does not switch heat up.
The functions do not come on.
DEMO MODE on.
Follow the instructions in the “DEMO
MODE“ paragraph.
e.g.
:
The hob does not allow a special
function to be activated.
The power regulator limits the power
levels in accordance with the maximum
value set for the hob.
See paragraph "Power management".
e.g.
[
Power level lower than
level requested
]
The hob automatically sets a minimum
power level to ensure that the cooking
zone can be used.
The power regulator limits the power
levels in accordance with the maximum
value set for the hob.
See paragraph "Power management".
AFTERSALES SERVICE
In order to receive a more complete assistance, please register your
product on www.indesit.com/register.
BEFORE CALLING THE AFTER-SALES SERVICE:
1. See if you can solve the problem by yourself with the help of the
suggestions given in the TROUBLESHOOTING.
2. Switch the appliance o and back on again to see if the fault persists.
IF AFTER THE ABOVE CHECKS THE FAULT STILL OCCURS, GET IN
TOUCH WITH THE NEAREST AFTER-SALES SERVICE.
To receive assistance, call the number shown on the warranty booklet or
follow the instructions on the website www.indesit.com.
When contacting our Client After sales service, always specify:
• a brief description of the fault;
• the type and exact model of the appliance;
XXXXXXXXXXXXXXX
XXXXXXXXXXXXXXXXXXXXXX
Made in X
Type: XXXMod.: XXX01 XXXX XXX XXXXXXX XXXX XXXXX
XXXXXXXXXXXXXXXXXXXX
XXXXXXXXXXXXXXXXXXXXXXXXXXXXXXXXXXXXXXXXXXXXXXXXXXXXXXXXXXXXXXXXXXXXXXXXX
• the service number (number after the word Service on the rating
plate). The service number is also indicated on the guarantee
booklet;
• your full address;
• your telephone number.
If any repairs are required, please contact an authorized after-sales
service (to guarantee that original spare parts will be used and repairs
carried out correctly).
In the case of ush-mounted installation, call the After Sales Service to
request assembly of screws kit 4801 211 00112.
400011415253
EN
enn nivået som
ønskes]
Platetoppen stiller automatisk inn
tilberedningssonen kan benyttes.
maksimale verdien som er stilt
inn for platetoppen.
• Hold varm
Denne funksjoner hjelper deg å opprettholde den ideelle
temperaturen på maten, vanligvis etter at tilberedningen er
fullført, eller når du skal redusere væsker svært langsomt.
Ideell for å servere mat til perfekt temperatur.
• Trekking
Denne funksjonen er ideell for å opprettholde en temperatur
for trekking, og den gjør at maten kan småkoker over lenger
tid uten fare for at den brennes. Ideell for lange oppskrifter
som krever lang tilberedningstid (ris, sauser, steker) med
• Koking
Denne funksjonen gjør at du kan bringe vann til kokepunktet
og holde det kokende, med lavere energiforbruk.
Omtrent 2 liter vann (helst ved romtemperatur) bør helles over
i kjelen, uten lokk. Uansett anbefaler en at brukerne følger
nøye med på kokingen av vannet, og at de kontrollerer hvor
mye vann som blir værende igjen.
MERK
kokefunksjonen være tilgjengelig.

18
1Automaattisten toimintojen symbolit
2Keittotaso valittu
3Keittoalue pois päältä
4Selauspainike
5Pikakuumennus
6Päällä/Pois
7Silta+-tila
8Ajastimen säätö
9Kypsennysajan osoitin
10 Automaattisten toimintojen aktivointi
11 OK/Painikelukitus-painike
12 Tauko
13 Aktiivisen alueen led
14 Ajastimen led
15 Ajastimen symboli
Käyttöpaneeli
AKäyttöpaneeli
BKeittoalueet: 1, 2, 3, 4
Tuotteen kuvaus
Väärin sijoitettu tai puuttuva keittoastia
Tämä symboli tulee näkyviin, jos keittoastia ei sovellu
induktioliedelle, sitä ei ole sijoitettu oikein tai jos se ei ole
tunnisteta 30 sekunnin kuluessa valinnan suorittamisesta,
keittoalue kytkeytyy pois toiminnasta.
HJälkilämpö
Kun keittoalue jäähtyy, näyttö kytkeytyy pois.
Lataa täysi versio osoitteesta www.ikea.com
SUOMI
3 4 5 9 152
0
0
0
0
7 12
6 11
13 14
10
1 1
81 1
0
0
0
0
B
A
3
4
2
1
Päivittäinen käyttö
SIJOITTAMINEN
Ensimmäinen käyttökerta
TEHON RAJOITUS
Uusi keittotaso on aina asetettu mahdollisimman suurelle
teholle. Säädä asetus kotisi sähköverkon rajoitusten mukaisesti
seuraavassa kappaleessa kuvatulla tavalla.
HUOMAA: jos maksimitehoksi aktivoidaan 2.5 kW, eräitä
enemmän tehoa tarvitsevia ominaisuuksia ei voida käyttää.
Lieden tehon asettaminen:
Kun laite on kytketty verkkovirtaan, voidaan sen tehotaso
asettaa 60 sekunnin kuluessa.
Paina ajastimen “+“-painiketta vähintään 5 sekunnin ajan.
Näytössä näkyy PL
Paina -painiketta, kunnes esiin tulee viimeksi valittu
tehotaso.
PL 2.5kW 4.0 kW 6.0 kW 7.2 kW
P
L
2.
5
4.
0
6.
0
7.
2
Valitse haluttu lieden tehonkulutuksen maksimitaso “+“ ja “-“
painikkeilla. Valittavissa olevat tasot ovat: 2.5 kW – 4.0 kW – 6.0
kW – 7.2 kW. Vahvista painikkeella .
Valittu tehotaso pysyy muistissa vaikka virta katkeaisikin.
HUOMIO: Älä koskaan peitä käyttöpaneelia astioilla tai muilla
esineillä, sillä tuote saattaisi siirtyä suojaustilaan. Tuotteen
toimintatila palautetaan poistamalla astia ja odottamalla vähintään 10
sekuntia ennen tuotteen käyttämistä.
Käyttöpaneelin läheisyydessä olevilla keittoalueilla kattilat ja pannut
on pidettävä merkittyjen alueiden sisällä ja keittoalueiden keskellä.
Grillattaessa tai rasvalla paistettassa on suositeltavaa käyttää takana
olevia keittoalueita.

19
SUOMI
Lataa täysi versio osoitteesta www.ikea.com
Toiminnot
SILTA+TILA
Valitsemalla “Silta+tilan“ painikkeen voit yhdistää kaksi
keittoaluetta ja käyttää niillä samalla teholla peittäen koko
pinnan suurella kattilalla tai osittain pyöreällä/soikealla kattilalla.
Toiminto jää aina päälle ja vain yhtä kattilaa käytettäessä sitä
voidaan siirtää koko alueella. Tässä tapauksessa kumpaakin
vasemman puoleista liukuvalitsinta voidaan käyttää.
Ihanteellinen kypsentämiseen soikion tai suorakulmaisten
keittoastioiden kanssa tai kattilankannattimien kanssa.
Silta + alue aktivoidaan/deaktivoidaan painamalla silta+
painiketta
AUTOMAATTISET TOIMINNOT
Laita keittoastia paikalleen ja valitse keittoalue.
Paina automaattisten toimintojen painiketta. Näyttöön ilmestyy
“ A “.
Keittoalueelle sopivan erikoisominaisuuden merkkivalo syttyy.
Vahvista painamalla “ok“-painiketta, muutoin erikoistoiminnon
merkkivalo alkaa vilkkua odottaessaan ok-komentoa.
Erikoistoiminnon aikainen tehotaso on esiasetettu eikä sitä
voida muokata.
Automaattiset toiminnot deaktivoidaan painamalla
“0“-painiketta.
• Sulatus
Tämän toiminnon ansiosta voit saattaa ruoan ihanteelliseen
lämpötilaan sulattamista varten ja pitää sen tässä tilassa
ilman, että on vaaraa sen palamisesta. Tämä toimintatapa
on ihanteellinen, sillä se ei vahingoita arkoja ainesosia,
kuten suklaata, ja estää niiden palamisen pohjaan.
• Tarkista, että kyseessä ei ole sähkökatko.
•
sähköverkosta.
•
aakkosnumeerinen koodi, toimi seuraavan taulukon mukaan.
Huomaa: Vesi, kattiloista roiskunut neste tai jokin esine
liesitason säätönuppien kohdalla saattaa vahingossa aktivoida
tai ottaa pois käytöstä ohjauspaneelin lukitustoiminnon.
Vianetsintä
Näytön koodi Kuvaus Mahdolliset syyt Korjaus
Ei koodia Et voi käynnistää tai käyttää liettä. Käyttöpaneelin päälle on
jäänyt vettä tai tahroja.
Puhdista ja kuivaa käyttöpaneeli.
Ei koodia Näyttö ei reagoi kosketukseen. Osa näyttöä on peitossa tai
kattiloita on asetettu liian
lähelle näyttöä.
Poista esineet. Siirrä kattilat
jatkuu, odota 10 sekuntia.
F0E1 Keittoastia havaitaan, mutta
se ei ole yhteensopiva halutun
toiminnon kanssa.
Keittoastiaa ei ole sijoitettu
asianmukaisesti keittoalueelle,
tai se ei ole yhteensopiva yhden
tai useamman keittoalueen
kanssa.
Sammuta F0E1-koodi painamalla
keittoalueen toiminta. Yritä sitten
käyttää keittoastiaa eri keittoalueella
tai käytä eri keittoastiaa.
F0E7 Virtajohto kytketty väärin Virtakytkentää ei ole suoritettu
täsmälleen “SÄHKÖLIITÄNTÄ“-
kappaleessa ilmoitetulla tavalla.
Korjaa virtakytkentä
“SÄHKÖLIITÄNTÄ“-kappaleen
mukaisesti.
F0EA Käyttöpaneeli sammuu liian
korkeiden lämpötilojen vuoksi.
Elektronisten osien sisäinen
lämpötila on liian korkea.
Odota liesitason jäähtymistä, ennen
kuin käytät sitä uudelleen.
F0E2, F0E4, F0E6,
F0E8, F0EC, F1E1, F6E1,
F7E5, F7E6, F2E1
Kytke liesi irti sähköverkosta.
Odota muutama sekunti, ja kytke sitten liesitaso uudelleen virtaan.
esim. Liedelle ei ole mahdollista
aktivoida erikoistoimintoa.
Tehonsäädin rajoittaa
tehotasoja liedelle asetetun
maksimiarvon mukaisesti.
Katso kappale “Tehojen hallinta”.
esim.
Induction hobs may whistle or creak during normal operation.
These noises actually come from the cookware and are linked to the
characteristics of the pan bottoms (for example, when the bottoms are
made from dierent layers of material or are irregular).
These noises may vary according to the type of cookware used and to
the amount of food it contains and are not the symptom of something
wrong.
SOUNDS PRODUCED DURING OPERATION
TROUBLESHOOTING
• Check that the electricity supply has not been shut o.
• If you are unable to turn the hob o after using it, disconnect it from the
power supply.
• If alphanumeric codes appear on the display when the hob is switched on,
consult the following table for instructions.
Please note: The presence of water, liquid spilled from pots or any
objects resting on any of the hob buttons can accidentally activate or
deactivate the control panel lock function.
DISPLAY CODE DESCRIPTION POSSIBLE CAUSES SOLUTION
F0E1
Cookware is detected but it is not
compatible with requested operation.
The cookware is not well positioned on
the cooking zone, or it is not compatible
with one or more cooking zones.
Press On/O button twice to remove the
F0E1 code and restore the functionality
of the cooking zone. Then, try to use the
cookware with a dierent cooking zone, or
use dierent cookware.
F0E7
Wrong power cord connection. The power supply connection is not
exactly as indicated in “ELECTRICAL
CONNECTION“
paragraph
.
Adjust the power supply connection
according to “ELECTRICAL CONNECTION“
paragraph
.
F0EA
The control panel switches o because
of excessively high temperatures.
The internal temperature of electronic
parts is too high.
Wait for the hob to cool down before using
it again.
F0E2, F0E4, F0E6,
F0E8, F0EC, F1E1,
F6E1, F7E5, F7E6
Disconnect the hob from the power supply.
Wait a few seconds then reconnect the hob to the power supply.
If the problem persists, call the service centre and specify the error code that appears on the display.
d E
[when the hob is off]
The hob does not switch heat up.
The functions do not come on.
DEMO MODE on.
Follow the instructions in the “DEMO
MODE“ paragraph.
e.g.
:
The hob does not allow a special
function to be activated.
The power regulator limits the power
levels in accordance with the maximum
value set for the hob.
See paragraph "Power management".
e.g.
[
Power level lower than
level requested
]
The hob automatically sets a minimum
power level to ensure that the cooking
zone can be used.
The power regulator limits the power
levels in accordance with the maximum
value set for the hob.
See paragraph "Power management".
AFTERSALES SERVICE
In order to receive a more complete assistance, please register your
product on www.indesit.com/register.
BEFORE CALLING THE AFTER-SALES SERVICE:
1. See if you can solve the problem by yourself with the help of the
suggestions given in the TROUBLESHOOTING.
2. Switch the appliance o and back on again to see if the fault persists.
IF AFTER THE ABOVE CHECKS THE FAULT STILL OCCURS, GET IN
TOUCH WITH THE NEAREST AFTER-SALES SERVICE.
To receive assistance, call the number shown on the warranty booklet or
follow the instructions on the website www.indesit.com.
When contacting our Client After sales service, always specify:
• a brief description of the fault;
• the type and exact model of the appliance;
XXXXXXXXXXXXXXX
XXXXXXXXXXXXXXXXXXXXXX
Made in X
Type: XXXMod.: XXX01 XXXX XXX XXXXXXX XXXX XXXXX
XXXXXXXXXXXXXXXXXXXX
XXXXXXXXXXXXXXXXXXXXXXXXXXXXXXXXXXXXXXXXXXXXXXXXXXXXXXXXXXXXXXXXXXXXXXXXX
• the service number (number after the word Service on the rating
plate). The service number is also indicated on the guarantee
booklet;
• your full address;
• your telephone number.
If any repairs are required, please contact an authorized after-sales
service (to guarantee that original spare parts will be used and repairs
carried out correctly).
In the case of ush-mounted installation, call the After Sales Service to
request assembly of screws kit 4801 211 00112.
400011415253
EN
[Tehotaso on
pyydettyä pienempi]
Liesi asettaa automaattisesti
minimitehotason, joka varmistaa,
että keittoaluetta voidaan käyttää.
Tehonsäädin rajoittaa
tehotasoja liedelle asetetun
maksimiarvon mukaisesti.
Katso kappale “Tehojen hallinta”.
• Lämpimänäpito
Tämän ominaisuuden ansiosta ruoka pystytään pitämään
ihanteellisessa lämpötilassa, yleensä kypsennyksen
päätyttyä, tai kun nesteitä halutaan haihduttaa erittäin
hitaasti. Sopii ihanteellisesti ruokien tarjoiluun täydellisessä
lämpötilassa.
• Haudutus
Tämä toiminto on ihanteellinen haudutuslämpötilan
pitämiseen, jolloin ruokaa voidaan kypsentää pitkään ilman,
että on vaaraa sen palamisesta pohjaan. Ihanteellinen pitkää
keittoaikaa vaativille ruokalajeille (riisi, kastikkeet, paistit),
joissa on nesteisiä kastikkeita.
• Keittäminen
Tämän toiminnon ansiosta vesi saadaan kiehumaan ja
pysymään kiehumassa alhaisemmalla energiankulutuksella.
Pannuun tulee laittaa noin 2 litraa vettä (mieluiten huoneen
veden kiehumista ja jäljellä olevaa vesimäärää seurattava
tarkkaan.
HUOMAA: jos tehonhallinta on aktivoitu arvoon 2.5 kW,
keittämistoiminto ei ole käytettävissä.

20
1Symboler för automatiska funktioner
2Vald tillagningsnivå
3Kokzon avstängd
4Rullningsfält
5Snabbvärme
6På/Av
7Bryggläge+
8Timer
9Indikering för tillagningstid
10 Aktivering av automatiska funktioner
11 OK/Knapplåsningsknapp
12 Paus
13 Lysdiod för aktiv zon
14 Lysdiod för timer
15 Timersymbol
Kontrollpanel
AKontrollpanel
BKokzoner: 1, 2, 3, 4
Beskrivning av produkten
Kokkärl är felplacerat eller saknas
Denna symbol visas om kastrullen inte passar för
induktionshällar, har placerats felaktigt eller inte har rätt storlek
för den valda kokzonen. Om ingen kastrull detekteras inom 30
sekunder efter att valet har gjorts stängs spishällen av.
HRestvärme
Om displayen visar “H“ är kokzonen fortfarande varm. När
kokzonen har svalnat släcks displayen.
Besök www.ikea.com för att ladda ner hela versionen
SVENSKA
3 4 5 9 152
0
0
0
0
7 12
6 11
13 14
10
1 1
81 1
0
0
0
0
B
A
3
4
2
1
Daglig användning
PLACERING
Första användning
EFFEKTBEGRÄNSNING
inställningen i förhållande till gränserna för elsystemet i ditt hem
enligt beskrivningen i följande stycke.
OBS!
Efter att ha anslutit produkten till elnätet kan du ställa in
Tryck på timerknappen “+“ i minst 5 sekunder. Displayen visar PL
Tryck in
PL 2.5kW 4.0 kW 6.0 kW 7.2 kW
P
L
2.
5
4.
0
6.
0
7.
2
Använd knapparna “+“ och “-“ för att välja spishällens önskade
kW – 6,0 kW – 7,2 kW. Bekräfta med knappen .
bryts.
VARNING: Täck aldrig över kontrollpanelen med köksredskap
eller andra föremål, annars kan produkten gå in i skyddsläge. För att
återställa produktens arbetsförhållanden, ta bort köksredskapet och
vänta minst 10 sekunder innan du använder produkten.
I kokzonerna nära kontrollpanelen måste kastruller och stekpannor
förvaras innanför markeringen och centreras inom kokzonerna.
Vid grillning eller fritering, rekommenderas de bakre kokzonerna.
Other manuals for SMAKLIG
7
Table of contents
Other IKEA Hob manuals

IKEA
IKEA MOJLIG User manual

IKEA
IKEA LAGAN User manual

IKEA
IKEA MATMASSIG 504-672-51 User manual

IKEA
IKEA GRUNDAD User manual

IKEA
IKEA HEMLAGAD User manual

IKEA
IKEA MOJLIG User manual

IKEA
IKEA LIVSLAGA User manual

IKEA
IKEA SMAKLIG User manual

IKEA
IKEA SKALAN 005.234.19 User manual

IKEA
IKEA HÖGKLASSIG User manual
Popular Hob manuals by other brands

Bosch
Bosch 8 Series Assembly instructions

Haier
Haier Candy HA2MTSJ68MC instruction manual

Baumatic
Baumatic BSIH32-ANZ instruction manual

Lofra
Lofra Venere 90 Instructions for the installation and use

Candy
Candy CDH 30 Instruction manual / installation manual

Miele
Miele Miele@home XKM 2000 KM installation instructions