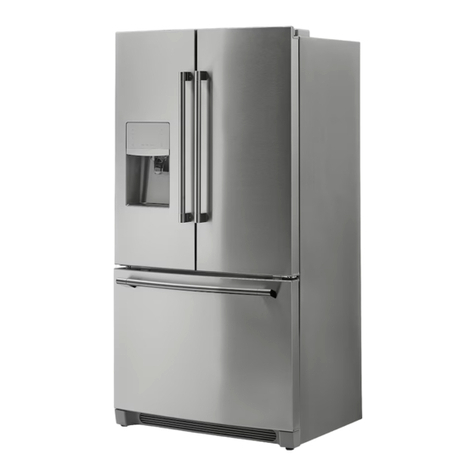
IKEA 604.621.54 User manual

设 计
DESIGN
校 对
CO.BY 蔡宇超
图号/物料编码 PART NO.
标准化
STANDAR
D
图纸名称 PART NAME
业务
seller
图样标记
REL
版本号
REV.NO.
重量(g)
WEIGHT
比例
scale
材料 MATERIAL
80g双胶纸
批 准
AUTHORI
ZE
共 页
TOTAL SHEETS
第 页
NO. OF SHEETS
美的冰箱事业部
MIDEA REFRIGERATION
DIVISION
技术要求
标记
MARKER
1:1
变更内容 修改日期 签名
张馨予
IKEA(美国) ÖVERSKÅDLIG
604.621.54 UR-BCD622WE-ST
22031040001881 说明书
1
王雅霞
2020.07.24
1、尺寸:32K A5(148*210)76P 备注:客户版式,不可随意修改
在发票&送货单上打印FSC认证号、认证产出
2、印刷颜色:单色(灰度印刷)
3、制件必须满足QMB-J53.005 产品说明书及其它类似印刷件技术规范。
4、需要符合美的冰箱事业的最新版《QMB-GC08.007 有害物质管理规定》的限值要求。
5、产品需经过封样合格后方可进行批量生产。
说明书递交文档
16131000A38923

ÖVERSKÅDLIG FR
ES

ENGLISH
Please refer to the last page of this manual for the full list of IKEA
appointed After Sales Service Provider and relative national phone
numbers.
Please record your model and serial numbers
below for reference.
Purchase Date
Model Number
Serial Number
Please attach sales receipt here for future
reference.
Installation checklist
Door
Door handles installed
Door seals completely to cabinet on all sides
Door is level
Levelling
Refrigerator is level, side-to-side and
tilted ¼ in. (6mm) front-to-back
Cabinet is setting solid on all corners
Distance holder (anti-tip bracket) set
Water lter cartridge
Water lter cartridge installed
Water supply line
Water supply line installed
Electrical power
House power turned on
Refrigerator plugged in
Final Checks
Shipping material removed
Refrigerator and freezer temperatures set

FRANÇAIS
Veuillez vous reporter à la dernière page du présent manuel pour la liste
complète des prestataires de service après-vente désignés par IKEA et les
numéros de téléphone nationaux correspondants.
Veuillez enregistrer vos numéros de modèle et
de série ci-dessous à titre informatif.
Date d’achat
Numéro de modèle
Numéro de série
Veuillez brocher votre reçu ici pour vous y
référer ultérieurement.
Vérications avant installation
Porte
Poignées de porte installées
La porte se ferme complètement sur
l’armoire de tous les côtés
La porte est de niveau
Mise à niveau
Le réfrigérateur est de niveau d’un côté à
l’autre et incliné de 6 mm (¼ po) de l’avant à
l’arrière
L’armoire a un appui solide aux quatre coins
Le support de distanciation
(anti-basculement) est installé
Cartouche de ltre à eau
Cartouche de ltre à eau installée
Conduite d’eau
Conduite d’eau installée
Alimentation électrique
L’alimentation électrique de la maison est
sous tension
Le réfrigérateur est branché
Vérications nales
Matériel d’expédition retiré
Réglage de la température du réfrigérateur
et du congélateur

ESPAÑOL
Por favor, consulte la última página de este manual donde encontrará la
lista completa de los proveedores de servicios posventa designados por
IKEA y sus respectivos números de teléfono.
Por favor, registre su modelo y los números de
serie que aparecen debajo para referencia.
Fecha de compra
Número del modelo
Número de serie
Por favor, adjunte su recibo de compra
aquí para futura referencia.
Lista de control de la instalación
Puerta
Manillas de puerta instaladas
La puerta sella por completo el gabinete
La puerta está nivelada
Nivelador
El refrigerador está nivelado, de lado a lado,
y tiene una inclinación de ¼ de pulgada
(6 mm) hacia atrás.
El gabinete descansa sólidamente en las
cuatro esquinas.
Dispositivo distanciador (soporte anti-vuelco)
jado
Cartucho del ltro de agua
Cartucho del ltro de agua instalado
Línea de suministro de agua
Línea de suministro de agua instalada
Corriente eléctrica
Corriente doméstica encendida
Refrigerador enchufado
Revisiones nales
Material de embalaje retirado
Cómo jar la temperatura del refrigerador y
del congelador

ENGLISH 6
FRANÇAIS 27
ESPAÑOL 50

6ENGLISH
Contents
IMPORTANT SAFETY INFORMATION 6
Installation 9
First use 11
Product description 12
Operation 13
Daily use 16
Hints and tips 18
Care and cleaning 19
Troubleshooting 21
Technical information 24
Environmental concerns 25
IKEA limited guarantee 25
Subject to change without notice.
IMPORTANT SAFETY INFORMATION
•Read these instructions.
•Keep these instructions.
•Heed all warnings.
•Follow all instructions.
•Retain all documents for subsequent use
or for the next owner.
•The manufacturer is not liable if you
disregard the instructions and warnings
in the operating and installation
instructions.
•Know these safety symbols.
This is the attention symbol, pertaining to
safety, which alerts users to potential risks
to themselves and others.
All safety warnings are preceded by the
attention symbol and the following terms:
Warning: indicates a potentially hazardous
situation which, if not avoided, could result
in death or serious injury.
Caution: indicates a potentially hazardous
situation which, if not avoided, may result in
minor or moderate injury.
Child safety
• Keep children away from packaging and its
parts. Danger of suocation from folding
cartons and cling wrap!
• This appliance is not intended for use by
persons (including children) with reduced
physical, sensory or mental capabilities,
or lack of experience and knowledge,
unless they have been given supervision or
instruction concerning use of the appliance
by a person responsible for their safety.
• Do not allow children to play with the
appliance!
• Destroy or recycle the carton, plastic
bags, and any exterior wrapping material
immediately after the refrigerator is
unpacked. Children should never use
these items to play. Cartons covered with
rugs,bedspreads, plastic sheets or stretch
wrap may become airtight chambers, and
can quickly cause suocation.
General Safety
• This appliance is intended to be used in
household and similar applications such as:
- Farm houses; sta kitchen areas in
shops, oces and other working
environments;
- By clients in hotels, motels, bed and
breakfast and other residential type
environments;
• If the power cord is damaged, it must be
replaced by the manufacturer, its Authorised
Service Centre or similarly qualied persons
in order to avoid a hazard.
• Only original parts supplied by the
manufacturer should be used. Only original
parts satisfy safety requirements.
• Do not use electrical appliances inside the
appliance (e.g. heater, electric ice maker,
etc.). Risk of explosion!
• Do not use water spray and steam to clean
the appliance. The steam may penetrate
electrical parts and cause a short–circuit.
Risk of electric shock!
• Do not use pointed and sharp–edged
implements to remove frost or layers of
ice. You could damage sensitive internal
components, including the refrigerant
tubes. Leaking refrigerant may ignite or
cause eye injuries.

7ENGLISH
• Do not use other means to accelerate
the defrosting process other than those
recommended by the manufacturer.
• Do not damage the refrigerant circuit.
• Do not store products which contain
ammable propellants (e.g. spray cans) or
explosive substances in the appliance. Risk
of explosion!
• Only store high-proof alcohol tightly closed
and standing up.
• Keep ventilation openings, in the appliance
enclosure or in the built-in structure, clear of
obstruction.
• Never cover or block the ventilation
openings for the appliance.
• Switch the appliance o prior to cleaning.
• Clean the appliance with a moist soft cloth.
Only use neutral detergents. Do not use
abrasive products, abrasive cleaning pads,
solvents or metal objects.
• Keep plastic parts and the refrigerator seal
free of oil and grease. Otherwise, parts and
the refrigerator seal will become porous.
• Do not stand on or lean heavily against the
base of the appliance, door, shelves etc.
Transportation
The appliance is heavy and must be handled
with caution during transportation and
installation. Because of the weight and
dimensions of the appliance, at least two
persons are necessary to move the appliance
into position securely and avoid injuries to
people or damage to the appliance.
Installation
Warning! Only a qualied person can
install this appliance.
• Remove all the packaging and the transit
bolts.
• Do not install or use a damaged appliance.
• Follow the installation instruction supplied
with the appliance.
• Always take care when moving the
appliance as it is heavy. Always use safety
gloves and enclosed footwear.
• Make sure the air can circulate around the
appliance.
• Do not tilt the refrigerator for more than 45°
form upright during moving it.
• At rst installation wait at least 4 hours
before connecting the appliance to the
power supply. This is to allow the oil to ow
back in the compressor.
• Before carrying out any operations on
the appliance (e.g. e.g. re-installing the
appliance), remove the plug from the power
socket.
• Do not install the appliance close to
radiators or cookers, oven or hobs.
• The rear of the appliance must stand
against the wall.
• Do not install the appliance where there is
direct sunlight.
• Do not install this appliance in areas that
are too humid or too colds, such as the
construction appendices, garages or wine
cellars.
• When you move the appliance, lift it by the
front edge to avoid scratching the oor.
Electrical connection
Warning! Risk of re and electrical shock.
Warning! When positioning the appliance,
ensure the power cord is not trapped or
damaged.
Warning! Do not use multi-plug adapters
and extension cords.
Warning! Do not, under any
circumstances, cut, remove, or bypass the
grounding prong.
3-prong plug
3-prong receptacle
Grounding pin
Ground receptacle box
• The appliance must be earthed. The
appliance must be plugged into its own
dedicated 115 Volt, 60 Hz.,15 Amp, AC
only electrical outlet. The power cord of
the appliance is equipped with a 3-prong
grounding plug for your protection
against electrical shock hazards. It must be
plugged directly into a properly grounded
3-prong receptacle. The receptacle must be
installed in accordance with local codes and
ordinances. Consult a qualied electrician.
Avoid connecting refrigerator to a Ground
Fault Interrupter (GFI) circuit.
8ENGLISH
• If there is a 2-prong standard wall socket,
it is the responsibility of the customer to
have this socket replaced with a correctly
grounded 3-prong wall socket.
• Never unplug the appliance by pulling on
the power cord. Always grip the plug rmly,
and pull straight out from the receptacle to
prevent damaging the power cord.
• Performance may be aected if the
voltage varies by 10% or more. Operating
the appliance with insucient power can
damage the compressor. Such damage is
not covered under your warranty.
• Do not plug the appliance into an electrical
outlet controlled by a wall switch or pull
cord to prevent the appliance from being
turned o accidentally.
• Make sure that the parameters on the rating
plate are compatible with the electrical
ratings of the mains power supply.
• Always use a correctly installed shockproof
socket.
• Make sure not to cause damage to the
electrical components (e.g. mains plug, power
cord, compressor). Contact the Authorised
Service Centre or an electrician to change the
electrical components.
• The power cord must stay below the level of
the mains plug.
• Connect the mains plug to the mains socket
only at the end of the installation. Make sure
that there is access to the mains plug after
the installation.
Use
Warning! Risk of injury, burns, electrical
shock or re.
The appliance contains ammable gas,
isobutane (R600a), a natural gas with a high
level of environmental compatibility. Be careful
not to cause damage to the refrigerant circuit
containing isobutane.
• The surface of the compressor becomes hot:
The surface of the compressor may become
hot under normal operation. Do not touch it
with hands.
• Do not change the specication of this
appliance.
• Do not put electrical appliances (e.g. ice
cream makers) in the appliance unless they
are stated applicable by the manufacturer.
• If damage occurs to the refrigerant circuit,
make sure that there are no ames and
sources of ignition in the room. Ventilate
the room.
• Do not let hot items to touch the plastic
parts of the appliance.
• Do not put soft drinks in the freezer
compartment. This will create pressure on
the drink container.
• Do not store ammable gas and liquid in the
appliance.
• Do not put ammable products or items
that are wet with ammable products in,
near or on the appliance.
• Do not touch the compressor or the
condenser. They are hot.
• Do not remove or touch items from the
freezer compartment if your hands are wet
or damp.
• Do not freeze again food that has been
thawed.
• Follow the storage instructions on the
packaging of frozen food.
Internal lighting
Warning! Risk of electric shock.
• The lamp is only for interior lighting of the
appliance. Do not use it for house lighting.
Care and cleaning
Warning! Risk of injury or damage to the
appliance.
• Before maintenance, deactivate the
appliance and disconnect the mains plug
from the mains socket.
• This appliance contains hydrocarbons in the
cooling unit. Only a qualied person can do
the maintenance and the recharging of the
unit.
• Regularly examine the drain of the
appliance and if necessary, clean it. If the
drain is blocked, defrosted water collects in
the bottom of the appliance.
Service
• To repair the appliance contact the
Authorised Service Centre listed at the end
of this manual.
• Use original spare parts only.
• Please note that self-repair or non-
professional repair can have safety
consequences and might void the guarantee.

9ENGLISH
Proper disposal of your appliance
Warning! Risk of child entrapment.
Child entrapment and suocation are not
problems of the past. Junked or abandoned
appliances are still dangerous – even if they will
sit for “just a few days”. If you are getting rid of
your old, please follow the instructions below to
help prevent accidents.
• Disconnect the appliance from the mains
supply.
• Cut o the power cord and discard it.
• Remove the door to prevent children and
pets to be closed inside of the appliance.
• The refrigerant circuit and the insulation
materials of this appliance are ozone-
friendly.
• The insulation foam contains ammable
gas. Contact your municipal authority for
information on how to discard the appliance
correctly.
• Do not cause damage to the part of the
cooling unit that is near the heat exchanger.
• We strongly encourage responsible
appliance recycling/disposal methods.
Check with your utility company or visit
www.energystar.gov/recycle for more
information on recycling your old unit.
CFC/HCFC Disposal
Your old refrigerator may have a cooling system
that used CFCs or HCFCs (chlorouorocarbons
or hydrochlorouorocarbons). CFCs and HCFCs
are believed to harm stratospheric ozone if
released to the atmosphere. Other refrigerants
may also cause harm to the environment if
released to the atmosphere.
If you are throwing away your old refrigerator,
make sure the refrigerant is removed for
proper disposal by a qualied technician. If
you intentionally release refrigerant, you may
be subject to nes and imprisonment under
provisions of environmental legislation.
State of California Proposition 65 Warnings
Warning! This product can expose you
to chemicals including vinyl chloride,
which is known to the State of California
to cause cancer and birth defects or other
reproductive harm. For more information
go to www.P65Warnings.ca.gov.
Installation
Warning! Refer to Safety chapters.
Positioning
• Follow the the separate Assembly Instructions
to install this appliance.
• This appliance should be installed in a dry,
well ventilated indoor.
• Do not install this appliance:
- Outdoors;
- In an environment with dripping water;
- In rooms where there is a risk of frost.
Location
• To ensure best performance, install the
appliance well away from sources of heat
such as radiators, boilers, direct sunlight
etc. Make sure that air can circulate freely
around the back of the cabinet.
• Leave a space of at least 3.94" between the
appliance and the wall, and at least 11.81"
between the top of the appliance and the
ceiling.
• Leave enough space to access and open the
door easily.
• For more detailed product dimension
information, refer to the separate Assembly
Instructions.

10ENGLISH
35.63”
60.31”
24.41”
42.20”
Levelling feet
If the appliance tilts in some way, adjust the
height of the left/right foot of the appliance
to level the appliance. Refer to the separate
Assembly Instructions for detailed installation.
1. Disconnect the mains plug of the appliance
from the power socket.
2. Turn the foot clockwise to raise the
appliance; turn the foot counter clockwise to
lower the appliance.
Levelling doors
If the doors of the appliance are not aligned,
adjust the height of the doors to be in a
horizontal level. Refer to the separate Assembly
Instructions for detailed installation.
1. Disconnect the mains plug of the appliance
from the power socket.
2. Raise the low door to align with the higher
door.
3. On the bottom of the low door, use a a pair
of pliers (not supplied) to insert a supplied
fastener-ring into the gap between the
hinge and the hinge-grommet. Insert more
supplied fastener-rings for height increase
(if needed) until the two doors are aligned.
Unlevel Hinge-
grommet
Hinge
Installing water lter cartridge
Install the water lter cartridge before the water
lter equipped in the appliance can be used.
Refer to the separate Assembly Instructions for
installation.
Connecting to water supply line
Connect the appliance to a drinking water line
before the water and ice dispenser equipped in
the appliance can be used. Refer to the separate
Assembly Instructions for installation.
Installing distance holder
Warning! Serious or fatal crushing injuries
can occur from appliance tip-over. ALWAYS
secure this appliance to the wall using tip-
over restraints.
Using the supplied distance holder to x
the appliance to the wall for the following
advantages. You must follow the separate
Assembly Instructions to correctly install this
distance holder/anti-tip bracket.
• Allow enough space for air circulation
between the appliance and the walls.
• Secure the appliance to the wall for tip-over
prevention.

11ENGLISH
Electrical connection
Caution! Any electrical work required to
install this appliance should be carried
out by a qualied electrician or competent
person.
Warning! This appliance must be earthed.
Failure to follow these instructions can
result in death, re or electrical shock.
The manufacturer declines any liability should
these safety measures not be observed.
First use
Cleaning the interior
Before using the appliance for the rst
time,wash the interior and all internal
accessories with lukewarm water and same
neutral soap so as to remove the typical smell of
a brand new product, then dry thoroughly.
Important! Do not use detergents or abrasive
powders, as these will damage the nish.

12ENGLISH
Product description
Product overview
1
2
3
14
15
16
17
4
5
6
7
8
9
10
11
12
13
1 Water lter
2Door gasket
3Door balconies
4Door for freezer drawers
5 Door for ex drawer
6Crisper drawers
7Door balcony
8Tray
9Turnover box
10 Racks
11 Door balcony
12 Ice maker
13 LED lamp
14 Control panel
15 Flex drawer
16 Upper freezer drawer
17 Lower freezer drawer
Least cold zone
Intermediate temperature zone
Coldest zone

13ENGLISH
Operation
Control panel
21 3 4 5 6 7 8 9 10 11 12
1Indicators for refrigerator/freezer/
compartment and ex drawer
2Temperature display
3Temperature colder button
4Temperature warmer button
5Refrigerator compartment button
6Freezer compartment button
7Flex drawer button
8 Temperature indicators for ex drawer
9Ice maker button; ice maker indicator
10 Energy saving button; energy saving
indicator
11 Water lter reset button; water lter alarm
indicator
12 Lock/Unlock button
Water and ice dispenser
19 18 17 13
1415
16
13 Water and ice dispenser
14 Crushed ice dispensing button
15 Water dispensing button
16 Cubed ice dispensing button
17 Crushed ice dispensing indicator
18 Water dispensing indicator
19 Cubed ice dispensing indicator

14ENGLISH
Switching on
Warning! Refer to "Electrical connection"
section of the Safety chapter.
Connect the mains plug to the power socket.
The display on the control panel turns on.
To change temperature, refer to the section for
temperature regulation.
When operating the appliance for the rst time,
set the appliance at a colder temperature and
run it without loading any food until it auto
stops at the set temperature. Usually it takes
2 or 3 hours, then set a desired temperature and
put food in the appliance.
Switching o
To disconnect the appliance from the power
supply, disconnect the mains plug from the
power socket. The display on the control panel
turns o.
Switching temperature unit
Hold down the
3
and
4
Temperature buttons
for 3 seconds to switch Celsius and Fahrenheit
display.
Locking/unlocking
• If the door is closed and no button
operation occurs for 30 seconds, the control
panel will be locked. Button operation is
invalid.
• The display will turn o after 30 seconds of
inactivity when the control panel is locked.
Press any button to turn on the display.
• To lock or unlock the control panel, press
and hold the 12 Lock/Unlock button on the
control panel for three seconds.
Temperature regulation for refrigerator
compartment
4. Press the 5Refrigerator compartment
button on the control panel to select the 1
refrigerator compartment.
5. Press the 3, 4Temperature button to
change temperature between 34°F (1°C) and
44°F (7°C).
Temperature regulation for freezer
compartment
1. Press the 6Freezer compartment button
on the control panel to select the 1freezer
compartment.
2. Press the 3, 4Temperature button to
change temperature between 7°F (-14°C)
and -7°F (-22°C).
Temperature regulation for ex drawer
1. Press the 7Flex drawer button on the
control panel to select the 1 ex drawer.
2. Press the 7Flex drawer button repeatedly
to select one of the following temperatures:
30°F (-1°C), 34°F (1°C), 37°F (3°C) and 41°F
(5°C). The 8corresponding temperature
indicator will be turned on.
- (meat) indicates 30°F (-1°C).
- (beverage) indicates 34°F (1°C).
- (delicacy) indicates 37°F (3°C).
- (wine) indicates 41°F (5°C).
Adjust the temperature setting by keeping in
mind that the temperature inside the appliance
depends on:
• room temperature
• how often the door is opened
• the quantity of food stored
• the location of the appliance
Important! If the ambient temperature is
high or the appliance is fully loaded, and the
appliance is set to the lowest temperatures, it
may run continuously causing frost to form on
the rear wall. In this case a higher temperature
must be set to allow automatic defrosting and
therefore reduced energy consumption.
Fast freezing function
• Hold down the 6Freezer compartment
button on the control panel for three
seconds to activate the function. The 1
Freezer compartment indicator turns blue.
• When the function is activated, the freezer
compartment temperature is automatically
xed at -7°F (-22°C).
• To deactivate the function, hold down
the 6Freezer compartment button for
three seconds again.

15ENGLISH
Fast cooling function
• Hold down the 5Refrigerator
compartment button on the control panel
for three seconds to activate the function.
The 1Refrigerator compartment indicator
turns blue.
• When the function is activated, the
Refrigerator compartment temperature is
automatically xed at 34°F (1°C).
• To deactivate the function, hold down the
5Refrigerator compartment button for
three seconds again.
Energy saving mode
• Press the 10 Energy saving button to enter
energy saving mode. The 10 Energy saving
indicator turns on.
• In energy saving mode, the refrigerator
compartment temperature is xed at
44°F (7°C), and the freezer compartment
temperature is xed at 7°F (-14°C).
• To exit energy saving mode, press the 10
Energy saving button again. The 10 Energy
saving indicator turns o.
Door open alarm
If the door of the appliance is left open for two
minutes, the buzzer of the appliance will sound
continuously until all the doors are closed. To
switch the buzzer o, press any button.
Water lter replacement alarm
• If the water lter cartridge is used for
more than 150 or 180 days, the 11 Water
lter alarm indicator will turn on or ash
respectively.
• To turn the alarm o, press and hold the 11
Water lter reset button for three seconds.
The day-counting of water ltering will be
reset.
• To replace the water lter cartridge, refer to
the separate Assembly Instructions.
Operating water dispenser
Connect the water supply line to the appliance
before you can use the water and ice dispenser.
Refer to the separate Assembly Instructions for
installation.
1. Press the 9Ice maker button to activate ice
making. When activated, the 9Ice maker
indicator turns on.
To deactivate ice making, press the 9Ice
maker button again. The 9Ice maker
indicator turns o.
2. To dispense water, press the 15 Water
dispensing button and the 18 Water
dispensing indicator turns on.
To dispense crushed ice, press the 14
Crushed ice dispensing button and the 17
Crushed ice dispensing indicator turns on.
To dispense cubed ice, press the 16 Cubed
ice dispensing button and the 19 Cubed ice
dispensing indicator turns on.
3. Place a glass or other container right
under the dispensing outlet, and push
the dispensing lever with the glass or the
container, then water, crushed ice or cubed
ice is dispensed.
Dispensing
lever
Dispensing
outlet
Warning! Flush the water line and clean
the water tank if water is not used for a
period of time (e.g. 2 days).
It is recommended to replace the water
lter cartridge after use for a period of
time (e.g. 180 days). For purchase of water
lter cartridge, contact the Authorised
Service Centre listed at the end of this
manual.

16ENGLISH
Daily use
Freezing calendar
1-2
10 -12
3-4
10 -12
3-6
10 -12
3-6
10 -12
3-6
• The symbols show dierent types of frozen
goods.
• The numbers indicate storage times in
months for the appropriate types of frozen
goods. Whether the upper or lower value of
the indicated storage time is valid depends
on the quality of the foods and treating
before freezing.
Freezing fresh food
• The freezer compartment is suitable for
freezing fresh food and storing frozen and
deep-frozen food for a long time.
• The freezing process lasts 24 hours: during
this period do not add other food to be
frozen.
Storage of frozen food
• When rst starting-up or after a period out
of use, before putting the products in the
compartment let the appliance run at least
2 hours on the colder setting.
• Successful freezing depends on the correct
packaging. When you close and seal the
package you must not allow air or moisture
in or out. If you do, you could have food
odour and taste transfer throughout the
refrigerator, and also dry out frozen food.
•Note: Never put bottled food or drinks in
the freezer compartment.
• For best performance, leave enough space
in the freezer and refrigerator compartment
for air to circulate around the packages.
Also let enough room at the front so the
door can close tightly.
Warning! In the event of accidental
defrosting, for example due to a power
failure, the defrosted food must be
consumed quickly or cooked immediately,
cooled and then re-frozen.
Thawing
Deep-frozen or frozen food, prior to being used,
can be thawed in the refrigerator compartment
or at room temperature, depending on the time
available for this operation.
Small pieces may even be cooked still frozen,
directly from the freezer: in this case, cooking
will take longer.
Storage of food in the refrigerator
compartment
• Cover or wrap the food, particularly if it has
a strong avour.
• Position the food so that air can circulate
freely around it.
Positioning the door balconies
Picture for reference only
1
1
2
• To permit storage of food packages of
various sizes, the door balconies can be
placed at dierent heights.
• To remove the door balcony, compress on
both sides of the door balcony then pull it
upward to remove.
Movable racks
The appliance is equipped with the bracket on
the wall for you to relocate the racks at dierent
heights.

17ENGLISH
Wall bracket
Lower hook
Upper hook
• To remove a rack from the wall bracket, raise
the rack then tilt it upward to remove.
• To install the rack, insert the upper hook of
the rack to the wall bracket then the lower
hook of the rack to the wall bracket.
Crisper drawers
Picture for reference only
• The crisper drawers can be pulled out for
cleaning.
• The refrigerator comes with two separate
crisper drawers. The drawers are suitable
for storing fruit and vegetables.
• Each drawer has a humidity adjustment
slider. Set the slider to the position for
higher humidity. Set the slider to the
position for lower humidity.
Removal of ex drawer
• Open the ex drawer to the maximum, pull
up the rear part of the drawer to disengage
the drawer from the slide, then tilt the front
part of the drawer upward to remove.
Removal of upper freezer drawer
• Open the upper freezer drawer to the
maximum, and pull up the rear part of
the drawer to disengage one side of the
drawing from the slide. Repeat the same
to disengage the other side of the drawer
from the slide. Then tilt the drawer upward
to remove.

18ENGLISH
Removal of lower freezer drawer
• Open the lower freezer drawer to the
maximum, and pull up the rear part of the
drawer to disengage the drawer from the
slide, then tilt the drawer upward to remove.
Removal of turnover box
The door of the appliance has a turnover box
which can be removed from its support for
cleaning.
Ice storage bin
Remove the ice storage bin to clean if ice
dispensing dose not work normally.
1
2
• Grip the handle on the ice storage bin and
gently press it downward, then pull the ice
storage bin out horizontally.
• Clean the ice storage bin, then push it back
to place.
Caution! Never store a beverage can or
other food in the ice storage bin. This
may damage the ice maker or cause the
beverage can or other container to burst.
Always keep the ice storage bin in place.
Remove any ice from the ice making
chamber if found any.
Hints and tips
Normal operating sounds
The following sounds are normal during
operation:
• A faint gurgling and bubbling sound from
coils sound when refrigerant is pumped.
• A whirring and pulsating sound from the
compressor when refrigerant is pumped.
• A sudden cracking noise from inside
appliance caused by thermic dilatation
(a natural and not dangerous physical
phenomenon).
Hints for energy saving
• Do not open the door frequently or leave it
open longer than absolutely necessary.
• If the ambient temperature is high and very
low internal temperature is set and the
appliance is fully loaded, the compressor
may run continuously, causing frost or ice
on the evaporator. If this happens, set the
internal temperature toward warmer one to
allow automatic defrosting and so a saving
in electricity consumption.
Hints for fresh food refrigeration
• Do not store warm food or evaporating
liquids in the refrigerator.
• Cover or wrap the food, particularly if it has
a strong avour.
• Position food so that air can circulate freely
around it.
Hints for refrigeration
Useful hints:

19ENGLISH
• Meat (all types): wrap in a suitable
packaging and place it on the glass shelf
above the vegetable drawer. Store meat for
at most 1-2 days.
• Cooked foods, cold dishes: cover and place
on any shelf.
• Fruit and vegetables: clean thoroughly and
place in a special drawer. Bananas, potatoes,
onions and garlic must not be kept in the
refrigerator if not packed.
• Butter and cheese: place in a special airtight
container or wrap in an aluminium foil or
a polythene bag to exclude as much air as
possible.
• Bottles: close with a cap and place on the
door bottle shelf, or (if available) on the
bottle rack.
Cautions for Use
• The more food stu put in or the more and
the longer for once the door is opened, the
more it needs electric consumption, which
even leads malfunction.
• Re-plug in the power plug at the interval of
over ten minutes.
• Do not store bottled drink in the freezer,
so as to prevent from being broken and
damaging the refrigerator.
• Open the door as less as possible during
power-cut.
• When defrosting, never use any sharp or
metallic objects to remove the frost on the
surface of the evaporator as it will damage
the evaporator.
• Do not touch foods and containers in the
freezing compartment with your wet hands
so as to prevent from being frostbitten.
Hints for freezing
To help you make the most of the freezing
process, here are some important hints:
• The freezing process takes 24 hours. No
further food to be frozen should be added
during this period.
• Freeze only top quality, fresh and
thoroughly cleaned, foodstus.
• Prepare food in small portions to enable it
to be rapidly and completely frozen and to
make it possible subsequently to thaw only
the quantity required.
• Wrap up the food in aluminium foil or
polythene and make sure that the packages
are airtight.
• Do not allow fresh, unfrozen food to touch
food which is already frozen, thus avoiding a
rise in temperature of the latter.
• Lean foods store better and longer than
fatty ones; salt reduces the storage life of
food.
• Water ices, if consumed immediately after
removal from the freezer compartment, can
possibly cause the skin to be freeze burnt.
• It is advisable to show the freezing in date
on each individual pack to enable you to
keep tab of the storage time.
Hints for storage of frozen food
To obtain the best performance from this
appliance, you should:
• Make sure that the commercially frozen
foodstus were adequately stored by the
retailer.
• Make sure that frozen foodstus are
transferred from the food store to the
freezer in the shortest possible time.
• Do not open the door frequently or leave it
open longer than absolutely necessary.
• Once defrosted, food deteriorates rapidly
and cannot be refrozen.
• Do not exceed the storage period indicated
by the food manufacturer.
Care and cleaning
Warning! Refer to Safety chapters.
General warnings
Caution! Unplug the appliance before
carrying out any maintenance operation.
This appliance contains hydrocarbons in its
cooling unit; maintenance and recharging
must therefore only be carried out by
authorized technicians.
The accessories and parts of the appliance
are not suitable for washing in a dishwasher.
Cleaning the interior
Before using the appliance for the rst time, the
interior and all internal accessories should be
washed with lukewarm water and some neutral
soap to remove the typical smell of a brand-new
product, then dried thoroughly.
This manual suits for next models
1
Table of contents
Languages:
Other IKEA Refrigerator manuals

IKEA
IKEA IR8GSMXRS03 User manual

IKEA
IKEA LAGAN 004.969.39 User manual

IKEA
IKEA FULLGORA User manual

IKEA
IKEA Svalkas User manual

IKEA
IKEA UPPKALLA User manual

IKEA
IKEA FROSTIG C 185 E User manual

IKEA
IKEA ISC23CDEXB00 User manual

IKEA
IKEA FÖRKYLD User manual

IKEA
IKEA KYLD User manual

IKEA
IKEA TINAD User manual
Popular Refrigerator manuals by other brands

Electrolux
Electrolux E42BS75ETT - 42" - Refrigerator Owner's manual and installation instructions

GE
GE GSCS3PGXSS Dimensions and installation information

Fulgor Milano
Fulgor Milano FM4BM22FBI manual

HOMCOM
HOMCOM ASBG-25 Assembly & instruction manual

AEG
AEG SKS58800E0 user manual

Electrolux
Electrolux ERB3512S Instruction book