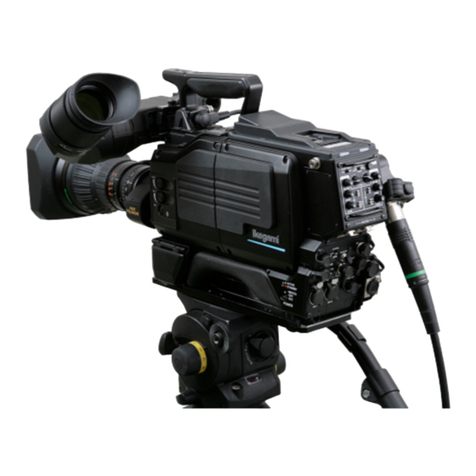
Ikegami Editcam 3 DNS-33W User manual

3
MONITOR
RETRO LOOP
ACCESS
F-RUN
TCG
PANEL
OFF
ON
R- RUN
LIGHT
DNS-
DNGDNGCameraraSySystemwitwith
33W
DiDigitalitalDDiskRecordorder
FIELDPAK GAIN OUTPUT AWB
STBY
SAVE
・L
・M
・H
CAM
BARS
・A
・B
OFF
POWER
VF
CHARA
CH1
CH2
CH1
F
R
W
CH2
F
R
W
CH3 CH4
REAR
FRONT
F
R
W
AUTO
MAN CH3/4
MIX
CH4
CH3/4
CH3
CH1
CH2
CH1/2
MIX
HYPER GAIN
P.FUNC
FIL
HEAD
-
+
41.6%
36.2%
22.5%
11.0%
ND D8 000K
C6 300K
B4 300K
A3 200K
ECC
ECC
AUDIO
OUTPUT
WIRELESS
CH1/2
DNS - 33W
OPERATION MANUAL


MONITOR
RETRO LOOP
ACCESS
F-RUN
TCG
PANEL
OFF
ON
R- RUN
LIGHT
DNS-
DNGDNGCCameraraSySystemwitwith
33W
DiDigitalitalDDiskRecordorder
FIELDPAK GAIN OUTPUT AWB
STBY
SAVE
・L
・M
・H
CAM
BARS
・A
・B
OFF
POWER
VF
CHARA
CH1
CH2
CH1
F
R
W
CH2
F
R
W
CH3 CH4
REAR
FRONT
F
R
W
AUTO
MAN CH3/4
MIX
CH4
CH3/4
CH3
CH1
CH2
CH1/2
MIX
HYPER GAIN
P.FUNC
FIL
HEAD
-
+
41.6%
36.2%
22.5%
11.0%
ND D8 000K
C6 300K
B4 300K
A3 200K
ECC
ECC
AUDIO
OUTPUT
WIRELESS
CH1/2
3
DNS - 33W
OPERATION MANUAL
0503 1st Edition (E)

DNS-33W DNS-33W 0503 VOL1 (E)
Copyright © 2005 Ikegami Tsushinki Co., Ltd.
We reserve the copyright on the software we create.
No part of this publication may be modified or reproduced in any form, or by any means, without prior written permission from
Ikegami Tsushinki Co., Ltd.

SAFETY PRECAUTIONS i
SAFETY PRECAUTIONS
The safety precautions on the use of DNS-33W are described below. Please read these precautions thoroughly before use.
1. Notes on this Manual
(1) This manual is written for readers with a basic knowledge on cameras, therefore the definitions of the technical terms
are omitted.
(2) The contents of this manual are subject to change without notice in the future.
2. Hazard Alert Symbols and Signal Words Concerning Safety in this Manual
This manual employs the following "hazard alert symbol", "signal words" that indicate the danger levels, "Notice" and
"Reference" for descriptions concerning safety.
Hazard Alert Symbol :
Signal Words :DANGER
WARNING
CAUTION
In this manual the following indications are used:
WARNING
Indicates that mis-operation may cause a potentially hazardous situation, which may result in the user's injury or
property damage.
CAUTION
Supplementary information on the matter just discussed.
Guides the reader to descriptions in other sections or on other pages concerning the matter just discussed.
Notice
For calling reader's notice.
Reference
Indicates reference items described elsewhere.
DNS-33W 0503 VOL1 (E) DNS-33W

ii SAFETY PRECAUTIONS
3. Precautions on Handling
This product has been designed with safety well concerned; however, all electrical appliances may cause electrocution accidents
or equipment damage if used in an inappropriate manner, or under unsuitable conditions. Therefore, please follow the
instructions on handling this product, listed below:
(1) Do not remove the cover or disassemble unless absolutely necessary, to prevent damage and electrocution.
(2) Always turn the POWER switch OFF after use.
Leaving the POWER switch ON when not in use may result in not only the battery running out, but also equipment
damage or accidents when using an AC pack.
(3) Remove the battery from the camera if not using the camera for a long time. The battery runs out if left inserted in
the equipment, even if it is not used.
(4) Do not expose the camera to a strong vibration or shock. A strong vibration or shock may cause equipment damage.
(5) Do not lift or hold the camera by the projection parts.
Lifting or holding the camera by the viewfinder or the lens causes the center of gravity of the camera to become
unstable so you may drop it. Moreover, the connection parts between the camera and the viewfinder, or the camera
and the lens may be exposed to unnecessary pressure, which may cause equipment damage.
(6) Always install the accessories after placing the camera on a fixed position.
When installing a lens or microphone, fix the camera on a stable place (e.g. on a table, a tripod, etc.), to make the
installation easier and to prevent dropping the equipment.
(7) Avoid use or storage in the following conditions:
• Extremely high/low temperature
• High humidity
• Strong magnetic field
• In direct sunlight for a long time, or near a heater
• In rain without the rain cover
• Exposed to water drops/spray
(8) Avoid moving the equipment rapidly from an extremely cold place to a warm place.
Condensation may occur in the CCD part.
(9) When shooting an important scene, always hold a trial in advance to check the videotaping and recording.
(10) Regarding the Lithium Battery
• Do not use an unspecified battery.
• Explosion or liquid leak of the battery may cause fire or injury.
When changing or discarding a battery, please contact Ikegami's sales or operation quarters.
(11) Wipe the dirt/dust off the camera using a dry, soft cloth.
If the stain is hard, soak the cloth with water or detergent, wring well, and wipe. If you use detergent, wipe off the
detergent with a cloth that was soaked in just water and wrung well. When wiping, always turn the power off, and
take care not to put water in the camera.
4. Regular Maintenance Recommended
This product includes parts that wears out and have a limited life even in proper use or storage. Therefore, regular maintenance
(once every 3 years or 8000 hours use) is recommended to extend the life and safe use of this product for a long time. Please
contact Ikegami sales and service centers or Techno Ikegami Co., Ltd. for the regular maintenance and repair of our products.
DNS-33W DNS-33W 0503 VOL1 (E)

HOW TO USE OPERATION MANUAL
The Editcam3, DNS-33W Camera Operation Manual is intended to describe how to operate DNS-33W Camera.
This Operation Manual is written for people who have some basic knowledge and understanding of a television camera, so
explanation of technical terms is omitted here.
The Operation Manual consists of eight chapters. Related topics are included in the same chapter as much as possible so that you
do not have to turn pages back and forth. Each chapter is arranged in the order of actual operating procedures. By reading it in
sequence, you can smoothly perform a series of steps, from connection to operation in a proper manner.
If you are not familiar with DNS-33W Camera, please start with "Chapter 1. OUTLINE". If you have some experience in
operation, read the relevant pages which you do not know how to proceed.
In addition, this manual contains "QUICK START GUIDE" before the Chapter 1. "QUICK START GUIDE" explains a series of
operations necessary for shooting and is written for people who have some basic knowledge of a television camera. Read this guide
when you briefly want to know how to use this camera.
It should be noted that this manual is written for the standard specifications of the camera. Your custom specifications are
addressed in "CHANGING INFORMATION". Changed information is described in this chapter, so read this chapter along with
other chapters, though it may be inconvenient ("CHANGING INFORMATION" may be sent to you later on).
Structure of Operation Manual
QUICK START GUIDE : Briefly explains how to operate the Camera.
1. OUTLINE : Briefly explains the outline and features of the Camera.
2. NAME AND FUNCTION : Explains the name and function of each part of the Camera.
3. INSTALLATION AND
CONNECTION : Explains how to mount and connect peripheral equipment of the Camera.
4. OPERATION : Explains the function and operation of the Camera.
5. SETTINGS AND ADJUSTMENT
OF CAMERA : Explains how to set and adjust various settings of the Camera.
6. SETTINGS AND ADJUSTMENT
OF RECORDER SECTION : Explains how to set and adjust various settings of the Recorder Section.
7. TROUBLE SHOOTING AND
MAINTENANCE : Explains how to take countermeasures when you encounter troubles and how to
inspect the Camera and peripheral equipment. Also explains precautions when
optional equipment is mounted to the Camera. Read this chapter before the use of
optional equipment.
8. SPECIFICATIONS : Lists the specifications and external appearance of the Camera.
CHANGING INFORMATION : Contains revision information in the case of design revision and at request of
customers. Read by comparing with the main part of the Operation Manual.
DNS-33W 0503 VOL1 (E) DNS-33W

DNS-33W DNS-33W 0503 VOL1 (E)

CONTENTS
DNS-33W 0503 VOL1 (E) DNS-33W© Copyright March 2005 (Ikegami) 1st Edition : March 2005 (Ikegami) DNS-33W 0503 VOL1 (E)
DNS-33W
OPERATION MANUAL
CONTENTS
SAFETYPRECAUTIONS
HOWTOUSEOPERATIONMANUAL
QUICKSTARTGUIDE
1. OUTLINE ................................................................. 1-1
1.1 Features .................................................................... 1-1
2. NAMEANDFUNCTION .......................................... 2-1
2.1 CameraFrontSide .................................................... 2-1
2.2 CameraRearSide ..................................................... 2-3
2.3 CameraRightSide(1) .............................................. 2-5
2.4 CameraRightSide(2) .............................................. 2-9
2.5 CameraLeftSide .................................................... 2-12
2.6 Viewfinder(VF15-32A-S) ..................................... 2-14
3. INSTALLATIONANDCONNECTION ...................... 3-1
3.1 PreparationtoConnect ............................................. 3-1
3.2 MountingonaTripod .............................................. 3-4
3.3 MountingtheLens ................................................... 3-5
3.4 MountingtheViewfinder ......................................... 3-6
3.5 ConnectingaMicrophone ........................................ 3-7
3.6 PowerConnection .................................................... 3-8
3.7 ConnectingaMonitor ............................................. 3-10
4. OPERATION ............................................................ 4-1
4.1 OperationProcedures ............................................... 4-1
4.2 SwitchPositionChecks ............................................ 4-2
4.3 TurningONPower ................................................... 4-3
4.4 AdjustingtheViewfinder ......................................... 4-4
4.5 AdjustingtheLens ................................................... 4-4
4.6 OutputSignalChecks ............................................... 4-5
4.7 AutoWhiteBalance,AutoBlackBalanceand
AutoBlackShading ................................................. 4-6
4.8 FieldPakLoadingandChanging .............................. 4-7
4.9 OperationsofRecorderSection ............................... 4-8
4.10 OperationsofMenusofRecorderSection ............. 4-11
4.11 ShootinginParticularEnvironment ....................... 4-13
5. SETTINGSANDADJUSTMENTOFCAMERA ....... 5-1
5.1 MicrophonePower/LevelDownSetting .................. 5-1
5.2 SelectingShutterSpeed ............................................ 5-2
5.3 EnhancingtheVerticalResolution
(Super-Vmode) ........................................................ 5-3
5.4 ImprovingtheLowLuminanceReproduction
(BlackStretch/BlackPress) ...................................... 5-3
5.5 ScreenDetailEnhancement(DTL) .......................... 5-4
5.6 SwitchingtheGain ................................................... 5-5
5.7 UsingtheMemoryCard ........................................... 5-6
5.8 AllocatingFunctionstoP.FUNC ........................... 5-10
5.9 InitializingVariousCameraSettings ..................... 5-11
5.10 SettingsintheMenu ............................................... 5-12
6. SETTINGSANDADJUSTMENT
OFRECORDERSECTION ...................................... 6-1
6.1 BASEMenu ............................................................. 6-1
6.2 AUDIO/VIDEOMenu ............................................. 6-1
6.3 DISKOPERATIONSMenu .................................... 6-5
6.4 RECORD/PLAYBACKMenu ................................. 6-8
6.5 SYSTEMSETUPMenu ......................................... 6-10
7. TROUBLESHOOTINGANDMAINTENANCE ........ 7-1
7.1 TroubleShooting ...................................................... 7-1
7.2 Maintenance ............................................................. 7-2
7.3 PrecautionswhenOptionalEquipmentisUsed ....... 7-5
8. SPECIFICATIONS ................................................... 8-1
8.1 DNS-33WProductSpecifications ............................ 8-1
8.2 ControlItems ............................................................ 8-3
8.3 ExternalAppearance ................................................ 8-6
8.4 ExternalConnections ............................................. 8-10
CHANGINGINFORMATION
GUARANTEESAFTERPURCHASE
DNS-33W DNS-33W 0503 VOL1 (E)

QUICK START GUIDE
"QUICK START GUIDE" explains a series of basic operations
necessary for shooting and is written for people who have some
basic knowledge of a television camera and who have experience
using the camera.
This guide explains main operations after camera equipment is
connected to the camera. For how to install and connect the
camera equipment, refer to "3. INSTALLATION AND
CONNECTION". For details of settings of the camera and recorder
section, refer to "5. SETTINGS AND ADJUSTMENT OF CAMERA"
and "6. SETTINGS AND ADJUSTMENT OF RECORDER
SECTION".
DNS-33W 0503 VOL1 (E) DNS-33W
Preparations before Shooting...................................... 1
Power ON/OFF ............................................................ 1
FieldPak2 (FP2) Loading ............................................ 2
Compression Type Selection ...................................... 2
Disk Initialization .......................................................... 3
Shooting........................................................................... 5
Playing ............................................................................. 6
Normal Playback .......................................................... 6
REC-REVIEW Playback............................................... 7
Special Recording Modes ............................................ 8
Retro Loop Recording ................................................. 8
Time Lapse Recording ................................................ 9
Table of Control Key Operations ............................... 11
Menu Structure of the Recorder Section ....................
12
Status Screen Display .................................................. 13

DNS-33W DNS-33W 0503 VOL1 (E)

DNS-33W 0503 VOL1 (E) DNS-33W
QUICK START GUIDE 1
Preparations before Shooting
Power ON/OFF
■Turning On Power
Turn ON the POWER switch of the camera to turn the power of the camera on.
When the power is turned ON normally, the string "BOOTING!!" is displayed on the viewfinder (hereinafter
called VF) screen. Then, the four LEDs (AUDIO LED) on the right side of the camera will light up in
orange.
GOUU
POWER
ON OFF
VF
CHARA
POWER Switch
After the camera is powered on normally, the LEDs once turn off. Then, the color LCD on the right side
of the camera displays the logo "Ikegami" and the Status screen.
When a FieldPak2 (hereinafter called FP2) has been loaded in the camera, the logo "Ikegami" is displayed
and the disk is recognized automatically (recognition requires a few minutes).
For descriptions of each item displayed on the Status screen, refer to "Status Screen Display" (page 13)
in this "QUICK START GUIDE".
■Turning OFF Power
Turn OFF the POWER switch to shut the power off.
A few seconds are required to complete the shutdown of the camera. When the camera is to be restarted,
the power must be turned ON 10 seconds or more after powering off.
CAUTION
Do not disconnect battery or turn off the power of the AC pack while the power of the camera remains
ON. This may cause damage of a clip (image and audio data).
1
0
2 3 4
DV25 PAL 48k
DVCPRO AIF
LOCAL
BIN FAG7CM 1M NLT 1 .0 .9
POWER 15.0V
FP1 02:43:49
FAT32
VID=CAMERA
READY
0001/0002
0003
00 : 02 : 06 :14
(Status Screen)

DNS-33W DNS-33W 0503 VOL1 (E)
2 QUICK START GUIDE
FieldPak2 (FP2) Loading
1. Insert FP2 by pressing the EJECT key after the camera is
powered on.
2. Close the eject cover.
Push the cover firmly until it clicks into position.
The FP2 will be recognized automatically just after the
loading.
At this moment, "Disk spinning up!" and "Loading Data"
messages are displayed on the color LCD.
Notice
When FIELDPAK switch is set to "SAVE", FP2 is not
recognized automatically.
A message disappears, and when a disk status is displayed,
FP2 recognition is completed.
Compression Type Selection
Select a data compression type to be used by the camera
before shooting.
1. Touch the Status screen to display the "BASE" menu.
2. Press the "A/V" (AUDIO/VIDEO) button on the screen.
1
0
2 3 4
DV25 PAL 48k
DVCPRO AIF
LOCAL
BIN - - - - - - - - - - - NLT 1 .0 .9
- - - - - - - -
- - - -
- - - - - - - - - - - - - - - - - - - - - -
NONE 0.0V
- - - - - - - - - - - - - - - -
- - - - - - - -
VID=CAMERA
SPIN UP
DISK Spinning up
Message is displayed here.
1
0
2 3 4
DV25 PAL 48k
DVCPRO AIF
LOCAL
BIN FAG7CM 1M NLT 1 .0 .9
POWER 15.0V
FP1 02:43:49
FAT32
VID=CAMERA
READY
0001/0002
0003
00 : 02 : 06 :14
Press the "A/V" button.
A/V
AUDIO/VIDEO
DSK
DISKOPERATIONS
R/P
RECORD/PLAYBACK
SYS UP
SYSTEMSETUP
(BASE Menu)

DNS-33W 0503 VOL1 (E) DNS-33W
QUICK START GUIDE 3
3. Press the "PRJ" (PROJECT) button on the screen.
4. Change the compression format (DV or JFIF) by pressing the
button on the right. Change the compression ratio using the
button on the left.
Display Compression Ratio
DV25 DVCPRO25 compression
DV50 DVCPRO50 compression (option)
3:1 JFIF3:1 compression
10:1 JFIF10:1 compression
20:1 JFIF20:1 compression
MPG50 MPEG50 compression (option)
If setting is not changed, press the "UP" button and return to
the "BASE" menu.
Notice
Clips with different compression format cannot co-exist in an
FP2. On the other hand, clips with the same compression
format and different compression ratio can co-exist.
When the compression format is changed, replace an FP2
with another FP2 initialized by the compression format to be
used or initialize an FP2 by the same compression format.
5.
When the compression format is changed, turn the power ON again.
Changed settings will be applied after the restart.
Disk Initialization
Initialize (format) the hard disk of the FP2.
Perform this procedure when an FP2 needs to be initialized or
an unformatted FP2 is used.
When an unformatted FP2 is loaded, nothing will be displayed
on the "Disk Format Type" field on the Status screen. Check if
a disk format type is displayed before starting initialization.
CAUTION
Note that all data in an FP2 will be erased when the hard disk is initialized.
Press the "PRJ" button.
PRJ
PROJECT SWITCHER:
CAMERA
VID
VIDEO
AUD
AUDIO TESTON
TC UP
TIMECODE
This button changes compression ratio.
This button changes compression
format (DV/JFIF).
When setting is not changed, press the
"UP" button and return to the "BASE" menu.
PRJ
COMPRESSION:
DV25
TYPE:
DV
VID
AUDIORATE:
48K
FILE:
AIF
PRJ
VID
FMT:
DVCam
VID
STANDARD:
PAL
UP
1
0
2 3 4
DV25 PAL 48k
DVCPRO AIF
LOCAL
BIN FAG7CM 1M NLT 1 .0 .9
POWER 15.0V
FP1 02:43:49
FAT32
VID=CAMERA
READY
0001/0002
0003
00 : 02 : 06 :14
"Disk Format Type" field

DNS-33W DNS-33W 0503 VOL1 (E)
4 QUICK START GUIDE
1. Touch the Status screen to display the "BASE" menu.
2. Press the "DSK" (DISK OPERATIONS) button on the screen.
3. Press the "FMT" (FORMAT) button on the screen.
4. When initializing a disk, press the "OK" button while the
SHIFT key is pressed.
It takes 5 to 6 seconds to finish initialization.
When the initialization starts, "FORMATTING DISK" will be
displayed on the screen. When the initialization is completed,
"DISK FORMATTED" will be displayed.
To stop initialization, press the "CLR" button.
5. After the initialization is completed, press the "UP" button
and return to the "BASE" menu.
Press the "DSK" button.
A/V
AUDIO/VIDEO
DSK
DISKOPERATIONS
R/P
RECORD/PLAYBACK
SYS UP
SYSTEMSETUP
Press the "FMT" button.
FMT
BIN
MED
MEDIA
TOOLS
EDIT
TOOLS
SET UP
ED
DISK
SETTINGS
>FP1RDY40g39g
DISKS
When initializing a disk, press the "OK"
button while the SHIFT key is pressed.
To stop initialization, press the "CLR" button.
OK FORMATDISKPAK1
CLR

DNS-33W 0503 VOL1 (E) DNS-33W
QUICK START GUIDE 5
Shooting
Pressing the REC button starts recording. Pressing the REC button once again stops recording.
REC Button
There are 2 REC buttons on the camera
body, and there is a VTR button on the
lens. The VTR button on the lens works
the same as the REC button. Recording
starts/stops by pressing these buttons.
Pressing the REC key on the right side
of the camera also starts recording.
Pressing the STOP key stops recording.
CH1
F
R
W
CH2
F
R
W
CH3 CH4
REAR
FRONT
F
R
W
AUTO
MAN
SHIFT
IN
OUT
PLAY STOP
<
|<<
>
CH3/4
CH1/2
OUTPUT
WIRELESS
REC
REC Key
STOP Key
>>|
<<< >>>
[When Recording External Input Video]
When an external VIDEO output line is connected to the camera, pressing the REC key can record the
external input video to an FP2.
1. Connect the external VIDEO output line to the GENLOCK IN connector of the camera.
2. Select the "A/V" (AUDIO/VIDEO) button on the "BASE" menu of the recorder section, and set
"SWITCHER" to "EXTERNAL".
3. Press the REC key on the right side of the camera.
Recording will be started.
4. Press the STOP key to stop the recording.
Notice
• When the REC button is pressed, the input to the recorder section changes to video signal from the
camera, and a clip (image and audio data) will be recorded to the FP2.
• Pressing the REC button during playback of a clip in the FP2 does not overwrite the image in the
clip. Playback will be discontinued, and recorded image and audio data will be saved as a new clip.
• The recording function of the external input video is optional.

DNS-33W DNS-33W 0503 VOL1 (E)
6 QUICK START GUIDE
Playing
There are two ways to play recorded image, normal playback and REC-REVIEW playback.
Normal Playback
Pressing the PLAY key starts playback of the recorded image.
To select a desired clip, use the PRIOR key or the NEXT key on the top of the camera or |<< key or
>>| key on the right side of the camera.
CH1
F
R
W
CH2
F
R
W
CH3 CH4
REAR
FRONT
F
R
W
AUTO
MAN
SHIFT
IN
OUT
PLAY STOP
<<<
<
|<<
>
>>>
CH3/4
CH1/2
OUTPUT
WIRELESS
REC
Plays recorded image.
VF CHARA Button
Control Switch Panel on the Right
Side of the Camera
Plays recorded image.
Control Keys on the Top of the Camera
EJECT
PLAY PRIOR
STOP REW
NEXT
FF
>>|
Notice
•Playback on the camera is simplified video.
•When the playback is stopped, the still image displayed when being stopped remains on the LCD.
To switch to the image of the camera, press the VF CHARA button or the RET button once. RET
buttons are placed on the handle and the lens.
[Playing Images on the Color LCD Screen]
The color LCD screen is able to play images being shot, FP2 video, and external input video. Press the
SHIFT key (on the right side of the camera) and touch the screen. The screen toggles between menu
display and image display.

DNS-33W 0503 VOL1 (E) DNS-33W
QUICK START GUIDE 7
REC-REVIEW Playback
When the RET button on the handle or on the lens is pressed with the output set to "CAM", the ending
part for the last several seconds of the last clip is played.
Notice
•No REC-REVIEW operation is performed if the output is set to "DISK".
•Since the recorder section is placed in playback mode for REC-REVIEW, audio output (main) is the
playback audio, which is normal.
•The REC-REVIEW playback time can be set at "REVIEW LENGTH" under "PLAYBACK" menu. During
REC-REVIEW operation, image and audio outputs are selected as shown below.
Output Target Output Signal
VF Playback image
MON OUT connector Image of the camera
VIDEO OUT connector (main) Image of the camera
Audio (monitor) Playback audio signal
Audio (main) Playback audio signal

DNS-33W DNS-33W 0503 VOL1 (E)
8 QUICK START GUIDE
Special Recording Modes
Retro Loop Recording
Pressing RETRO LOOP switch on the right side of the camera starts the RETRO LOOP mode.
By starting the RETRO LOOP mode in advance, the images shot before pressing the REC button are
additionally recorded. The TALLY lamp blinks when the RETRO LOOP switch is pressed. Image will
countinuously be saved to the disk for the specified time length.
RETRO LOOP Switch
[How to Set the Retro Loop Length]
1. Touch the Status screen to display the "BASE" menu.
2. Press the "R/P" (RECORD/PLAYBACK) button on the
screen.
3. Press the "REC" (RECORD) button on the screen.
Press the "R/P" button.
A/V
AUDIO/VIDEO
DSK
DISKOPERATIONS
R/P
RECORD/PLAYBACK
SYS UP
SYSTEMSETUP
Press the "REC" button.
REC
RECORD
PLY
PLAYBACK
NAV UP
NAVIGATION
Table of contents
Other Ikegami Camcorder manuals

Ikegami
Ikegami HC-D57 User manual

Ikegami
Ikegami HDL-45E User manual

Ikegami
Ikegami HDK-65C User manual

Ikegami
Ikegami HL-60W User manual

Ikegami
Ikegami UHL-43 User manual

Ikegami
Ikegami HL-45A User manual

Ikegami
Ikegami HLV59 User manual

Ikegami
Ikegami CCU-430 User manual

Ikegami
Ikegami HDK-790E User manual

Ikegami
Ikegami HDK-55 User manual