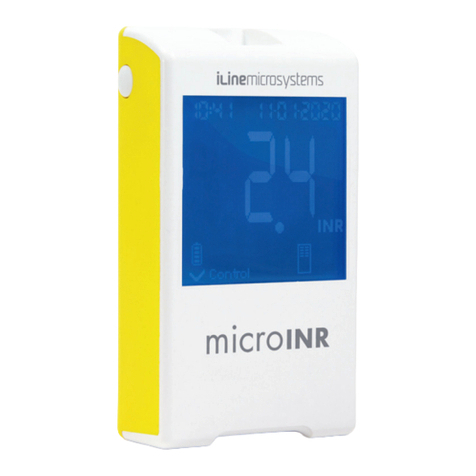
iLine microsystems microINR link User manual

© 2020 iLine Microsystems. microINR is trademark of iLine Microsystems.
The Bluetooth® word mark and logos are registered trademarks owned by Bluetooth SIG,
Inc. and any use of such marks by iLine Microsystems is under license.
IND0001AA - Rev 2020-05
Paseo Mikeletegi, 69
20009 Donostia - Gipuzkoa (SPAIN)
www.ilinemicrosystems.com
iLine Microsystems S.L.
friendly
technology
Instructions for use
Instrucciones de uso
Bedienungsanleitung
Gebruiksaanwijzing
Istruzioni per l’uso
Instructions d’utilisation
Instruções de utilização
Návod k použití
Navodila za uporabo
link
en
es
de
it
nl
fr
pt
cs
sl
Charge completely the battery of the Meter before its first use.
Cargue la batería del Monitor por completo antes del primer uso.
Carregue totalmente a bateria do Monitor antes da sua primeira utilizaçao.
De batterij van de meter moet vóór het eerste gebruik volledig worden opgeladen.
Caricare completamente la batteria del dispositivo prima del suo primo utilizzo.
Charger complétement la batterie de l’appareil avant la première utilisation.
Laden Sie die Batterie des Messgeräts vor dem ersten Gebrauch vollständig auf.
Před prvním použitím měřícího přístroje baterii zcela nabijte.
Pred prvo uporabo baterijo Merilnika napolnite v celoti.
en
es
de
it
nl
fr
pt
cs
sl


No part of these instructions for use or the products it describes may be reproduced by any means or in any form without prior consent in writing from iLine
Microsystems.
The information contained in these instructions for use was correct at the time of printing. However, iLine Microsystems reserves the right to introduce changes
to the specifications, equipment and maintenance procedures of the system at any time, without prior notification. Any substantial changes will be added to the
next revision of these instructions for use. In case of conflict between the information of the instructions for use of the microINR Link Meter and the microINR
Chip, the information contained in the instructions for use of the microINR Chip will have priority.
microINR is trademark of iLine Microsystems.
The Bluetooth® word mark and logos are registered trademarks owned by Bluetooth SIG, Inc. and any use of such marks by iLine Microsystems is under license.
en
es
de
No está permitida la reproducción de estas instrucciones de uso o de los productos que describe, por ningún medio o de ninguna forma sin la autorización previa
por escrito de iLine Microsystems.
La información de estas instrucciones de uso era correcta en el momento de su impresión. No obstante, iLine Microsystems se reserva el derecho de aportar
cambios a las especificaciones, el equipo y los procedimientos de mantenimiento del sistema en cualquier momento, sin previo aviso. Cualquier cambio sustancial
será incorporado en la próxima revisión de estas instrucciones de uso. En caso de conflicto entre la información de las instrucciones de uso del Monitor microINR
Link y el Chip microINR, prevalecerá la información contenida en las instrucciones de uso del Chip microINR.
microINR es una marca registrada de iLine Microsystems.
La marca denominativa Bluetooth® y sus logotipos son marcas registradas propiedad de Bluetooth SIG, Inc. y cualquier uso de dichas marcas por parte de iLine
Microsystems está bajo licencia.
Diese Bedienungsanleitung und Produktbeschreibungen dürfen ohne vorherige schriliche Zustimmung seitens iLine Microsystems weder gänzlich noch teilweise
mit jeglichen Mitteln sowie in jeglicher Form reproduziert werden.
Die in dieser Bedienungsanleitung enthaltenen Angaben waren zum Zeitpunkt der Drucklegung korrekt. Dennoch behält sich iLine Microsystems das Recht vor,
jederzeit und ohne Vorankündigung Änderungen an technischen Daten, Geräten und Wartungsverfahren des Systems vorzunehmen. Sämtliche maßgeblichen
Veränderungen werden in die nächste Ausgabe dieser Anleitung aufgenommen. Falls Abweichungen zwischen der Bedienungsanleitung zum microINR-Messgerät
und microINR-Chip aureten sollten, hat die Bedienungsanleitung zum microINR-Chip Priorität.
microINR ist ein Markenzeichen von iLine Microsystems.
Die Bluetooth®-Wortmarke und -Logos sind eingetragene Warenzeichen im Besitz von Bluetooth SIG, Inc. und jede Verwendung dieser Marken durch iLine
Microsystems erfolgt unter Lizenz.

È vietata la riproduzione, in ogni forma e con ogni mezzo, delle presenti istruzioni per l’uso o dei prodotti ivi descritti, senza previo consenso scritto
di iLine Microsystems.
Le informazioni contenute nelle presenti istruzioni per l’uso sono corrette al momento della stampa. Tuttavia, iLine Microsystems si riserva il diritto di
introdurre modifiche alle specifiche, alle apparecchiature e alle procedure di manutenzione del sistema in qualunque momento, senza previa notifica.
Eventuali modifiche sostanziali verranno aggiunte alla prossima revisione delle presenti istruzioni per l’uso. In caso di conflitto tra le informazioni
contenute nelle istruzioni per l’uso del Monitor microINR Link e del Chip microINR, prevalgono le istruzioni per l’uso del Chip microINR.
microINR è un marchio di iLine Microsystems.
Il marchio e i loghi Bluetooth® sono marchi registrati di proprietà di Bluetooth SIG, Inc. e l’utilizzo di tali marchi da parte di iLine Microsystems è
concesso in licenza.
Aucune partie des présentes instructions d’utilisation ou des produits décrits ne peut être reproduite de quelque façon ou sous quelque forme que ce
soit sans le consentement écrit de iLine Microsystems.
Les informations qui y sont contenues étaient exactes au moment de la mise sous presse. Toutefois, iLine Microsystems se réserve le droit d’apporter
des modifications aux spécifications, à l’équipement et aux procédures d’entretien du système, à tout moment et sans avis préalable. Toute modification
substantielle sera ajoutée à la prochaine version révisée des présentes instructions d’utilisation. En cas de conflit entre les informations des instructions
d’utilisation du Moniteur microINR Link et celles de la Chip microINR, les informations des instructions d’utilisation de la Chip microINR sont prioritaires.
microINR est une marque déposée de iLine Microsystems.
La marque et les logos Bluetooth® sont des marques déposées appartenant à Bluetooth SIG, Inc. et toute utilisation de ces marques par iLine
Microsystems est sous licence.
Geen enkel deel van deze gebruiksaanwijzing of de producten die erin beschreven worden, mag op geen enkele manier en geen enkele vorm worden
gereproduceerd zonder vooraf schrielijk toestemming te hebben verkregen van iLine Microsystems.
De informatie in deze gebruiksaanwijzing was correct op het moment van drukken. Desondanks behoudt iLine Microsystems zich het recht voor om op elk
moment zonder voorafgaande kennisgeving wijzigingen door te voeren in de specificaties, de apparatuur en de onderhoudsprocedures van het systeem.
Alle wezenlijke wijzigingen zullen in de volgende herziening van deze gebruiksaanwijzing worden toegevoegd. Indien zich een conflict voordoet tussen de
informatie van de gebruiksaanwijzing van de Meter microINR Link en de microINR-Chip, hee de informatie in de gebruiksaanwijzing van de microINR-Chip
voorrang op de andere informatie.
microINR is een handelsmerk van iLine Microsystems.
Het Bluetooth® woordmerk en logo’s zijn geregistreerde handelsmerken van Bluetooth SIG, Inc. Het gebruik ervan door iLine Microsystems is onder licentie.
nl
it
fr

Nenhuma parte destas instruções de utilização ou os produtos aí descritos poderão ser reproduzidos através de qualquer meio ou sob qualquer forma
sem o consentimento prévio por escrito da iLine Microsystems.
As informações contidas nestas instruções de utilização estavam corretas no momento da impressão. Contudo, a iLine Microsystems reserva-se o
direito de introduzir alterações às especificações, equipamento e procedimentos de manutenção do sistema a qualquer momento, sem aviso prévio.
Quaisquer alterações substanciais serão acrescentadas à revisão seguinte respeitante a estas instruções de utilização. No caso de conflito entre as
informações contidas nas instruções de utilização do Medidor microINR Link e o Chip microINR, as informações contidas nas instruções de utilização
do Chip microINR deverão prevalecer.
microINR é uma marca registada da iLine Microsystems.
A marca e logótipos da palavra Bluetooth® são marcas registadas propriedade da Bluetooth SIG, Inc. e qualquer utilização destas marcas pela iLine
Microsystems é feita sob autorização.
Žádná část tohoto návodu k použití nebo popisovaných produktů, nesmí být žádným způsobem a v žádné formě reprodukována bez předchozího
písemného souhlasu společnosti iLine Microsystems.
Informace obsažené v tomto návodu k použití byly v okamžiku tisku správné. Společnost iLine Microsystems si nicméně vyhrazuje právo zavádět
změny parametrů, vybavení a postupů údržby systému kdykoli, bez předchozího oznámení. Veškeré zásadní změny budou přidány při příští revizi
tohoto návodu k použití. V případě neshody mezi informacemi v návodu k použití Měřicího přístroje microINR Link a Chip microINR mají přednost
informace uvedené v návodu k použití Chip microINR.
microINR je ochranná známka společnosti iLine Microsystems.
Loga a slovní značka Bluetooth® jsou registrované ochranné známky společnosti Bluetooth SIG, Inc. a jakékoli použití těchto značek společností iLine
Microsystems podléhá licenci.
Noben del teh navodil za uporabo ali izdelki, ki jih opisujejo, se ne sme na kakršen koli način ali v kakršni koli obliki razmnoževati brez predhodnega
pisnega soglasja družbe iLine Microsystems.
Informacije v teh navodilih za uporabo so bile v času tiskanja pravilne. Vendar si družba iLine Microsystems pridržuje pravico, da brez predhodnega
obvestila kadar koli uvede spremembe specifikacij, opreme in postopkov vzdrževanja sistema. Vse bistvene spremembe bodo dodane v naslednji
reviziji teh navodil za uporabo. V primeru neskladja med informacijami v navodilih za uporabo Merilnika microINR Link in Chip microINR imajo prednost
informacije v navodilih za uporabo Chip microINR.
microINR je blagovna znamka iLine Microsystems.
Besedna znamka in logotipi Bluetooth® so registrirane blagovne znamke, ki so v lasti družbe Bluetooth SIG, Inc. in kakršna koli uporaba takšnih znamk
s strani iLine Microsystems je pod licenco.
pt
cs
sl


01
For monitoring of oral anticoagulation treatment
based on Vitamin K antagonist drugs.
CONTENTS
English
microINR®Link Meter
INTRODUCTION
INTENDED USE
BEFORE STARTING TO USE THE
microINR® SYSTEM
Safety information
ORAL ANTICOAGULANT THERAPY
Prothrombin Time and INR
MEASURING PRINCIPLE
microINR® SYSTEM
DESCRIPTION OF THE microINR® Link KIT
PARTS OF THE microINR® Link METER
CHARGING THE microINR® Link METER
SETTING THE TIME & DATE
PATIENT IDENTIFICATION (OPTIONAL)
QUALITY CONTROL
CONDUCTING THE TEST
PREPARING THE NECESSARY MATERIALS
MEASUREMENT PROCEDURE
Turning the Meter On
Inserting the Chip
Modes of Use
Conducting the Test
1.
1.1
1.2
1.3
1.4
2.
2.1
2.2
2.3
2.4
2.5
2.6
3.
3.1
3.2
Test Result and Assay End
Turning the Meter Off
OBTAINING AND APPLYING THE CAPILLARY
BLOOD SAMPLE
INTERPRETING THE RESULTS
LIMITATIONS OF USE
MEMORY
BLUETOOTH® FUNCTIONALITY
BLUETOOTH® CONFIGURABLE FEATURES
microINR® Link METER BLUETOOTH® MENU
DEVICE PAIRING
DEVICE UNPAIRING
TRANSFERRING DATA
SENDING ALL RESULTS
CLEANING AND DISINFECTING THE
microINR® Link METER
ERROR GUIDE
ADDITIONAL INFORMATION
SPECIFICATIONS
WARRANTY
TECHNICAL SERVICE
SYMBOLS
GLOSSARY
10
11
11
12
13
13
14
14
14
15
16
17
17
18
19
20
20
20
20
21
23
3.3
3.4
3.5
4.
5.
5.1
5.2
5.3
5.4
5.5
5.6
6.
7.
8.
8.1
8.2
8.3
8.4
8.5
2
2
2
2
4
4
5
6
6
6
6
7
7
8
8
8
9
9
9
9
10
link

02
1.1 INTENDED USE
The microINR System is intended to monitor oral
anticoagulation therapy (OAT) with vitamin K antagonist drugs.
The microINR System determines quantitative prothrombin
time (PT) in INR (International Normalized Ratio) units with
fresh capillary blood performed by fingersticking.
The microINR System is a medical device for in-vitro
diagnostics intended for professional and self-testing use.
1.2 BEFORE STARTING TO USE THE
microINR® SYSTEM
These instructions for use will guide you, with comprehensive
information, on the handling and use of the microINR Link
Meter. Please, read them as well as the instructions for use of
the microINR Chip carefully. Furthermore, do not forget to read
the instructions for use of the disposable lancets and/or
lancing device used to obtain the capillary blood sample.
The microINR Link Meter refers to the reader device.
The microINR Chips refer to the test strips, intended to be used
exclusively with the microINR or microINR Link Meters.
The microINR System refers to reader (microINR or microINR
Link Meters) and the strips (microINR Chips).
The microINR Link Meter can communicate through wireless
Bluetooth technology to a soware or smartphone application
(App). Please, inform yourself on the correct use of this
soware or app.
Keep these instructions for use near the microINR Link Meter
and refer to them if you have any questions about proper
operation of the system.
At the end of these instructions you will find a glossary.
Self-testing or self-management of vitamin K antagonists
may only be prescribed by a doctor.
Users of the microINR System (patients and healthcare
professionals) must receive proper training before
starting to use the system.
Safety Information
General Safety Warnings
Throughout these instructions for use you will find safety
warnings and information on the correct use of the microINR
System.
This warning symbol indicates a possibility of danger
which could result in death, injury or harm to the
patient or user if the procedures and instructions for
use are not strictly followed.
This precaution symbol indicates the possibility of
deteriorating or damaging the equipment and losing
data, if the procedures and instructions for use are not
strictly followed.
1. INTRODUCTION

03
Important information regarding the correct use of the
system that does not affect the safety of the patient or the
integrity of the device is displayed over a blue background.
Infection Risk Control on Multi-Patient Test System
•Healthcare professionals must wear gloves during the entire
process of the test.
•A separate lancet or lancing device must be used for each
individual.
•Used Chips, lancets and gloves might be source of infection.
Dispose of them in accordance with local regulations to
prevent infections.
•Also, comply with your centre’s internal hygiene and safety
regulations.
There is a potential risk of infection. Healthcare
professionals using the microINR system on multiple
patients must take into account that all objects that
come into contact with human blood are a possible
source of infection. (See: Clinical and Laboratory
Standards Institute: Protection of Laboratory Workers
from Occupationally Acquired Infections; Approved
Guideline, Fourth Edition CLSI document M29-A4, 2014).
Wireless Technology
The microINR Link Meter can communicate and transfer results
to a PC or other electronic device (e.g., computer, tablet or
smartphone) through a wireless Bluetooth connection.
Bluetooth is a form of radio frequency (RF) technology that
operates in the unlicensed industrial, scientific, and medical
band at 2.5 GHz. The microINR Link Meter can only
communicate with one compatible paired electronic device at
each time; therefore, other devices with Bluetooth cannot
access the information on the Meter unless the paired Meter is
first unpaired and paired to a new electronic device.
In case of electromagnetic interference with another device, it
is recommended to increase the distance between the Meter
and that device. You could also turn off the interfering device.
In addition, the Meter’s Bluetooth wireless connection could be
turned off.
The device generates, uses, and can radiate radio frequency
energy.
Electromagnetic Compatibility and Electrical Safety
The microINR Link Meter system complies with
electromagnetic compatibility requirements according to IEC
61326-1 and 61326-2-6 standards.
Do not use the microINR Link Meter near sources
of intense electromagnetic radiation, as this could
interfere with its correct operation.
The microINR Link Meter complies with electrical safety
requirements according to standards IEC 61010-1 and IEC
61010-2-101.
The Meter must be disposed of as indicated in the WEEE
Directive (Waste Electrical and Electronic Equipment
2012/19/EU).

The values of the MNPT and ISI parameters come from clinical
calibration studies.
The pharmacological activity of vitamin K-antagonist
oral anticoagulants can be modified by other drugs;
therefore, you should only take the medicines
prescribed by your physician.
Certain liver diseases, thyroid disorders and other
diseases or conditions, as well as nutritional
supplements, medicinal herbs or changes in diets can
affect the therapeutic activity of oral anticoagulants
and INR results.
04
1.3 ORAL ANTICOAGULANT THERAPY
Oral anticoagulant therapy is given to patients to prevent
thromboembolic events such as venous thrombosis and
pulmonary embolism or those linked to atrial fibrillation or
artificial heart valves.
The treatment entails the need to monitor and adjust the
doses periodically for each patient based on a blood test.
Depending on the reason for oral anticoagulant therapy a
therapeutic range is defined for each patient meaning the
value of the test should lie within that range.
Prothrombin Time and INR
The activity of oral anticoagulants is monitored by measuring
the prothrombin time (PT) in seconds, which is the time it
takes for a fibrin clot to form. The thromboplastin is used as a
reagent to calculate the prothrombin time (PT). Depending on
the nature of this reagent and the equipment used variations
of the PT results are to be expected.
Therefore, in 1977, the World Health Organization (WHO)
recommended a system standardisation method. Thus,
prothrombin time values are converted into INR values,
International Normalized Ratio, using the following equation:
Where PT is the prothrombin time obtained in the test, MNPT
is the mean normal prothrombin time and ISI the international
sensitivity index corresponding to the thromboplastin.
INR =PT ISI
MNPT
( )

05
1.4 MEASURING PRINCIPLE
The technology used by the microINR system is based on the
microfluidics of the microINR Chip, which allows storing,
dosing, moving and/or mixing small volumes of liquids to
perform a chemical reaction.
The microINR Chips contain two channels, one for
measurement and the other for control. An image of the Chip
is shown below:
Each channel consists of a micro-reactor that contains the
reagent and a microcapillary where the INR is determined. The
reagent used in the measuring channel contains human
recombinant thromboplastin and the reagent in the control
channel contains recombinant thromboplastin and human
coagulation factors to normalize the patient’s blood.
The blood is applied to the Chip through the entry channel,
separated into two channels and mixed with the reagents
contained in each micro-reactor. The coagulation cascade is
triggered instantly. When blood coagulates, its viscosity
increases, which results into a change in blood flow behaviour.
The Meter captures the position of the sample by means of a
Machine vision system and the position is transformed
mathematically into speed and acceleration curves, from
which an INR value is obtained.
Calibration
Each batch of microINR Chips has been calibrated against a
reference batch of human recombinant thromboplastin traced
to International Reference Thromboplastin of the World Health
Organization1.
These calibration values (ISI and MNPT) are encoded in the
printed Datamatrix of each microINR Chip. Therefore, every
test is automatically and individually calibrated eliminating
any risk of human error.
(1). Expert committee of the WHO on biological normalization.
Report forty-eight. Geneva, World Health Organization, 1999
(WHO technical report series No. 889)
ENTRY CHANNEL
MICROREACTORS
DATAMATRIX
MICROCAPILLARY
CHANNELS
CONTROL CHANNEL MEASURING
CHANNEL

2.1 DESCRIPTION OF THE microINR® Link KIT
The microINR Link kit includes the following materials.
Make sure these items are included into the kit:
- Case
- microINR Link Meter
- Charger
- Plug adapter
- Instructions for use of the microINR Link Meter
- Quick guide
- Error guide
- Lancing device with instructions
(exclusive for Reference Kit KTD0001XX)
- Lancets (exclusive for Reference Kit KTD0001XX)
microINR Chips are sold separately.
Always carry the Meter inside its case.
06
2.2 PARTS OF THE microINR® Link METER
2.3 CHARGING THE microINR® Link METER
The Meter uses a lithium battery that can be recharged
through the mini USB connection on the top of the Meter.
The recommended charging time is approximately 3 hours.
MINI USB CONNECTION
EXIT (E) BUTTON
MEMORY (M)
BUTTON
CHIP
INSERTION
AREA
DISPLAY
2. microINR® SYSTEM

07
Charge the battery completely before using the Meter
for the first time.
Do not open or manipulate the Meter.
Do not pierce or burn the battery.
Do not change the battery. The manufacturer will not
warrant Meters that have been opened.
For battery replacement or meter repairs,
the equipment must be sent to the manufacturer.
Use only the supplied charger and wall power adapter
provided by the manufacturer or you may damage the
Meter.
2.4 SETTING THE TIME & DATE
Before using the microINR System, check that the
Meter’s time and date are correct, since those are
necessary to determine the Chips’ expiration date.
Those parameters are set during the manufacturing process,
so it probably will not be necessary to change them.
Time format: 24 hours. Date format: DD-MM-YYYY.
Follow the steps described below to change the Meter’s time
and date. Change only the digits needed to be set and confirm
the rest digits:
•Press and hold the left and right buttons (E and M) at the
same time for 10 seconds until the time field flashes.
•Press the left button (E) to set the hour.
•After selecting the correct hour, press the right button (M) and
set the minutes.
•After selecting the minutes, press the right button (M) again
and the date fields will start flashing.
•Use the left button (E) to select the correct day.
•When you reach the correct day, press the right button (M) to
set the month. Use the left button (E) to select the correct month.
•When you reach the correct month, press the right button (M) to
set the year. Use the left button (E) to select the correct year.
•After setting the month, time and date, press the right button
(M) again to save your settings.
If the time and date setting is mistakenly initiated or a digit is
unintentionally changed, the Meter will automatically exit that
setting without saving any change aer 10 seconds of inactivity.
2.5 PATIENT IDENTIFICATION (OPTIONAL)
microINR Link Meter can optionally record a result together
with its Patient Identification (PID). To identify the patient, take
the following steps before conducting a test:
•Hold the right button while inserting a Chip and release it
afterwards. Upon releasing the button, “PID” and a
16-character alphanumeric field will be displayed.
•To enter the characters corresponding to the PID:
- The first field will flash when selected.
- To enter the first character, press the le button (E) until
you reach the desired character.
- Validate the character with the right button (M) and go to
the next field.

3. CONDUCTING THE TEST
08
- Repeat the previous steps until you reach the last field.
- Aer accepting the last field, the first field is automatically
selected in case you want to correct any characters.
- To confirm the ID entered and go back, hold the right
button (M) for 3 seconds.
While you are entering the PID, if one-minute elapses without
pressing any button, an E01 message will be displayed.
When consulting the results on the Meter, the result of a test
(INR or error message) is displayed along with its
corresponding PID (if entered), date and time.
When entering the PID, do not include patient sensitive
information (name, age, etc.) since it can be viewed in the
Meter.
2.6 QUALITY CONTROL
Internal quality control
Meter performance is automatically checked when the system
is turned on.
Integrated and independent on-board quality controls
Level 1 – Pre-test
•Chip integrity check
•Correct insertion check
•Automatic system calibration and rejection of expired
Chips
Level 2 - Measuring channel
•Analytic verification performed on the measuring channel that
identifies failures when processing the sample during the test,
as well as proper pre-analytical treatment of the sample.
Level 3 - Control channel
•Control channel provides highly controlled clotting times.
System reliability is assured when control clotting time lies
within a pre-defined range.
PROFESSIONAL USE:
Liquid control:
The microINR system has a number of on-board quality
control functions integrated into the Meter and the Chip and
therefore there is no need to run quality control tests with
liquid quality controls. However, iLine Microsystems has
available an optional liquid control (plasma) for the microINR
system. This control is provided to help meet the regulatory
requirements applicable to your facility. To purchase, contact
your local distributor.
3.1 PREPARING THE NECESSARY MATERIALS
•microINR Link Meter
•microINR Chips CHB0001UU (not supplied)

•Open the pouch.
Hold the Chip by the yellow part so that
the “microINR” logo can be read correctly.
Insert the Chip into the slot and push it
until it stops.
•Make sure the Chip has reached the end.
If the pouch of the Chip is open, damaged or the film
of the Chip is removed, please, dispose of the Chip and
use a new one.
Modes of Use
The microINR system provides two application modes of the
sample:
iLine Microsystems only recommends the option of approaching
the Meter to the sample for users who are experienced in
conducting INR assays with the microINR system.
09
•Fingersticking material
- Professional use: disposable lancets (not supplied)
- Self-testing: lancing device and lancets (exclusive
Reference Kit KTD0001XX)
•Skin cleaning material (not supplied)
Always use CE marked lancing devices and lancets.
3.2 MEASUREMENT PROCEDURE
Turning the Meter On
The Meter can be turned on:
- By inserting the Chip: - By pressing any button:
Inserting the Chip
Verify the expiry date and the storage conditions of the
Chip before conducting the test.
- Approaching the
sample to the Meter.
- Approaching the Meter to
the sample.

Conducting the Test
•Once the Chip is inserted, the Meter
will perform the quality controls
mentioned in section 2.6 of these
instructions for use. After
conducting the aforementioned
quality controls prior to the test,
the “control” symbol will light up.
If the first level of quality control is not passed, an error
message will be displayed on the screen of the Meter.
•The Chip begins to flash and heats
up until it reaches the proper
temperature. Once this temperature
is reached:
- The device emits an audible signal (beep).
- The drop symbol begins to flash on
the display.
- A count down appears (80s).
- The Chip emits a steady light.
•Perform the fingerstick (see section 3.3 of these instructions
for use).
•Make sure to obtain a spherical and properly sized drop,
equivalent to a teardrop.
•Apply the drop of blood on the Chip immediately, by contact
with the entry channel, without resting the finger on the Chip.
•The Meter will emit a beep when it detects the sample for
the test and the drop symbol will stop flashing.
10
•After the beep, gently move the finger away and wait until
the INR results are displayed on the screen.
If you apply the sample and no sound is emitted, this means
that there is not enough sample volume. Remove the Chip and
repeat the test with a new Chip. Ensure that the size of the drop
is enough and the entry channel is not blocked when placing it.
Do not reapply sample or try to add more blood to the
channel.
Never perform the fingerstick before the start of the
countdown.
Do not touch the Chip’s entry channel with the finger
while applying the sample.
Keep the Meter away from direct sunlight during the test.
Do not shake or drop the Meter. If the Meter is dropped
or gets wet and the frequency of errors messages
increases, contact your distributor.
Test Result and Assay End
•The measurement is performed and the Meter displays the
result in INR units or an error message.
Error messages are
displayed as a letter
“E” followed by a
number. If an error
message is shown,
follow the steps in the
“Error Guide” section.
COUNTDOWN

Before lancing the finger, it is
convenient to warm hands.
There are several techniques
that can be used for that
purpose such as washing
hands with warm water,
keeping hands below the
waist, massaging the fingertip
soly…
The fingerstick site must
be clean, completely dry and free of contaminants.
Washing the hands with warm soapy water is
recommended. You may also use alcohol to clean the
fingerstick area. Always dry the area thoroughly to
remove any traces of substances that might interfere
with the result. Always use a new, clean and dry gauze.
Any alcohol (disinfectants, shaving creams, etc.),
lotions or sweat on the fingerstick area or the blood
sample may cause incorrect results.
•You can use any finger for the
fingerstick. The recommended site is
the one shown on the following
image.
•Once the Meter is ready for testing
and the 80-second countdown
appears on the screen, place the
lancet firmly against the finger and
press the button. Press the finger
11
•Remove the Chip, holding it from both sides.
The used Chips, lancets and gloves
might be source of infection.
For healthcare professionals:
dispose the materials according to
your institution´s infection control
policy and the appropriate local
regulations. For self-testing patients:
you can dispose all the materials in
your regular waste. Discard the used
lancets with care to prevent injuries.
Turning the Meter Off
There are two ways to turn the Meter off:
•The Meter turns off automatically after
3 minutes of inactivity.
•Press the left button (EXIT) to turn the
Meter off, holding it for 3 or 4 seconds.
The Meter cannot be turned off while
connected to the power supply.
3.3 OBTAINING AND APPLYING THE CAPILLARY
BLOOD SAMPLE
The steps to obtain and apply a capillary blood sample
correctly are detailed below:
•Read the instructions for use of the fingerstick device or lancet.

12
Samples must be applied immediately aer collection,
since blood clotting does naturally occur upon fingerstick.
Avoid contact between the Chip and the finger in order
not to obstruct the entry channel and to allow for
uninterrupted blood absorption. Only the drop of blood
must make contact with the Chip.
Apply the sample on a single attempt. Never add more
blood to the Chip.
•After the beep tone, gently remove
the finger, leaving a small amount
of blood (remnant) at the entry
channel as shown in the picture.
•If the test must be repeated,
perform the fingerstick on a
different finger, using a new
Chip and lancet.
3.4 INTERPRETING THE RESULTS
The results are
shown as
International
Normalized Ratio
(INR) units. The
microINR System’s
results range
between 0.8 and 8.0.
gently from the base to help form
a drop of blood. Do not press the
fingerstick site or let the drop of
blood spread on the finger.
•Before placing the sample on the
Chip, make sure to obtain a
spherical and properly sized drop
(equivalent to a teardrop), large
enough to leave a small amount
of blood (remnant) at the entry
channel.
Sampling technique can affect the result of the test. Do
not squeeze or “milk” the fingerstick area as this can
alter the coagulation process.
When using the Meter in a multi-patient site uses only
auto-disabling single use lancets.
•Apply the drop to the Chip immediately, in contact with the
entry channel.

13
If you obtain a result out of the measuring range, the display
will show ↓ 0.8 (below 0.8) or ↑ 8.0 (above 8.0).
If an error message is displayed, see the “Error guide” section
and follow the instructions.
If an unexpected result is obtained, repeat the
test making sure that the indications described in
these instructions for use are strictly followed. If an
unexpected result is obtained again, contact your
physician and/or distributor.
Results are unexpected when they lie outside the
therapeutic range or do not match the patient´s
symptoms: haemorrhages, bruises, etc.
3.5 LIMITATIONS OF USE
•Once the Chip is taken out of its original pouch, it should be
used within the following 6 hours.
•Do not use to measure or monitor the anticoagulation status
of patients under treatment with direct oral anticoagulation
treatments (non-vitamin-k antagonist drugs).
•The performance of the microINR System has not been
demonstrated on blood samples with hematocrit values
outside the range of 25% to 55%. Hematocrit out of this
range may affect test results.
•The device is highly sensitive to vitamin K dependent
coagulation factor deficiencies.
For more information on interferences of the microINR System
with other drugs and diseases and the microINR System
performance, refer to the instructions for use of the microINR Chip.
The microINR Link Meter can store up to 199 results of
patients, liquid quality controls and error messages. Each
result is stored with the date and time of the test. When
conducting a test, if there is no free storage space, the oldest
result will be automatically deleted to store the new one.
To check the results:
•Press the right button (M). The result of the last test
conducted will be displayed with its date and time and the
ID of the corresponding patient (if it was entered).
•Press again to display the next result, corresponding to the
second-to-last test and so on.
•Press the left button (E) to return to the initial screen. If you
enter a Chip while you are checking the memory, a new test
will begin normally.
4. MEMORY

The microINR Link Meter can communicate and transfer results
to a PC or other electronic devices through wireless Bluetooth
connection.
Transferring results from microINR Link Meter is useful for
data storing in DMS (Data Management Soware) or in
suitable smartphone/tablet Apps.
Please, contact your local distributor for further information
about DMS or Apps compatible with the microINR Link Meter.
microINR Link Meter can just be paired with one device at a time.
A description of all the symbols related to the microINR Link
Meter Bluetooth performance can be
found at the end of this instructions of
use or at the Quick Guide included in
the microINR Link Kit.
In case the “Bluetooth failure” symbol
displays on the Meter’s screen, contact
with your local distributor.
5.1 BLUETOOTH®CONFIGURABLE FEATURES
The microINR Link Meter wireless communication via Bluetooth
can be configurable to suit the user’s needs. Contact your local
distributor if you want to change the default microINR Link
Meter configuration. The configurable features are:
•The microINR Link Meter Bluetooth functionality can be turn
on or off.
•Pairing modes:
- Free mode: no password required.
- Password mode: a pairing code will be required to connect
both devices.
- NFC Mode: allows pairing devices by approximation.
•If, after having been paired with a device, the microINR Link
Meter is paired with another one, it is possible to configure
the management of the results performed on the microINR
Link Meter while paired with the previous device.
5.2 microINR®LINK METER BLUETOOTH®MENU
The microINR Link Meter Bluetooth functionality has been
designed to be as simple and automatic as possible. For
certain processes, it will be necessary to enter the microINR
Link Meter Bluetooth menu.
To enter the microINR Link Meter Bluetooth menu, ensure that
the Meter is turned off and no cable is connected to the USB
port. Turn the Meter on by pressing the le and right buttons
at the same time. Hold both buttons (approx. 4 seconds) until
the Meter shows the menu’s first option.
The menu allows to perform the
following four activities:
1. Pairing: to pair the microINR Link
Meter, see the section 5.3.
5. BLUETOOTH® FUNCTIONALITY
14
Table of contents
Languages:
Other iLine microsystems Measuring Instrument manuals
