imagistics DL170 User manual

Pitney Bowes Office Systems, Inc.
has changed its name to
Imagistics International Inc.
For supplies and service, please
continue to call:
w
w
w
.
i
m
a
g
i
s
t
i
c
s
.
c
o
m
1-800-462-6797
1-800-243-5556
service
supplies
www.imagistics.com
Operating Manual
For use with Imagistics and Pitney Bowes DL170 copier/printer/facsimile systems.
DL170


Welcome …
Thank you!
Thanks for selecting an Imagistics International Inc. fax
machine for your business.
Before you begin, please note that before your fax can be
used and before you can turn on power to the unit for the
first time, there are important precautions to take. Please
see page 1.5 for more information.

Trademarks
Imagistics,the Imagistics logo and all Imagistics fax product names
contained herein are trademarks of Imagistics International Inc.
E
NERGY
S
TAR
is a registered mark of the United States Environmental Protection
Agency.
Copyright
Copyright © 2002 by Imagistics International Inc, All rights reserved.
As an Energy Star®partner, Imagistics International Inc., has determined
that this product meets the Energy Star guidelines for energy effi-
ciency.
Energy saving
Your machine can save the energy with its Energy Saving Mode.
In the Energy Saving Mode the printer will not use its fusing lamp and. If your
machine receives a fax message or if any key is pressed your machine will automati-
cally wake up.
The time for the machine to enter the Energy saving mode can be selected from 1 to
120 minutes. For details, see “Setting sleep mode,” page 4.10.
The Model DL170 uses a high-speed
ITU
-
TV
.34 bis modem for 33.6
Kbps transmission and high-speed protocols for rapid handshak-
ing.
JBIG
— Joint Bi-level Image experts Group, the new
ITU
-
T
stan-
dard image data compression method. As
JBIG
compresses the
data more efficiently than
MMR
, it is especially effective when
transmitting halftone (grayscale) image document.

Where to set up your fax machine
Follow these guidelines when setting up your fax machine:
Away from direct sunlight
To avoid overheating, set up your fax machine away
from direct sunlight or a heater.
Level, and vibration-free
To avoid damage to the machine or injuries, set the
fax machine up in a level, vibration-free location.
Avoid extreme high / low temperatures
Use your fax machine within the temperature range
of 50º F to 89.6º F (10º C to 32º C).
Away from a television or radio
Many appliances and office equipment, including
televisions, radios, copy machines, air conditioners
and computers, can generate electronic noise that
can interfere with the operation of your fax
machine.
Clean
Dust buildup can damage your fax. Periodically
clean your fax machine as described in the operating
instructions. Do not use a dust cover, which can
cause damage from overheating.
Near a phone jack
Your fax machine uses a standard (modular) tele-
phone jack, also known as an
RJ
-11.
Space around the fax machine
To ensure proper ventilation and easy operation, set
up the machine in an area that meets the minimum
requirements for clearance as illustrated below.
50 - 89.6 F
(10 - 32 C)
Before using your Imagistics Fax Machine
15 cm
(5.9 inches)
25 cm
(9.8 inches)
40 cm
(15.7 inches)
40 cm
(15.7 inches)
60 cm
(23.6 inches)

Power requirements
Plug in the power cord
Plug the power cord carefully and completely into a
wall outlet. Do not leave any portion of the electrical
cord’s metal plugs exposed. Doing so could cause a
fire and poses a risk of electrical shock.
Do not share an extension cord
connector with other plugs
It can cause electrical shock.
Do not share an outlet with a large
appliance
High-consumption appliances such as a refrigerator
or air conditioner can cause “draw-downs” which
could damage your fax machine.
120 VAC outlet
Use a standard three-pronged 120 V electrical outlet
to power your fax machine. Using any other electri-
cal outlet will cause damage to your fax.
For domestic use only
Never use your fax machine outside the country in
which you purchased it. Doing so may violate
telecommunication and safety regulations of that
country, and variations in electrical and telephone
standards can cause poor performance and damage
to your fax.
General Precautions
Never disassemble your fax machine!
Disassembling your fax machine can cause serious
injury to you and damage to your fax. If service is
required, call Imagistics Service at 1800.243.5556
Keep away from liquids
Keep liquids and metal pins or other objects away
from your fax machine. If something falls into the
fax machine, remove the plug from the outlet, and
call Imagistics Service at 1 800.243.5556
Never handle your fax machine or
power cord with wet hands
Never touch your fax machine or power cord if your
hands are wet.
During electrical storms, disconnect
the plug from the outlet
Electrical storms can cause electrical shock or
damage to the fax machine.
AC 120V

Do not put furniture or equipment on
the power cord
Do not put anything on or over the electrical power
cord, and do not route the power cord under rugs or
carpets. Doing so can damage the power cord or fax,
and can cause fire or electrical shock.
Avoid temperature fluctuations
Sudden changes in temperature can cause damag-
ing condensation to form inside your fax machine.
Allow clearance around the outlet
Don’t stack boxes or furniture around the outlet.
Use caution when carrying the fax
Lift and carry the fax machine as described in your
operating instructions. Some fax machines require
two people to safely and properly carry.
Use supplies manufactured
specifically for Imagistics fax
machines
Using toner cartridges and other supplies that are
not manufactured specifically for Imagistics
machines may affect the operation of your unit.
Storing and handling toner cartridges and drum unit
To avoid damage to your fax machine and to assure the best performance possible,
follow these guidelines when storing and handling toner cartridges and drum unit:
Store the cartridge
Store the cartridge at a constant temperature within a range of 32º F to 95º F (0º C
to 35º C). To avoid dew do not store cartridges in locations subject to extreme fluctu-
ation of temperature and humidity.
Do not stand the cartridge on its end and do not store it
upside down.
Do not open the protective bag of the cartridge until you are
ready to install the cartridge.
Do not store cartridges and drums in areas of:
• Direct sunlight
• Dusty conditions
• Near floppy disks or other computer media, computer screens, or any other
materials sensitive to magnetic fields.
DO NOT BURN TONER CARTRIDGES!
The toner powder is extremely flammable. Exposure to
flame can cause toner cartridges to burn or explode,
causing serious injury.
Be careful not to get the toner powder in
your eyes.
If the toner powder gets in your eyes, wash your eyes well
and see a doctor.
Keep cartridges away from water or oil.
Do not expose cartridges or drums to direct
sunlight.
Do not expose the cartridges or drums to
static or other electrical shock.

Supplies and Services
Ordering Supplies, Accessories and Options
There are a number of supply, accessory and optional items you can order for your
DL170. They can be ordered from either Imagistics Supply Line or from your
local Imagistics Sales Office. When placing an order, be sure to have your model
number, serial number and customer account number ready .
SUPPLIES Reorder
Item Number Description
Toner Cartridge823-4One (1) Cartridge
Drum Unit823-5One (1) Drum
Recording Paper
Letter -size 471-1 8.5” x 11” (case: 10 reams)
Legal-size 462-1 8.5” x 14” (case: 6 reams)
Document Carrier 802-8 Transparent folder for
transmission of
non-conforming originals
OK Stamp 806-2 OK Stamp refill
ACCESSORIES Reorder
Item Number Description
Paper Cassettes
500-sheet 6429744* Universal cassette with feeder
500-sheet 823-2 Replacement cassette
Document T rays 822-6 Original document feed tray
823-0 Receive Extension tray
Handset 6429748* Telephone handset
Power Cord 290087905* 3-prong AC power cord
Operator ’s Guide FX30074** Manual
*Order through your local Imagistics Sales Office
**May also be ordered through the Imagistics Diagnostic Center (USA only)
Serviceand Supply Information
Service on all Ima gisti cs facsimile products is available in virtually all of the
principal cities throughout the United States, Canada, U.K. and Australia. In case
of a malfunction, or for additional information, please call the Imagistics
Facsimile Diagnostic Center .
Diagnostic
Center Phone Supply Supply
Number Phone Number Fax Number
United States 800-243-5556* 800-462-6797 800-832-1869
Canada (English) 800-668-9194 800-263-4660 800-441-9823
Canada (French) 800-387-0185 800-263-4660 800-441-9823
United Kingdom 01279-443431 01279-456519 01279-456510
Australia Call your local office
*In the United States, you can fax questions to the Imagistics
Diagnostic Center at 800-243-5556. Note: Please be sure to include
your phone, fax, model and serial number.
When calling for service or supplies, please be prepared to provide the
following information:
Model Number:
Serial Number:
Customer Account Number:
Company Name:
Machine Phone Number:
Postcode (U.K.):
For service on all other Imagistics products, please call your
Imagistics Service Branch.

These instructions are divided into the following sections.
•
“Getting started” (page 1.1) describes how to set up your
machine, operating tips and some important settings that you
should perform before you use your machine.
•
“Basic operations” (page 2.1) describes the basic operations of
the transmission, reception and copying.
•
“Advanced features” (page 3.1) describes the convenient features
of your machine.
•
“Changing the default settings” (page 4.1) describes how to
change the settings of your machine.
•
Finally, “Just in case … ” (page 5.1) helps you if you ever have a
problem with your machine. It also tells you how to give your
machine the kind of easy, sensible care that should keep troubles to
a minimum.
Find your serial number and write it down
Please note that your machine’s serial
number is located on the bar code label
as shown on the drawing at right. Use
the blank at the bottom of this column
to copy this down before you set up
your machine.
Close up, the bar code label looks some-
thing like this, but with a different set of
numbers:
Please copy down your machine’s serial number below for future reference, and note
the machine’s model number:
My machine’s serial number: ________________________________________
Serial numbers or etc.
Welcome to your Imagistics fax machine!
Model: DL17
Imagistics Product Code DL17

Getting started
Packaging contents . . . . . . . . . . . . . . . . . . . . . . . . . . . . . . . . . . . . . . . . . . . . . 1.1
Parts of your machine . . . . . . . . . . . . . . . . . . . . . . . . . . . . . . . . . . . . . . . . . . . 1.1
Control Panel Overview . . . . . . . . . . . . . . . . . . . . . . . . . . . . . . . . . . . . . . . . . . 1.3
Setting up . . . . . . . . . . . . . . . . . . . . . . . . . . . . . . . . . . . . . . . . . . . . . . . . . . . . . 1.5
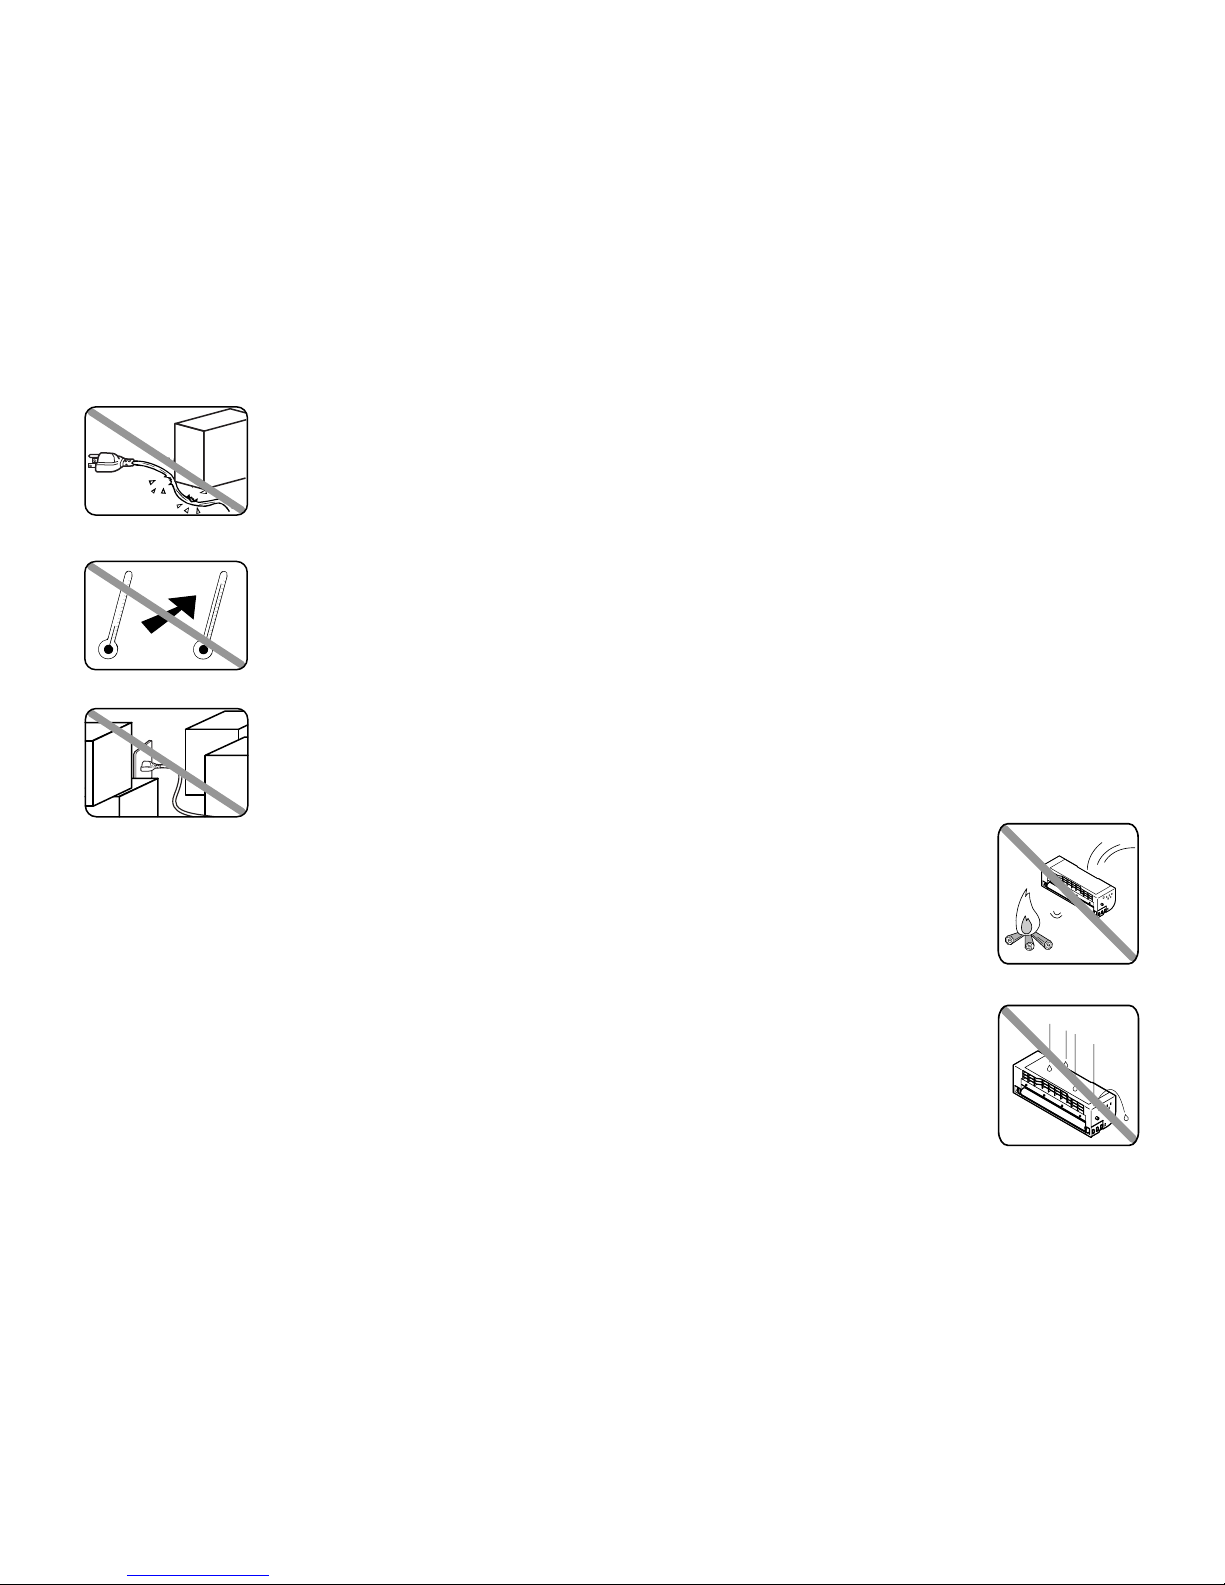
Pick an installation spot . . . . . . . . . . . . . . . . . . . . . . . . . . . . . . . . . . . . . . . 1.5
Power tips . . . . . . . . . . . . . . . . . . . . . . . . . . . . . . . . . . . . . . . . . . . . . . . . . . 1.5
Unlocking the mirror carriage . . . . . . . . . . . . . . . . . . . . . . . . . . . . . . . . . . 1.5
Installing the printing supplies . . . . . . . . . . . . . . . . . . . . . . . . . . . . . . . . . 1.6
Attach the paper-handling parts . . . . . . . . . . . . . . . . . . . . . . . . . . . . . . . . 1.7
Plug in and power up . . . . . . . . . . . . . . . . . . . . . . . . . . . . . . . . . . . . . . . . . 1.7
Turning off the transport mode . . . . . . . . . . . . . . . . . . . . . . . . . . . . . . . . . 1.8
Adjust the monitor speaker’s volume . . . . . . . . . . . . . . . . . . . . . . . . . . . . 1.8
Loading paper . . . . . . . . . . . . . . . . . . . . . . . . . . . . . . . . . . . . . . . . . . . . . . . 1.8
Operating tips . . . . . . . . . . . . . . . . . . . . . . . . . . . . . . . . . . . . . . . . . . . . . . . . . 1.11
Changing modes . . . . . . . . . . . . . . . . . . . . . . . . . . . . . . . . . . . . . . . . . . . . 1.11
Turning off the power . . . . . . . . . . . . . . . . . . . . . . . . . . . . . . . . . . . . . . . . 1.11
How to operate the machine . . . . . . . . . . . . . . . . . . . . . . . . . . . . . . . . . . . 1.11
Entering characters . . . . . . . . . . . . . . . . . . . . . . . . . . . . . . . . . . . . . . . . . 1.12
Searching the functions using the cursor key . . . . . . . . . . . . . . . . . . . . . 1.13
Function table . . . . . . . . . . . . . . . . . . . . . . . . . . . . . . . . . . . . . . . . . . . . . . . . 1.14
EasyStart (Initial settings) . . . . . . . . . . . . . . . . . . . . . . . . . . . . . . . . . . . . . . 1.18
Getting started . . . . . . . . . . . . . . . . . . . . . . . . . . . . . . . . . . . . . . . . . . . . . 1.18
Clearing stored settings . . . . . . . . . . . . . . . . . . . . . . . . . . . . . . . . . . . . . . 1.18
Entering initial settings . . . . . . . . . . . . . . . . . . . . . . . . . . . . . . . . . . . . . . 1.18
Basic Operations
Sending faxes . . . . . . . . . . . . . . . . . . . . . . . . . . . . . . . . . . . . . . . . . . . . . . . . . . 2.1
Guidelines . . . . . . . . . . . . . . . . . . . . . . . . . . . . . . . . . . . . . . . . . . . . . . . . . . 2.1
Memory transmission . . . . . . . . . . . . . . . . . . . . . . . . . . . . . . . . . . . . . . . . . 2.3
Memory overflow message . . . . . . . . . . . . . . . . . . . . . . . . . . . . . . . . . . . . . 2.3
Quick memory transmission . . . . . . . . . . . . . . . . . . . . . . . . . . . . . . . . . . . 2.3
Real time transmission (Non-memory transmission) . . . . . . . . . . . . . . . . 2.3
Sending a fax using the
ADF
. . . . . . . . . . . . . . . . . . . . . . . . . . . . . . . . . . . . 2.4
Sending a fax using the
FBS
glass . . . . . . . . . . . . . . . . . . . . . . . . . . . . . . . 2.5
Sending a fax using monitor/call key or a handset . . . . . . . . . . . . . . . . . . 2.6
Redialing . . . . . . . . . . . . . . . . . . . . . . . . . . . . . . . . . . . . . . . . . . . . . . . . . . . 2.7
Reviewing or canceling commands . . . . . . . . . . . . . . . . . . . . . . . . . . . . . . 2.8
Printing a delayed command list . . . . . . . . . . . . . . . . . . . . . . . . . . . . . . . . 2.9
Printing a stored document . . . . . . . . . . . . . . . . . . . . . . . . . . . . . . . . . . . . 2.9
Receiving faxes . . . . . . . . . . . . . . . . . . . . . . . . . . . . . . . . . . . . . . . . . . . . . . . . 2.10
Answering calls manually . . . . . . . . . . . . . . . . . . . . . . . . . . . . . . . . . . . . 2.10
Reception modes . . . . . . . . . . . . . . . . . . . . . . . . . . . . . . . . . . . . . . . . . . . . 2.10
How to select the fax reception mode: . . . . . . . . . . . . . . . . . . . . . . . . . . . 2.11
If supplies run out during fax reception . . . . . . . . . . . . . . . . . . . . . . . . . 2.11
Making copies . . . . . . . . . . . . . . . . . . . . . . . . . . . . . . . . . . . . . . . . . . . . . . . . . 2.12
Your machine’s copier features . . . . . . . . . . . . . . . . . . . . . . . . . . . . . . . . . 2.12
Basic copy procedure . . . . . . . . . . . . . . . . . . . . . . . . . . . . . . . . . . . . . . . . . 2.12
Single copy . . . . . . . . . . . . . . . . . . . . . . . . . . . . . . . . . . . . . . . . . . . . . . . . . 2.12
Stacking multiple copies . . . . . . . . . . . . . . . . . . . . . . . . . . . . . . . . . . . . . . 2.13
Sorting multiple copies (using ADF) . . . . . . . . . . . . . . . . . . . . . . . . . . . . 2.13
Enlarged or reduced copies . . . . . . . . . . . . . . . . . . . . . . . . . . . . . . . . . . . 2.13
Using the bypass tray . . . . . . . . . . . . . . . . . . . . . . . . . . . . . . . . . . . . . . . . 2.14
Memory overflow message . . . . . . . . . . . . . . . . . . . . . . . . . . . . . . . . . . . . 2.14
If the paper runs out while copying . . . . . . . . . . . . . . . . . . . . . . . . . . . . . 2.14
Making copy settings . . . . . . . . . . . . . . . . . . . . . . . . . . . . . . . . . . . . . . . . 2.15
Special copy function . . . . . . . . . . . . . . . . . . . . . . . . . . . . . . . . . . . . . . . . 2.16
Copy protection . . . . . . . . . . . . . . . . . . . . . . . . . . . . . . . . . . . . . . . . . . . . . 2.18
Using your fax machine as a phone . . . . . . . . . . . . . . . . . . . . . . . . . . . . . . . 2.19
Dialing a telephone number . . . . . . . . . . . . . . . . . . . . . . . . . . . . . . . . . . . 2.19
On-hook dialing . . . . . . . . . . . . . . . . . . . . . . . . . . . . . . . . . . . . . . . . . . . . . 2.19
Redial . . . . . . . . . . . . . . . . . . . . . . . . . . . . . . . . . . . . . . . . . . . . . . . . . . . . . 2.19
Call request . . . . . . . . . . . . . . . . . . . . . . . . . . . . . . . . . . . . . . . . . . . . . . . . 2.19
Changing the dialing type . . . . . . . . . . . . . . . . . . . . . . . . . . . . . . . . . . . . 2.19
In the event of a power failure . . . . . . . . . . . . . . . . . . . . . . . . . . . . . . . . . 2.19
Attaching a phone or answering machine . . . . . . . . . . . . . . . . . . . . . . . . 2.20
Advanced Features
Autodialer . . . . . . . . . . . . . . . . . . . . . . . . . . . . . . . . . . . . . . . . . . . . . . . . . . . . . 3.1
Autodialer basics . . . . . . . . . . . . . . . . . . . . . . . . . . . . . . . . . . . . . . . . . . . . . 3.1
Using one-touch keys . . . . . . . . . . . . . . . . . . . . . . . . . . . . . . . . . . . . . . . . . 3.2
Using speed-dial numbers . . . . . . . . . . . . . . . . . . . . . . . . . . . . . . . . . . . . . 3.5
Call group dialing . . . . . . . . . . . . . . . . . . . . . . . . . . . . . . . . . . . . . . . . . . . . 3.8
EasyDial directory dialing . . . . . . . . . . . . . . . . . . . . . . . . . . . . . . . . . . . . . 3.9
Broadcasting . . . . . . . . . . . . . . . . . . . . . . . . . . . . . . . . . . . . . . . . . . . . . . . . . . 3.10
Making changes to broadcasts . . . . . . . . . . . . . . . . . . . . . . . . . . . . . . . . . 3.10
Delayed transmission . . . . . . . . . . . . . . . . . . . . . . . . . . . . . . . . . . . . . . . . . . . 3.11
Setting up a delayed transmission . . . . . . . . . . . . . . . . . . . . . . . . . . . . . . 3.11
Batch transmission . . . . . . . . . . . . . . . . . . . . . . . . . . . . . . . . . . . . . . . . . . . . 3.12
Table of Contents

Creating or modifying a batch box . . . . . . . . . . . . . . . . . . . . . . . . . . . . . . 3.12
Printing a list of batch boxes . . . . . . . . . . . . . . . . . . . . . . . . . . . . . . . . . . 3.13
Storing a document for batch transmission . . . . . . . . . . . . . . . . . . . . . . 3.13
Printing a list of stored batch documents . . . . . . . . . . . . . . . . . . . . . . . . 3.13
Printing a document stored in a batch box . . . . . . . . . . . . . . . . . . . . . . . 3.13
Erasing a document stored in a batch box . . . . . . . . . . . . . . . . . . . . . . . 3.14
Erasing an empty batch box . . . . . . . . . . . . . . . . . . . . . . . . . . . . . . . . . . . 3.14
Polling . . . . . . . . . . . . . . . . . . . . . . . . . . . . . . . . . . . . . . . . . . . . . . . . . . . . . . . 3.15
Regular polling . . . . . . . . . . . . . . . . . . . . . . . . . . . . . . . . . . . . . . . . . . . . . 3.15
Being polled . . . . . . . . . . . . . . . . . . . . . . . . . . . . . . . . . . . . . . . . . . . . . . . . 3.15
Printing a stored polling document . . . . . . . . . . . . . . . . . . . . . . . . . . . . . 3.15
Erasing a stored polling document . . . . . . . . . . . . . . . . . . . . . . . . . . . . . 3.15
Securing polling access to your fax machine . . . . . . . . . . . . . . . . . . . . . . 3.15
Special features . . . . . . . . . . . . . . . . . . . . . . . . . . . . . . . . . . . . . . . . . . . . . . . 3.17
Soft keys . . . . . . . . . . . . . . . . . . . . . . . . . . . . . . . . . . . . . . . . . . . . . . . . . . 3.17
Macro keys . . . . . . . . . . . . . . . . . . . . . . . . . . . . . . . . . . . . . . . . . . . . . . . . . 3.18
Fax & Copy . . . . . . . . . . . . . . . . . . . . . . . . . . . . . . . . . . . . . . . . . . . . . . . . 3.21
Setting the activity journal . . . . . . . . . . . . . . . . . . . . . . . . . . . . . . . . . . . 3.21
Setting the reports:
TCR
s and
RCR
s . . . . . . . . . . . . . . . . . . . . . . . . . . . . . . 3.22
Cover page . . . . . . . . . . . . . . . . . . . . . . . . . . . . . . . . . . . . . . . . . . . . . . . . . 3.23
Distinctive Ring Detection (DRD) . . . . . . . . . . . . . . . . . . . . . . . . . . . . . . 3.24
Call request . . . . . . . . . . . . . . . . . . . . . . . . . . . . . . . . . . . . . . . . . . . . . . . . 3.25
The power of Multitasking . . . . . . . . . . . . . . . . . . . . . . . . . . . . . . . . . . . . 3.26
F-Code Boxes . . . . . . . . . . . . . . . . . . . . . . . . . . . . . . . . . . . . . . . . . . . . . . . 3.26
Programmable one-touch keys . . . . . . . . . . . . . . . . . . . . . . . . . . . . . . . . . 3.36
Security features . . . . . . . . . . . . . . . . . . . . . . . . . . . . . . . . . . . . . . . . . . . . . . 3.50
The passcode . . . . . . . . . . . . . . . . . . . . . . . . . . . . . . . . . . . . . . . . . . . . . . . 3.50
Security reception . . . . . . . . . . . . . . . . . . . . . . . . . . . . . . . . . . . . . . . . . . . 3.50
Masking the
PIN
. . . . . . . . . . . . . . . . . . . . . . . . . . . . . . . . . . . . . . . . . . . . . 3.52
Setting Block Junk Fax . . . . . . . . . . . . . . . . . . . . . . . . . . . . . . . . . . . . . . 3.54
Using department codes . . . . . . . . . . . . . . . . . . . . . . . . . . . . . . . . . . . . . . 3.56
Changing the default settings
Settings for transmission . . . . . . . . . . . . . . . . . . . . . . . . . . . . . . . . . . . . . . . . . 4.1
Scan settings . . . . . . . . . . . . . . . . . . . . . . . . . . . . . . . . . . . . . . . . . . . . . . . . 4.1
Memory transmission . . . . . . . . . . . . . . . . . . . . . . . . . . . . . . . . . . . . . . . . . 4.2
Quick Memory transmission . . . . . . . . . . . . . . . . . . . . . . . . . . . . . . . . . . . 4.2
TTI transmission . . . . . . . . . . . . . . . . . . . . . . . . . . . . . . . . . . . . . . . . . . . . . 4.2
Settings for reception . . . . . . . . . . . . . . . . . . . . . . . . . . . . . . . . . . . . . . . . . . . . 4.3
Print settings . . . . . . . . . . . . . . . . . . . . . . . . . . . . . . . . . . . . . . . . . . . . . . . . 4.3
Setting the number of rings . . . . . . . . . . . . . . . . . . . . . . . . . . . . . . . . . . . . 4.4
Image Rotation . . . . . . . . . . . . . . . . . . . . . . . . . . . . . . . . . . . . . . . . . . . . . . 4.4
Settings for dialing . . . . . . . . . . . . . . . . . . . . . . . . . . . . . . . . . . . . . . . . . . . . . . 4.5
Changing the dialing pause length . . . . . . . . . . . . . . . . . . . . . . . . . . . . . . 4.5
Changing redial settings . . . . . . . . . . . . . . . . . . . . . . . . . . . . . . . . . . . . . . 4.5
Settings for copying . . . . . . . . . . . . . . . . . . . . . . . . . . . . . . . . . . . . . . . . . . . . . 4.6
Copy scan settings . . . . . . . . . . . . . . . . . . . . . . . . . . . . . . . . . . . . . . . . . . . 4.6
Adjusting the copy print settings . . . . . . . . . . . . . . . . . . . . . . . . . . . . . . . . 4.6
Changing the copy auto reset time . . . . . . . . . . . . . . . . . . . . . . . . . . . . . . 4.7
Setting copy auto . . . . . . . . . . . . . . . . . . . . . . . . . . . . . . . . . . . . . . . . . . . . . 4.7
Setting Negative/Positive . . . . . . . . . . . . . . . . . . . . . . . . . . . . . . . . . . . . . . 4.7
Setting combine . . . . . . . . . . . . . . . . . . . . . . . . . . . . . . . . . . . . . . . . . . . . . . 4.7
Settings for operation . . . . . . . . . . . . . . . . . . . . . . . . . . . . . . . . . . . . . . . . . . . 4.8
Setting the silent mode . . . . . . . . . . . . . . . . . . . . . . . . . . . . . . . . . . . . . . . . 4.8
Primary mode . . . . . . . . . . . . . . . . . . . . . . . . . . . . . . . . . . . . . . . . . . . . . . . 4.9
Printing your settings . . . . . . . . . . . . . . . . . . . . . . . . . . . . . . . . . . . . . . . . 4.10
Printer options . . . . . . . . . . . . . . . . . . . . . . . . . . . . . . . . . . . . . . . . . . . . . . . . 4.11
Print the Demo Page . . . . . . . . . . . . . . . . . . . . . . . . . . . . . . . . . . . . . . . . . 4.11
Print the Printer Configuration Page . . . . . . . . . . . . . . . . . . . . . . . . . . . 4.11
Print PCL Font List . . . . . . . . . . . . . . . . . . . . . . . . . . . . . . . . . . . . . . . . . 4.11
Print NIC status . . . . . . . . . . . . . . . . . . . . . . . . . . . . . . . . . . . . . . . . . . . . 4.11
Set TCP/IPAddress . . . . . . . . . . . . . . . . . . . . . . . . . . . . . . . . . . . . . . . . . . 4.11
Just in case …
Clearing paper jams . . . . . . . . . . . . . . . . . . . . . . . . . . . . . . . . . . . . . . . . . . . . . 5.1
If an original document jams . . . . . . . . . . . . . . . . . . . . . . . . . . . . . . . . . . . 5.1
If a printout jams inside your machine . . . . . . . . . . . . . . . . . . . . . . . . . . . 5.2
Print quality problems . . . . . . . . . . . . . . . . . . . . . . . . . . . . . . . . . . . . . . . . . . . 5.3
Troubleshooting . . . . . . . . . . . . . . . . . . . . . . . . . . . . . . . . . . . . . . . . . . . . . . . . 5.5
Errors . . . . . . . . . . . . . . . . . . . . . . . . . . . . . . . . . . . . . . . . . . . . . . . . . . . . . . 5.9
Caring for your fax machine . . . . . . . . . . . . . . . . . . . . . . . . . . . . . . . . . . . . . 5.12
Corrective cleaning . . . . . . . . . . . . . . . . . . . . . . . . . . . . . . . . . . . . . . . . . . 5.12
If you have unsatisfactory printout quality . . . . . . . . . . . . . . . . . . . . . . 5.13
Frequently asked questions . . . . . . . . . . . . . . . . . . . . . . . . . . . . . . . . . . . . . . 5.14
General questions . . . . . . . . . . . . . . . . . . . . . . . . . . . . . . . . . . . . . . . . . . . 5.14
Sending faxes . . . . . . . . . . . . . . . . . . . . . . . . . . . . . . . . . . . . . . . . . . . . . . 5.14
We’re here to help you! . . . . . . . . . . . . . . . . . . . . . . . . . . . . . . . . . . . . . . . 5.14
Receiving faxes . . . . . . . . . . . . . . . . . . . . . . . . . . . . . . . . . . . . . . . . . . . . . 5.16
Polling . . . . . . . . . . . . . . . . . . . . . . . . . . . . . . . . . . . . . . . . . . . . . . . . . . . . 5.16
Glossary . . . . . . . . . . . . . . . . . . . . . . . . . . . . . . . . . . . . . . . . . . . . . . . . . . . . . 5.17
Appendix and index
Specifications . . . . . . . . . . . . . . . . . . . . . . . . . . . . . . . . . . . . . . . . . . . . . . . . . .
AI
.1
Regulatory information . . . . . . . . . . . . . . . . . . . . . . . . . . . . . . . . . . . . . . . . .
AI
.3
Index . . . . . . . . . . . . . . . . . . . . . . . . . . . . . . . . . . . . . . . . . . . . . . . . . . . . . . . .
AI
.4

Getting started
This chapter describes how to
set up your machine, operating tips
and some important settings
before you use your machine
Packaging contents 1.1
Parts of your machine 1.1
Control Panel Overview 1.3
Setting up 1.5
Operating tips 1.11
Function table 1.14
EasyStart (Initial settings) 1.18

1.1
Getting started
Packaging contents
Included in your machine’s packaging:
1. Main unit with 500-sheet paper cassette installed
2. drum units 7. AC power cord
3. Toner cartridge 8. Operating instructions
4. Document tray 9. Paper size stickers
5. Extension paper tray 10. One-touch labels
6. Telephone line cord 11. Soft Key labels
Note: Be sure to save the box (or boxes) and packing materials for reshipment.
Parts of your machine
Note: Any terms used here that are unclear to you right now will be explained in
detail in the coming pages.
1Control Panel — The keys you use to operate your machine. (See pages
1.3–1.4 for more details.)
2ADF (Automatic Document Feeder) — TheADF automatically feeds
original document into the machine, one at a time. It can hold up to 50 pages.
3Scanner cover — Opens this cover to remove original document jams.
4Document guides — Adjust these to fit the width of the original document
so it will feed properly into the machine.
5Document tray — Holds original documents placed for scanning into the
machine.
6Platen cover — Opens to scan an original document using the FBS (Flatbed
Scanner) glass.
7Original document exit — Where your original document comes out after
being scanned.
8Top cover — Opens to provide access for changing the toner and drum units
(or, occasionally, fixing printout jams).
1
2
345
6
7
8
9
13
14
15
16
17 12
11
10
18
REPORT
FLASH
MONOTOR
/CALL
MEMORY
TRANSMIT
TTI
TRANSMIT
SECURITY
SORT
COVER
PAGE
NEGATIVE
/POSITIVE
FAX©
ENERGY
SAVING
COPY/FAX
MODE
SOFTKEY
1
23
4567
8910
11

1.2
Getting started
9
AC
power switch — Turns your fax machine on and off.
10
AC
power jack — Where you plug in the
AC
power cord.
11 Bypass tray — Open and use the bypass tray to use the paper that cannot
be set in the paper cassette. It can hold up to 50 sheets of paper. For details
about paper capacity of the bypass tray, see “Specifications,” pages
AI
.1–
AI
.2.
12 Side cover — Open to fix a printout jam.
13 Side cover release — Pull this to open the side cover.
14 Top cover release — Pull up on this to open the top cover.
15 Recording paper size sticker — Shows the size of the paper that is set in
the paper cassette.
16 Recording paper level indicator — Shows the level of the current paper
supply without requiring you to open the paper cassette.
17 Paper cassette — Set paper here. It can hold up to 500 sheets. For details
about paper capacity of the paper cassette, see “Specifications,” pages
AI
.1–
AI
.2.
18 FBS (Flatbed Scanner) glass — Makes it possible for you to fax or copy
objects and even irregularly shaped sheets, just as a conventional copier. 19
LINE
jack — Where you plug in the telephone line cord. The other end of the
cord plugs into a wall telephone jack.
20
PHONE
2 jack — If you connect a second telephone to your machine, this is
where you plug in the cord.
21
PHONE
1jack — Where you plug in the optional handset.
22 RS-232C interface port (optional) — Where you plug in the RS-232C
cable, when you use the optional RS-232C interface kit.
23
PRINTER PARALLEL
port (optional) — Where you plug in the printer cable,
when you use the optional printer controller.
24 Extension paper tray — Holds up the printout after it emerges.
25 Printed document exit — Where the printout emerges.
26Handset (optional )— Used for voice communication. This handset is avail-
able from your authorized Imagistics dealer, and can be added when you
purchase DL170 or as an upgrade afterward.
19 20 21
26
25
24
23
22
LINE
PHONE1PHONE2

1.3
Getting started
1
COPY
light — Glows when the machine is in the Copy mode.
2
FAX
light — Glows when the machine is in the Fax mode.
3
ALARM
light — Glows when a problem occurs during fax communication,
printing or scanning. The light stays on until the machine prints a Check
Message report.
4
COMM
. light — Glows when the machine is communicating with another
machine.
5
MEMORY RECEIVE
light — Glows when the machine is receiving an incoming
fax document into its electronic memory.
6Soft Keys — Shortcut keys. Any function that can be turned on or off can be
programmed into these three keys. If the light above one of these keys glows,
this indicates the setting that’s been programmed into it (see page 3.17) is
turned on. These keys are programmed at the factory to turn the following
functions on or off:
Soft key 1:
REPORT
— Press to turn the confirmation report feature on or off
for the next fax transmission.
Soft key 2:
MEMORY TRANSMISSION
— Selects which transmission mode your
fax machine uses, whether Memory transmission or Real time transmission
(see page 2.3).
Soft key 3:
MONITOR
/
CALL
— Turns the monitor speaker off or on. When it’s on,
it allows you to hear the call you’re making. When using this feature, you can
only hear the communication taking place. You cannot be heard unless you
use a handset (optional). When sending a fax, this key also activates the call
request feature.
7
REDIAL
/
PAUSE
— Redials the last number you dialed. In certain operations, it
also produces a special pause character which can be useful when dialing
long-distance numbers.
8
DIALING OPTIONS
— Press this to insert special symbols into telephone num-
bers (see page 3.1).
9
BROADCAST
— Press to send a broadcast fax (sending the same document to
more than one location).
10
GROUP
— Press this to set up a fax transmission to a call group, a set of fax
numbers which will receive the same document in one fax operation.
11
ADVANCED FUNCTIONS
—
In Fax mode: Chooses from following several fax options – delayed transmis-
sion, Polling, F-Code transmission, F-Code polling and Batch transmission.
Or, in Copy mode: Chooses from following copy options – Nega/Posi copy,
Combine copy or Ultra copy.
12
REVIEW COMMANDS
— Press to review pending fax commands or to view a
brief description of delayed commands.
Control Panel Overview
12 345 6 789101112 13 14
15161718192021222324252627
28

1.4
Getting started
13
START
— Press to begin a fax transmission, reception or copying.
14
STOP
— Stops the current operation and ejects a document from the ADF.
15
COPY RESET
— Use in copy mode only. Press to reset the copy settings to their
defaults.
16 Numeric keypad — Just like the numeric keys on a regular tone-dialing
phone. Use these to dial phone and fax numbers and to enter numbers when
you’re setting up the machine.
17 In Fax mode:
SPEED DIAL
/
TEL INDEX
— Starts a speed-dialing operation, which you finish by
pushing three of the keys on the numeric keypad. Also displays one-touch and
speed-dial entries sorted alphanumerically, as in a telephone directory. (See
page 3.9.)
Or, in Copy mode:
ZOOM
– Press to turn on or off the
ZOOM
light.
When the
ZOOM
light glows, you can set the copy reproduction ratio at 1%
steps by using or key.
When the
ZOOM
light is not lit, you can choose one of several fixed copy repro-
duction ratio by using or key.
18 Program key — Any function can be started by first pressing this key and
then entering the function number.
19 Cursor Keys
— Scrolls (moves) through features and command options as dis-
played on the
LCD
.
20
ENTER
— It confirms user settings, begins operations and moves through
command levels.
21
CANCEL
— Press to delete characters on the
LCD
and cancel commands you
have entered into the machine.
22
PAPER SIZE
/
NEXT DOC
—
In Copy mode:
Selects the printout paper you want to use.
While scanning a document:
Press to tell your machine to scan one or more additional documents after the
current scanning ends.
23
DOCUMENT SIZE
— Instructs the fax to scan letter-, legal or half-letter sized
documents when you use the FBS (flatbed scanner) glass.
24 Liquid crystal display (
LCD
)— Shows the machine’s status and lets you
see what you’re programming into the machine. The display shows 2 lines, 20
characters per line. If the
LCD
is blank, the machine is off.
25 Printer status lights — Green lights indicate the acceptable paper sources.
Red light will glow if the printer problem (such as paper jam) occurred.
26
CONTRAST
— Press to adjust the contrast level.
27
DOCUMENT
/
RESOLUTION
—
In Fax mode: Press to toggle among the three resolution modes and grayscale.
Or, in Copy mode: Press to select the type of your document.
28
COPY
/
FAX
— Press this key to toggle between Fax mode and Copy mode.
29 Macro Keys — Programming the Macro keys (
M
1 and
M
2) can reduce many
steps of the operation to a simple press of a key. You can “teach” the Macro
keys to carry out one of the several operations (see pages 3.18–3.20).
30 Programmable One-Touch Keys — The keys labeled P1 and P2, this lets
you teach your machine an advanced multi-step function just once, then
recall the function at any time by pressing one of these keys.
31 One-Touch Keys — The keys labeled 01-55 offer one-touch dialing conve-
nience. Also, you may use these keys to enter the characters when you are
setting up the machine.
ALPHABET CODE

1.5
Getting started
Pick an installation spot
Where should you install your fax machine? The location should be:
•Clean ——-Dust buildup can damage your machine. (However, do not use a
cover!)
•In the open —Allow at least 12 inches of clearance around your machine. Be
sure that you never cover the machine. Its vents must be able to “breathe.”
•Away from direct sunlight — This helps avoid overheating.
•Dry — Avoid any location where splatters or sprays (such as from a water foun-
tain) could reach your fax machine.
•Level, and vibration—-free.
•Near a phone jack — Your fax machine uses a standard (modular) telephone
jack, also known as an
RJ
—-11.
•Near an
AC
power outlet — The
AC
power cord is about 6 feet long when
stretched to its limit, and the power cord should never be stretched to its limit.
Power tips
•Use a standard three—-pronged 120
VAC
outlet.
•Make sure the outlet isn’t controlled by a wall switch.
If it is, you’ll risk occasional shutoffs to the machine, causing you
to lose fax messages.
•Don’t use an outlet which also is supplying power to a
large appliance, such as a refrigerator or air conditioner.
Such high—-consumption appliances can cause “draw—-downs”
(temporary drops in the power available for other equipment on
the circuit) which could damage your fax machine.
•Use an electrical surge suppressor, preferably one which guards both tele-
phone and electrical lines. This device helps to shield your fax machine from
damaging high—-voltage electrical surges.
Voltage requirements: 120
VAC
± 10%, 50–60% Hz.
Power consumption: Standby Transmission Reception Copying Maximum
21.2
W
22.0
W
23.1
W
1060
W
1150
W
Setting up

1.6
Getting started
Installing the printing supplies
Your fax prints incoming faxes and copies with a reliable 600 dpi print engine. Your
fax requires two types of printing supplies (sometimes also called consumables):
• The drum unit —- It yields 16,000 “normal” letter—-sized printouts (see
“Specifications,” pages
AI
.1–
AI
.2). By “normal,” we’re referring to the amount of
text and/or graphics on each page. This is based on an industry—-standard test
document.
• The toner cartridge —- It yields 10,000 “normal”, letter—-sized printouts (see
“Specifications,” pages
AI
.1–
AI
.2 and “the ITC-T test document #1,”
AI
.9).
To install these supplies:
Important: Gently close the top cover so that you don’t catch your hands, possibly
injuring them.
1Pull up the top cover
release and open the top
cover.
2Slide the printer cover
release and open the
printer cover.
3Unpack a new toner cartridge from its
carton. Then, holding the toner car-
tridge with both hands, slowly shake it
to distribute the toner evenly inside the
cartridge.
Note: Do not touch the roller of the
toner cartridge.
4Gently install the toner cartridge in
the printer, making sure the toner car-
tridge’s two pins fit in the slits inside
the printer frame.
5Unpack the drum units from its carton.
Note: Shield the drum units from light, especially strong light. Later, if you
have to remove the units from the machine, immediately wrap it in a
thick cloth to protect it from light.
6Gently install the drum unit in the
printer, making sure the drum unit’s
four pins fit in the slits inside the
printer frame.
7Gently clean the LED print head
using the cleaning paper included in
the toner cartridge carton box.
For best print quality, you should
clean the LED head every time you
change the new toner cartridge.
Note: Do not use abrasive materials
on the LED print head, and
do not subject the LED print
head to strongly shock.
8Gently close the printer cover.
9Close the top cover. Be sure to push on a portion of the cover to lock it into its
original (closed) position.
Note: The fax machine will not work if the cover isn’t closed properly.

Attach the paper—-handling parts
1Attach the document tray by inserting it into the appropriate holes, as shown.
2Attach the extension paper tray by inserting its two pegs at a slightly upward
angle into the appropriate holes, as shown.
Plug in and power up
1Plug one end of the telephone line cord into the
LINE
jack on the machine’s
rear side and the other end into a standard telephone wall jack.
2Plug the non—-pronged end of the AC power cord into the AC power cord jack
on the right rear side of the machine and the pronged end into a 120 V electri-
cal outlet (preferably on a surge suppressor, as mentioned on page 1.5).
3Use the AC power switch to turn on your machine. The markings are interna-
tional standards: I means on, O means off.
It will take a few seconds for the machine to warm up. The
LCD
shows:
When the machine is ready to use (standby mode), you will see:
Fax Ready
Jan 1 2001 0:00
** Warming Up **
1.7
Getting started

Adjust the monitor speaker’s volume
You can set the volume of the monitor speaker.
1Press
MONITOR
/
CALL
on the control panel. You now should hear a dial tone.
And press or of the cursor key. The
LCD
indicates the volume:
2To turn the volume up, press .
To turn the volume down, press .
3Press
MONITOR
/
CALL
again to hang up.
Loading paper
Acceptable paper size and cassette capacity
Paper source Paper type Paper size Capacity
Paper cassette Plain paper*1Letter , Legal , Half-letter 500 sheets
Letter , Legal , Half-letter ,
Plain paper*1A4 , A5 , A6 , F4 , 50 sheets
Bypass Tray Executive , Custom-sized*2
Envelopes DL , CM10 , Monarch 1 sheet
Postcard 3.9” x 5.8” (100 x148mm) 20 sheets
Transparency*3Letter 20 sheets
*1Paper weight: 60 – 90 g/m2
*2(3.8 – 8.5) inches ˘ (5.5 – 14.0) inches (Width ˘ Length): It only can use if the
optional Printer Controller is attached.
*3We recommend: 3M PP2500 for laser printers or equivalent
Note: Do not use any paper which has been creased, wrinkled or has absorbed any
moisture.
Loading paper in paper cassette
Before you load paper, note the following:
• After you loaded paper in paper cassette, you need to “tell” your machine which
paper size, letter—-, legal—- or half letter—-sized, you loaded.
You can do this by the “Setting of the paper size” operation. (See next page.)
Note:If you will be using letter—-sized paper, there’s no need to adjust the cas-
sette; your machine is initially set for Letter—-sized paper. Simply attach
the LTR sticker to the outside of the paper cassette.
1Open the paper cassette from the front of your machine by gently pulling it
toward you.
** Tel Mode **
Volume:JJJJJJJJ
1.8
Getting started
Other manuals for DL170
1
Table of contents
Other imagistics Fax Machine manuals