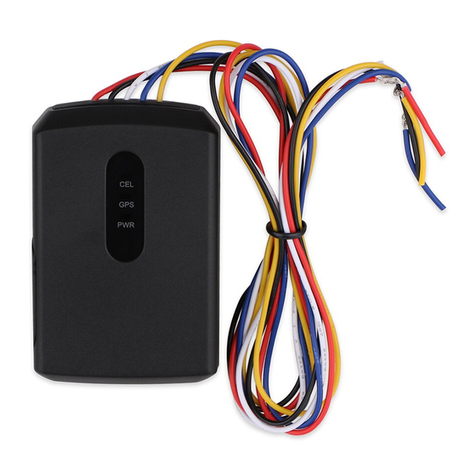
imec tempmate.-G3 User manual

WHPSPDWH* QuickStart Guide
-- 1 --
Welcome
Thanks for choosing the WHPSPDWH* as
your Package Tracking solution!
The purpose of this Quick Start Guide is to
help you get your system up and running
as quickly as possible. The process is
simple and will typically take just a few
minutes of your time.
What’s in this Guide
Welcome ...............................1
Getting Started .........................1
1. Gather what you’ll need................... 1
2. Familiarize yourself with your WHPSPDWH*...2
3. Charge up your Sensor Pack ............... 2
4. Activate Your Wireless Account.............. 2
5. Provision your WHPSPDWH*............... 3
6. Remove Command Module from Sensor Pack . . 3
7. Request Device Password . ................. 3
8. Sign-up and register your device on Findum . . . 4
Appendix ..............................4
LED Light Indications ........................ 4
Getting Started
1. Gather what you’ll need
a) You’ll require:
Charger Cable Battery Charger
Sensor PackCommand
Module
b) All of these components should be inyour
original WHPSPDWH* product package.

WHPSPDWH* QuickStart Guide
-- 2 --
2. Familiarize yourself with your tempmate.-G3
A
B
C
B
C
D
J
C
C
E
G
H
I
F
End View
F
A Command Module F Atmospheric Vents (for
temperature, relative humidity,
and altimeter/pressure)
B Module Release Buttons (2) G Network LED (CDMA Coverage)
C Light Detectors (Ambient,
Infrared)
H Battery LED
D Sensor Pack I Charger LED
E Status Button (Touch-
Sensitive)
J Mini-USB Connector (AC/DC
Charger; USB On-the-Go)
Sensor Packs contain the EDWWHU\
used to power the WHPSPDWH*.
3. Charge up your Sensor Pack
a) In order to provision your WHPSPDWH*
Command Module, you’ll need to have
your Sensor Pack fully charged.
b) To charge your Sensor Pack, simply
plug your charger into any standard
electrical receptacle using the supplied
Battery Charger and cable.
Battery/Sensor Pack
Charger
If your Sensor Pack has been sitting on
the shelf for awhile, the battery charge
may be too low to permit provisioning.
In that case, allow up to six hours of
charging before getting started.
4. Activate Your Wireless Account
a) Contact your wireless service provider
and provide them with the Device
Identifier number of your device.
The Device Identifier is device-specific
serial number found on the back of the
Command Module (see image EHORZ
Device Identifier
Command
Module
b) When they advise you that your account
has been Activated, proceed to step “5.
Provision your WHPSPDWH*”.

WHPSPDWH* QuickStart Guide
-- 3 --
5. Provision your WHPSPDWH*
a) Once your wireless account is activated
and your Sensor Pack fully charged,
plug the pack into the WHPSPDWH*
&RPPDQGModule.
b) Ensure that the Charger LED is ON. The
color will be either red or green.
You can also learn the Provisioning
process by watching our video at
www.LPHFGH
c) Make sure the connection between the
Command Module and the Sensor Pack
is solid and that you hear the confirming
“Click” sound.
i) This step initiates communication
with both your carrier and with
Sendum. While communicating,
both the Network and Battery LEDs
will go on and off periodically.
ii) When complete (about a minute),
both Network and Battery lights will
go solid green (indicating success).
If you don’t get two solid green lights
at the end of the provisioning process,
please refer to our online support FAQ
at www.LPHFGH
6. Remove Command Module from Sensor
Pack
a) To remove the WHPSPDWH* Command
Module, squeeze the two tabs on the
side of the device, then pull the module
out of the Sensor Pack.
b) Your Command Module is now
provisioned and ready for deployment
with any fully charged Sensor Pack.
Before deploying your provisioned
GHYLFHmake sure to fully charge your
Sensor Pack. Note again that this can
take up to six hours.
7. Request Device Password
a) Open your web browser and go to
www.LPHFGHNRQWDNW
b) Provide your contact information
then list your Device Identifiers in the
description field. So we can validate
your account, please use the same
email address you purchased the
devices under.
c) After you submit the form, LPHF will
respond by emailing your passwords to you.

WHPSPDWH* QuickStart Guide
-- 4 --
You will need the Device Identifier and
password to be able to register the
device (and view it’s data) in Findum
software.
8. Sign-up and register your device on
Findum
a) Open up your web browser and go to
Sendum’s web portal (called Findum™)
at www.LPHFGH/findum
b) Unless you already have set up an
account, click the “Don’t have an
account” link.
c) Enter the required information in
each text field. Once the appropriate
information has been entered, and the
terms and conditions read and agreed
to, click the “Signup” button.
d) A message will be displayed informing
you that an email has been sent to you.
e) Open the email sent from the LPHF
application and follow the link to
complete the registration process.
f) If this is the first device to be registered
with the application, you will be
presented with the “Register New
Device” screen.
g) Here it prompts you to turn on the
device, and notifies you that the device
is visibly activated when the LED is on.
Click the “Next” button in the lower
right hand corner to continue.
h) The application will now ask for the
Device Identifier and password. Please
use the password you received from
LPHF Support.
i) Once the Device Identifier and Password
have been entered for the device, click
the “Next” button. This completes the
registration process.
For instructions on how to get started
using Findum software with your
trackers, please visit
www.LPHFGH
Appendix
LED Light Indications
LED Status Description
Network
Green Device in carrier coverage
area
Red Device out of carrier
coverage area
Red
(Blinking)
Device in Airplane Mode.
Note that the device will
automatically go into
Airplane Mode if it is out
of coverage for a period of
time.
Battery
Green Sensor Pack charge level
near full (80%+)
Red Sensor Pack needs
recharging
Red
(Blinking)
Sensor Pack charge level
good (approximately
20-80%)
Charger
Red Sensor Pack is charging
Green Sensor Pack charging is
complete

