2
1.5 Congurazione Relè Wi-Fi Sono del kit espan-
sione con la rete Wi-Fi del Gateway Smartech
Plus.
Ogni “Kit espansione Smartech Plus” è dotato di un Relè
Wi-Fi Sono modicato per funzionare con il Cronoter-
mostato Smartech Plus. Per il suo corretto funzionamento
occorre seguire la seguente procedura di congurazione
alla rete Wi-Fi a cui è collegato anche il Gateway dello
Smartech Plus.
Collegare il Relè come indicato in Fig. 1
N.B.: il Relè è modicato secondo le speciche tecniche
della IMMERGAS SpA, usare solo il Relè della confezione
del “Kit espansione Smartech Plus”. IMMERGAS SpA
declina ogni responsabilità su un uso di un Relè diverso
da quello contenuto nella confezione.
1 Tenere premuto il pulsante presente sul Relè per 10
secondi e poi rilasciare, il Led lampeggerà 2 volte al
secondo;
2 prendere lo smartphone e seguire le istruzioni sotto
riportate:
- andare su Wi-Fi e selezionare la rete "Jotto_RL_
xxxxxx", uscire e aprire il browser e digitare l'indi-
rizzo "192.168.4.1";
- cliccare su "Congure wi";
- la pagina fa vedere le reti Wi-Fi disponibili, scegliere
la rete su cui avete connesso il Gateway.
- inserire la password relativa alla rete Wi-Fi a cui è
connesso il Gateway e premere invio;
- se tutto è stato fatto correttamente, il Led sul Relè
smetterà di lampeggiare e diventerà sso, altrimenti
ripetere la procedura dall'inizio.
3 Ora il Relè è pronto per essere abbinato al Gateway.
1.6 Associazione Cronotermostato e Relè Wi-Fi del
kit espansione al Gateway Smartech Plus (Max.
due Cronotermostati - zona 2, zona 3).
N.B.: dopo aver installato lo Smartech Plus come da rel-
ativo foglio istruzioni, aver fatto i collegamenti come da
schemi (Parag. 4) e aver congurato il Relè Wi-Fi (Parag.
1.5): procedere all'associazione del Cronotermostato kit
espansione al Gateway dello Smartech Plus.
Assicurarsi di avere acceso il Gateway da almeno 5 minuti:
1 tenere premuto il pulsante Reset del Gateway per 5 sec-
ondi no a vedere il led BLE che passa da dei lampeggi
veloci a un lampeggio al secondo;
2 premere il pulsante Reset del Gateway, il Led Cloud
lampeggiarà una volta al secondo.
N.B.: qualora non si utilizzi il Relè del Gateway per co-
mandare la zona 1 principale; in questa fase è possibile
abbinare un relè Wi-Fi (da acquistare separatamente)
associandolo al Cronotermostato Smartech Plus (zona
1 principale): in questo caso premere velocemente il
pulsante sul Relè dopo averlo congurato (Parag. 1.5);
3 premere nuovamente il pulsante Reset, il Led BLE
lampeggerà due volte veloci in un secondo ed è pos-
sibile abbinare il Cronotermostato del kit espansione
(zona 2):
- sul cronotermostato dalla schermata principale,
tenere premuto per 3 secondi no a far comparire il
menù "Program", ruotare no a visualizzare il menù
"Settings", premere e ruotare per entrare nel menù
"Diagnostic", premere per entrare nel menù;
- premere nuovamente sul cronotermostato, compar-
irà il messaggio "Pairing", quando compare "Discon-
nect", il Cronotermostato è associato al Gateway.
4 premere nuovamente il pulsante Reset, il Led Cloud
lampeggiarà due volte al secondo: è possibile abbinare
il relè Wi-Fi associato al Cronotermostato (zona 2):
premere velocemente il pulsante sul Relè in modo da
abbinarlo al proprio Cronotermostato.
N.B.: nel caso si voglia abbinare un secondo Cronoter-
mostato (zona 3) procedere come segue:
5 premere nuovamente il pulsante Reset, il Led BLE
lampeggerà tre volte veloci in un secondo ed è possibile
abbinare il Cronotermostato del kit espansione (zona
3):
- sul cronotermostato dalla schermata principale,
tenere premuto per 3 secondi no a far comparire il
menù "Program", ruotare no a visualizzare il menù
"Settings", premere e ruotare per entrare nel menù
"Diagnostic", premere per entrare nel menù;
- premere nuovamente sul cronotermostato, compar-
irà il messaggio "Pairing", quando compare "Discon-
nect", il Cronotermostato è associato al Gateway;
6 premere nuovamente il pulsante Reset, il Led Cloud
lampeggiarà tre volte al secondo: è possibile abbinare
il relè Wi-Fi associato al Cronotermostato (zona 3);
7 spegnere (togliendo tensione) e riaccendere il Gateway.
2. MODALITÀ DI SICUREZZA
SMARTECH PLUS
N.B.: solo nella modalità: "O" o "Inverno", il Cronoter-
mostato Zona 1 principale è l'unico nel caso di più Zone
a poter attivare questa "Modalità di sicurezza", quindi non
è disponibile per i Cronotermostati del "Kit espansione"
(vedere foglio istruzioni "Smartech Plus").
3. CARATTERISTICHE TECNICHE
CRONOTERMOSTATO:
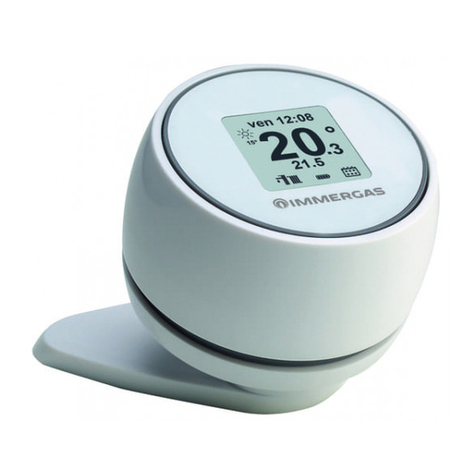
• Dimensioni: ...... diametro 71.5mm, spessore 35.5mm
• Tecnologia senza li: ....................... Bluetooth 4.1 BLE
• Distanza fra termostato e Gateway:. Max. 15mt, 30mt
in spazio aperto
• Range di lettura: .......................................da 0°C a 40°C
• Precisione di lettura: ......................................... +/- 0.1K
• Range di impostazione: ........................da 4.5°C a 35°C
• Range di incremento di temperatura:....................0.5K
• Alimentazione: .................. n°2 batterie AAA 1.5V (no
ricaricabili) mod. LR03, durata della batteria circa 2
anni(*)
(*) Durata della batteria calcolata con uso normale, con
temperatura ambiente compresa tra 16°C a 27°C.
3.1 Scheda di prodotto.
In conformità al Regolamento 811/2013 la classe del
dispositivo di controllo della temperatura è:
Classe
Contributo all’ecienza
energetica stagionale di
riscaldamento d’am-
biente
Descrizione
VI +4%
Smartech Plus
con 1 kit espan-
sione
VIII +5%
Smartech Plus
con 2 kit espan-
sioni
3.2 Descrizione dei Led
Led Descrizione
Led
Power
Segnala la presenza della tensione, il Gate-
way è acceso, deve essere sempre ssa e di
colore verde.
Led
BLE
Segnala la connessione Bluetooth del Gate-
way con il cronotermostato Smartech Plus:
• 1 lampeggio ogni 4 secondi: signica che
il Gateway è connesso al cronotermostato
e sta regolarmente comunicando;
• 5 lampeggi al secondo: signica che il
Gateway sta cercando di connettersi al
cronotermostato, nel caso questo lampeg-
gio sia frequente, provare ad avvicinare il
Gateway al cronotermostato o viceversa.
Led
Bus
E' un Led di servizio gestito a parte dal Gate-
way, il suo funzionamento è indipendente da
qualsiasi stato del Gateway.
Led
Cloud
Segnala la connessione alla rete Wi-Fi
domestica e al Cloud del cronotermostato:
• Spento: significa che il Gateway non è
connesso a nessuna rete Wi-Fi o non è
stato collegato nessun Account a questo
Gateway, il cronotermostato funziona re-
golarmente anche senza una connessione
Wi-Fi, attraverso la connessione BLE;
• 1 lampeggio al secondo: signica che il
Gateway si sta connettendo alla rete Wi-Fi
o all'Account associato, se il lampeggio per-
siste vericare che la rete Wi-Fi sia attiva
e vericare di aver inserito la password
corretta nel Gateway;
• Accesa ssa: signica che il Gateway è con-
nesso alla rete Wi-Fi e al Cloud e funziona
correttamente.
1.5 Sono Wi-Fi relay conguration of the expan-
sion kit with the Smartech Plus Gateway Wi-Fi
network.
Each "Smartech Plus Expansion Kit" is equipped with a
Sono Wi-Fi Relay changed to work with the Smartech
Plus Chrono-thermostat. For its correct operation it is
necessary to comply with the following Wi- network
conguration procedure to which the Smartech Plus
Gateway is also connected.
Connect the Relay as shown in Fig. 1
N.B.: the Relay is changed according to IMMERGAS
SpA technical specications, only use the Relay of the
"Smartech Plus expansion kit" package. IMMERGAS SpA
declines any responsibility for the use of a Relay other than
the one contained in the packaging.
1 Press and hold the button on the Relay for 10 seconds
and then release, the LED will ash 2 times per second;
2 take your smartphone and follow the instructions
below:
- go to Wi-Fi and select the network "Jotto_RL_xxxx",
exit and open the browser and type the address
"192.168.4.1";
- click on "Congure Wi-Fi";
- the page shows the available Wi-Fi networks, choose
the network on which you have connected the Gate-
way.
- enter the password for the Wi-Fi network to which
the Gateway is connected and press enter;
- if everything has been done correctly, the LED on the
Relay will stop ashing and become steady, otherwise
repeat the procedure from the beginning.
3 Now the Relay is ready to be paired with the Gateway.
1.6 Pairing Chrono-thermostat and Wi-Fi relay of the
expansion kit with the Smartech Plus Gateway
(Max. two Chrono-thermostats - zone 2, zone 3).
N.B.: aer installing the Smartech Plus according to
the relative instruction sheet, making the connections
according to the diagram (Parag. 4) and conguring the
Wi-Fi Relay (Parag. 1.5): proceed to pair the expansion
kit chrono-thermostat with the Smartech Plus Gateway.
Make sure you have turned on the Gateway for at least
5 minutes:
1 press and hold down the Reset button of the Gateway
for 5 seconds until you see the "BLE" Led going from
fast ashes to one ash per second;
2 press the Gateway Reset button, the Cloud Led will
ash once per second.
N.B.: if the Gateway Relay is not used to control the
main zone 1; in this phase it is possible to pair a Wi-Fi
relay (to be purchased separately) with the Smartech
Plus Chrono-thermostat (main zone 1): in this case
quickly press the button on the Relay aer its congu-
ration (Parag. 1.5);
3 press the Reset button again, the BLE LED will ash fast
twice in a second and it is possible to pair the expansion
kit chrono-thermostat (zone 2):
- on the chrono-thermostat from the main screen,
press and hold for 3 seconds until the "Program"
menu appears and rotate until the "Settings" menu
appears, press and rotate to enter the "Diagnostic"
menu, press to enter the menu;
- press again on the chronothermostat, the message
"Pairing" will appear, when "Disconnect" appears,
the Chrono-thermostat is associated to the Gateway.
4 press the Reset button again, the Cloud Led will ash
twice a second: it is possible to pair the associated
Wi-Fi relay with the Chrono-thermostat (zone 2):
quickly press the button on the Relay to pair it with
your Chrono-thermostat.
N.B.: if you want to pair a second Chrono-thermostat
(zone 3) proceed as follows:
5 press the Reset button again, the BLE LED will ash
fast three times in a second and it is possible to pair
the expansion kit chrono-thermostat (zone 3):
- on the chrono-thermostat from the main screen,
press and hold for 3 seconds until the "Program"
menu appears and rotate until the "Settings" menu
appears, press and rotate to enter the "Diagnostic"
menu, press to enter the menu;
- press again on the chronothermostat, the message
"Pairing" will appear, when "Disconnect" appears,
the Chrono-thermostat is associated to the Gateway;
6 press the Reset button again, the Cloud Led will ash
three times per second: it is possible to pair the Wi-Fi
relay associated with the Chrono-thermostat (zone 3);
7 switch o (removing power) and switch the Gateway
back on.
2. SAFETY MODE
SMARTECH PLUS
N.B.: only in the: "O"mode or "Winter" mode, the main
Zone 1 Chrono-thermostat in case of more than one Zone
is the only one that activates this "Safety Mode", so it is
not available for the “Expansion kit” chrono-thermostats
(see "Smartech Plus" instruction sheet).
3. TECHNICAL CHARACTERISTICS
CHRONO-THERMOSTAT:
• Dimensions: ..... diameter 71,5mm, thickness 35,5mm
• Wireless technology: ....................... Bluetooth 4.1 BLE
• Distance between thermostat and gateway: ........ Max.
15mt, 30mt in open space
• Reading range:....................................from 0°C to 40°C
• Reading accuracy: ............................................. +/- 0.1K
• Setting range: ...................................from 4,5°C to 35°C
• Temperature increase range:...................................0,5K
• Power Supply: .......................................................2 AAA
1.5V batteries (not rechargeable) mod. LR03, battery
life about 2 years(*)
(*) Battery life calculated with normal use, with a room
temperature between 16°C and 27°C.
3.1 Product che.
In compliance with Regulation 811/2013, the class of the
temperature control device is:
Class
Contribution to room
central heating seasonal
energy eciency
Description
VI +4%
Smartech Plus
with 1 expansion
kit
VIII +5%
Smartech Plus
with 2 expansion
kit
3.2 Description of the LEDs
LED Description
LED
Power
It signals the presence of voltage, the Gate-
way is on, it must always be xed and green.
LED
BLE
It signals the Bluetooth connection of
the Gateway with the Smartech Plus
chrono-thermostat:
• 1 ash every 4 seconds: it means that the
Gateway is connected to the chrono-ther-
mostat and is communicating regularly;
• 5 ashes per second: it means that the
Gateway is trying to connect to the chrono-
thermostat, if this ashing is frequent, try
to bring the Gateway closer to the chrono-
thermostat or vice versa..
LED
Bus
It is a service Led managed separately from
the Gateway, its operation is independent
from any Gateway status.
LED
Cloud
Signals the connection to the home Wi-Fi
network and the Cloud of the chrono-ther-
mostat:
• O: it means that the Gateway is not con-
nected to any Wi-Fi network or no Account
has been connected to this Gateway, the
chrono-thermostat works regularly even
without a Wi-Fi connection, through the
BLE connection;
• 1 ash per second: it means that the Gate-
way is connecting to the Wi-Fi network or
associated Account, if the ashing persists
check that the Wi-Fi network is active and
verify that you have entered the correct
password in the Gateway;
• Steady on: it means that the Gateway is
connected to the Wi-Fi network and Cloud
and is working properly..


