imoo Z6 User manual

2. Device Layout
Watch Face: Watch Back:
1. Package and Product Parameters
Package Contents:
Product Parameters:
Product: Watch Phone
Model: W1818AO
Battery: Lithium Polymer Battery 3.85V 680mAh
Camera: Front Camera 5MP, Rear Camera 8MP
Charge Input: DC 5V 1200mA
Working Temperature: 0℃~35℃Working Humidity: Noncondensable 15%~93%
Front Camera
Speaker
Touch
Screen
On/Off
Mic
Lock Button
SIM Card Deck
Rear Camera
Charging
Contactor
Base
3. Choose and Install the SIM
Step 1: Choose the Right SIM Card (1)The Size of SIM Card: supports Standard
Nano-SIM card only [as picture (1)].
Step 3: Install the SIM Card
1. Open up the SIM
card deck with a
SIM card picker.
2. Put the Nano-SIM card
on the card deck with the
gold chip facing upward.
3. Insert the SIM card
deck into the watch’s
back.
5. Download the App & Bind the Watch
Step 1: Download/Install the App
1. Scan the QR code on the right.
2. Go to Google Play or Apple App Store and search
for “imoo” or “Watch Phone” to download
the App.
Step 2: Bind the Watch
1. Open the App, register or log in.
2. Slide the watch interface to find Bind Code and scan the QR code
or enter the bind code manually to bind the watch.
Get the Bind Code:
4. Power On
1. If the new watch cannot be turned on, it is probably out of power.
Please plug in the charging cable until the watch is turned on
automatically.
2. For general abnormal conditions (e.g., blank screen), press On/Off
button for 10 seconds to restart the watch phone.
Power On: Press On/Off button for 2
seconds to power on the watch phone.
1. Tap Bind Code on More
interface to get the bind
code.
2. Scan the QR code or
enter the Bind Code
manually.
Bind Code
6. Charge
1. As shown below, please flip up the watch through the lock button to
find the charging contactors of the watch.
8. Basic Operation
Turn on the screen: Tap the screen or press On/Off button to turn it on.
Turn off the screen: 1. Press On/Off button to turn off the screen when
the home screen is on;
2. Cover the screen with your hand to turn it off;
3. You can set the “Screen Timeout” in “Display &
Brightness” of the “Watch Settings” on More
interface. When the time is up, the screen will be
turned off.
Wallpaper:
Long press the home screen to enter Wallpaper.
Slide left or right to view more and select one as
your wallpaper.
Slide left from the home screen to enter More
interface, slide up or down to choose
corresponding features.
Bind Code Chat
Add Friends Steps
Warranty Card
(The First Invoice: User Invoice)
User’s
Data
Warranty
Data
Product
Data
User’s Name: _______________ Telephone: ____________
Kid’s Grade: ___________
Name of Sales or Service Center: _________________________
Cause of Machine Repair: _____________________
Handled by: ________________ Telephone: ____________
Handled on: _______________________ (DD/MM/YYYY)
Product Model: ________________________
Machine No.: __________________________
Date of Purchase: ______________________ (
DD/MM/YYYY)
Site of Sales: ____________ (Store) ______________________
_________________________________ (Address)
Warranty Card
(The Second Invoice: Sales Invoice)
User’s
Data
Warranty
Data
Product
Data
User’s Name: _______________ Telephone: ____________
Kid’s Grade: ___________
Name of Sales or Service Center: _________________________
Cause of Machine Repair: _____________________
Handled by: ________________ Telephone: ____________
Handled on: _______________________ (DD/MM/YYYY)
Product Model: ________________________
Machine No.: __________________________
Date of Purchase: ______________________ (
DD/MM/YYYY
)
Site of Sales: ____________ (Store) ______________________
_________________________________ (Address)
Material Code: 5211764 Version: V1.0
Charging...(90%)
2. Then align the charging contactors on the watch with the charging
contactors on the charging cable until “Charging” is shown on the
screen.
1
Watch Phone Z6 1 1
1Manual
Charging Cable
SIM Card Picker 1
23
Please activate “Caller ID” function and enable GPRS data network.
Step 2: Activate “Caller ID” function & data plan
4 5 6
7. OTA Upgrade
ChargingWhen binding a watch, the App will detect the watch's
version to check if it needs to be upgraded. If needed,
the watch will be upgraded automatically when
charging.
System Updating...
Remark: There may be risks for informal root or system upgrade.
78
FCC SAR statement
This equipment complies with FCC radiation exposure limits set forth for an
uncontrolled environment. End user must follow the specific operating instructions
for satisfying RF exposure compliance. This transmitter must not be co-located or
operating in conjunction with any other antenna or transmitter.
The portable device is designed to meet the requirements for exposure to radio
waves established by the Federal Communications Commission (USA). T
hese requirements set a SAR limit of 1.6 W/kg averaged over one gram of tissue.
The highest SAR value reported under this standard during product certification
for use when properly worn on the body

CMHK
Slide right from the home screen to enter “Call”.
Slide from top to bottom to check the status bar
and some important push notifications.
Family Chat
Add Friends
Chat
Slide right from
Chat interface.
After entering each feature,
you can slide right to exit
the feature, as shown on
the left. You can also press
the On/Off button to go
back to the home screen.
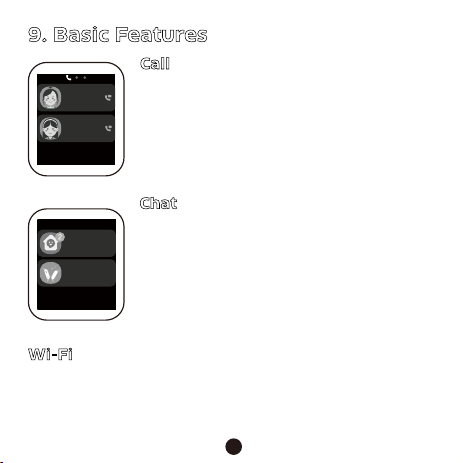
9. Basic Features
Select a contact to make a voice call or video call.
Video calls may consume a lot of network data.
We suggest you make video calls when connected
to a WLAN network. If the App cannot receive the
video call, please check whether Notifications has
been enabled or whether the call was intercepted
by the system.
Call
Mum
Sister
Family Chat
Add Friends
Chat
Chat
Send voice messages: Tap “Hold to Talk” to record,
and release your finger to send your voice message.
Play voice messages: Unread voice messages will
be shown on the screen. Tap to play voice messages.
Add friends: Tap “Face-to-face Making Friends” on
Add Friends interface. Then you can add a friend by
bumping your watches together after you find a
friend.
Bluetooth headsets can be connected to the watch. You can use
Bluetooth headsets to make a call.
On More interface, tap “Watch Settings” and choose “Bluetooth” to
enable or disable Bluetooth.
Bluetooth
After binding your watch, enter ”More-Watch’s Wi-Fi” on App to add a
network.
Wi-Fi
Tap “Start” to record a video. Tap the corresponding
icon to switch cameras or view the saved videos or
photos.
Video
Tap the watch screen to take a photo. If you want
to switch to outdoor shooting, please flip up the
watch face. Besides, you can switch cameras by
sliding up or down on the interface.
Take Photos
Tap to shoot
Start
10. Statements
· Please read this manual carefully so that you can use this product
correctly and safely.
· Please use the watch strap that is well matched with this product to
avoid affecting the watch’s antenna signal. The use of other straps
may result in poor call quality and locating failure.
· This product is equipped with GPS locating, which is disabled until
the watch is bound. Users can use GPS to locate the watch’s location.
· This product is not equipped with the monitoring feature.
· This manual contains important information, which should be kept
properly.
· Go to https://imoo.com/e-manual/ or scan the QR code below to
review more details or download the electronic version of the manual
about this product.
11. Attentions
Attentions for Operation Place and Environment:
Please read the following contents and attentions carefully before using
this product, and abide by them when using it. We bear no liabilities for
the consequences caused by the failure in using this product correctly
or abiding by the relevant instructions of this product.
· Any radio transmission device (including this product) may interfere
with the medical device that is not properly protected and please
observe the relevant regulations of the places where wireless transmi-
ssion of electronic equipment is prohibited.
· Pacemaker and implanted cardioverter defibrillator: Keep the distance
between the watch and the instrument greater than 6 inches (about
16cm) each time you turn on your watch. Do not put your watch in
your clothes pocket. Please use the watch on the other side of the
instrument to reduce potential interference. If you suspect that inter-
ference has occurred, turn off your watch immediately.
· Hearing aids and implanted cochlea: Some wireless digital devices
may interfere with some hearing aids or implanted cochlea. If this
type of interference occurs, please contact the manufacturer to find a
solution.
· For other medical equipment, check with the manufacturer to confirm
whether the surrounding RF signals can be adequately shielded. You
can also consult your doctor for the relevant information.
Attentions for Charging and Battery Use:
· The volume of the watch decreases gradually as the voltage decreases.
· Due to the consideration of environmental protection, this product is
not equipped with a power adapter. You can use the USB interface of
your computer or the power adapter with CE certification to charge.
And the output voltage and current of the power adapter should
conform to the following specifications: output DC voltage: 5V; output
DC current: No less than 1200mA.
HD
Bind Code Chat
Add Friends Steps
Go back to More
interface. Statement of Water Resistance:
· The water resistance level of the watch reaches 20 meters of the ISO
22810: 2010 IDT. It can be used for shallow-water activities (e.g., swi-
mming in a pool), but it cannot be used for diving, water skiing, or
other activities involving high velocity flow or exceeding the specific
depth.
Specific Absorption Rate (SAR):
910 11 12 13
CE SAR 0.49W/kg (Front to face)
1.29W/kg (Wrist Worn)
14 15
Email: service@imoo.my (Malaysia)
sevicesg@imoo.com (Singapore)
Website: www.imoo.com
Hotline: 1800-22-7778
Tech Generation Sdn Bhd
The image shown is for illustration purpose only.
Important: Information stated is important for successful
application and understanding the product. We recommend you
to keep this guide for future reference.
Product Model & Machine No.: Product Model & Machine No.:
FCC compliance statement
This device complies with Part 15 of the FCC Rules. Operation is subject to the
following two conditions: (1) this device may not cause harmful interference, and
(2) this device must accept any interference received, including interference that
may cause undesired operation.
changes or modifications not expressly approved by the party responsible for
compliance could void the user’s authority to operate the equipment.
This equipment has been tested and found to comply with the limits for a Class B
digital device, pursuant to Part 15 of the FCC Rules. These limits are designed to
provide reasonable protection against harmful interference in a residential
installation. This equipment generates, uses and can radiate radio frequency
energy and, if not installed and used in accordance with the instructions, may
cause harmful interference to radio communications. However, there is no
guarantee that interference will not occur in a particular installation.
If this equipment does cause harmful interference to radio or television reception,
which can be determined by turning the equipment off and on, the user is
encouraged to try to correct the interference by one or more of the following
measures:
-- Reorient or relocate the receiving antenna.
-- Increase the separation between the equipment and receiver.
-- Connect the equipment into an outlet on a circuit different from that to which the
receiver is connected.
-- Consult the dealer or an experienced radio/TV technician for help.

CMHK
Slide right from the home screen to enter “Call”.
Slide from top to bottom to check the status bar
and some important push notifications.
Family Chat
Add Friends
Chat
Slide right from
Chat interface.
After entering each feature,
you can slide right to exit
the feature, as shown on
the left. You can also press
the On/Off button to go
back to the home screen.
9. Basic Features
Select a contact to make a voice call or video call.
Video calls may consume a lot of network data.
We suggest you make video calls when connected
to a WLAN network. If the App cannot receive the
video call, please check whether Notifications has
been enabled or whether the call was intercepted
by the system.
Call
Mum
Sister
Family Chat
Add Friends
Chat
Chat
Send voice messages: Tap “Hold to Talk” to record,
and release your finger to send your voice message.
Play voice messages: Unread voice messages will
be shown on the screen. Tap to play voice messages.
Add friends: Tap “Face-to-face Making Friends” on
Add Friends interface. Then you can add a friend by
bumping your watches together after you find a
friend.
Bluetooth headsets can be connected to the watch. You can use
Bluetooth headsets to make a call.
On More interface, tap “Watch Settings” and choose “Bluetooth” to
enable or disable Bluetooth.
Bluetooth
After binding your watch, enter ”More-Watch’s Wi-Fi” on App to add a
network.
Wi-Fi
Tap “Start” to record a video. Tap the corresponding
icon to switch cameras or view the saved videos or
photos.
Video
Tap the watch screen to take a photo. If you want
to switch to outdoor shooting, please flip up the
watch face. Besides, you can switch cameras by
sliding up or down on the interface.
Take Photos
Tap to shoot
Start
10. Statements
· Please read this manual carefully so that you can use this product
correctly and safely.
· Please use the watch strap that is well matched with this product to
avoid affecting the watch’s antenna signal. The use of other straps
may result in poor call quality and locating failure.
· This product is equipped with GPS locating, which is disabled until
the watch is bound. Users can use GPS to locate the watch’s location.
· This product is not equipped with the monitoring feature.
· This manual contains important information, which should be kept
properly.
· Go to https://imoo.com/e-manual/ or scan the QR code below to
review more details or download the electronic version of the manual
about this product.
11. Attentions
Attentions for Operation Place and Environment:
Please read the following contents and attentions carefully before using
this product, and abide by them when using it. We bear no liabilities for
the consequences caused by the failure in using this product correctly
or abiding by the relevant instructions of this product.
· Any radio transmission device (including this product) may interfere
with the medical device that is not properly protected and please
observe the relevant regulations of the places where wireless transmi-
ssion of electronic equipment is prohibited.
· Pacemaker and implanted cardioverter defibrillator: Keep the distance
between the watch and the instrument greater than 6 inches (about
16cm) each time you turn on your watch. Do not put your watch in
your clothes pocket. Please use the watch on the other side of the
instrument to reduce potential interference. If you suspect that inter-
ference has occurred, turn off your watch immediately.
· Hearing aids and implanted cochlea: Some wireless digital devices
may interfere with some hearing aids or implanted cochlea. If this
type of interference occurs, please contact the manufacturer to find a
solution.
· For other medical equipment, check with the manufacturer to confirm
whether the surrounding RF signals can be adequately shielded. You
can also consult your doctor for the relevant information.
Attentions for Charging and Battery Use:
· The volume of the watch decreases gradually as the voltage decreases.
· Due to the consideration of environmental protection, this product is
not equipped with a power adapter. You can use the USB interface of
your computer or the power adapter with CE certification to charge.
And the output voltage and current of the power adapter should
conform to the following specifications: output DC voltage: 5V; output
DC current: No less than 1200mA.
HD
Bind Code Chat
Add Friends Steps
Go back to More
interface. Statement of Water Resistance:
· The water resistance level of the watch reaches 20 meters of the ISO
22810: 2010 IDT. It can be used for shallow-water activities (e.g., swi-
mming in a pool), but it cannot be used for diving, water skiing, or
other activities involving high velocity flow or exceeding the specific
depth.
Specific Absorption Rate (SAR):
910 11 12 13
CE SAR 0.49W/kg (Front to face)
1.29W/kg (Wrist Worn)
14 15
Email: service@imoo.my (Malaysia)
sevicesg@imoo.com (Singapore)
Website: www.imoo.com
Hotline: 1800-22-7778
Tech Generation Sdn Bhd
The image shown is for illustration purpose only.
Important: Information stated is important for successful
application and understanding the product. We recommend you
to keep this guide for future reference.
Product Model & Machine No.: Product Model & Machine No.:
FCC compliance statement
This device complies with Part 15 of the FCC Rules. Operation is subject to the
following two conditions: (1) this device may not cause harmful interference, and
(2) this device must accept any interference received, including interference that
may cause undesired operation.
changes or modifications not expressly approved by the party responsible for
compliance could void the user’s authority to operate the equipment.
This equipment has been tested and found to comply with the limits for a Class B
digital device, pursuant to Part 15 of the FCC Rules. These limits are designed to
provide reasonable protection against harmful interference in a residential
installation. This equipment generates, uses and can radiate radio frequency
energy and, if not installed and used in accordance with the instructions, may
cause harmful interference to radio communications. However, there is no
guarantee that interference will not occur in a particular installation.
If this equipment does cause harmful interference to radio or television reception,
which can be determined by turning the equipment off and on, the user is
encouraged to try to correct the interference by one or more of the following
measures:
-- Reorient or relocate the receiving antenna.
-- Increase the separation between the equipment and receiver.
-- Connect the equipment into an outlet on a circuit different from that to which the
receiver is connected.
-- Consult the dealer or an experienced radio/TV technician for help.

CMHK
Slide right from the home screen to enter “Call”.
Slide from top to bottom to check the status bar
and some important push notifications.
Family Chat
Add Friends
Chat
Slide right from
Chat interface.
After entering each feature,
you can slide right to exit
the feature, as shown on
the left. You can also press
the On/Off button to go
back to the home screen.
9. Basic Features
Select a contact to make a voice call or video call.
Video calls may consume a lot of network data.
We suggest you make video calls when connected
to a WLAN network. If the App cannot receive the
video call, please check whether Notifications has
been enabled or whether the call was intercepted
by the system.
Call
Mum
Sister
Family Chat
Add Friends
Chat
Chat
Send voice messages: Tap “Hold to Talk” to record,
and release your finger to send your voice message.
Play voice messages: Unread voice messages will
be shown on the screen. Tap to play voice messages.
Add friends: Tap “Face-to-face Making Friends” on
Add Friends interface. Then you can add a friend by
bumping your watches together after you find a
friend.
Bluetooth headsets can be connected to the watch. You can use
Bluetooth headsets to make a call.
On More interface, tap “Watch Settings” and choose “Bluetooth” to
enable or disable Bluetooth.
Bluetooth
After binding your watch, enter ”More-Watch’s Wi-Fi” on App to add a
network.
Wi-Fi
Tap “Start” to record a video. Tap the corresponding
icon to switch cameras or view the saved videos or
photos.
Video
Tap the watch screen to take a photo. If you want
to switch to outdoor shooting, please flip up the
watch face. Besides, you can switch cameras by
sliding up or down on the interface.
Take Photos
Tap to shoot
Start
10. Statements
· Please read this manual carefully so that you can use this product
correctly and safely.
· Please use the watch strap that is well matched with this product to
avoid affecting the watch’s antenna signal. The use of other straps
may result in poor call quality and locating failure.
· This product is equipped with GPS locating, which is disabled until
the watch is bound. Users can use GPS to locate the watch’s location.
· This product is not equipped with the monitoring feature.
· This manual contains important information, which should be kept
properly.
· Go to https://imoo.com/e-manual/ or scan the QR code below to
review more details or download the electronic version of the manual
about this product.
11. Attentions
Attentions for Operation Place and Environment:
Please read the following contents and attentions carefully before using
this product, and abide by them when using it. We bear no liabilities for
the consequences caused by the failure in using this product correctly
or abiding by the relevant instructions of this product.
· Any radio transmission device (including this product) may interfere
with the medical device that is not properly protected and please
observe the relevant regulations of the places where wireless transmi-
ssion of electronic equipment is prohibited.
· Pacemaker and implanted cardioverter defibrillator: Keep the distance
between the watch and the instrument greater than 6 inches (about
16cm) each time you turn on your watch. Do not put your watch in
your clothes pocket. Please use the watch on the other side of the
instrument to reduce potential interference. If you suspect that inter-
ference has occurred, turn off your watch immediately.
· Hearing aids and implanted cochlea: Some wireless digital devices
may interfere with some hearing aids or implanted cochlea. If this
type of interference occurs, please contact the manufacturer to find a
solution.
· For other medical equipment, check with the manufacturer to confirm
whether the surrounding RF signals can be adequately shielded. You
can also consult your doctor for the relevant information.
Attentions for Charging and Battery Use:
· The volume of the watch decreases gradually as the voltage decreases.
· Due to the consideration of environmental protection, this product is
not equipped with a power adapter. You can use the USB interface of
your computer or the power adapter with CE certification to charge.
And the output voltage and current of the power adapter should
conform to the following specifications: output DC voltage: 5V; output
DC current: No less than 1200mA.
HD
Bind Code Chat
Add Friends Steps
Go back to More
interface. Statement of Water Resistance:
· The water resistance level of the watch reaches 20 meters of the ISO
22810: 2010 IDT. It can be used for shallow-water activities (e.g., swi-
mming in a pool), but it cannot be used for diving, water skiing, or
other activities involving high velocity flow or exceeding the specific
depth.
Specific Absorption Rate (SAR):
910 11 12 13
CE SAR 0.49W/kg (Front to face)
1.29W/kg (Wrist Worn)
14 15
Website: www.imoo.com
Hotline: 1800-22-7778
Tech Generation Sdn Bhd
The image shown is for illustration purpose only.
Important: Information stated is important for successful
application and understanding the product. We recommend you
to keep this guide for future reference.
Product Model & Machine No.: Product Model & Machine No.:
FCC compliance statement
This device complies with Part 15 of the FCC Rules. Operation is subject to the
following two conditions: (1) this device may not cause harmful interference, and
(2) this device must accept any interference received, including interference that
may cause undesired operation.
changes or modifications not expressly approved by the party responsible for
compliance could void the user’s authority to operate the equipment.
This equipment has been tested and found to comply with the limits for a Class B
digital device, pursuant to Part 15 of the FCC Rules. These limits are designed to
provide reasonable protection against harmful interference in a residential
installation. This equipment generates, uses and can radiate radio frequency
energy and, if not installed and used in accordance with the instructions, may
cause harmful interference to radio communications. However, there is no
guarantee that interference will not occur in a particular installation.
If this equipment does cause harmful interference to radio or television reception,
which can be determined by turning the equipment off and on, the user is
encouraged to try to correct the interference by one or more of the following
measures:
-- Reorient or relocate the receiving antenna.
-- Increase the separation between the equipment and receiver.
-- Connect the equipment into an outlet on a circuit different from that to which the
receiver is connected.
-- Consult the dealer or an experienced radio/TV technician for help.
Table of contents


