Impax IM200-12L User manual

Always Read Instruction Manual
Retain for Future Reference
IM200-12L
12L OIL FREE AIR COMPRESSOR

2
CERTIFICATE OF GUARANTEE
This product is guaranteed for a period of 1 Year, with effect from the date of purchase and applies
only to the original purchaser. This guarantee only applies to defects arising from, defective materials
and or faulty workmanship that become evident during the guarantee period only and does not
include consumable items. The manufacturer will repair or replace the product at their discretion
subject to the following. That the product has been used in accordance with the guidelines as
detailed in the product manual and that it has not been subjected to misuse, abuse or used for a
purpose for which it was not intended. That it has not been taken apart or tampered with in any way
whatsoever or has been serviced by unauthorised persons or has been used for hire purposes.
Transit damage is excluded from this guarantee, for such damage the transport company is
responsible. Claims made under this guarantee must be made in the first instance, directly to the
retailer within the guarantee period. Only under exceptional circumstances should the product be
returned to the manufacturer. In this case it shall be the consumer’s responsibility to return the
product at their cost ensuring that the product is adequately packed to prevent transit damage and
must be accompanied with a brief description of the fault and a copy of the receipt or other proof of
purchase. The manufacturer shall not be liable for any special, exemplary, direct, indirect, incidental,
or consequential loss or damage under this guarantee. This guarantee is in addition to and does not
affect any rights, which the consumer may have by virtue of the Sale of Goods Act 1973 as
amended 1975 and 1999.
INTRODUCTION
Thankyou for purchasing this product which has passed through our extensive quality assurance
process. Every care has been taken to ensure that it reaches you in perfect condition. However, in
the unlikely event that you should experience a problem, or if we can offer any assistance or advice
please do not hesitate to contact our customer care department. For details of your nearest
customer care department please refer to the telephone numbers at the back of this manual.
Safety First
Before attempting to operate this product the following basic safety precautions should always be
taken to reduce the risk of fire, electric shock and personal injury. It is important to read the
instruction manual to understand the application, limitations and potential hazards associated with
this product.
HELPLINE & SPARE PARTS
In the unlikely event of a defect occurring please contact our Helpline.
Office hours: Monday - Friday 9:00am – 5:30pm.
Telephone Number 0844 264 2485

3
SAFETY INFORMATION
Specific Safety Instructions
Warning! If not used and maintained correctly
this compressor when used with some
pneumatic tools can cause serious injury and
death. Before attempting to operate this
machine, it is important that you read,
understand and follow these instructions very
carefully. They are designed for the safety of
yourself and others ensuring a long and trouble
free service life from your machine. If not used
correctly and as detailed in these instructions
pneumatic tools can be dangerous. This product
can cause injury to the operator and others. The
warnings and safety instructions must be
followed to ensure reasonable safety and
efficiency in using this product.
Note: The operator is responsible for following
the warnings and safety instructions in this
manual and on the product.
Ensure that this compressor is disconnected
from the mains supply when not in use and the
air receiver fully discharged before servicing,
lubricating or making adjustments and when
changing accessories. Always switch ON and
OFF using the ON/OFF switch on the
compressor before switching OFF at the mains
supply.
Warning! When spraying paint or cleaning
agents the fine mist produced could ignite.
When performing this type of operation the
compressor must be a minimum of 4 Metres
away from the work area. Do not smoke and
keep naked flames and other sources of ignition
well away from the work area. Make sure that
the area in which you are working has good
ventilation and protect your nose and mouth
with a suitable face mask. Always check the
safety data sheets for substances being sprayed
& ensure manufacturers instructions are
followed.
This air compressor must be used in a suitable
environment. There must be adequate
ventilation, the ambient temperature must be
+5/+40°C. The working area must be free from
dust, acid vapour, explosive gasses and
flammable materials.
Compressed air can be potentially dangerous
when not used correctly. Do not exceed the
maximum rated air pressure for the accessory.
Do not direct compressed air at yourself, any
other person or animals. Do not direct any liquid
or any other material that is being sprayed by
yourself towards any other person or animals.
Only use hoses and connectors designed for
use with compressed air. The maximum working
pressure of hoses and connectors must be
higher than the maximum working pressure of
the compressor. Do not attempt to move the
compressor by pulling on the air hose.
This compressor is designed for tyre inflation,
the operation of pneumatic tools, spray painting
and spraying non-corrosive cleaning agents. Do
not use this compressor for filling cylinders for
breathing or diving apparatus. Compressed air
from this compressor must not be used for
pharmaceutical, food or health applications.
When spraying flammable liquids such as paint
and non-corrosive cleaning agents the distance
between the compressor and the work area
must be a minimum of 4 metres. When spraying
liquids always wear a suitable face mask
designed for protection against the liquid being
sprayed. Always wear approved safety glasses.
Do not attempt to modify the compressor or any
pneumatic tools in any way. Use only
accessories and pneumatic tools that are rated
for the capacity of the compressor. Never leave
the compressor pressurised.
Always transport the compressor by lifting or
pulling it with the appropriate grips or handles.
Do not insert your fingers or other objects inside
the motor housing to avoid physical damage or
damage to the compressor.
If any part of the compressor is damaged, it
should be carefully checked to determine that it
will operate correctly and perform its intended
function. Check for the alignment of parts,
damage to parts, air leaks and any other
conditions that may affect its operation. A guard
or any other part that is damaged or defective
should be properly repaired or replaced by an
authorised service centre. Defective pressure
switches must be replaced prior to further use
of the compressor.

SAFETY INFORMATION
Warning! This compressor must be connected
to a power socket that is safeguarded by a
suitable circuit breaker or fuse.
Only use recommended parts. To avoid the risk
of bursting, only hoses with a rated pressure of
10 bar, or more should be used. Never attempt
to repair faulty hoses.
Avoid kinking or trapping the air hose. Always
replace faulty hoses - never attempt a repair if a
leak is detected.
Drain the tank after each use. Switch off and
slowly open the drain valve to release the air
then tilt the compressor to empty condensed
water.
Keep the motor vent clear and free from dust,
wipe regularly to maintain an adequate supply of
clean air to the air compressor.
General Safety Rules
Warning! Read all instructions Failure to follow
all instructions listed below may result in electric
shock, fire and/or serious injury. The term
"power tool" in all of the warnings listed below
refers to your mains operated (corded) power
tool or battery operated (cordless) power tool.
Save These Instructions
1) Work Area
a) Keep work area clean and well lit.
Cluttered and dark areas invite accidents.
b) Do not operate power tools in explosive
atmospheres, such as in the presence of
flammable liquids, gases or dust. Power
tools create sparks which may ignite the dust
or fumes.
c) Keep children and bystanders away while
operating a power tool. Distractions can
cause you to lose control.
2) Electrical Safety
a) Power tool plugs must match the outlet.
Never modify the plug in any way. Do not
use any adapter plugs with earthed
(grounded) power tools. Unmodified plugs
and matching outlets will reduce risk of
electric shock.
b) Avoid body contact with earthed or
grounded surfaces such as pipes,
radiators, ranges and refrigerators.
There is an increased risk of electric shock if
your body is earthed or grounded.
c) Do not expose power tools to rain or wet
conditions. Water entering a power tool will
increase the risk of electric shock.
d) Do not abuse the cord. Never use the cord
for carrying, pulling or unplugging the
power tool. Keep cord away from heat, oil,
sharp edges or moving parts. Damaged or
entangled cords increase the risk of electric
shock.
e) When operating a power tool outdoors,
use an extension cord suitable for outdoor
use. Use of a cord suitable for outdoor use
reduces the risk of electric shock.
3) Personal Safety
a) Stay alert, watch what you are doing and
use common sense when operating a
power tool. Do not use a power tool while
you are tired or under the influence of
drugs, alcohol or medication.
A moment of inattention while operating
power tools may result in serious personal
injury.
b) Use safety equipment. Always wear eye
protection. Safety equipment such as dust
mask, non-skid safety shoes, hard hat, or
hearing protection used for appropriate
conditions will reduce personal injuries.
c) Avoid accidental starting. Ensure the
switch is in the off position before
plugging in. Carrying power tools with your
finger on the switch or plugging in power
tools that have the switch on invites
accidents.
d) Remove any adjusting key or wrench
before turning the power tool on.
A wrench or a key left attached to a rotating
part of the power tool may result in personal
injury.
4

5
e) Do not overreach. Keep proper footing
and balance at all times. This enables
better control of the power tool in
unexpected situations.
f) Dress properly. Do not wear loose clothing
or jewellery. Keep your hair, clothing and
gloves away from moving parts. Loose
clothes, jewellery or long hair can be caught
in moving parts.
g) If devices are provided for the connection
of dust extraction and collection facilities,
ensure these are connected and properly
used. Use of these devices can reduce dust
related hazards.
4) Power Tool Use And Care
a) Do not force the power tool. Use the
correct power tool for your application.
The correct power tool will do the job better
and safer at the rate for which it was
designed.
b) Do not use the power tool if the switch
does not turn it on and off. Any power tool
that cannot be controlled with the switch is
dangerous and must be repaired.
c) Disconnect the plug from the power
source before making any adjustments,
changing accessories, or storing power
tools. Such preventive safety measures
reduce the risk of starting the power tool
accidentally.
d) Store idle power tools out of the reach of
children and do not allow persons
unfamiliar with the power tool or these
instructions to operate the power tool.
Power tools are dangerous in the hands of
untrained users.
e) Maintain power tools. Check for
misalignment or binding of moving parts,
breakage of parts and any other condition
that may affect the power tools operation.
If damaged, have the power tool repaired
before use. Many accidents are caused by
poorly maintained power tools.
f) Keep cutting tools sharp and clean.
Properly maintained cutting tools with sharp
cutting edges are less likely to bind and are
easier to control.
g) Use the power tool, accessories and tool
bits etc., in accordance with these
instructions and in the manner intended
for the particular type of power tool,
taking into account the working
conditions and the work to be performed.
Use of the power tool for operations different
from intended could result in a hazardous
situation.
5) Service
a) Have your power tool serviced by a
qualified repair person using only identical
replacement parts. This will ensure that the
safety of the power tool is maintained.
SAFETY INFORMATION

ELECTRICAL INFORMATION
6
Connection Of The Mains Plug
Important! The wires in the mains lead fitted to this product are coloured in accordance with
the following code:
Brown: Live (L)
Blue: Neutral (N)
Green andYellow: Earth (E)
THIS PRODUCT IS DOUBLE INSULATED AND
THEREFORE DOES NOT REQUIRE A
CONNECTION TO EARTH.
3 PIN PLUG MUST COMPLYTO BS1363/A.
FUSE MUST COMPLY TO BS1362.
If for any reason the 13 amp plug fitted to this product requires replacement it must be wired in
accordance with the following instruction:
DO NOT CONNECT THE BROWN LIVE OR BLUE NEUTRAL TO THE EARTH PIN MARKED E
ON THE 3 PIN PLUG.
Connect the Blue wire to the terminal marked Neutral (N). Connect the Brown wire to the terminal
marked Live (L). Connect the Green and Yellow wire to the terminal marked Earth E . Ensure that
the outer insulation is gripped by the cord grip and that the wires are not trapped when replacing the
plug cover. The mains lead on this product is fitted with a 13 amp (BS1363/A) plug. A 13 amp
(BS1362) fuse must be fitted in the plug.
If In Doubt Consult A Qualified Electrician.
There are no user serviceable parts inside except those referred to in the manual. Always refer
servicing to qualified service personnel. Never remove any part of the casing unless qualified to do
so; this unit contains dangerous voltages.
Warning!
For your protection if this tool is to be used outdoors do not expose to rain or use in damp
locations. Do not place tool on damp surfaces, use a workbench if available. For added protection
use a suitable residual current device (R.C.D.) at the socket outlet.
Note: If the mains cable requires replacing it must be replaced with an identical one and fitted by a
qualified person.

7
COMPONENTS
#OMPONENT ,IST
(ANDLE
0RESSURE REGULATOR
!IR OUTLET QUICK RELEASE CONNECTOR REGULATED
#ONDENSATION DRAIN TAP
/./&& SWITCH
0RESSURE GAUGE FOR READING TANK PRESSURE
!IR OUTLET PRESSURE GAUGE
#ABLE AND HOSE TIDY
2UBBER FOOT X
!IR RECEIVER TANK
0RESSURE RELIEF SAFETY VALVE
4ECHNICAL SPECIFICATION
6OLTAGE 6^(Z
2ATED POWER (0
2ECEIVER CAPACITY ,
4YPE /IL FREE
&REE AIR DELIVERY &!$ ,MIN
#&-
7ORKING PRESSURE "ARPSI
.O LOAD SPEED MIN
7EIGHT KG
3OUND POWER LEVEL D"!

UNPACKING AND OPERATING INSTRUCTIONS
5NPACKING
#AUTION 4HIS PACKAGING CONTAINS SHARP OBJECTS
4AKE CARE WHEN UNPACKING 2EMOVE THE
MACHINE TOGETHER WITH THE ACCESSORIES
SUPPLIED FROM THE PACKAGING #HECK CAREFULLY TO
ENSURE THAT THE MACHINE IS IN GOOD CONDITION
AND ACCOUNT FOR ALL THE ACCESSORIES LISTED IN THIS
MANUAL !LSO MAKE SURE THAT ALL THE ACCESSORIES
ARE COMPLETE )F ANY PARTS ARE FOUND TO BE
MISSING THE MACHINE AND ITS ACCESSORIES SHOULD
BE RETURNED TOGETHER IN THEIR ORIGINAL PACKAGING
TO THE RETAILER
$O NOT THROW THE PACKAGING AWAY KEEP IT SAFE
THROUGHOUT THE GUARANTEE PERIOD THEN RECYCLE IF
POSSIBLE OTHERWISE DISPOSE OF IT BY THE PROPER
MEANS $O NOT LET CHILDREN PLAY WITH EMPTY
PLASTIC BAGS DUE TO THE RISK OF SUFFOCATION
4AKE CARE WHEN LIFTING THE COMPRESSOR FROM THE
PACKAGING
#AUTION $O NOT LIFT THE COMPRESSOR BY THE
PRESSURE REGULATOR 'ET ASSISTANCE IF NECESSARY
4HIS UNIT WEIGHS KG
,OCATING THE !IR #OMPRESSOR
4HIS COMPRESSOR SHOULD BE POSITIONEDONA
STABLE FLAT SURFACE OR ONE WITH A MAXIMUM
INCLINATION OF Ę %NSURE THAT IT IS COMPLETELY
STABLE
$O NOT COVER OR BOX IN THE COMPRESSOR !LWAYS
POSITION IT WITH GOOD ALL ROUND VENTILATION
-OVING THE !IR #OMPRESSOR
"EFORE MOVING THE COMPRESSOR SWITCH OFF AND
DISCONNECT IT FROM THE MAINS POWER SUPPLY
o !LWAYS USE THE HANDLE
o $O NOT LIFT BY OR PUT STRAIN ON AIR TAPS VALVES
OR HOSES
o 4AKE CARE WHEN MOVING THE COMPRESSOR TO
AVOID DAMAGING THE VALVES OR FITTINGS
4HE COMPRESSOR IS HEAVY TAKE CARE WHEN LIFTING
AND MOVING THIS COMPRESSOR TO AVOID PERSONAL
INJURY 'ET ASSISTANCE IF NECESSARY
4HIS IS AN mOIL LESSn COMPRESSOR THIS MEANS THAT
LUBRICATION OF MOVING PARTS IS ACHIEVED BY USING
LUBRICANT IMPREGNATED MATERIALS THERE IS
THEREFORE NO OIL RESERVOIR AND THE COMPRESSOR
CAN BE MOUNTED IN ANY ORIENTATION WITHOUT THE
FEAR OF SPILLING OIL 4HE ONLY CONSIDERATION WHEN
MOUNTING IS THE POSITION OF THE WATER DRAIN COCK
7ARNING 7HEN THE COMPRESSOR IS USED FOR
SPRAYING PAINT OR SPRAYING CLEANING AGENTS THE
FINE MIST PRODUCED COULD IGNITE 7HEN
PERFORMING THIS TYPE OF OPERATION THE
COMPRESSOR MUST BE A MINIMUM OF -ETRES
AWAY FROM THE WORK AREA $O NOT SMOKE AND
KEEP NAKED FLAMES AND OTHER SOURCES OF IGNITION
WELL AWAY FROM THE WORK AREA
"ASIC #OMPRESSOR /PERATION
)MPORTANT .OTE 4HIS MANUAL IS PROVIDED TO
ALLOW THE CORRECT ASSEMBLY AND BASIC SAFE
OPERATION OF THE COMPRESSOR )T MUST BE READ IN
CONJUNCTION WITH THE MANUAL THAT IS SUPPLIED
WITH ANY OTHER ACCESSORY INTENDED FOR USE WITH
THIS COMPRESSOR &OR MORE DETAILED INFORMATION
ON THE USE OF COMPRESSORS AND ACCESSORIES WE
STRONGLY RECOMMEND THAT YOU PURCHASE A GOOD
QUALITY PUBLICATION IN ORDER TO ALLOW YOU TO USE
THIS PRODUCT TO ITS FULL POTENTIAL
4HE ELECTRIC MOTOR DRIVES AN AIR PUMP WHICH
DRAWS IN AIR FROM THE ATMOSPHERE AND DELIVERS IT
INTO THE AIR RECEIVER TANK THROUGH THE AIR RECEIVER
TANK SUPPLY TUBE 7HEN THE AIR PRESSURE IN THE
AIR RECEIVER TANK REACHES THE OPERATING PRESSURE
OF "AR THE PRESSURE SWITCH OPERATES AND
SWITCHES /&& THE MAINS SUPPLY TO THE MOTOR !T
THE SAME TIME THE AIR THAT IS IN THE PUMP
CYLINDER AIR RECEIVER TANK SUPPLY TUBE AND THE
PRESSURE SWITCH IS DISCHARGED 4HIS
DEPRESSURISES THE PUMP AND THE PRESSURE
REGULATING SYSTEM ALLOWING THE PUMP TO RESTART
WHEN THE AIR PRESSURE IN THE AIR RECEIVER TANK
FALLS BELOW THE MINIMUM OPERATING PRESSURE OF
"AR 4HE PRESSURE SWITCH IS FITTED WITH A DELAYED
DISCHARGE VALVE WHICH WILL START THE AIR PUMP
MOTOR 4HE PRESSURE RELIEF SAFETY VALVE IS SET TO
OPERATE AT "AR AND IS CONNECTED DIRECTLY
ONTO THE AIR RECEIVER TANK AND WILL OPERATE IF THE
SET PRESSURE OF "AR IS EXCEEDED SHOULD THE
PRESSURE SWITCH FAIL
/VERLOAD 0ROTECTION
4HIS COMPRESSOR IS FITTED WITH AN OVERLOAD
PROTECTION DEVICE )N THE EVENT THAT THE MOTOR
BECOMES TOO HOT A THERMAL PROTECTION DEVICE
WILL CUT THE MAINS SUPPLY TO THE MOTOR 7HEN THE
MOTOR TEMPERATURE RETURNS TO NORMAL THE MAINS
SUPPLY WILL BE RESTORED AUTOMATICALLY
8

9
Preparing For Use
Before connecting your compressor to the
mains supply, check the following:-
• The mains voltage is 230V.
• The ON/OFF switch is in the OFF (O)
position.
• The pressure regulator should be set at its
lowest setting, i.e. turned fully anticlockwise.
• If the machine has not been used for 24
hours or so, open the drain valve tap to drain
any condensate which may have
accumulated.
When clear, close the valve.
Important: If the receiver is under pressure,
keep your hands well away from the air being
expelled.... remember, compressed air is
dangerous!
Warning! Before connecting any air tool, make
sure you have read and fully understood the
manufacturers instruction booklet for the tool
being used.
Also ensure that the tool is compatible with the
compressor and hose specifications.
If the pressure rating of the tool is less than 8
bar, the pressure regulator must be used to
adjust the output pressure.
Switching On and Off
Warning! Switching On & Off must be done
using the On/Off switch mounted on the
compressor. Switching the compressor Off at
the mains supply can damage the motor and
will invalidate the guarantee.
Before switching on the power supply to the
compressor check that the On/Off switch is in
the Off position (O) (Fig.1).
Check that the pressure regulator is closed
(turned fully anti-clockwise) (Fig.2).
Check that the drain valve tap is closed (Fig.3).
Connect the compressor to a suitable 13A
mains supply. Switch on the compressor by
pressing the On/Off switch to the ON (I) position
(Fig.4). The compressor will now start.
OPERATING INSTRUCTIONS
Fig 1
Fig 2
Fig 3
Fig 4

OPERATING INSTRUCTIONS
When the air receiver tank is pressurised to its
working capacity the compressor will
automatically switch off. When the compressor
switches off there will be the sound of leaking
air while the pressure regulating system is
depressurised, this will last for only a few
seconds and is quite normal. Check all valves
and regulators for leaks. Note during extended
periods of use the air receiver tank supply tube
will become hot.
Connecting Hoses & Accessories
Warning! Do not operate accessories at an air
pressure greater than the maximum rated air
pressure for the accessory.
Connect a hose to the compressor using the
hose to compressor quick release connector
(Fig.5).
When using the regulated air output first
determine the working pressure of the
accessory by referring to the accessory manual.
Slowly open the pressure regulator (Fig.6) at the
same time observing the air outlet pressure
gauge until the pressure gauge reads the
minimum pressure for the accessory.
Fine adjustments to the air pressure can be
made until the accessory is working at its
optimum performance.
Do not exceed the maximum rated air pressure
for the accessory.
To disconnect a hose push the hose connector
towards the compressor and at the same time
pull back the brass collar, this will allow the hose
to be removed.
Always wait at least 10 seconds from when the
compressor has been switched off before
restarting.
Safety Valve
Check the operation of the safety valve, under
pressure, daily by pulling the ring as shown in
Fig.7. Air should be released you pull the ring
and stop when the ring is released.
• If the valve does not operate as described, or
if the valve is stuck, it must be replaced by
qualified service personnel before using the
compressor.
Warning! Do not remove or attempt to adjust
the safety valve.
Draining the Reservoir
Caution! It is important to drain the reservoir
before storage.
Switch the air compressor off, by pressing the
On/Off button to the (O) position, and remove
the plug from the mains supply.
10
Fig 5
Fig 6
Fig 7

11
Place a suitable container beneath the
compressor to catch any condensation.
Carefully open the drain tap until you hear a
hissing noise, this is the reservoir depressurising
(Fig.8).
When the gauge indicates zero and the hissing
has stopped, tighten the drain outlet nut again.
Maintenance
Important: Before carrying out any
maintenance, always disconnect the
compressor from the mains supply, drain the air
receiver and, if necessary, allow the machine to
cool down before starting work.
1.The compressor must be drained completely
by opening the drain tap. Drain the air receiver
tank after approx. 2 hours of use.
2.Cleaning and maintaining the compressor
regularly will give a long and trouble free life.
Before long term storage it is advisable to give
the compressor a thorough clean. This should
include the removal of all fitted accessories. Do
not use any solvents as these can damage
plastic parts. Only use a clean cloth dampened
with warm soapy water. Any metal parts should
be given a wipe with a light machine oil to
prevent rusting.
Caution. Water must never come into contact
with the compressor.
OPERATING INSTRUCTIONS & MAINTENANCE
Fig 8
TROUBLESHOOTING
12
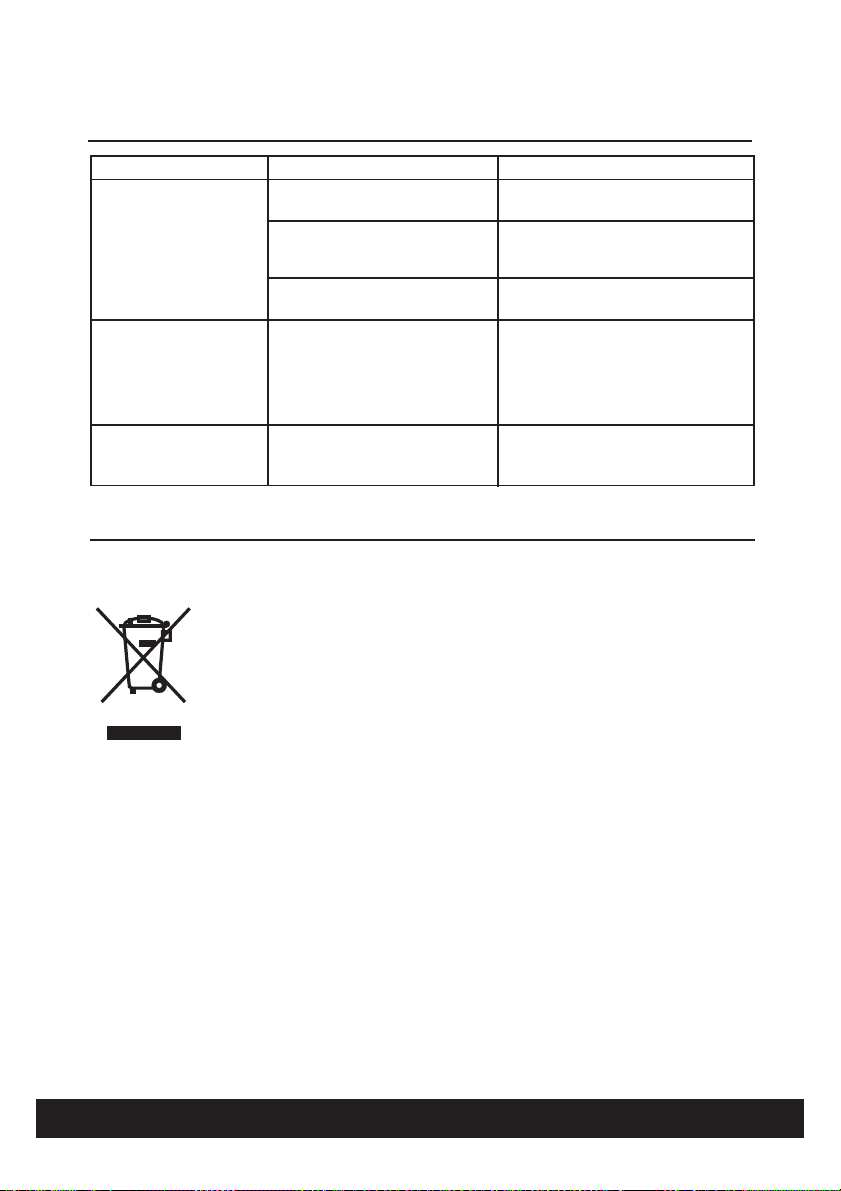
PROBLEM POSSIBLE CAUSE REMEDY
The compressor stopped
and does not start.
The compressor does not
reach the set pressure
and overheats easily.
Compressor does not
start.
Bad connections.
Overload cutout switch has
tripped or duty cycle has been
exceeded.
Motor windings burnt out.
Compressor head gasket blown
or valve broken.
Air receiver charged
Check electrical connections. Clean
and tighten as necessary.
Switch off and wait approx 5 minutes
before pressing the reset button and
switching on again.
Contact your local Impax dealer for a
replacement motor.
Wait for compressor to cool down,
disassemble head and replace any
broken components. Carefully clean
all sealing surfaces before
reassembling. If in doubt contact your
Impax dealer.
Open drain valve to expel air.
Compressor should start again when
pressure reduces to approx. 115 psi.
ENVIRONMENTAL PROTECTION
Information for (private householders) for the environmentally responsible disposal of Waste
Electrical and Electronic Equipment (WEEE)
This symbol on products and or accompanying documents indicates that used
and end of life electrical and electronic equipment should not be disposed of in
household waste. For the proper disposal, treatment, recovery and recycling,
please take these products to designated collection points, where they will be
accepted on a free of charge basis. Alternatively, in some countries you may be
able to return your products to your retailer upon the purchase of an equivalent
new product. Disposing of this product correctly will help to save valuable
resources and prevent any potential adverse effects on human health and the
environment which could otherwise arise from inappropriate waste disposal and handling. Please
contact your local authority for further details of your nearest designated collection point. Penalties
may be applicable for incorrect disposal of this waste in accordance with national legislation.
FOR BUSINESS USERS IN THE EUROPEAN UNION.
If you wish to discard electrical and electronic equipment, please contact your dealer or supplier for
further information.
Information on Disposal in other Countries outside the European Union.
This Symbol is only valid in the European Union.
If you wish to dispose of this product, please contact your local authorities or dealer and ask for the
correct method of disposal.
13
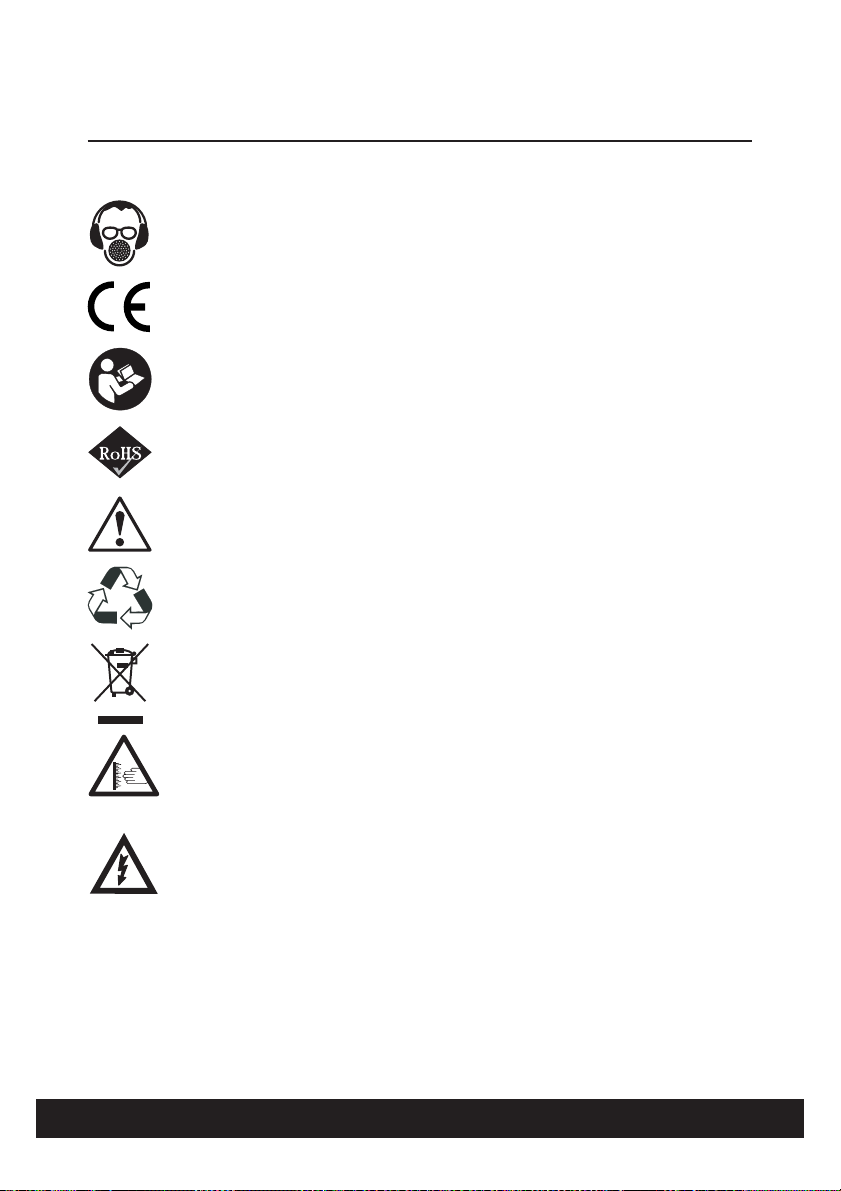
SYMBOLS
The rating plate on this product may show symbols. These represent important information about the
product or instructions on its use.
Conforms to relevant safety
standards.
Read the instruction manual.
Product conforms to RoHs
requirements
Waste electrical products
should not be disposed of
with household waste. Please
recycle where facilities exist.
Check with your Local
Authority or retailer for
recycling advice.
General warning
Wear hearing protection.
Wear eye protection.
Wear respiratory protection.
CAUTION: Hot surface
Risk of electric shock. The
compressor must be
disconnected from the mains
supply before removing any
covers. Do not use in a damp
environment.

NOTES
14

15
NOTES

EC DECLARATION OF CONFORMITY
4HE MANUFACTURER OF THE PRODUCT COVERED BY THIS $ECLARATION IS
.!0 "RANDS ,TD
.APIER (OUSE 5NIT #ORUNNA #OURT
7ARWICK 5NITED +INGDOM #6 (1
4HE MANUFACTURER HEREBY DECLARES THAT THE MACHINE AS DETAILED IN THIS DECLARATION FULFILS ALL THE
RELEVANT PROVISIONS OF THE -ACHINERY $IRECTIVE AND OTHER APPROPRIATE DIRECTIVES AS DETAILED BELOW
4HE MANUFACTURE FURTHER DECLARES THAT THE MACHINE AS DETAILED IN THIS DECLARATION WHERE APPLICABLE
FULFILS THE RELEVANT PROVISIONS OF THE ESSENTIAL HEALTH AND SAFETY REQUIREMENTS
4HE $IRECTIVES COVERED BY THIS $ECLARATION ARE AS DETAILED BELOW
0RODUCT $ETAILS
$ESCRIPTION , /IL &REE !IR #OMPRESSOR
-ODEL .O )-,
"RAND .AME )MPAX
.AME AND ADDRESS OF TECHNICAL DOCUMENTATION HOLDER
4HE TECHNICAL DOCUMENTATION REQUIRED TO DEMONSTRATE THAT THE PRODUCT MEETS THE REQUIREMENTS OF
DIRECTIVE HAS BEEN COMPILED AND IS AVAILABLE FOR INSPECTION BY THE RELEVANT ENFORCEMENT AUTHORITIES
3IGNED 0RINT -ARK 3HANNON
1UALITY $IRECTOR
.!0 "RANDS ,TD
.APIER (OUSE 5NIT #ORUNNA #OURT 7ARWICK 5NITED +INGDOM #6 (1
$ATE
%# 4HE -ACHINERY $IRECTIVE
%# ,OW 6OLTAGE %QUIPMENT $IRECTIVE
%# %LECTROMAGNETIC #OMPATIBILITY $IRECTIVE
%# 4HE #% -ARKING $IRECTIVE
%5 4HE 2ESTRICTION OF THE 5SE OF CERTAIN (AZARDOUS 3UBSTANCES IN %LECTRICAL %QUIPMENT
2O(3 $IRECTIVE
%# AS AMENDED BY %# 4HE 7ASTE %LECTRICAL AND %LECTRONIC %QUIPMENT 7%%%
$IRECTIVE
%# !NNEX 6) AND THE $IRECTIVE %# 4HE .OISE %MISSIONS IN THE %NVIRONMENT BY
%QUIPMENT FOR USE /UTDOORS 2EGULATIONS 3) AS AMENDED
!FTER SALES SUPPORT 4EL 7EBSITE WWWIMPAXPOWERTOOLSCOM
14
!ND IS IN CONFORMITY WITH THE APPLICABLE REQUIREMENTS OF THE FOLLOWING DOCUMENTS
%.
%.
%.
%.
%.
%.
Table of contents
Other Impax Air Compressor manuals


