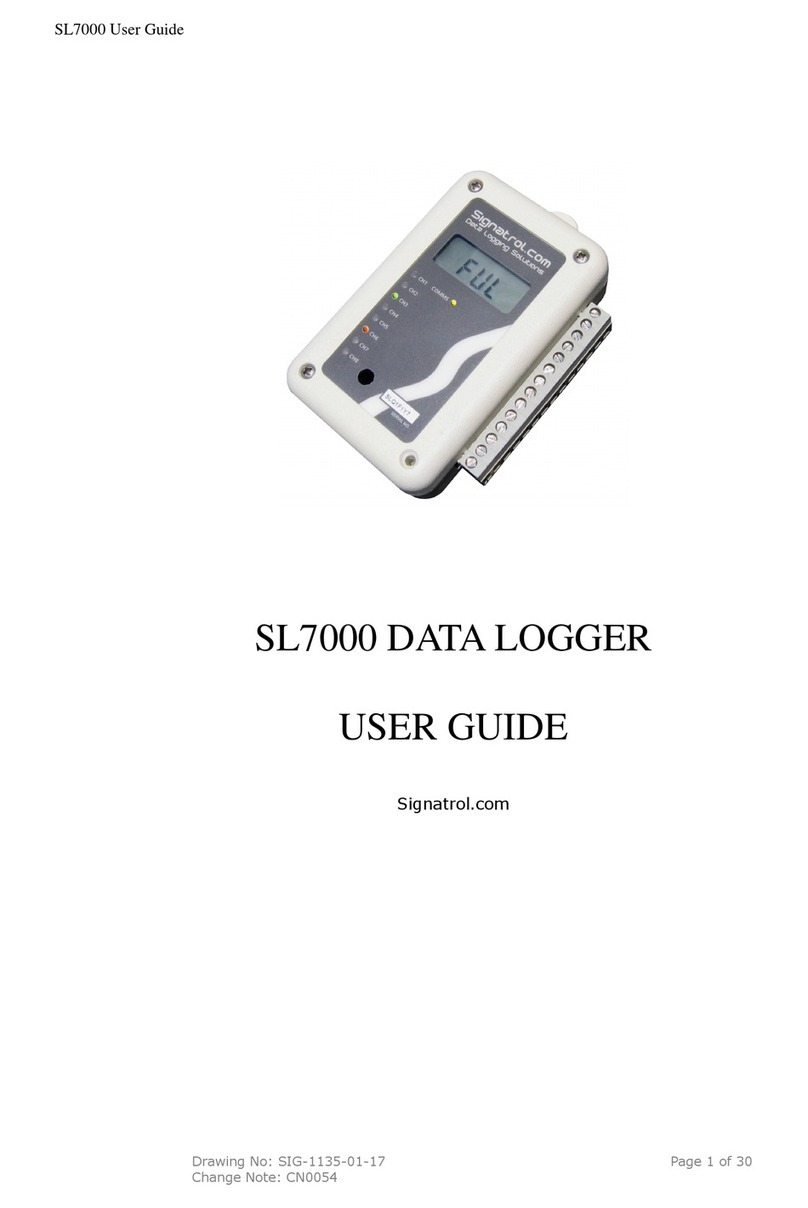
IMV SD Logger4 User manual

IMV CORPORATION
SD Logger4 instruction manual[X51 00 -3]
1/28 <2020/03/03> (3rd edition)
SD Logger4 Instruction Manual
ESD-CS4A
ESD-CC4A
ESD-BS4A
ESD-BC4A
【Cased (Case Type)】
【PCB(PCB Type)】
・The contents of this instruction manual are subject to change without notice for improvement.
・Please check our website for the latest information.

SD Logger4 instruction manual[X51 00 -3]
2/28 <2020/03/03> (3rd edition)
Contents
I Overview・Specification .......................................................................................... 4
1. Overview .............................................................................................................. 4
2. Variation .............................................................................................................. 5
3. Setting change by configuration mode ............................................................... 5
4. Specification ........................................................................................................ 6
5. Name of each part ............................................................................................... 7
II Setting ....................................................................................................................
1. DIP switch setting and configuration setting ....................................................
2. DIP switch ......................................................................................................... 11
III Connection ............................................................................................................ 13
1. RS-232C cable connection ................................................................................. 13
2. Power supply ..................................................................................................... 14
IV Usage procedure ................................................................................................... 15
1. Usage procedure ................................................................................................ 15
2. LED display and buzzer sound ......................................................................... 16
V File ........................................................................................................................ 17
1. File control system ............................................................................................ 17
2. Logging file [script version] .............................................................................. 17
3. Subdirectory ...................................................................................................... 17
4. Maximum number of files ................................................................................. 18
5. Command version file specification [Command version] ................................ 18
6. Script file [script version] ................................................................................. 18
7. Writing speed .................................................................................................... 1
VI Response to power shutdown .............................................................................. 20
1. Auto sync function ............................................................................................ 20
2. Capacitor backup .............................................................................................. 20
VII Other function ...................................................................................................... 21
1. Date / time setting ............................................................................................ 21
2. Jumper switch ................................................................................................... 21
3. Flow control ....................................................................................................... 23
4. Maintenance information ................................................................................. 23
VIII Enhanced functions and differences with Logger 3 .......................................... 24
1. Added high bit rate ........................................................................................... 24
2. Status file .......................................................................................................... 24
3. Update from card .............................................................................................. 25
4. Synchronize script and received data .............................................................. 25
5. Automatic clear of communication error ......................................................... 25

SD Logger4 instruction manual[X51 00 -3]
3/28 <2020/03/03> (3rd edition)
6. Strengthen short-term power-off response ...................................................... 25
7. Other enhancements ......................................................................................... 26
8. Main differences from Logger 3 ........................................................................ 26
IX Functions enhanced after V3 4X ........................................................................ 26
1. Script log start / stop function
X External dimensions ............................................................................................ 27
XI Notes・Other ......................................................................................................... 28

SD Logger4 instruction manual[X51 00 -3]
4/28 <2020/03/03> (3rd edition)
Ⅰ Overview・Specification
1. Overview
【Script version】
The SD logger “script version” is a device whose basic function is to save data
received from serial communication (RS-232C) to an SD card.
Data stored on the card can be read out on a PC using a commercially available
card reader.
In addition to basic functions, functions can be expanded by writing scripts in
their own scripting language.
It is possible to send a specific command at regular intervals, or send specific data
in response to some reception. A simple communication protocol can be realized.
It also has a date / time function. The script can write the date and time to the log
file.
Part of the written script can be simulated on a personal computer using the free
software "CMLogger" provided by our company.
After confirming the operation on the personal computer, it can be implemented
in the SD logger “script version”.
Please refer to the following documents for the script language specifications.
「SD logger script language reference format (X507018)」
「SD logger script language tutorial format (X50701 )」
【Command version】
The SD logger “Command Version” is a device that can read and write SD card file
data by exchanging commands via serial communication (RS-232C).
Card data can be read and written by a personal computer using a commercially
available card reader.
Refer to the following document for command specifications.
「SD logger (command version) Command communication specification (X507016)」
「SD logger (command version) command reference (X507017)」
「Date / Time Command Reference (X51 005)」
※The SD logger can be switched between “script version” and “command version”
by changing the setting in “configuration mode”.
※Free software provided by our company can be downloaded from our website.

SD Logger4 instruction manual[X51 00 -3]
5/28 <2020/03/03> (3rd edition)
2. Variation
This instruction manual explains the following models of the SD logger.
Model
Name
Factory function
Exterior
(Basic version)
ESD
-
CS4A
SD
logger
4
Script version
Case
ESD
-
CC4A
SD
logger
4
Command version
Case
ESD
-
BS4A
SD
logger
4
Script version
PCB
ESD
-
BC4A
SD
logger
4
Command version
PCB
※The “script version” includes the functions of the original “normal version”.
3. Setting change by configuration mode
In the logger, the setting can be changed in "Configuration Mode". The items that
can be changed are as follows.
Item Contents
Function Script version
Command version
Data bit
※1
8〔Bit〕
7〔Bit〕
Stop bit
※1
1〔Bit〕
2〔Bit〕
Bit rate
※2
300〔bps〕
1,200〔bps〕
2,400〔bps〕
4,800〔bps〕
,600〔bps〕
1 ,200〔bps〕
38,400〔bps〕
57,600〔bps〕
115,200〔bps〕
Flow control
No flow control by RTS(DISABLE)。
Perform flow control by RTS(ENABLE)。
Auto clear Do not automatically clear communication errors.
Automatically clears communication errors.
※1:When DIP switch 6 is ON
※2:When DIP switches 1 to 3 are all ON
Please refer to the following documents for how to change the settings.
「How to use ESDHost (X51 006)」

SD Logger4 instruction manual[X51 00 -3]
6/28 <2020/03/03> (3rd edition)
4. Specification
Item Contents Remarks
Baud rate(bps) 300,1200,2400,4800,
600,1 200,38400,57600
115200
Data bit 7bit / 8bit ※1
Step bit 1bit / 2bit Refer to Chapter IV-4
Parity None/Odd/ Even number
File system FAT16、FAT32 Refer to ChapterV-1
Card SD card(Compatible with
SDHC)
※2
RS-232C D-SUB 9pin male connector Fixed screw:
Inch(#4-40UNC)
Power supply DC 8V~12V
Current consumption
Standard 100mA, maximum
150mA
Operating
temperature range
0℃~60℃
Time accuracy ±0.01% Script WAIT TIME
Built-in clock accuracy
Within ± 60 seconds per month
@25℃
Built-in clock battery
CR2032 Standard battery life
7 years ※3
(注)Memory card and connection cable are not included.
※1 Only 8 bit can be used in configuration mode and update mode.
※2 SDXC cards are not supported.
※3 Batteries installed at the time of product shipment do not guarantee a
battery life of 7 years from the time of purchase.

SD Logger4 instruction manual[X51 00 -3]
7/28 <2020/03/03> (3rd edition)
5. Name of each part
【PCB type】
No.
Symbol
Contents
① SW2 Power switch
② CN3 Connector for memory card
③ LED3
Red LED(Error)
④ LED2
Yellow LED(Access)
⑤ LED1
Green LED(Pilot)
⑥ CN2 DC Power connector(DC jack)
⑦ CN1 RS-232C Connector(D-Sub pin male)
Fixed screw:Inch (#4-40UNC)
⑧ SW1 Dip switch for baud rate and other settings

SD Logger4 instruction manual[X51 00 -3]
8/28 <2020/03/03> (3rd edition)
【Case type】
No.
Symbol Contents
① POWER
Power switch
② Connector for memory card
③ ERR Red LED(Error)
④ ACC Yellow LED(Access)
⑤ PL Green LED(Pirot)
⑥ DC8~12V
DC power connector(DC jack)
⑦ RS-232C
RS-232C Connector(D-Sub 9pin male)
Fixed screw:Inch(#4-40UNC)
⑧ DIPSW Dip switch for baud rate and other settings

SD Logger4 instruction manual[X51 00 -3]
/28 <2020/03/03> (3rd edition)
Ⅱ Setting
1. DIP switch setting and configuration setting
SD Logger 4 has a function that can be switched by DIP switch setting and a
function that can be switched by configuration setting.
Configuration settings are made by connecting to a PC.
For configuration settings, refer to “Chapter I-3”. For details, refer to 「the way of
using ESDHost (X51 006)」.
Item Dip
Switch Configuration
Remark
Bit rate
300〔bps〕 × 〇
1,200〔bps〕 × 〇
2,400〔bps〕 ◎ 〇
4,800〔bps〕 ◎ 〇
,600〔bps〕 ◎ 〇
1 ,200〔bps〕 ◎ 〇
38,400〔bps〕 ◎ 〇
57,600〔bps〕 ◎ 〇
115,200〔bps〕 ◎ 〇
Parity
None 〇 ×
Odd number 〇 ×
Even number 〇 ×
Data bit
8bit ◎ 〇
7bit × 〇
Stop bit
1bit ◎ 〇
2bit × 〇 ※1
Flow control
Not performed △ 〇
Do × 〇
(Continued on next page)

SD Logger4 instruction manual[X51 00 -3]
10/28 <2020/03/03> (3rd edition)
(Continued)
Item Dip
Switch Configuration
Remark
Automatic clear of communication
error
Don't do × 〇
Do
△
〇
Function
Script version × 〇
Command version × 〇
◎
Can be set. Dip switch settings can be prioritized.
〇 Can be set.
× Cannot be set.
△
Default setting. What has been changed in the configuration settings
cannot be changed with the DIP switch.
※1 It can also be set with a script.

SD Logger4 instruction manual[X51 00 -3]
11/28 <2020/03/03> (3rd edition)
2. Dip switch
Dip switch[DIPSW(SW1)]
1 2 3 4 5 6 7 8 ON
The switches are [1] to [8] from the left. The switch is OFF at the top and ON at the
bottom.
(Setting Example)
Contens
600bps、Data 8 bits, 1 stop bit, no parity (all OFF)
No. [1]
[2]
[3]
[4]
[5]
[6]
[7]
[8]
Setting
OFF OFF OFF OFF OFF OFF OFF OFF
1-1)Bit rate setting
The bit rate is set by operating dip switches [1] to [3].
The correspondence between switch ON / OFF and bit rate is shown in the table
below.
No. Bit rate〔bps〕
[1] [2] [3] [4]
[5]
[6]
[7]
[8]
OFF
OFF
OFF
-
-
-
-
-
,600
ON
OFF
OFF
-
-
-
-
-
1 ,200
OFF
ON
OFF
-
-
-
-
-
38,400
ON
ON
OFF
-
-
-
-
-
57,600
OFF
OFF
ON
-
-
-
-
-
115,200
ON
OFF
ON
-
-
-
-
-
2,400
OFF
ON
ON
-
-
-
-
-
4,800
ON
ON
ON
-
-
-
-
-
Follow configuration settings.
1-2)Parity
The parity is set by operating the DIP switches [4] and [5].
The correspondence between switch ON / OFF and parity is shown in the
table below.
No. Parity
[1]
[2]
[3]
[4] [5] [6]
[7]
[8]
-
-
-
OFF
OFF
-
-
-
None
-
-
-
ON
OFF
-
-
-
Odd number
-
-
-
OFF
ON
-
-
-
Even number
-
-
-
ON
ON
-
-
-
None (for future expansion)

SD Logger4 instruction manual[X51 00 -3]
12/28 <2020/03/03> (3rd edition)
1-3)Data bit / stop bit
Data bits and stop bits are set by operating DIP switch [6].
The correspondence between switch ON / OFF and data bit / stop bit is shown
in the table below.
No. Data bit / stop bit
[1]
[2]
[3]
[4]
[5]
[6] [7]
[8]
-
-
-
-
-
OFF
-
-
8 data bits and 1 stop bit
-
-
-
-
-
ON
-
-
Follow configuration settings.
※In configuration mode and update mode, even if data bit 7 is set
in configuration settings, data bit 8 operates.
1-4)Mode
The mode is set by operating DIP switches [7] and [8].
The correspondence between the switch ON and OFF and the mode is as shown
in the table below.
No. Mode
[1]
[2]
[3]
[4]
[5]
[6]
[7] [8]
-
-
-
-
-
-
OFF
OFF
Normal
-
-
-
-
-
-
ON
OFF
Configuration mode
-
-
-
-
-
-
OFF
ON
Status display (maintenance) mode
-
-
-
-
-
-
ON
ON
Update (programming) mode
※The maintenance mode is for checking maintenance information and
for maintenance. Normally, use it in non-maintenance mode.
※If a card is installed, it will not be in configuration mode or update mode.
Remove the card to use in configuration mode or update mode.
※Do not use a mechanical pencil for dip switch operation.
Mixing the core powder into the inside may cause malfunction.

SD Logger4 instruction manual[X51 00 -3]
13/28 <2020/03/03> (3rd edition)
Ⅲ Connection
1. RS-232C cable connection
Check each signal so that there is no mistake in the connection of the RS-232C
connector. The connector pin assignments are as follows.
RS-232C
1 2 345
67 8 9
D-Sub pin male
(View from connector mating surface)
Pin No. Name Contents Signal direction
1 NC Not connected (Note 1)
Logger Side
2 RXD Received data
3 TXD Send data
4 DTR Data terminal ready, connected to pin 6
5 GND Signal ground
6 DSR Data set ready, connected to pin 4 (Note
1)
7 RTS Transmission request (usually high
level, Note 3)
8 CTS Transmission permission (not used,
note 4)
Unused (Note 2)
(Use a cross cable when connecting to RS-232C on a PC.)
(For flow control using 7-pin RTS, refer to 「Ⅶ Other functions / 3. Flow
control」.)
(Note 1) Can be used as a terminal to turn the power on and off from the outside
by jumper settings. See 「Ⅶ Other functions 2. Jumper switches」.
(Note 2) It can be used as a terminal to supply power from outside by jumper
setting. See 「Ⅶ Other functions 2. Jumper switches」.
(Note 3) Can be controlled by script language.
(Note 4) Can be used to control the script language.

SD Logger4 instruction manual[X51 00 -3]
14/28 <2020/03/03> (3rd edition)
2. Power supply
Supply DC power (DC8V to 12V) from the DC power connector (DC jack, CN2
for board).
Use a compatible DC plug with an inner diameter of φ2.1 and an outer
diameter of φ5.5.
When using an AC adapter, select a suitable DC plug.
When using an AC adapter, the switching regulator type is recommended.
(Center is a plus)

SD Logger4 instruction manual[X51 00 -3]
15/28 <2020/03/03> (3rd edition)
Ⅳ Usage procedure
1. Usage procedure
Procedure 1.Insert memory card
Insert a memory card into the logger.
Procedure 2.Power switch(POWER/SW2)ON
Turn the power switch to the [ON] side to turn on the power.
Setting the power switch to the [ON] side is expressed as 「Turn the power
switch ON」.
If the green LED (PL / LED1) turns on and the yellow LED (ACC / LED2) turns
off, the preparation is complete.
Procedure 3.Power switch(POWER/SW2)OFF
To finish the work after receiving data and exchanging commands, set the power
switch to the [OFF] side.
Setting the power switch to the [OFF] side is expressed as 「Turning the power
switch off」. The power turns off automatically after closing the open file.
*It is possible to remove the memory card.
If the card is being accessed, it may take some time before the power is actually
turned off even if the power switch is turned off.
Check the card access with the yellow LED display.
Check that all LEDs are off before inserting or removing the card.

SD Logger4 instruction manual[X51 00 -3]
16/28 <2020/03/03> (3rd edition)
2. LED display / buzzer sound
The LED is displayed as follows.
Pilot lamp (Green)
PL/LED1
Lighting Power is on.
Access lamp (Yellow)
ACC/LED2
Lighting Accessing the memory card.
Holding data in the buffer.
Flashing In configuration mode.
Error lamp (red)
ERR/LED3
Flashes once The card is not installed.
Flashes twice
Error in card access.
Flashes 3
times Data communication error.
Flashing In update mode.
The buzzer sounds as follows.
Buzzer
When the access lamp(Yellow、 )starts to light,
it sounds briefly.
※Does not sound when the configuration mode
is blinking.
Sounds the same as the blinking error lamp (Red、 )
※Does not sound when flashing in update mode.
The buzzer can be stopped by removing the jumper switch, J3. See section 「Ⅶ.2」
for how to remove the jumper switch.

SD Logger4 instruction manual[X51 00 -3]
17/28 <2020/03/03> (3rd edition)
Ⅴ File
1. File control system
Logger uses the FatFs file system created by ChaN.I would like to thank and
thank Mr. ChaN for providing a competent file system.
Long file names are not supported.
2. Logging file
【Script version】
File name [4-digit hexadecimal number].LOG
(Example)
0000.LOG
0001.LOG
0002.LOG
The logging file has a name that does not overlap with an existing file.
Search for the existence of the file from "0000.LOG" to "FFFF.LOG", and the
name of the first non-existent file found is used as the logging file name.
※The extension can be changed by script.
3. Subdirectory
In the case of "script version", the following subdirectory function works.
If a directory called 「LOGDATA」 exists in the root directory, a logging file will be
created under that directory.
If there is no "LOGDATA" directory, the logging file will be created in the root
directory.
The “command version” does not have a subdirectory function.

SD Logger4 instruction manual[X51 00 -3]
18/28 <2020/03/03> (3rd edition)
4. Maximum number of files
The maximum number of files that can be logged by the logger is 65536 [* 1].
However, in general, only 512 [* 2] files can be created in the FAT16 root directory,
so the logger also conforms to this restriction.
It seems that the maximum number of files that can be created in a subdirectory
is generally limited to 65534 [* 2], but the logger can create more than 65535 [* 2]
files.
And in our verification, the 65535th and 65536th files created by the logger can
also be read on a personal computer.
[*1] The maximum number of logging files created by the logger.
[*2] This is the maximum number including files other than logging files.
Start-up time
If there are many files on the card, it takes time to start up, which is not practical.
The following table gives an estimate of the startup time for the number of files
under certain conditions.
Number of
files
512pcs 1,024pcs 4,0 6pcs 10,000pcs
Start-up time
1.3seconds 2.1 seconds 16. seconds 1minutes
2 .6 seconds
※It is a reference value , not a guaranteed value.
5. Command version file specification
【Command version】
File name 8 single-byte alphanumeric characters + 3 character extension
(Long file names are not supported)
For details on the file names that can be handled by the command version,
See「Command Communication Specifications」.
The subdirectory function cannot be used in the command version.
6. Script file
【Script version】
In the case of “script version”, if there is a file named 「SCRIPT.TXT」 or
「SCRIPT.SCR」 on the installed memory card, it will be read as a script file.
The script file is read and executed when the power switch is turned on and the
power is turned on.
Script files are read from the root directory even if the directory “LOGDATA”
exists.
In the script file, LF (0x0A) is judged as the end of the line.
CR (0x0D) appearing in the script file is ignored.

SD Logger4 instruction manual[X51 00 -3]
1 /28 <2020/03/03> (3rd edition)
7. Writing speed
As the amount of data in the card increases, the writing speed decreases, which is
not practical.If writing speed is required, it is recommended that you use a card that
has just been formatted or has not recorded much data.
Consider using flow control for use with large amounts of data. In the command
version, check the response firmly (it takes longer time to get a response).
Notes
If it takes time to write 1 byte, the power will not be turned off immediately even
if the power switch is turned off.
Depending on the situation, the power may not be turned off for more than 1
minute even if the power switch is turned off.
In such a case, please wait for the card to be inserted or removed or the main
power supply to be shut off until all LEDs turn off even if the power switch is turned
off.

SD Logger4 instruction manual[X51 00 -3]
20/28 <2020/03/03> (3rd edition)
Ⅵ Response to power shutdown
1. Auto sync function
When data is lost for 3 seconds, the data remaining in the buffer is written to the
card and the consistency of the file structure is restored.
As a result, data received more than 3 seconds ago will not be lost even if the
power is suddenly shut down.
In addition, even if the power supply is cut off without receiving data for more
than 3 seconds, the file structure will not be damaged.
2. Capacitor backup
Even if the external power supply is cut off, the internal power supply is
secured by the capacitor.
Even if the power supply (main power supply) to the DC power connector is cut off
while the power switch is ON, the power is supplied from the backup capacitor and
the shutdown process is performed.
When the shutdown process is completed, the logger will cut off the power supply
to itself.
Power is supplied from the backup capacitor for a short time during the shutdown
process.
Even if the external power supply is suddenly cut off due to auto sync and
capacitor backup, the possibility of damaging the file structure is low.
Notes
The time required for the shutdown process varies depending on the usage
conditions of the card used.
On the other hand, the backup time with a capacitor is limited.
Please fully verify the effectiveness under the conditions of use.
This manual suits for next models
4
Table of contents
