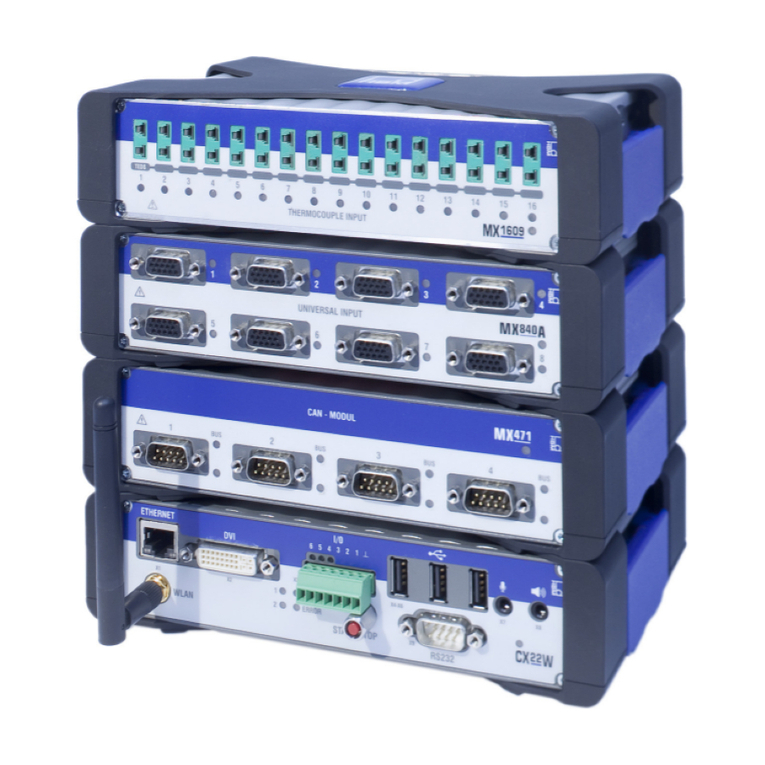
HBM QuantumX CX22-W User manual

English Deutsch
Data Recorder
CX22-W
Operating Manual
A3169-5.0_en/de

CX22-W
2 A3169-5.0_en/de
English
1 Safety instructions 5........................................
2 Markings used 12............................................
2.1 The markings used in this document 12..........................
2.2 Symbols on the module and their meaning 13....................
3 Introduction 14..............................................
4 CX22-W connections 15......................................
5 Changing the CompactFlash card 17..........................
5.1 Procedure for removing the CF card 20..........................
5.2 Procedure for inserting the CF card 21...........................
6 Connecting the CX22-W data recorder 22......................
6.1 System supply voltage 22......................................
6.2 Operation with monitor and keyboard/mouse 23...................
6.3 Connecting to a PC 24........................................
6.4 Connecting QuantumX modules 26..............................
6.5 Connecting other devices 27...................................
7 Connecting a PC with the CX22-W data recorder 28............
7.1 Direct connection of PC and CX22-W 29.........................
7.2 Connecting the CX22-W and PC via a network 33.................
7.3 Connection via WLAN 36......................................
7.3.1 Preparing the CX22-W for WLAN connections 36.................
7.3.2 Preparing the CX22-W for an existing WLAN (Access Point) 38.....
7.3.3 Setting up connection via WLAN 40.............................
7.3.4 Preparing the CX22-W for an Adhoc network 41..................
7.3.5 Preparing the PC for connection via an Adhoc network 45..........
7.3.6 Setting up a connection via WLAN and Adhoc network 46..........
7.4 Setting up connection via remote desktop 48.....................
7.5 Configuration of remote desktop 49.............................

CX22-W
A3169-5.0_en/de 3
7.6 Detecting and resolving connection problems 54..................
7.7 Using Ethernet and WLAN in parallel 56.........................
8 Connecting devices without the Windows operating system to
the CX22-W 57...............................................
9 The CX22-W data recorder start screen 58.....................
10 Configuring measurement with catman[EASY 60.............
10.1 General default settings, data storage and directories 60...........
10.2 Extending catmanAP functionality 62..........................
10.3 Setting up a device scan 62....................................
10.4 Creating a DAQ project 63.....................................
10.5 Transferring data/files from the CX22-W to the PC 66..............
10.6 Data analysis 69..............................................
11 Configuring the CX22-W for self-contained measurements 70...
12 Additional CX22-W connections 72...........................
12.1 Digital inputs and outputs 72...................................
12.2 START/STOP button 73.......................................
12.3 LED displays 73..............................................
12.3.1 Module LED 74...............................................
12.3.2 LEDs in the Ethernet connection 74.............................
12.3.3 Status LEDs for operating status 74.............................
12.3.4 Status LEDs for digital outputs 75...............................
12.3.5 LED for operating status of the CF card 75.......................
12.4 Microphone input, loudspeaker output 75........................
12.5 USB connections 76..........................................
12.6 RS-232 77...................................................
13 System settings, update and recovery 78......................
13.1 Changing system settings (Settings) 78..........................
13.2 System restoration (Recovery) 79...............................
CX22-W
4 A3169-5.0_en/de
13.3 Updating catmanEASY 82...................................
13.4 Installing Windows software or drivers 82........................
13.5 Partitioning memory in the CX22-W 83..........................
13.6 EWF, safeguarding your settings against change 84...............
14 Waste disposal and environmental protection 85..............
15 Index 87....................................................
CX22-W
A3169-5.0_en/de 5
1 Safety instructions
Appropriate use
The QuantumX data recorders CX22-W (with WLAN) are
to be used exclusively for measurement tasks and
directly related control tasks within the application limits
detailed in the specifications. Use for any purpose other
than the above is deemed to be non-designated use.
In the interests of safety, the module should only be
operated as described in the Operating Manuals. It is
also essential to comply with the legal and safety
requirements for the application concerned during use.
The same applies to the use of accessories.
Each time you start up the module, you must first run a
project planning and risk analysis that takes into account
all the safety aspects of automation technology. This
particularly concerns personal and machine protection.
Additional safety precautions must be taken in plants
where malfunctions could cause major damage, loss of
data or even personal injury. In the event of a fault, these
precautions must establish safe operating conditions.
This can be done,for example, by mechanical
interlocking, error signaling, etc.
Note
The module must not be connected directly to the power
supply system. Supply voltage 10 V ... 30 V (DC).

CX22-W
6 A3169-5.0_en/de
General dangers of failing to follow the safety
instructions
The QuantumX data recorders CX22-W are
state-of-the-art and fail-safe. The modules may give rise
to residual dangers if they are inappropriately installed
and operated by untrained personnel. Any person
instructed to carry out installation, startup, maintenance
or repair of the modules must have read and understood
the Operating Manuals and in particular the technical
safety instructions.
Ambient conditions on site
SProtect the module from direct contact with water.
SProtect the module from dirt, moisture or weather
conditions such as rain, snow, etc. The protection
class under the IP standard DIN EN 60529 is IP20.
SPlease observe the permissible maximum ambient
temperatures stated in the specifications.
SMake sure that the side ventilation openings are not
covered.
SThe permissible relative humidity at 31C is 80% (non
condensing); linear reduction up to 50% at 40C.
SDo not expose the device to direct sunlight.
SStellen Sie das Gerät so auf, dass eine Trennung
vom Netz jederzeit problemlos möglich ist.
SDas Modul kann bis zu einer Höhe von 2000 m sicher
betrieben werden.
Maintenance and cleaning
The modules are maintenance-free.
SBefore cleaning, disconnect all connections.

CX22-W
A3169-5.0_en/de 7
SClean the housing with a soft, slightly damp (not wet!)
cloth. Never use solvent as this could damage the
labeling or the housing.
SWhen cleaning, ensure that no liquid gets into the
module or connections.
Residual dangers
The scope of supply and performance of the modules
only covers a small area of measurement technology. In
addition, equipment planners, installers and operators
should plan, implement and respond to the safety
engineering considerations of measurement technology
in such a way as to minimize residual dangers. Comply
with the prevailing regulations at all times.
Product liability
In the following cases, the protection provided for the
device may be adversely affected. Liability for device
functionality then passes to the operator:
SThe device is not used in accordance with the
operating manual.
SThe device is used outside the field of application
described in this Chapter.
SThe operator makes unauthorized changes to the
device.
Warning signs and danger symbols
Important instructions for your safety are specifically
identified. It is essential to follow these instructions in
order to prevent accidents and damage to property.
The safety instructions take the following form:

CX22-W
8 A3169-5.0_en/de
WARNING
Type of danger
Consequences of non‐compliance
Averting the danger
SWarning sign:
draws attention to the danger
SSignal word:
indicates the severity of the danger (see table below)
SType of danger:
mentions the type or source of the danger
SConsequences:
describes the consequences of non-compliance
SAverting:
indicates how the danger can be avoided/bypassed

CX22-W
A3169-5.0_en/de 9
Danger categories under ANSI
Warning sign, signal word Meaning
WARNING This marking warns of a potentially dangerous situ
ation in which failure to comply with safety require
ments can result in death or serious physical injury.
CAUTION This marking warns of a potentially dangerous situ
ation in which failure to comply with safety require
ments can result in slight or moderate physical injury.
Note This marking draws your attention to a situation in
which failure to comply with safety requirements can
result in damage to property.
On the module
Meaning: Take details in the operating manual into
account.
Working safely
A device must not be directly connected to the
power supply system. Supply voltage 10 V ... 30 V
(DC).
The supply connection and all other connections must be
installed in such a way that electromagnetic interference
does not adversely affect device functionality (see also
“Greenline shielding design", downloadable from the
Internet at http://www.hbm.com/greenline).
When devices are working in a network, these networks
must be designed in such a way that malfunctions in
individual nodes can be detected and shut down.
Automation equipment and devices must be designed in
such a way that adequate protection or locking against
unintentional actuation is provided (e.g. access checks,
password protection, etc.).

CX22-W
10 A3169-5.0_en/de
When the modules are working in a network, these
networks must be designed in such a way that
malfunctions in individual nodes can be detected and
shut down.
Safety precautions must be taken both in terms of
hardware and software, so that a line break or other
interruptions to signal transmission, such as via the bus
interfaces, do not cause undefined states or loss of data
in the automation device.
Conversions and modifications
The module must not be modified from the design or
safety engineering point of view except with our express
agreement. Any modification shall exclude all liability on
our part for any resultant damage.
In particular, any repair or soldering work on
motherboards (replacement of components) is prohibited.
When exchanging complete modules, use only original
parts from HBM.
The module is delivered from the factory with a fixed
hardware and software configuration. Changes can only
be made within the possibilities documented in the
manuals.
Qualified personnel
This device is only to be installed and used by
qualified personnel strictly in accordance with the
specifications and with the safety rules and
regulations which follow.
Qualified persons means persons entrusted with the
installation, fitting, commissioning and operation of the
product who possess the appropriate qualifications for
their function.

CX22-W
A3169-5.0_en/de 11
This includes people who meet at least one of the three
following requirements:
SKnowledge of the safety concepts of automation
technology is a requirement and as project personnel,
they must be familiar with these concepts.
SAs automation plant operating personnel, they have
been instructed how to handle the machinery. They
are familiar with the operation of the modules and
technologies described in this documentation.
SAs system startup engineers or service engineers,
they have successfully completed the training to
qualify them to repair the automation systems. They
are also authorized to activate, ground and label
circuits and equipment in accordance with safety
engineering standards.
It is also essential to comply with the legal and safety
requirements for the application concerned during use.
The same applies to the use of accessories.
Maintenance and repair work on an open device with the
power on must only be carried out by trained personnel
who are aware of the dangers involved.

CX22-W
12 A3169-5.0_en/de
2 Markings used
catmanis a registered trademark of HOTTINGER
BALDWIN MESSTECHNIK GMBH.
All trademarks and brands used in this document are
trade names and/or trademarks belonging to the
respective product or the manufacturer/owner.
HOTTINGER BALDWIN MESSTECHNIK GMBH does
not lay claim to any other than their own trade
names/trademarks.
2.1 The markings used in this document
Important instructions for your safety are specifically
identified. It is essential to follow these instructions, in
order to prevent damage.
Symbol Significance
Note This marking draws your attention to a situation in
which failure to comply with safety requirements can
lead to damage to property.
Important
This marking draws your attention to information
about the product or about handling the product.
Tip
This marking indicates application tips or other
information that is useful to you.
Device -> New Bold text indicates menu items, as well as dialog and
window titles in the user interfaces. The arrows
between menu items indicate the sequence in which
menus and sub-menus are called
Data rate, 500 Bold-italic text indicates inputs and input fields in the
user interfaces.
Emphasis Italics are used to emphasize and highlight text.

CX22-W
A3169-5.0_en/de 13
2.2 Symbols on the module and their
meaning
Take details in the operating manual into account
CE mark
The CE mark enables the manufacturer to guarantee that
the product complies with the requirements of the
relevant EC directives (the Declaration of Conformity can
be found on the HBM support website,
www.hbm.com/support and HBMdoc).
Statutory waste disposal mark
The electrical and electronic devices that bear this
symbol are subject to the European waste electrical and
electronic equipment directive 2002/96/EC. The symbol
indicates that the device must not be disposed of as
household garbage, see also Chapter 14, Page 85.
USB connections, e.g. for keyboard, mouse, external
memory
Microphone connection
Loudspeaker connection
Connection for grounding the housing
The connection must be connected to the grounded
conductor potential.

CX22-W
14 A3169-5.0_en/de
3 Introduction
This manual is intended to support you in making the
basic settings of your QuantumX data recorder. The
CX22-W has a WLAN module with a WLAN antenna on
the front of the module.
All measurement technology settings are implemented
using the catmanEASY software, which has an
extensive online Help.
This manual shows you:
SHow to connect the module.
SWhat options are available for connecting to the
module.
SHow to connect to the module.
QuantumX modules are connected to the CX22-W data
recorder via FireWire in the same way as is the case with
other QuantumX modules, or alternatively, you can
connect QuantumX modules via Ethernet and a switch or
hub.
Full QuantumX documentation includes:
SThis operating manual
SQuantumX operating manual with pin assignments
SThe QuantumX data recorder data sheet
SQuantumX modules data sheets
SOnline Help in the software
- catmanEASY
- QuantumX Assistant
- Sensor database

CX22-W
A3169-5.0_en/de 15
4 CX22-W connections
USB Microphone
Loudspeaker
START/STOP button
RS-232-C
Digital I/Os
Status LEDs
Monitor
WLAN antenna
Ethernet
(network)
Module LED
Fig. 4.1 CX22-W connections on the front

CX22-W
16 A3169-5.0_en/de
CF card, type 1
Ejection button
for CF card
LED
Supply voltage
10 30VDC
Grounding FireWire
Lock for CF card
Fig. 4.2 CX22-W connections on the back
Ground connection and grounding
Lay signal and data leads separately from
current-carrying power lines. Cable ducts made of sheet
metal with an internal partition are ideal.
A potential equalization line must be laid if there are
potential differences in or to the connected measurement
system (reference value: highly flexible stranded wire,
wire cross section 10 mm2).

CX22-W
A3169-5.0_en/de 17
5 Changing the CompactFlash card
Important
CompactFlash cards (CF cards) only have a limited
number of write cycles, i.e., they age (typically 1,000,000
write cycles). You should therefore check the CF card
regularly for errors in Windows and replace with a new
card if required. The life of a CF card depends on the
demand made on it, and the manufacturer.
Make sure that you use an up-to-date, high-quality type 1
CF card, CF version 4.1, of at least 8GBytes, in order to
achieve a high data transfer rate; older CF cards usually
have lower data transfer rates. The card must be
formatted with the NTFS file system before insertion.
We recommend to use SanDisk Extreme Pro (UDMA7,
up to 160 MB/s).
The scope of supply for the CX22-W data recorder
includes a CF card of 8GBytes, although cards of up to
128GBytes can also be used.
Formatting the card
The CF card must be formatted with the NTFS file
system. You can carry out this formatting with any PC
that has a CF card slot or a CF card adapter and uses
Windows XP or higher. Right-click on the drive and select
Format from the context menu.
Converting to NTFS
If formatting with NTFS is not available on your
computer, use the “convert.exe" program. Insert a card
formatted e.g. with FAT32 into the CX22-W and use the
Windows Start menu to call up the command prompt:

CX22-W
18 A3169-5.0_en/de
Programs -> Accessories -> Command Prompt (also
see Chapter 9 on Page 58, Exit to Windows). Then enter
convert.exe E: /FS:NTFS, to convert drive E: to an
NTFS data medium. The progress is shown in the
window. When “Conversion complete" appears, the data
medium is then formatted with NTFS.
Optimizing CF card
Click in Windows Explorer with the right mouse button on
the CF card and then in “Preferences”. Select in the tab
“Hardware” again “Preferences” and then choose in the
tab “Policies” the option “Optimize for Performance”.
Trim data access on Drive E:\ in respect of performance:

CX22-W
A3169-5.0_en/de 19

CX22-W
20 A3169-5.0_en/de
5.1 Procedure for removing the CF card
Note
Do not replace the CF card when the CX22-W is
switched on.
Otherwise the CX22-W or the CF card could be damaged
or, if measurement data are being recorded, this could
cause all the data of the test to be lost.
Switch the CX22-W off before replacing the CF card.
1. Undo the retaining screw for the CF card (Fig. 4.2 on
Page16). The screw must not be removed, it should
just be loosened.
2. Swivel the cover plate upwards to expose the slot for
the CF card.
3. Use a blunt object, e.g. a ball-point pen, to press the
ejection button on the right in the CF card slot
(Fig. 4.2).
4. Remove the CF card.
5. Read Section 5.2, this describes the insertion of the
CF card. The CX22-W should not be operated without
a CF card, as no data can be stored.
Other manuals for QuantumX CX22-W
1
Table of contents
Languages:
Other HBM Data Logger manuals

HBM
HBM QuantumX CX22-W User manual

HBM
HBM SomatXR MX Series User manual

HBM
HBM QuantumX User manual

HBM
HBM eDAQXR-lite User manual

HBM
HBM QuantumX CX22 User manual

HBM
HBM espressoDAQ DQ401 User manual

HBM
HBM SOMAT XR CX22B-R User manual

HBM
HBM QuantumX User manual

HBM
HBM SomatXR MX Series User manual

HBM
HBM QuantumX CX22B User manual