Independence 335 User manual

1
6901 90th Avenue North Pinellas Park, FL 33782
Phone: (727) 545-9848 ~ Fax: (727) 546-0613
Copyright December 2010

2
335 Independence Exercise Chair
Introducing the Total Exercise Solution
The Independence Exercise Chair will help you make the right choice when considering your
future health and wellbeing. We will explain how the Independence Exercise Chair works to
preserve as well as improve your present levels of independence. For those of you who are
having difficulties we will show you how the exercise’s provided by this unique product will improve
your condition. We have all seen and heard the commercials that have targeted the elderly after
they have fallen but with the Independence Exercise Chair you don’t have to fall and you will be
able to get up!
The Independence Exercise Chair is not an expensive motorized reclining chair or a ‘free’ scooter
that everyone sees as the solution. Yes, these products get you up and moving around but do they
really help you? The answer is no. These products only provide a ‘crutch’ that leads to continued
reduction of your muscle strength and a decrease in your balance and stability. The loss of a
person’s ability to sit and stand or the chance of a fall has significant repercussions to them and to
their families. So what is the right solution?
The importance of maintaining your independence cannot be questioned and as we get older we
all understand what the loss of this means to us all. This is the reason the Independence Exercise
Chair is the solution that will work for you. This compact exercise machine is the size of a small
chair and will fit in almost any room. The wheels also allow you to move the machine around or
place it in front of the TV while you workout. Simply adjust the assistance level and the machine
supports you while you exercise. As you become stronger through repetitions you reduce the
amount of assistance, making your muscles work a little harder. Within weeks you will see
improvements in upper and lower body strength which in turn gives you greater stability and
balance. The Independence Exercise Chair will become an integral part of your regular exercise
program.
The Independence Exercise Chair benefits you in so many ways and here are a few highlights:
•Provides you with the ability to preserve your independence
•Build upper and lower body strength
•Increase stability and helps prevent falls
•A functional trainer for assisted exercise repetitions – muscle memory
•Easier transfers from a chair, bed, car, sofa, etc.
•Small compact design that will fit nicely into your home setting
•Wheels allow the unit to be moved easily
•Simple to adjust and set up for your workout
•Large comfortable seat
•An economical answer to the expensive alternatives
The medical version of the Independence Exercise Chair has been successfully used for several
years to improve a person’s ability to sit, stand and transfer while also increasing their balance and
stability. No other product will provide the positive results that this chair does. The Independence
Exercise Chair has not only been used for exercise, but to help people with numerous medical
conditions including Arthritis, Parkinson's, Muscular Dystrophy, Multiple Sclerosis, ALS (Lou
Gehrig's disease), post-operative conditions and Degenerative Joint disease.

3
INDEPENDENCE EXERCISE CHAIR – HOW IT WORKS
The Independence Chair is NOT a lift chair but an exercise chair that
will help you increase strength and keep your independence.
The Independence Chair works on assistance and your own body
weight. You adjust the setting to your weight and receive a level of
assistance with the chair every time you sit and stand. As you exercise
using the Independence Chair, you will strengthen the upper and lower
body and be able to lower the level of assistance set. With regular use,
you will able to sit and stand on your own using your own muscles and
relying on no one but yourself!
The Independence Chair works the lower body with the sit to stand
exercise and the upper body with assisted dips.
INDEPENDENCE EXERCISE CHAIR – SIT to STAND
Select the assistance level based on your body weight. Keeping your
backside on the seat, slowly start to stand up, position your head with
your nose over your toes. This is key in making sure you are in the
proper position.
After a few reps of the sit and stand exercise, you will start to feel
fatigue in your legs. Keep at it! Increase the amount of reps you do each
day and then slowly decrease the level of assistance used. You will
notice a difference in how you are sitting and standing as you build the
strength in your legs.
INDEPENDENCE EXERCISE CHAIR – TRANSFER
Position your legs out in front of you; hold onto the handles with your
elbows back. Lift your body weight concentrating on the triceps, then
slowly back down to seated. Repeat. Notice your triceps getting
fatigued. From week to week, decrease the amount of assistance set
so you are eventually doing the exercise assistance free. Work your
way to a stronger upper body!

4
WARNING:
Before beginning workouts with this or any other exercise unit, please consult with your physician.
This is especially important for people over the age of 35 or individuals with pre-existing health
problems. Please read instructions in full before using this unit. The Endorphin Corporation
assumes no responsibility for personal injury or property damage sustained by or through the use
of this product.
SAFETY PRECAUTIONS:
1. Consult your physician before using this exercise equipment.
2. Keep hands, feet, and head away from moving parts and adjustment tubes.
3. Minors should not workout alone - only with strict adult supervision. This equipment is not
recommended for use by children under 15 years of age. Young children should be kept clear
of the unit at all times to prevent injury.
4. Ensure that all adjustment pins/knobs are fully secured before using the machine.
5. Report product defects to the facility owner and DO NOT use until repairs are made.
6. Do not alter or modify this equipment.
ASSEMBLY:
The Endorphin 335 Independence Exercise Chair requires some assembly when received. Care
is to be taken when removing the unit from the box as the unit weighs over 70 lbs and may require
two people to remove from the box. The unit will roll through a 32" doorway.
•Step 1 - Upon removing all the components from the box. Screw the adjustment clamping
levers (3) into position on the main frame at the seat and handle adjustment tubes.
•Step 2 - Secure the 2” roller wheels (2) to the outside of the bracket located at the rear of
the unit with the 5/16” bolts and nuts provided.
•Step 3 - Secure the seat pads to the support tube. The logo pad should be located as the
back pad with 2 - 5/16” Bolts and the seat are secured with 3 – 5/16” bolts. Slide the
assembly into the seat adjustment tube and secure in place with adjustment handle.
•Step 4 – Insert the handles into the adjustment tubes on either side of the seat and secure
in place. Using the positioning decals ensure that both handles are positioned at the same
height in the adjustment tube. The handles should be pointing forward and parallel to the
seat.
Important: Before operating this unit, please carefully read this instruction manual and check all
fasteners, nuts, and setscrews to ensure that they are tight. Shipping may have caused parts to
loosen during transit to your location.

5
335 Independence Exercise Chair
INSTRUCTIONS:
The Independence Exercise Chair provides an adjustable assistance that allows the user to
establish an assist level and note their progress using the charts provided. Charting the number of
repetitions and assist level shows how you are improving your strength and balance on a daily
basis.
The assist level is the minimum assistance required by the user for them to perform the sit to
stand or transfer motion. Adjusting the assist level to 75% of the user’s body weight is a good
starting point. This will give the maximum support during the exercise and as you become
stronger you can decrease the assistance and in doing so increase the resistance on the muscles
being used.
Fitting the Independence Exercise Chair to the user requires just a couple of simple adjustments
that position the seat and support handles height. The seat should be positioned so that the front
edge is located behind the user’s knee. If the user’s heels come off the floor during use then the
seat is set to high and the seat should be positioned lower. The handles are adjusted to position 2
or 3 when used for user stabilization during the sit to stand. When the Independence Exercise
Chair is used for the transfer assist, the support handles may be adjusted higher to increase arm
range of motion during the exercise. The Independence Exercise Chair is designed to
accommodate users from 5’3” to 6’1” and it will provide assistance through 75% of the weakest
part of the user’s strength curve during the sit to stand motion.
User
Height ft/" Seat Start
Setting Seat Start
Height
6'0"- 6'1" 5 28"
5'11"- 6'0" 4 27"
5'10"-5'11" 3 26"
5'6"- 5'10" 2 25"
5'3"- 5'6" 1 24"
Note: All measurements shown are from the floor to the seat top front edge.
Note: Some may find the use of a walking frame for stabilization provides greater confidence and
control. The frame may be used initially and once strength and stability has increased, the support
handles can be used.

6
335 Independence Chair
SIT TO STAND EXERCISE:
1. Once the seat start position has been selected you can then set the “Assist Level” using
the assist selector handles on the unit.
2. Adjust both handles to the rear of the assist adjustment rails to start the setting procedure.
Using the user’s WEIGHT for a starting point, adjust the handles so that they indicate the
required weight. For a weight up to 155 lbs you adjust the left handle forward only and for
weights of 170 lbs to 330 lbs you leave the left handle forward and adjust the right handle
to indicate the required weight.
3. When the weight has been set the ‘max assist’ has been established for the user and the
assist lbs are indicated below the weight figure. This figure is approximately 70% of the
user’s total body weight. Example: A user weight selected of 145 lbs will provide 100 lbs
of assistance or provide their “max assist” level. Should the seat not move when sat upon
by the user at this setting, adjust the assist adjustment handle to the next lower assist
setting and start.
4. Once the assist level for the user is established, exercising can begin. Standing in front of
the seat with its front edge against the back of the legs, located approximately at the back
of the kneecap. In a slow and controlled motion begin to sit down while taking hold of the
adjustable support handles located on either side of the seat.
5. Continue the sitting down motion while keeping both feet planted firmly on the floor
supporting your body weight. It will help the user to concentrate on the leg muscles being
used while performing the exercise. Some weight will be supported with the arms and
shoulders during this exercise motion.
6. Upon reaching the seat stop, begin to stand using your legs and supporting the upper body
with arms in a slow and controlled manner. The user should concentrate on keeping their
backside in contact with the seat as they sit and stand.
7. Repeat this exercise and change the number of repetitions or reduce the assist level to
increase lower body strength and range of motion. This information may be charted on
copies the chart provided in this manual.

7
TRANSFER EXERCISE:
1. The seat start position has been selected; you then set the “assist load” using the assist
selector (following steps 2 & 3 on page 6).
2. In a slow and controlled motion begin to sit down while taking hold of the adjustable
support handles located on either side of the seat.
3. Upon reaching the seated position, place then place feet out and in front. Adjust the
support handles to the desired height so setting the range of motion for the arms.
4. Using arms only, press on the support handles lifting your body until reaching the arm
extension point. Then in a slow and controlled manner lower your body to the start
position. Repeat for the number of repetitions required to complete the set.
5. Adjusting the assistance level will either increase or decrease the amount of support given
to the user.
Important: Assist adjustments can only be made while the machine is not in
use and only when the user is not seated.
INDEPENDENCE CHAIR – MOBILTY:
The wheels provided on Independence Exercise Chair allow it to be moved in and around the
home. Stand behind the unit and simply take hold of the seat back rest and tilt backwards towards
you until the wheels contact the floor. The Independence Exercise Chair will roll through any 32”
door with little effort so making it possible to exercise in most areas of the home.
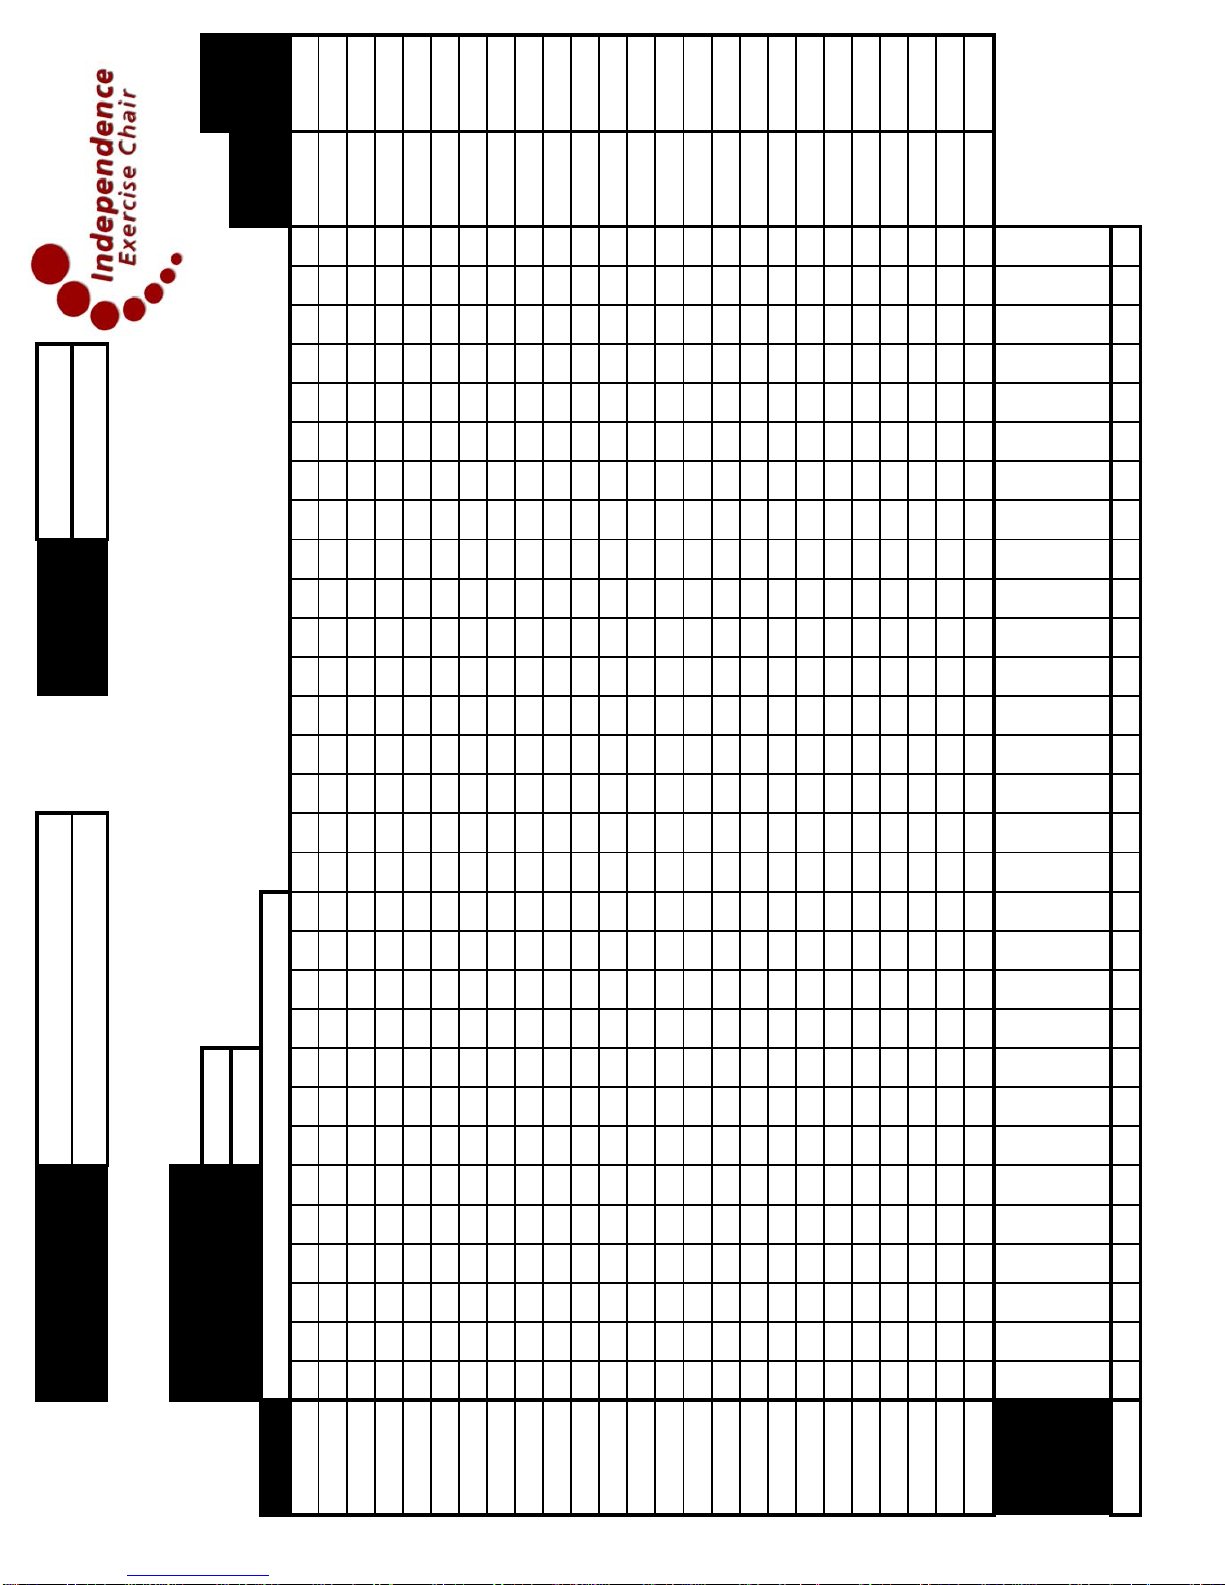
ROM
Total Foot
Assist lbs Reps Position
230
220
210
200
190
180
170
160
150
140
130
120
110
105
100
95
90
85
80
75
70
65
60
55
50
Enter Date
Day 123456789101112131415161718192021222324252627282930
Seat Position
Enter Number of Reps/Day @ lbs Assistance
Start Date
Finish Date
Lower Body
Assist Level lbs
Name
Weight lbs

ROM
Total Foot
Assist lbs Reps Position
230
220
210
200
190
180
170
160
150
140
130
120
110
105
100
95
90
85
80
75
70
65
60
55
50
Enter Date
Day 123456789101112131415161718192021222324252627282930
Arm Support Handle
Upper Body
Assist Level lbs
Enter Number of Reps/Day @ lbs Assistance

8
ITEM # QTY PART # DESCRIPTION PRICE
(Each)
1 1 RP-335-MFB Mainframe Base Assembly $450.00
2 1 RP-335-UPA-ASR Upper Pivot Arm Assembly/Adj Slide Rail $250.00
3 1 RP-335-LPA Lower Pivot Arm Assembly $150.00
4 1 RP-335-SAT Seat Adjustment Tube $55.00
5 1 RP-335-SST Seat Support Tube $130.00
6 2 RP-335-ASH Adjustable Support Handle w/ Grip $35.00
9 2 RP-335-GSA-A Gas Spring Slide Adjuster Plate $35.00
10 2 RP-335-GSA-B Gas Spring Slide Adjuster Plate-Connector $40.00
11 2 RP-335-SAH Slide Adjustment Handle w/Grip $45.00
12 1 RP-PUP-335-SSP Seat Support Pad $38.00
13 1 RP-PUP-335-BSP Back Support Pad w/Logo $48.00
15 1 04-AME-330/335 ABS Plastic Cover Left or Right Side $55.00
16 3 02-MON-MA-48254 Adjustable Clamping Lever Size 3-3/8"-16 $12.00
17 2 02-SUN-2.2.53 Roller 2” Wheel 5/16” Spanner $13.60
18 1 02-SER-GSNI-2200-120 Adjustment Rail Gas Spring – Right Side $30.00
19 1 02-SER-GSNI-2200-70 Adjustment Rail Gas Spring – Left Side $30.00
20 1 02-SER-GSNI-2100-60 Seat Support Gas Spring $28.00
21 1 02-MCM-1587T36 Pad 2.74" x 3.95" Rubber $7.75
22 4 02-KAM-P2008 2” Round Foot Support $3.00
23 5 02-TPL-1502 14G Square Tube Plug - Black 1 1/2” 14 Gauge $1.50
24 2 02-MOC-S1/4" Straight Cap ID .246" x .875" Long - RED $2.00
25 2 02-PIN-3/8-16X1 1/2 3/8-16 X 1 1/2 Hex Cap Screw GR 5 Zinc $2.50
26 2 02-PIN-5/16-18X2 ½ 5/16-18 X 2 1/2 Hex Cap Screw GR 5 Zinc $2.00
27 6 02-PIN-5/16-18X1 5/16-18 X 1 Hex Cap Screw GR 5 Zinc $2.00
28 2 02-PIN-7MMX25MM 7 mm X 25 mm Hex Cap Screw GR 5 Zinc $2.00
29 1 02-PIN-7MMX40MM 7 mm X 40 mm Hex Cap Screw GR 5 Zinc $2.00
30 1 02-PIN-7MMX45MM 7 mm X 45 mm Hex Cap Screw GR 5 Zinc $2.00
31 2 02-PIN-3/8-16NI L/N 3/8-16 Nylon Insert L/N Zinc $1.50
32 4 02-PIN-5/16-18NI L/N 5/16-18 Nylon Insert L/N Zinc $1.50
33 8 02-PIN-7MM NI L/N 7 mm Nylon Insert L/N Zinc $1.50
34 4 02-PIN-3/8 SAE FW Z 3/8 SAE FLAT WASHER ZINC $0.50
35 16 02-PIN-5/16 SAE FW Z 5/16 SAE FLAT WASHER ZINC $0.50
36 8 02-PIN-7MM FW 7 mm FLAT WASHER ZINC $0.50

9
+
Purchase Order #
Contact Date:
Telephone # Fax #:
Facility Street:
City Zip:
ITEM # QTY PART # DESCRIPTION PRICE
(Each)
$
$
$
Order Sub Total $
Shipping $
Tax $
TOTAL $

10
.
Product Warranty
The Endorphin Corporation warrants that all equipment conforms to the written specifications set forth
by Endorphin and applicable at the time of Buyer’s order.
Endorphin warrants all of its products to be free of defects for a period of five (5) years for
movable parts and for twenty (20) years for the frame.
We will promptly repair or replace any defective parts or products including labor at any time during the
first year from delivery and acceptance by the end user. For certain products, warranty repairs will be
provided on site at no additional cost for the first year. Defective parts or frames will be promptly
replaced at no cost excepting labor for the remainder of the warranty period thereafter.
In certain cases to avoid any undue delay, Endorphin may, at its discretion, replace a product with a
factory-refurbished product of the same model and feature level.
Warranties are void if, in the reasonable opinion of Endorphin, the equipment has been abused,
altered, improperly used, or improperly maintained.
Except for the express warranties contained herein, Endorphin hereby disclaims all expressed, implied,
or statutory warranties with regard to its equipment, including all warranties of merchantability and
fitness for any particular purpose. And stated express warranties are in lieu of all obligations or liability
on the part of Endorphin for damages, including but not limited to, special indirect, or damages arising
out of or in connection with the use of, or performance of the equipment sold to Buyer.
………………………………………………………………………………………………………..
Please cut along line
CUSTOMER WARRANTY INFORMATION RECORD
DATE
PURCHASED: CONTACT:
FACILITY: STREET:
CITY: STATE &
ZIP:
TELEPHONE: FAX:
MODEL #: ITEM:
SERIAL #:
DIRECT
PURCHASE: YES / NO (CIRCLE) DEALER
NAME:

11
………………………………………………………………………………………………………
Endorphin Corporation
Attn: Customer Service
6901 90th Avenue North
Pinellas Park, FL 33782
U.S.A.
PLACE
STAMP
HERE
Table of contents
Popular Fitness Equipment manuals by other brands

Coopers of Stortford
Coopers of Stortford G191 Instructions for use

ProMed
ProMed VHT-1000 Instruction leaflet

Life Fitness
Life Fitness Integrity SL Service manual

Tunturi
Tunturi Cardio Fit R30 Rower user manual

Nustep
Nustep T4R user manual

Roswell
Roswell Chaparral Triton Board Rack Installation & Usage Instructions


Deltech Fitness
Deltech Fitness DF1200 Assembly instructions

TKO
TKO 850MR owner's manual

Cando
Cando 10-0709 instruction manual

Australian Barbell Company
Australian Barbell Company 6 PAIR RACK Assembly instructions

Keys Fitness
Keys Fitness Dumbbell Rack 3ft KF-DB3 owner's manual

CYBEX
CYBEX 12170 owner's manual