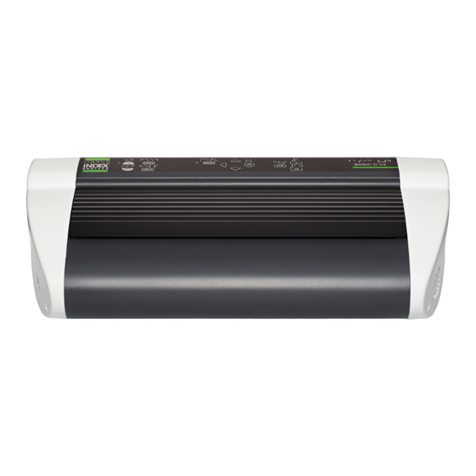
Index Braille Everest-D User manual

Manual Index Everest-D
IndexBraillePrinterCompany Page 1
Version 4.32
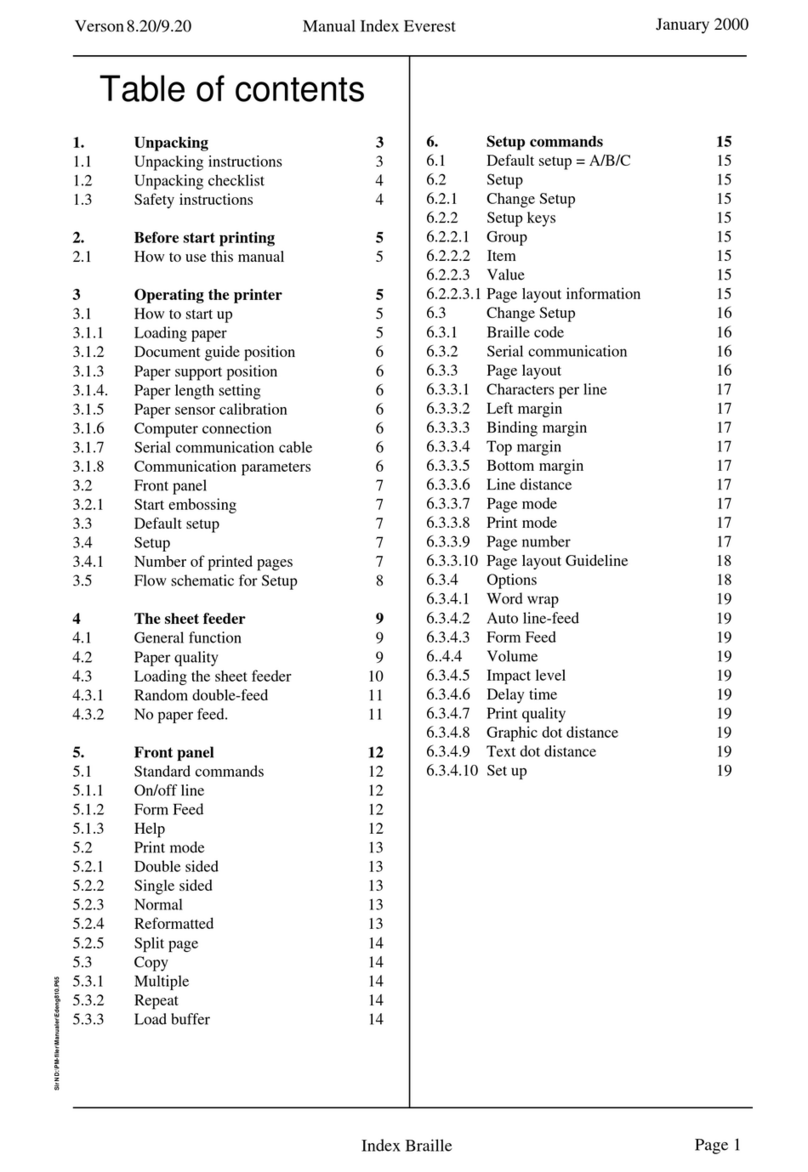
Tableofcontents
1. Unpacking. 4
1.1 Unpacking instructions. 4
1.2 Unpacking checklist. 5
2. Before start printing. 6
2.1 How to use this manual. 6
3Operating the printer 6
3.1 How to start up. 6
3.1.1 Load paper. 6
3.1.2 Document guides position. 7
3.1.3 Paper length setting. 7
3.1.4 Computer connection. 7
3.1.5 Serial communication cable. 7
3.1.6 Transmission parameters. 7
3.1.7 Serial cable configuration. 7
3.2 Front panel. 8
3.2.1 Training mode. 8
3.2.2 Parameter settings printout. 8
3.2.3 Startprinting. 8
3.3 Default setup. 8
3.4 Setup. 8
3.5 Flow schematic for Setup. 9
4. Front panel. 10
4.1 Standard commands. 10
4.1.1 On/off line. 10
4.1.2 Form Feed. 10
4.1.3 Help. 10
4.2 Print mode. 10
4.2.1 Double sided. 11
4.2.2 Single sided. 11
4.2.3 Normal. 11
4.2.4 Reformatted. 11
4.2.5 Split page. 12
4.3 Multiple copy. 12
4.3.1 Repeat. 12
4.3.2 Load buffer. 13
4.3.3 Multiple. 13
4.3.3.1 Multiple copies selection by
ESC sequences 14
4.4 Remaining copies to print 14
5. Setup commands. 15
5.1 Default setup = A/B/C. 15
5.2 Setup. 15
5.2.1 Change Setup. 15
5.2.2 Setup keys. 15
5.2.2.1 Group. 15
5.2.2.2 Item. 16
5.2.2.3 Value. 16
5.2.2.3.1 Page layout information. 16
5.3. Change Setup. 16
5.3.1 Braille Code. 16
5.3.2 Serial Communication. 17
5.3.3 Page Layout. 17
5.3.3.1 Characters per line. 17
5.3.3.2 Left margin. 17
5.3.3.3 B-margin. 17
5.3.3.4 Top margin. 17
5.3.3.5 Bottom margin. 17
5.3.3.6 Line per page 17
5.3.3.7 Page mode. 18
5.3.3.8 Print mode. 18
5.3.3.9 Page number. 18
5.3.3.10 Page and margin layout 18
5.3.3.11 Line per page 18
c:\Manualer\Edeng432.PM5
5.3.3.12 Page layout guideline 18
5.3.4 Option. 19
5.3.4.1 Word wrap. 19
5.3.4.2 Auto linefeed. 19
5.3.4.3 Form Feed. 19
5.3.4.4 Volume. 19
5.3.4.5 Impact level. 19
5.3.4.6 Delay. 19
5.3.4.7 7 - Printning Speed. 19
5.3.4.8 8 - Graphic dot distance. 20
5.3.4.9 9 - Text dot distance. 20
5.3.4.10 Set up. 20
5.3.4.11 Line Type. 20
5.4 Selftest. 20
5.5 Factory setting. 20
5.6 Training mode. 20
5.7 Braille manual printout. 21
5.8 Transportation mode. 21
5.9 Flow schematic for setup. 22
5.10 Fault messages. 23
5.10.1 Failure "100" - No reference-pulse. 23
5.10.2 Failure "Front panel open". 23
5.10.3 Failure "Paper length fault". 23
5.10.4 Failure "Paper jam". 23
5.10.5 Failure "140". 23
5.10.6 Failure "150". 23
5.10.7 Failure "160" 23
5.10.8 Failure "170" 23
5.11 Reference pulse offset. 23
6Everest Support disc 24
6.1 Installation of support programs 24
6.2 Open the main menu 24
6.3 Run programs 24
6.4 Edit a Braille table. 24
6.4.1 Different types of Braille. 25
6.4.2 Start BRLED program 25
6.4.3 Keyboard control. 26
6.4.3.1 Cursor position. 26
6.4.3.2 Edit Braille keys. 26
6.5 What you can edit. 26
6.5.1 Edit a Braille cell. 26
6.5.2 Create a multiple Braille sign. 27
6.5.3 Edit a multiple cell. 27
6.5.4 Edit a prefix. 27
6.5.5 Edit information screen. 27
6.7.6 Save the Braille table. 27
6.5.7 Status printout. 27
6.6 Test program. 28
6.7 Setup program for Index Everest-D 29
6.7.1 Run SETUP 29
6.7.2 Load Setup file. 29
6.7.3 Change SETUP values. 29
6.7.4 Save Setup values 30
6.7.5 Print screen 30
6.7.6 Set all positions to unchanged 30
6.7.7 Append driver to text 30
6.7.8 Send file to Everest. 30
6.7.9 Send file from DOS 30
6.7.10 Exit 30
6.8 Voltage compensation. 30
6.8.1 Run Volt 31
6.8.2 General parameter settings 31
6.8.3 Advanced parameter settings 31
6.8.4 Send file to Everest 32
6.8.5 Help 32
6.8.6 Exit the Volt program 33

IndexBraillePrinterCompany
Manual Index Everest-D
Version 4.32
Page 2
6.9 Display the on-screen manual 33
6.9.1 Open the main menu 33
6.9.2 Find your way in the on-screen manual 33
6.9.3 Print the manual 33
6.10 Graphic programs. 33
7. Using the sheet feeder. 34
7.1 Load paper. 34
7.2 Problem solving. 35
7.3 Maintenance. 36
7.3.1 General maintenance. 36
7.3.2 Cleaning the sheet feeder. 36
8.1.1 4-dot graphic mode. 37
8. Graphic. 37
8.1 Graphic modes. 37
8.1.2 6-dot graphic mode. 37
8.1.3 General graphic mode. 38
8.1.4 High resolution graphic. 38
8.1.5 Versapoint graphic files printout. 38
8.2 Graphic programs. 38
8.2.1 Draw. 38
8.2.2 Open the main menu 38
8.2.3 Start and install Draw 39
8.2.2.4 Draw function keys. 39
8.3 Letter. 39
8.3.1 Open the main menu 39
8.3.1.2 Start letter 40
8.3.1.3 How to use Letter. 40
8.3.1.4 Letter function keys. 40
9Control sequences. 41
9.1 Pro-printer emulation. 41
9.2 Defined codes. 42
9.3 ESC Sequences - Index commands. 42
9.4 VersaPoint graphic. 42
9.5 Changes in setup from computer. 42
9.5.1 Change setup by ESC-sequences. 43
Position 0 - Activated braille code. 43
Position 1 - Type of braille code. 43
Position 2 - 6/8 Dot braille. 43
Position 3 - Capital prefix. 44
Position 4 - Baudrate. 44
Position 5 - Number of databits. 44
Position 6 - Parity. 44
Position 7 - Number of stopbits. 44
Position 8 - Handshake. 44
Position 9 - Character per line. 44
Position 10 - Left margin. 44
Position 11 - B-margin. 44
Position 12 - Top margin. 44
Position 13 - Bottom margin. 44
Position 14 - Line spacing. 44
Position 15 - Pagemode. 44
Position 16 - Print mode. 44
Position 17 - Page number. 44
Position 18 - Print sided. 44
Position 19 - Word wrap. 44
Position 20 - Auto line feed. 44
Position 21 - Formfeed. 44
Position 22 - Volume. 45
Position 23 - Impact level. 45
Position 24 - Delay. 45
Position 25 - Printing speed. 45
Position 26 - Grafic dot distance. 45
Position 27 - Text dot distance. 45
Position 28 - Setup. 45
Position 29 - Line type 45
Position 30-39. 45
9.6 Page numbering selection
by ESC sequences 45
9.7 Multiple copies selection
by ESC sequences 45
10 Serial communication cables 46
10.1 Cable configuration
Index - Apple McIntosh 46
11 ASCII-Table 47
Index 48

Manual Index Everest-D
IndexBraillePrinterCompany Page 3
Version 4.32
INDEX EVEREST-D
100 cps Interpoint Braille printer
User manual version 4.32

IndexBraillePrinterCompany
Manual Index Everest-D
Version 4.32
Page 4
1. Unpacking.
1.1 Unpacking instructions.
1. Open the top of the box, and remove the chock absorbing plastic.
2. Lift the Everest-D from the box and place it on a table.
3. Check that the voltage on the printer is the same as your voltage, 115 or 230V.
Note! If the pre-installed voltage by any reason should be incorrect, change the voltage on the
switch under the left leg.
4. Save the transportation material back in the box.
5. Place the document collector underneath the printer.
6. Pull out the two plastic printinghead transportation lockings, located in the sheetfeeder. Save
them together with the transportation material in the box. It is important that you replace
them if you by any reason need to ship the printer.
Note! Printer should be shipped only in original packing!
7. Put both paper guides on the top of the sheet feeder.
We understand that you want to test your Everest, however we recommend that you read
chapters 1-3 in the manual before you start to use your printer.
Before installing the printer make sure that there is no visible damages to the printer and that the
delivery is complete. If you encounter any problems, contact your local dealer.

Manual Index Everest-D
IndexBraillePrinterCompany Page 5
Version 4.32
1.2 Unpacking checklist.
INDEX EVEREST-D
USER MANUAL BRAILLE
DOCUMENT COLLECTOR
USER MANUAL INKPRINT
BRAILLE PAPER
CABLES
SUPPORT DISK

IndexBraillePrinterCompany
Manual Index Everest-D
Version 4.32
Page 6
2. Before start printing.
2.1 How to use this manual.
This manual is organized in 9 chapters, with a table of contents and an index.
Chapters 1-3 includes the basic information to get the printer up and running.
We recommend that you read chapters 1-3 before you start the printer.
Chapters 4-8 includes information about the different detailed functions of the Everest.
Chapter 9 is an Appendix for the control sequences in the Pro-printer emulation.
3Operating the printer
This chapter is a short-hand manual that explains how to run the printer.
3.1 How to start up.
3.1.1 Load paper.
1. Adjust the sheet feeder to the correct paper width by adjusting the left paper mechanism.
Don't forget to lock it.
2. Release the pick-up rollers, by moving the control on the button on the side of the sheet
feeder upwards and fill it with paper. Move the control back down. If you intend to use
normal Braille paper the sheet feeder must be in CARD position.
When using normal (90 gram/m2) paper, the sheet feeder must be in the position SHEET.
To change between SHEET and CARD, move the buttons on the front of the sheet feeder.

Manual Index Everest-D
IndexBraillePrinterCompany Page 7
Version 4.32
3.1.2 Document guides position.
On the lower edge of the front panel cover are two plastic document guides located. The right
position for these is to follow the side edges of the document when it leaves the printer, in order
to lift the paper to the correct position in the document stack.
Note! If the document guides are to close to the centre or used together with a very hard type of
paper, it can cause paper jam.
3.1.3 Paper length setting.
When the Everest is powered on for the first time, the paper length is set for A4.
If a paper with a different length is used, Everest will give a faulty alarm PAPER JAM. To
change the default paper length value, simply press Form Feed. The printer will now feed a paper,
in order to measure it. The new length will now be stored until the next time the Form Feed key
is pressed. After paper lengt measuring by the FF command, the printer echo: "lines per page
:#".Index Everest accepts all paper lengths between 150-350mm (6-14 Inch).
3.1.4 Computer connection.
Connect Index Everest to the computer with the serial and centronics interface. When turning on
the Everest, both ports are ready to receive information. As soon as the printout has started,
Everest will close the non-active port.
The ports are designed to follow the international standards for printers as far as possible. When
using Everest together with a standard PC, you can use standard centronics and a serial cable.
3.1.5 Serial communication cable.
Everest is equipped with a 25 pin female (D-sub) on the serial interface and a standard
centronics connector for the centronics interface.
Pin configuration on serial interface:
1=GND, 2=TXD, 3=RXD, 4=RTS, 5=CTS, 6=DSR, 7=SG, 20=DTR.
Transmitting parameters (factory setting) are:
Baudrate=9600, Data bits=8, Parity=N, Stop bits=1, Handshake=DTR hardware handshake.
3.1.6 Transmission parameters.
The communication parameters on the serial-port and centronics port on your PC are normally
set with the following command in the AUTOEXEC.BAT file.
MODE COM1:9600,N,8,1,P
MODE LPT1:,,P
3.1.7 Serial cable configuration.
There is a standard cable between the Everest and the PC. On the Everest side a 25 pin male D-
sub and on the PC side a 25 or 9 pin female D-sub. Cable with the following wires.
Everest - 25p D-sub. Everest - 9p D-sub.
1-1, 2-3, 3-2, 4-5, 5-4, 6-20, 20-6, 7-7. 2-2, 3-3, 4-9, 5-7, 6-6, 7-5, 20-4.
For other configuration descriptions, see chapter 11.

IndexBraillePrinterCompany
Manual Index Everest-D
Version 4.32
Page 8
3.2 Front panel.
The front panel and the user logic on the Everest is designed to make the use and installation of
the printer as easy and efficient as possible. All the keys are marked both in Braille and ink print
and are organized in clearly marked modules. All feedback is by digitized speech.
3.2.1 Training mode.
One easy and efficient way to learn how to use and setup the printer is to set the printer in
TRAINING mode. Press the HELP key and turn on the printer. The commands on the Everest
will now work as normal, the only difference is that nothing will be printed out or saved in printer
memory. Use the tutor mode and let the speech guide you through all the different modules.
When you understand how the printer is working, turn the printer off to end the TRAINING
mode.
3.2.2 Parameter settings printout.
Make sure that the paper is loaded and that the power is on.Press HELP to get a printout of the
test page. This test page will present the version number of the software, current printer settings,
number of printed pages and the active Braille table.
3.2.3 Start printing.
Connect the printer to your computer, load the paper and turn it on. Everest will feed one page
and echo INDEX EVEREST READY. Everest is ready for use with the default factory settings.
If you need additional information to change the parameters, please refer to that section in the
manual.
3.3 Default setup.
To change the active default setup between setup A, setup B and setup C, simply press the DE-
FAULT SETUP KEY A, B or C. If the setup is set NOT OPEN you must press A/B/C while
you power up the printer. Everest will now work according to all the parameters stored in this
setup. All changes that will be made in the parameter setting will be stored in the active default
setup. To change active default setup press the default setup key A, B or C.
3.4 Setup.
If you need to change the setup parameters you can do it from the front panel.
To start the setup sequence press SETUP. If the printer echo "This key has no function", the
setup is "not open". (To get access Setup, press Setup + power on.) The setup program is now
available. In setup mode you can change and save all parameters in the group: BRAILLE CODE,
SERIAL COMMUNICATION, PAPER LAYOUT and OPTION. All parameter changes will be
stored in the active default setup A/B/C.

Manual Index Everest-D
IndexBraillePrinterCompany Page 9
Version 4.32
3.5 Flow schematic for Setup.

IndexBraillePrinterCompany
Manual Index Everest-D
Version 4.32
Page 10
The front panel is designed to be easy to understand and use. All feedback uses digitized speech.
The keys are organized in five groups;
1. STANDARD COMMANDS; On Line, Off Line, Form Feed, Help.
2. PRINT MODE; Normal, Reform, Split Page, Double, Single.
3. COPY; Repeat, Multiple, 1, 10.
4. DEFAULT SETUP;
A = default setup A.
B = default setup B.
C = default setup C.
5. SETUP; Setup, Group, Item, Value.
4.1 Standard commands.
4.1.1 On/off line.
Connect/disconnect line to computer. Off line interrupts printout.
4.1.2 Form Feed.
Form Feed will feed one sheet through the printer.
4.1.3 Help.
The HELP key, in the print mode, is used get a printout of active
printer settings. The printout is two pages and includes the software version, Braille code, active
setup parameters for Braille code, paper layout, serial communication and options.
Pressing the Help key in Setup mode, will give printout of the new
settings in setup, even then the value is not stored. The Braille table
will not be printed.
HELP + POWER ON starts the TRAINING mode on Everest. The
HELP key, in SETUP mode, gives you a printout of the parameter
setting you are working with.
The Help key can also tell you at what page of a document you currently are printing, by press-
ing the sequence; Off line, Help. Echo "Page no.#". On line will re-start the printout.
4. Front panel.

Manual Index Everest-D
IndexBraillePrinterCompany Page 11
Version 4.32
4.2 Print mode.
Print mode includes keys for changing between the different print modes. You can choose be-
tween single and double sided printout and normal, reformatted or split page.
4.2.1 Double sided.
In double-sided print the first page will appear on the underside of the paper and the second on
the upper side of the paper. Odd pages 1,3,5,7... on the underside of the sheet and even pages
2,4,6,8.... on the top of the page. After printing a document you can take the whole printed
package and put it in a file without any additional work.
In the SETUP/PAGE LAYOUT/PAGE MODE it is possible to select single or double-sided print
mode.
Graphic printout will always be printed in the single sided mode, on the odd pages (1,3,5,7...).
even if the printer is set for double sided printout. If a graphic picture is included in a text file,
Everest will automatically change the page formatting so that the graphic and necessary connec-
tion pages will be in single sided mode.
4.2.2 Single sided.
In the single sided mode Everest will print out the text on the under side of the paper. It is possi-
ble to change to the upper side of the printer in setup with the module SETUP/PAGE LAYOUT/
PRINT SIDED 1/2 (default 1= down).
4.2.3 Normal.
In the normal print mode the Everest will print the Braille as it is formatted in the text file, The
text has to be formatted with the correct characters per line according to the setup on the printer.
4.2.4 Reformatted.
In reformatted print mode the Everest is formatting the text so that it erase space in the text file,
like multiple space, FF (Form Feed) and CR/LF (New line). This function is very useful when
printing a text file made for ink print in Braille or normal literary (grade 1) Braille. The text is
reformatted according to the installed character/line in active setup.
Reformatting function works in the following way:
Auto linefeed and word wrap is automatically set ON.
1 or more space substitute with 1 space.
1 CR/LF erase.
2 CR/LF substitute with 1 CR/LF
3 CR/LF substitute with 1 CR/LF followed by two space.
>3 CR/LF substitute with 2 CR/LF.
1 FF erase.
>1 FF substitute with 1 FF.

IndexBraillePrinterCompany
Manual Index Everest-D
Version 4.32
Page 12
4.2.5 Split page.
The SPLIT PAGE print mode prints out information in Braille with more characters per line. Split
page is similar to "sideway" print on normal printers. In SPLIT PAGE mode the printout will
always be in singlesided mode word wrap off, even if the printer is installed in double-sided mode
and word wrap on. Maximum line length in split page mode is 328 character, with a line length of
42 characters.
Split page printout will always have the line mark and page number. If there is a text-file with 123
characters per line and the printer is installed on a 42 character per line, the following printout
sequence will appear:
Page 1.1 Sign 1-41 Line 1-28 Page 1.2 Sign 42-83 Line 1-28 Page 1.3 Sign 83-123 Line 1-28
Page 2.1 Sign 1-41 Line 29-56 Page 2.2 Sign 42-83 Line 29-56 Page 2.3 Sign 83-123 Line 29-56
Page 3.1 Sign 1-41 Line 57-84 Page 3.2 Sign 42-83 Line 57-84 Page 3.3 Sign 83-123 Line 57-84
Page 4.1 Sign 1-41 Line 85-110 Page 4.2 Sign 42-83 Line 85-110 Page 4.3 Sign 85-110 Line 85-110
When the printer is installed for 42 characters per line, you will have 41 characters per line in the
split page mode and one character is used as the line marker.
4.3 Multiple copy.
With the copy function you can produce large quantities of Braille without using your computer
during the printout. Printer buffer is 400K = 400 pages of Braille. It is also possible to copy a
part of your text file. When using the COPY function you will be guided by the speech feedback.
Copy function includes the following keys REPEAT, MULTIPLE,
1 and 10. With REPEAT and MULTIPLE you can choose between the different copy functions
and with "1" and "10" you select the number of copies or what part of a document to print.
4.3.1 Repeat.
REPEAT is used when Everest produces to copy a part of or all of the last printed document.
When pressing REPEAT once completed by the number 1+10 to select from page, REPEAT 1 +
10 to select to page. REPEAT again, and Everest will print one copy of the selected part of the
document.
Note! Repeat command is not accessable if the loaded file is exceeding the size of the buffer!
Error message "Failure 170" will be given.
REPEAT x 2 prints a copy of the complete document.
Example: Print pages 13 to 25 of the last document in singlesided mode.
+ = and/or.
x = times.
Command, REPEAT 1 x 10 + 1 x 1 (from page 13), REPEAT 1 x 10 + 1 x 1 (until page 25),
REPEAT. Everest will now print page 13-25 of the last document.
Double-sided mode.
Choose an odd side as first page using the repeat command in double-sided mode. The REPEAT
command will always start with an odd and end with an even page, even if the last page of the
document is odd.
Note! Every "1" gives 1 paper (2 printed pages) in double-sided mode. (1-2,3-4,5-6 etc.)

Manual Index Everest-D
IndexBraillePrinterCompany Page 13
Version 4.32
Example 1: Choose page 14 to 25, REPEAT 1 x 10 + 2 x 1 (from page 13 (frontside to 14)),
REPEAT 2 x 10 + 3 x 1. (to page 26 (backside to 25))
Echo: "Print from page 13 to page 26".
Example 2: Print page 3 and 4 = REPEAT 2 x 1, REPEAT + REPEAT.
When pressing REPEAT two times Everest will print one copy of latest document. After the
Repeat function is completed, Everest will automatically be in print mode, similar as after power
on.
4.3.2 Load buffer.
Repeat can even be used to download a file to the printer buffer, without immediately printout.
Use the following commands;
Press the repeat key - Index echo "File to buffer"
Send the file to Index - When the file is completely received Index echo "from page".
Give number of the first page to print by pressing the 1 and/or 10 keys.
Press the REPEAT key - Index echo "To page".
Give number of the last page to print by pressing the 1 and/or 10
keys.
Press the REPEAT key again - Index echo "Print from page # to
page # ".
To print the complete file, press REPEAT x 2. Echo: "Print file".
Note! If the loaded file is exceeding the size of the buffer, of the
buffer, the error message “fail 170” will be given and the file from
the computer will be cut off. The remaining part of the file will be
removed from the transmission. It is then possible to select a printout of the received part of the
file. After the printout is completed, the REPEAT function is not accessible.
4.3.3 Multiple.
MULTIPLE is used to select number of copies, either in advance or with the buffer already
loaded.
Example 1: Make 54 copies of the next document. MULTIPLE + 5 x 10+ 4 x1 + MULTIPLE.
Then press REPEAT once. Echo "File to buffer". Send the file. When the file is completely
received the printer will Echo "From page". Select page where to start printout, (see 4.3.1) then
press repeat again, Everest Echo: "to page". Select last page of printout, then press REPEAT,
echo: "print from page # to page #". Printout starts.
To print the complete file, just press REPEAT x 2.
Example 2: Make 54 copies of the last printed document.
MULTIPLE + 5 x 10+ 4 x1 + MULTIPLE + 2 X REPEAT.
After the copy procedure is completed, Everest will return to the print mode.

IndexBraillePrinterCompany
Manual Index Everest-D
Version 4.32
Page 14
4.3.3.1 Multiple copies selection by ESC sequences
Choose number of copies by sending the following ESC sequence in the beginning of the file, like
a driver:
[ESC][^R], xxx,[ESC][^R]
Note! If the printer is pre-setted in "multiple copy mode", that will override the software com-
mand!
4.4 Remaining copies to print
While printing multiple copies of a document, it is possible to get a message of the number of
copies left to print by the following command:
1. Press Off line.
2. Press Help. The printer will echo the remaining number of copies to print, and at what page the
printout was interrupted: Number of copies #, page #.
Example: Print a document of 10 pages, interrupt in copy no 3 at page no 6:
ECHO: Number of copies 7, page 6.

Manual Index Everest-D
IndexBraillePrinterCompany Page 15
Version 4.32
5. Setup commands.
5.1 Default setup = A/B/C.
Everest has three different setup parameter settings stored as DEFAULT SETUP A,B and C.
To select DEFAULT SETUP press A,B or C. If Setup is set NOT OPEN, press A,B or C while
you power up the printer. Everest will echo SETUP A LOADED. All changes that are made in
the setup is stored in the active default setup.
5.2 Setup.
The group of setup keys includes four keys SETUP, GROUP, ITEM and VALUE.
5.2.1 Change Setup.
To activate SETUP, press SETUP, Everest will echo CHANGE SETUP A. (A referring to active
setup, A,B or C.)
The changes you make in the printer setting will be stored in the active DEFAULT SETUP A,B
or C. It is not possible to change in a non active default setup. If you want to interrupt without
saving your changes in the setup, just turn off the printer before you end the setup mode.
The keys GROUP, ITEM and VALUE are organized in a tree structure where GROUP is the
selection of four major groups, ITEM is the different items to change in each group and VALUE
is the value that is possible to select in each item. (See also 5.8)
Pressing the Help key in Setup mode, will give printout of the new settings in setup, even then the
value is not stored. The Braille table will not be printed.
5.2.2 Setup keys.
5.2.2.1 Group.
GROUP includes four different groups of parameters,
BRAILLE CODE, SERIAL COMMUNICATION,
PAGE LAYOUT and OPTION. When pressing
GROUP several times you will toggle between these
four groups, in a similar way as in ITEM and VALUE.

IndexBraillePrinterCompany
Manual Index Everest-D
Version 4.32
Page 16
5.2.2.2 Item.
ITEM is the selection available within one GROUP. For
example in the GROUP; PAGE LAYOUT you can select
between the following ITEM: Characters per line, left mar-
gin, Binding-margin, top margin, bottom margin, line spac-
ing, page mode, print mode, page number and print sided.
5.2.2.3 Value.
VALUE is the actual value that you can select in any item.
For example left margin 0,1,2 or 3 characters.
5.2.2.3.1 Page layout information.
Pressing value with the printer in stand by mode, gives the active number of lines per page and
characters per line.
5.3. Change Setup.
This is a command sequence that changes stop bit
in serial communications from 1 bit to 2 bits.
1. Press SETUP while power on.
2. Press GROUP until the printer echo
SERIAL COMMUNICATION
3. Press ITEM until the printer echo STOP BITS
4. Press VALUE until the printer echo TWO
5. Press SETUP to save the change in DEFAULT
SETUP A
To abandon the setup, simply turn off the printer.
5.3.1 Braille Code.
In this group the following items can be changed;
Language, Computer or Literary (grade 1) Braille,
6 or 8 dot Braille in computer Braille and with or
without capital prefix in Literary (grade 1) Braille.
When a user defined Braille table is used it can be
changed to all combinations between literary and
computer Braille with no system limitations.
- Language -(OWN ONE, OWN TWO and
Language comp./litt. defined in prom Braille
table).
- Computer - 6/8 dots Braille.
- Literary (grade 1) - with or without capital
prefix.
Flowshematicforsetup

Manual Index Everest-D
IndexBraillePrinterCompany Page 17
Version 4.32
5.3.2 Serial Communication.
In this group all the parameters referring to serial communication can be changed.
Baud rate 300/600/1200/2400/4800/9600.
Serial data 7/8.
Parity Odd/Even/None.
Stop Bit 1/2.
Handshake Hardware/Software.
5.3.3 Page Layout.
The page layout contains the following options:
Characters per line 23-48
Left margin 0/1/2/3.
B-margin 0/1/2/3.
Top margin 0/1/2/3.
Bottom margin 0/1/2/3.
Line spacing 0.5/0.75/0.90/0.95/1.0/1.05/1.10/1.50/2.0 mm
Page mode Single/Double.
Print mode Normal/Reformatted.
Page number On/Off.
Lines per page -3/-2/-1/normal/+1/+2/+3
5.3.3.1 Characters per line.
With item characters per line you select the value for # of characters per line.
Max char/lilne: Interpoint is 42
iterline is 48
5.3.3.2 Left margin.
The option left margin gives the width of your margin. Select # of lines.
Note! The items B-margin and Left margin decreases the # of characters per line.
5.3.3.3 B-margin.
Binding-margin is used to get an extra width on your margin if you like to bind it in to a file or as
a book. Moves the text blocks on both sides simultaneously.
5.3.3.4 Top margin.
Top margin gives empty space in the top of each page. Select # of lines.
5.3.3.5 Bottom margin.
Bottom margin gives empty space in the bottom of each page. Select # of lines.
NOTE! Minimum value 1 is necessary to set page number on.
5.3.3.6 Line distance
Line distance sets the size of the distances between the lines.

IndexBraillePrinterCompany
Manual Index Everest-D
Version 4.32
Page 18
5.3.3.7 Page mode.
With the option page mode, select between single- or double-sided. Default is double-sided.
5.3.3.8 Print mode.
With the option print mode, select between normal and reformatted printout.
5.3.3.9 Page number.
With the option page number, select page numbering - On/Off.
NOTE! Minimum bottom margin value 1 is necessary to set page number on.
5.3.3.10 Page and margin layout
To deside the layout of an interpoint printout, there is a few things to be aware of.
5.3.3.11 Line per page
Select Number of Lines per page according to the installed page format.
Normal is 29 lines per page for an A4 page.
It is possible to choose + / - 3 lines according to the normal value.
5.3.3.12 Page layout Guideline
Line length
Maximum number of characters should never
exceed the paper size, even if the file is
correctly formatted, otherwise parts of the
text on the even pages will start to be printed
outside the paper and therefore be lost.
Use the following setting of the characers per
line in interpoint/interline 2,5 mm mode.
8½" width= max 32 char/line
12" width= max 42 char/line
In Japanese standard interline, 2,2 mm
dot distance, use the following setting
8½" width= max 36 char/line
12" width= max 48 char/line
Margins
See the description on the picture beside.
On the front-page all margins are at the given
position.
The left margin and the binding margin is
both to the left of the page.

Manual Index Everest-D
IndexBraillePrinterCompany Page 19
Version 4.32
On the back-page the left margin has "moved" to the opposite side, viewed form the front, and
the binding margin remains on the same position.
When changing the size of the binding margin, the text-block's on both sides moves simultane-
ously in the same direction, but when changing the left margin, the text-block's moves in the
apposite directions.
5.3.4 Option.
The following options are available:
Word wrap On/Off.
Auto Line-feed On/Off.
Form feed After/Before/Both/None.
Volume 1/2/3/4/5.
Impact level 1/2/3/4/5.
Delay 1/2/3/4/5.
7/Printing Speed 60/70/80/90/100 cps
8/Dots 2.0/2,5 mm
9/Text mode 2.2/2.5 mm
Setup Open/Not open
Line Type 1/2 (Interpoint/Inteline)
5.3.4.1 Word wrap.
Select between split the to long words or to wrapping the last word of the line to the next line.
5.3.4.2 Auto linefeed.
Select if you like to have an automatic linefeed together with a carriage return.
Some word processors and other computer programmes gives a linefeed automatically.
5.3.4.3 Form Feed.
Selects when you like a form feed according to the file.
5.3.4.4 Volume.
Selects the volume of the speech feedback.
5.3.4.5 Impact level.
Selects the impact level on the hammers. Select impact level according to paper quality.
5.3.4.6 Delay.
Selects the delay time for the printer to wait for more information after a file.
Note! Using a computer with a slow disc-drive requires a longer delay time in the printer.
5.3.4.7 7 - Printing speed.
Selects the printing speed. Value 60/70/80/90/100 cps/second.

IndexBraillePrinterCompany
Manual Index Everest-D
Version 4.32
Page 20
5.3.4.8 8 - Graphic dot distance.
Selects resolution in graphic mode. Select between 2.0 or 2.5
5.3.4.9 9 - Text dot distance.
Selects resolution in text mode. Select between 2.2 or 2.5
Note! 2.2 mm gives automatically Line type Interline - Japanese standard.
Maximum number of characters per line in Japanese mode is 48.
5.3.4.10 Set up.
Selects access to setup. NOT OPEN gives access only by the command "power on + Setup key".
OPEN gives access by pressing the Setup key when printer is stand by.
Note! Changing of access to Set up (Open/Not open) will effect all three setup´s, A/B/C.
5.3.4.11 Line Type.
Select Interpoint (1) or Interline (2) printout. Interline is Japanese standard.
Interpoint gives automatically 2.5 mm text resolution.
5.4 Selftest.
Command: on line + power.
This command starts a self test of printing quality on all needles, interpoint dot quality and long
time durability. The first page will print a pattern of all hammers according to the active page
layout setting with the number for each hammer. After page five it will return to page one and
then continuously repeat the same sequence in a never ending printout.
5.5 Factory setting.
Command: group + power.
The printer will reload all parameter settings except operation defined Braille code OWN ONE
and OWN TWO. The factory setting will activate setup A.
To make a system reset, press GROUP + POWER ON.
After the system reset, the printer will echo "SETUP 000, Index Everest ready".
5.6 Training mode.
Command: help + power.
One easy and effective way to learn how to use and setup the printer is to set the printer in
TRAINING mode. Press the HELP key and turn on the printer. The commands on the Everest
will now work as normal. The only difference is that you will not be able to print out and your
changes in Setup will not be stored in memory. Test this mode and let the speech guide you
through all the different modules. When you understand how the printer is working, just turn it
off to end the TRAINING mode.
Table of contents
Other Index Braille Printer manuals

Index Braille
Index Braille BASIC User manual

Index Braille
Index Braille Everest-D V5 User manual

Index Braille
Index Braille BASIC User manual

Index Braille
Index Braille Index V4 User manual

Index Braille
Index Braille Basic-D V5 User manual

Index Braille
Index Braille Index V4 User manual

Index Braille
Index Braille EVEREST Series User manual

Index Braille
Index Braille Everest-D V5 User manual