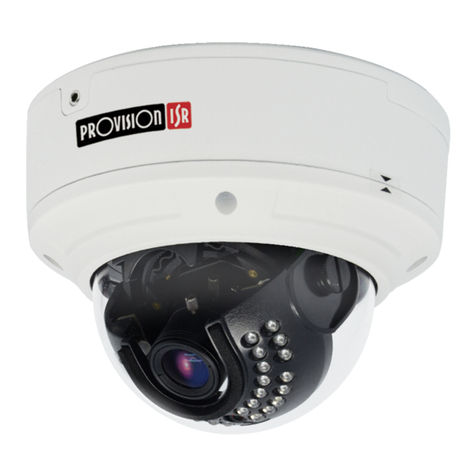
INDUSVISION iAQUA Series User manual

Underwater CCTV Camera
iAQUA Series
http://www.indusvision.com
User Manual

01
IAQUA Series
User Manual
Underwater CCTV Camera Manual
Copyright
©2021 INDUSVISION Inc. All rights reserved.
Notes on the use of copyrights and trademarks
The names of products and companies mentioned in this manual are trademarks
or registered trademarks belonging to the company. It is a trademark.
Warranty
If the product does not operate properly even though the product is operated under normal
conditions of use, The manufacturer will repair it for free.
The warranty period is 1 years and the following circumstances are excluded from the warranty.
1. When the system operates incorrectly by executing a program not related to the system operation.
2. Changes in the product over time or abnormalities caused by natural wear during use.
※Product appearance and specifications are subject to change without prior notice to improve performance.
Every 3 months to protect personal information safely and prevent personal information theft damage
Change your password periodically.
Users are responsible for security and other issues caused by careless password management.
Be very careful.

02
03
04
05
06
07
10
13
14
15
16
18
20
Underwater CCTV Camera Manual
PC system recommended specifications
• CPU : Intel Core 2 Duo 2.4 GHz or more (1920x1080 30fps Use)
Intel Core i7 2.8 GHz or more (1920x1080 60fps Use)
• Resolution : 1280x1024 or more (32 bit color)
• Memory : 2GB or more
• Supported OS: Windows XP, VISTA, 7, 8, 10 / Mac OS 10.7 more
• Support web browser: Microsoft Internet Explorer (Ver. 8~11),
Mozilla Firefox (Ver. 9~19) New 85
Google Chrome (Ver. 15~15) New 88
Apple Safari (Ver. 6.0.2) New 14
- Windows 8 is only supported in desktop mode.
- Beta or developer versions other than those released on the
official website are not supported.
- Windows 7 or higher is recommended for IPv6 connection.
- Safari Browser is only supported on Mac OS X.
• Video memory: 256MB or more
- If the driver of the video memory card is not installed correctly or
is not the latest version, the video may not play properly.
- If more than one monitor is used, playback performance may decrease
depending on the system specifications.
• Components
• Part names
• Safety Rules
• Precautions before install
• How to Installation
• NETWORK setting
• How to set Light
• Firmware update
• HD model OSD setting
• Maintenance
• Troubleshooting
• Technical drawing
• Product warranty
Contents
Summary
11

03
*1
*4
• The IVEX-EMC-B300 submersible cable can be optionally selected
from three types of 20m, 50m, and 100m.
• When purchasing the wall mount bracket, 3 set anchors are
provided as standard.
• When purchasing a ceiling bracket, mounting bolts and 2 set
anchors are provided as standard..
+
M6*30
M5
*1
*1 *1
+
M5
M5
Underwater CCTV Camera Manual
*1
Underwater
cable
IVEX-WB02 IVEX-CB01
IVEX-EMC-B300
Components
Before starting the installation,
remove the following components enclosed in the product box.
Please check carefully to ensure that there are no missing parts during
installation.
Basic Components
L Wrench
Stainless
steel plate Knife Block Set Spare Bolt Set
User Manual
Separately Purchased Product
Wall Bracket Set Anchor Ceiling Bracket
Bolt and
Set Anchor
Component Notes
L Wrench (Hexagonal) Standard

04
IAQUA Series
① Front Cap
② Front Cover
③ Main Body
④ Cable Connect Port
⑤ Base Bracket
[Front] [Rear] [Side]
②
③④
⑤
Underwater CCTV Camera Manual
①
• The bracket can be changed to the shape shown in the figure
above according to the order specifications.
[Base Bracket Type A_Basic] [Wall Mount Bracket Type B_Option]
IAQUA Series Bracket classification
Part Names
Part names for each product are important to provide fast and accurate
service for each part, so please be aware of it.

05
• When installing or performing maintenance with the breaker ON,
make sure that the product power is off.
• A power cut-off device should be included in the electrical
installation and ensure that it is recognizable very quickly and
is switched off when necessary.
• For electrical installations to which the device is connected,
an earth leakage breaker of up to 16A is recommended.
• The minimum spacing between circuit breaker contacts must be
3 mm (0.1").
• Do not use worn or corroded cables.
• During installation operation, check whether the characteristics
of the power supply provided by the facility match the
characteristics of the power supply required by the product.
• This product is not suitable for use in locations where children
may be present.
• It is recommended to test the product before installation.
• All unused cables are electrically insulated power.
• This product is only in the standard position.
• Before powering up, make sure the device is manufactured and fixed.
• Unauthorized modification of tying, use of non-genuine spare parts,
unapproved. No liability is assumed for any damage to the support
mechanism due to installation, maintenance and repair by
unskilled personnel.
• Refer only to authorized products covered by technical service.
• Strictly follow the maintenance given in this instruction manual.
• The manufacturer assumes no responsibility for any damage caused
by improper use of the devices mentioned in this manual.
We also reserve the right to change some parts without notice.
• The manufacturer assumes no responsibility whatsoever arising from
improper use of the device.
• Since it is the user's responsibility to select the surface to which the
product will be mounted, no fasteners are provided for attaching the
product to a specific surface.
It is the installer's responsibility to select a fixture suitable for that
particular application. Use installation methods and materials that
can support at least 4 times the weight of the product.
• For all product maintenance, it is recommended that the product be
repaired by shipping the product to the manufacturer.
• This product is a Class A product. In a residential environment,
this product may cause radio interference. In this case, the user
may be asked for a suitable electromagnetic wave shielding method.
• We recommend that you use an uninterruptible power supply (UPS)
to protect against temporary power outages.
Underwater CCTV Camera Manual
Safety rules
Please read the product instruction manual carefully before installing and
using this product.
Keep the manual in a separate place for future reference.
Risk of electric shock
To avoid the risk of electric shock, make sure that voltage
is applied to the product before performing any work.
Caution when working
Operation is very important for the correct functioning of
the system. Please proceed with the installation
in the order indicated in the product instruction manual.
Product feature description
Please read the information below to understand the
installation process.

06
Underwater CCTV Camera Manual
Before proceeding with the installation of the product, carefully read the
chapter'Safety Rules' in the product manual.
Check the packing box
!
Information provided on the
box label
- Model name
- Serial number of the product
- IP address
- ID / Password
- etc
• When delivering the product, check that the packaging is intact,
and that there are no drops or tears.
• In the case of returning a broken product, it is recommended
to use the packaging box provided for transportation.
• The box label affixed to the product box contains the information
shown above. Before discarding the box, please back up the
information entered on the label to prevent product operation
problems.
Check the contents
• Refer to the component information on page 3 and check that
the contents match.
Safe disposal of packaging materials
• Among the packaging materials, PE foam other than paper is
subject to separate discharge.
Therefore, please separate and dispose according to the
separate collection method and regulations.
Check before installation
•It is recommended to use only the brackets and accessories
approved by the manufacturer for the brackets required for
installation.
•The manufacturer is not responsible for any damage caused
by the use of brackets not provided by the manufacturer.
How to install
• This system can only be installed in a standard location.
Precautions before Installation

07
Underwater CCTV Camera Manual
Before proceeding with the installation of the product, carefully read the
chapter'Safety Rules' in the product manual.
Installation using base bracket
[Floor installation] [Wall mounting] [Ceiling installation]
• First, choose the installation method from the picture above.
• Place the base bracket in the position to be installed and mark
the perforation point.
• Insert the knife block provided with the product into the perforated
part.
• Insert the cross piece provided with the product into the
knife block position on the bracket.
• Loosen the bolts of the base bracket slightly to adjust the height
and level of the video and finish.
• Equipment for wall drilling is not provided.
Fixed to vertical wall
Set anchor
Bracket from top to bottom
(IVEX-WB02)
• The wall mount bracket can be fixed to a vertical wall. (IVEX-WB02)
• Fix the bracket to the wall with the provided set anchor that
can withstand at least 4 times the weight of the device.
Then use the provided hexagon bolt SET to fix the device
to the bracket.
• At this time, check that there are no foreign substances in the thread
or the product's fastening hole..
• Apply enough locking compound (Loctite 263) on the two screws
and lock the screws.
• The thread compound should solidify for an hour,
during which time the installation should be completed.
• When tightening the bolt, tighten the torque to 35Nm.
How to Install

08
Underwater CCTV Camera Manual
Before proceeding with the installation of the product, carefully read the
chapter'Safety Rules' in the product manual.
Installation using ceiling bracket
• The ceiling bracket can be fixed to the ceiling wall.
• Fix the bracket to the wall with the provided set anchor that
can withstand at least 4 times the weight of the device.
• At this time, check that there are no foreign substances in the thread
or the product's fastening hole.
• Apply enough locking compound (Loctite 263) on the 2 screws
and lock the screws.
• The thread compound should solidify for an hour, during which time
the installation should be completed.
• When tightening the bolts, tighten the torque to 35Nm.
How to Install

09
How to connect cables for underwater use
Underwater CCTV Camera Manual
Connector (female) Connector (male)
1. Proceed with the connection
by checking the male/female
connector fastening groove
of the cable connector.
2. Fasten the cable connector
cap to the product joint.
3. Tighten the cable connector
cap to 40Nm using a monkey
wrench.
PoE model connection diagram
HD model connection diagram
[PoE Hub]
• In case of PoE model, it is possible to connect directly to PoE
hub and NVR within a maximum distance of 100M as shown in
the figure.
• For HD model, connect the coaxial cable and DVR as shown in
the picture, Power is supplied using a DC adapter.
[DVR]
[DC adapter]
It is strongly recommended that all devices be carried out after final testing
prior to installation at the final installation site.
How to Install

10
Underwater CCTV Camera Manual
Web browser access
①②
③
IP address change
①
②③
NETWORK setting
After sufficiently checking the IP-related information that can be checked in
‘Checking the packing box’ on page 10, proceed to the following.
①Enter the IP address in the address bar of Internet Explorer.
- The IP address is ‘Check the box’
②When the web page shown in the picture above appears,
enter your ID and PW, and click the OK button.
③If you log in successfully, you will be directed to the
Live Monitoring page.
• Click the Setup item at the top of the Live Monitoring screen.
• Click INTERFACE in the NETWORK category
→ move to IP Address
• When selecting STATIC IP in IP setting, all settings except DNS
must be entered in the setting window as shown in the figure
above.
• At this time, the gateway of the PC to which the router and web
viewer are to be connected,It must match the camera.
• The IP address must also match the camera with all numbers
except for the 4th digit address, such as 192.168.1.X.
• After all the settings are completed, it takes about 3~4 seconds for
the SAVE click settings to be applied.
• When selecting DHCP in NETWORK TYPE, the above IP setting
is not required.

11
Underwater CCTV Camera Manual
Change Web Port RTSP settings
NETWORK setting
• Click PORT in the NETWORK item
→ go to Web Port
• The default setting of Web Port is as shown in the figure.
• The HTTP port is for web access, video streaming, and playback.
• The HTTP port is the network port that the PC uses to access
the product's web page, and can be used by specifying a port
in the range of 80 to 65535. The default is 80.
• The above setting can be changed by the user,
but the port is a general setting, so the manufacturer is not
responsible for any problems caused by the change.
• Click RTSP / ONVIF in the NETWORK item
→ move to RTSP Port
• The default setting of RTSP is as shown in the figure.
• Real-time Streaming Protocol (RTSP) is a protocol used to
transmit video and audio streams over a network.
• The above setting can be changed by the user,
but it is a port of general setting, so the manufacturer is
not responsible for any problems caused by the change.
RTSP ADDRESS
•The RTSP address is as follows. (General use)
- MAIN Stream (Channel 1) : rtsp://camera IP/stream1
- SUB Stream (Channel 2) : rtsp://camera IP/stream2

12
Go to Live screen
• Check the LIGHT menu at the bottom left of the live screen.
How to set LIGHT
• Select ON for LIGHT in the ON/OFF selection bar of the LIGHT menu.
You can adjust the amount of light from 0 to 10 by pressing the
+ and - buttons.
• Adjust the LIGHT intensity by pressing the +,- buttons..
Underwater CCTV Camera Manual
①
②

13
Underwater CCTV Camera Manual
Camera firmware update
Firmware updated
• When the window as shown in the picture above appears,
select the file to be uploaded in ①and click Upgrade in ②.
When a pop-up window appears, click ③again to upgrade.
• The upgrade takes about 4 minutes.
• When uploading is complete,
the message shown on the left
appears. Click OK to complete
the upload and reboot
• After rebooting, log in again, move setup → system →
system default, and click DEFAULT.
• Upload file is applied only when DEFAULT is completed..
• After clicking SYSTEM UPGRADE in the SYSTEM item
→ Move on to Select Upgrade File.
①
②
③
①
②
③
Updating the product's firmware may cause the product to stop functioning.
So please proceed carefully.

14
Underwater CCTV Camera Manual
OSD menu screen description
• The main menu is structured as follows ①.
• For AF mode adjustment and IR-LED control, refer to the pictures
in ②and ③.
• To save all menus, press the 'SAVE' button of EXIT to save them
in order to save them normally.
System setup
HD model OSD setting
• The settings that affect the image quality are the menus in the
picture above.
• This is a menu to select the video output format
that is important for HD video.
• How to access the menu is shown in the figure below.
• The sequence of video output (OUTPUT) conversion is as follows.
Please refer to the procedure below to switch the video output.
• Since the video output format is changed during video conversion,
video output may not be available.
• In this case, the format is not saved if the device is
powered ON→OFF
•MAIN OUTPUT : SDI → ANALOG
•SDI OUTPUT : HD-SDI → EX-SDI1.0 → EX-SDI2.0 → OFF
•ANALOG OUTPUT : HD-AHD → CVBS → HD-CVI → HD-TVI

15
• Cables must not show any signs of damage or wear, which could
lead to a hazardous situation. In this case, special maintenance is
essential.
• Replacement of gaskets and O-rings is essential for maintenance.
• Damaged gaskets and O-rings during maintenance may cause
serious problems in product performance, so be sure to replace
them with genuine parts guaranteed by the manufacturer.
• The manufacturer's warranty is not covered for moisture and
malfunction due to product disassembly.
• When disassembling the product in unavoidable circumstances,
after removing the base bracket, you can remove the case by
turning the front cover in the following way.
Disposal of replaced parts
• Disposal of the device must be properly disposed of in accordance
with e-waste guidelines and environmental regulations.
①
①
②
Underwater CCTV Camera Manual
replacement of the front cap
• Depending on the characteristics of the installation environment,
it is possible to replace the front cap by turning the front cap by hand
if it is necessary to install a special front cap to protect the
tempered glass.
Maintenance
Parts used for maintenance of the device are guaranteed by the manufacturer.
The manufacturer guarantees only the use of genuine parts.
Summary

16
Underwater CCTV Camera Manual
Troubleshooting
Problem: The product does not turn on.
• Cause: Incorrect wiring, bad adapter
• Solution: Check the correct execution of the connection.
If a connection error or damage is found,
correct it, and if the adapter's LED does not light up,
replace the adapter.
Problem: The device does not appear on the
network.
• Cause: Do not change the IP address, the device’s
IP address is lost.
• Solution: Contact the manufacturer to download the
IP Search Program. Check the correct IP address of the
device or check again after correcting.
Problem: I can't remember the ID/PW.
• Cause: ID / PW lost due to customer mistake
• Solution: Due to the nature of explosion-proof products,
the reset button is not exposed to the outside,
so you must remove the product and send it to the
manufacturer.
An unlisted issue persists, or another unexplained issue
If there is, contact the manufacturer.
Please check the following
installation problems
•Is the installation location an area with
a lot of vibration?
→ If the IAQUA Series is exposed to
severevibration,
it may cause problems in the operation
of the product.
Therefore, install a device such as a damper
against vibration and then reinstall the product.
•Is the installation location in a high
temperature, high humidity, or
low temperature environment?
→ If the IAQUA Series is used in an
environment outside the guaranteed
temperature range,
it may cause functional problems.
Therefore, examine the installation
environment and compare it with the
specifications.

17
No Checking list Check
1Remove the protective vinyl from the glass surface of the product. □
2For PoE-only products, check if power is supplied normally when connecting to a PoE hub or an NVR that supports PoE.
For HD models, check whether the power supply through the 12V adapter is normal. □
3
For PoE-only products, check if the IP address indicated on the product box is properly connected.
(Usually, it takes about 2 minutes for booting up after power-on and IP access is available.)
For HD models, check the normal video output by connecting the video cable (BNC terminal) to the recorder or monitor correctly.
□
4Check if there is any problem with the product's video output and zoom control. □
5Finally, when you look inside the glass in a bright place, check that there is no moisture. □
Underwater CCTV Camera Manual
Troubleshooting
1. When receiving the product, be sure to install the product on-site when there is no problem after checking the pre-checklist according to the following
procedure before installation on-site.
2. Please note that for problems that occur during on-site delivery without prior checklist inspection, service measures may be charged in some cases.

18
IAQUA Series (Type A)
Underwater CCTV Camera Manual
IAQUA Series (Type B)
Technical drawing
The unit of measurement is expressed in mm.

19
Top Mount Bracket Wall Mount Bracket
Underwater CCTV Camera Manual
Technical drawing
The unit of measurement is expressed in mm.
Other manuals for iAQUA Series
1
Table of contents
Other INDUSVISION Security Camera manuals
