iNeo I-NA312N1-S User manual
Model:I-NA312N1-S
Network Attached Storage
User Manual
www.ineotechusa.com

Content
1Getting Started
Product Specification………..
Networking Concept……….
Package Contents …………………………...…….
System Requirements …………………………..
Updating Your Operating System ………………
Handling Precautions……………………
2Setting Up
I-NA305N1 Front View ……………
The information on LCD……………..
Hard Disk Drive Installation…………
3Connecting the NAS
Connecting the Cables ……………….
NAS Mode
Enclosure Mode
Powering Up the NAS ……..………
4Configuring the NAS
Overview……….
First Time Login…………..
Basic Setup…………..
Control Panel……………………
uShare
Web Album
IP Camera
Web Server
PHP BB
Gallery

5Appendixes
A: Mount NFS share in Linux
B: USB Devices
C: Remote Login FTP
D: Printer Server
E: Modify Password by User
F: Map NAS
G: Promise

1. Getting Started
FOREWORD
Thank you for choosing ineo products. This user manual provides detailed
instructions of usingI-NA312N1-S. Please read carefully and start to enjoy the
design of intimate user interface ofI-NA312N1-S.
Note
1. This manual provides the description of all functions ofI-NA312N1-S. The
product you purchased may not support certain functions dedicated to
specific models.
2. All features, functionality and other product specifications are subject to
change without prior notice or obligation.
3. All brands and products names referred to are trademarks of their
respective holders.
LIMITED WARRANTY
In no event shall the liability of ineo Tech Computers, Inc. ineo exceed the
price paid for the product form direct, indirect, special, incidental, or
consequential software, or its documentation. ineo makes no warranty or
representation, expressed, implied, or statutory, with respect to its products or
the contents or use of this documentation and all accompanying software, and
specifically disclaims its quality, performance, merchantability, or fitness for
any particular purpose. ineo reserves the right to revise or update its products,
software, or documentation without obligation to notify any individual or
entity.
Attention: Please backup your system periodically to avoid any potential
data loss. ineo disclaims any responsibility of all sorts of data
loss or recovery. If you return any components ofI-NA312N1-S
package for refund or maintenance, make sure they are
carefully packed for shipping. Any form of damages due to
improper packaging will not be compensated.

Product Specification
Networking Concept
Package Contents
Chipset Solution
Storlink 3516ARM9 300MHz
LAN Interface
Data Transfer Rates: 10/100/1000 Mbps
Connector Type: RJ-45 x 1port
Internal Hard Drives
Number of Drives: 2
Drive Interface: RJ-45 for SATA HDD
Interface
Standard Compliance: USB 2.0
Connector Type: USB Host A (Female) x 1
port
Device: works with USB devices, like USB
HUB, USB Printer, USB Enclosure, and USB
Pen Drive.
Supports USB printer server function
File System Management
EXT2 / EXT3 / FAT32
Language
English, Traditional Chinese, Simplified
Chinese
System Tools
System Firmware upgrades
Reset system setting
Display log file with SAMBA/FTP/DHCP
server/system/Administration
Support Hard Drive Capacity
Up to 4TB (2TB x 2)
Protocol Support
Networking: TCP/IP
File Sharing: SAMBA, FTP
Management: HTTP
User Management
User account management (no limit)
User group management (no limit)
User can change password
OS Supported (for Client PC)
Microsoft Windows 98SE / NT / 2000 / XP /
2003 / Vista / 7
Linux Redhat / Fedora / SUSE
Mac OS X
Wireless Network (I-NA305N1 w/ WiFi Optional)
Fixed / Dynamic IPAddress
DHCP Server
Encryption with 128 bit WEP / WPA I/II
IEEE 802.11 b/g/n
Features
Aluminum alloy casing with secure front door
LCD Display
Gigabit Transfer rate up to 1000Mbps
Fully compatible with 3.5" SATA I/II HDD
Support RAID 0/1 Function
Truly Plug and Play
Powerful and Quiet 40 x 40 mm Fan
External Power Adapter

Networking Concept
I-NA305N1 LAN to SATA HDD w/o WiFi
CD Yes
RJ-45 Cable Yes
Key Yes
User Manual Yes
Power Adapter Yes
System Requirements

Hardware
Pentium®II, 200 MHz equivalent or newer for IBM compatible PC
PowerPC G4, 350 MHz or newer for PowerPC-based Apple Computer Core®
or newer for Intel-based Apple Computer
Software
Windows 98SE / 2000/ 2003 / XP / Vista / 7
Mac®OS X
Note: For highest performance and reliability, we recommend that you install
the latest service pack (SP) and updates.
Updating Your Operating System
Windows
Go to the Start menu and select Windows updates. For more information
regarding updating your system, visit http://windowsupdate.microsoft.com.
Macintosh
Go to the Apple menu and select Software Update. For more information
regarding updating your system, visit http://www.apple.com/macosx.
Handling Precautions
Our products are precision instruments and must be handled with care during
unpacking and installation. Drives may be damaged by rough handling, shock,
or vibration. Be aware of the following precautions when unpacking your
external storage kit:
Do not unpack the product until you are ready to install it.
Do not drop or jolt the product.
Do not move the external storage when it is powered up.

2. Setting Up
You will need one or two 3.5 inch SATA Hard Disk Drives. Carefully follow
the procedures to install the Hard Disk Drives into the NAS System.
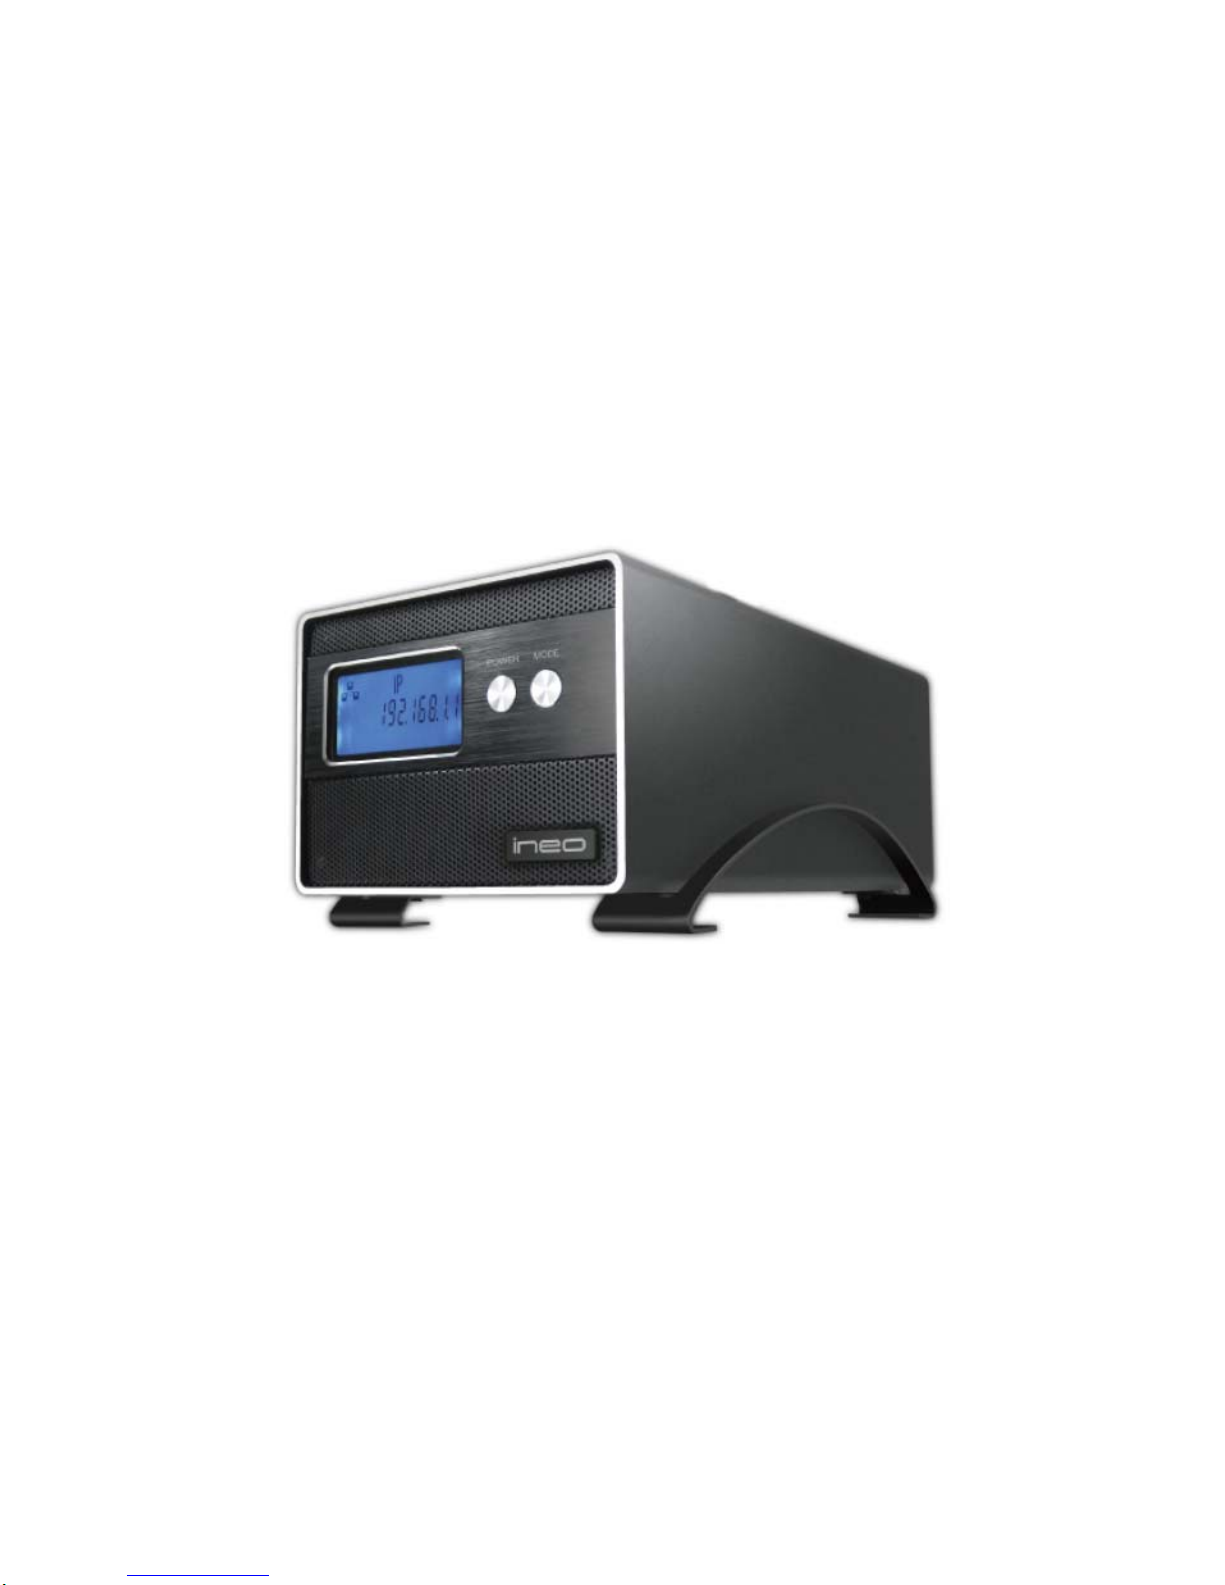
ineo |I-NA312N1-S Front View
The Information on LCD
Hard Disk Drive Installation
1. Loosen four screws from the bottom of the NAS

2. Please pull out the disk mounting tray from housing
3. Please connect SATA1 cable to the larger size hard disk drive
(Install two SATA hard disk drives into the SATA Connectors on the disk
mounting trays. If the hard disk driver does not have the same size, please
place the lager hard disk drive to SATA1 cable. If you format HDD
separately, the operating system only can identify the HDD connect to
SATA1 cable)
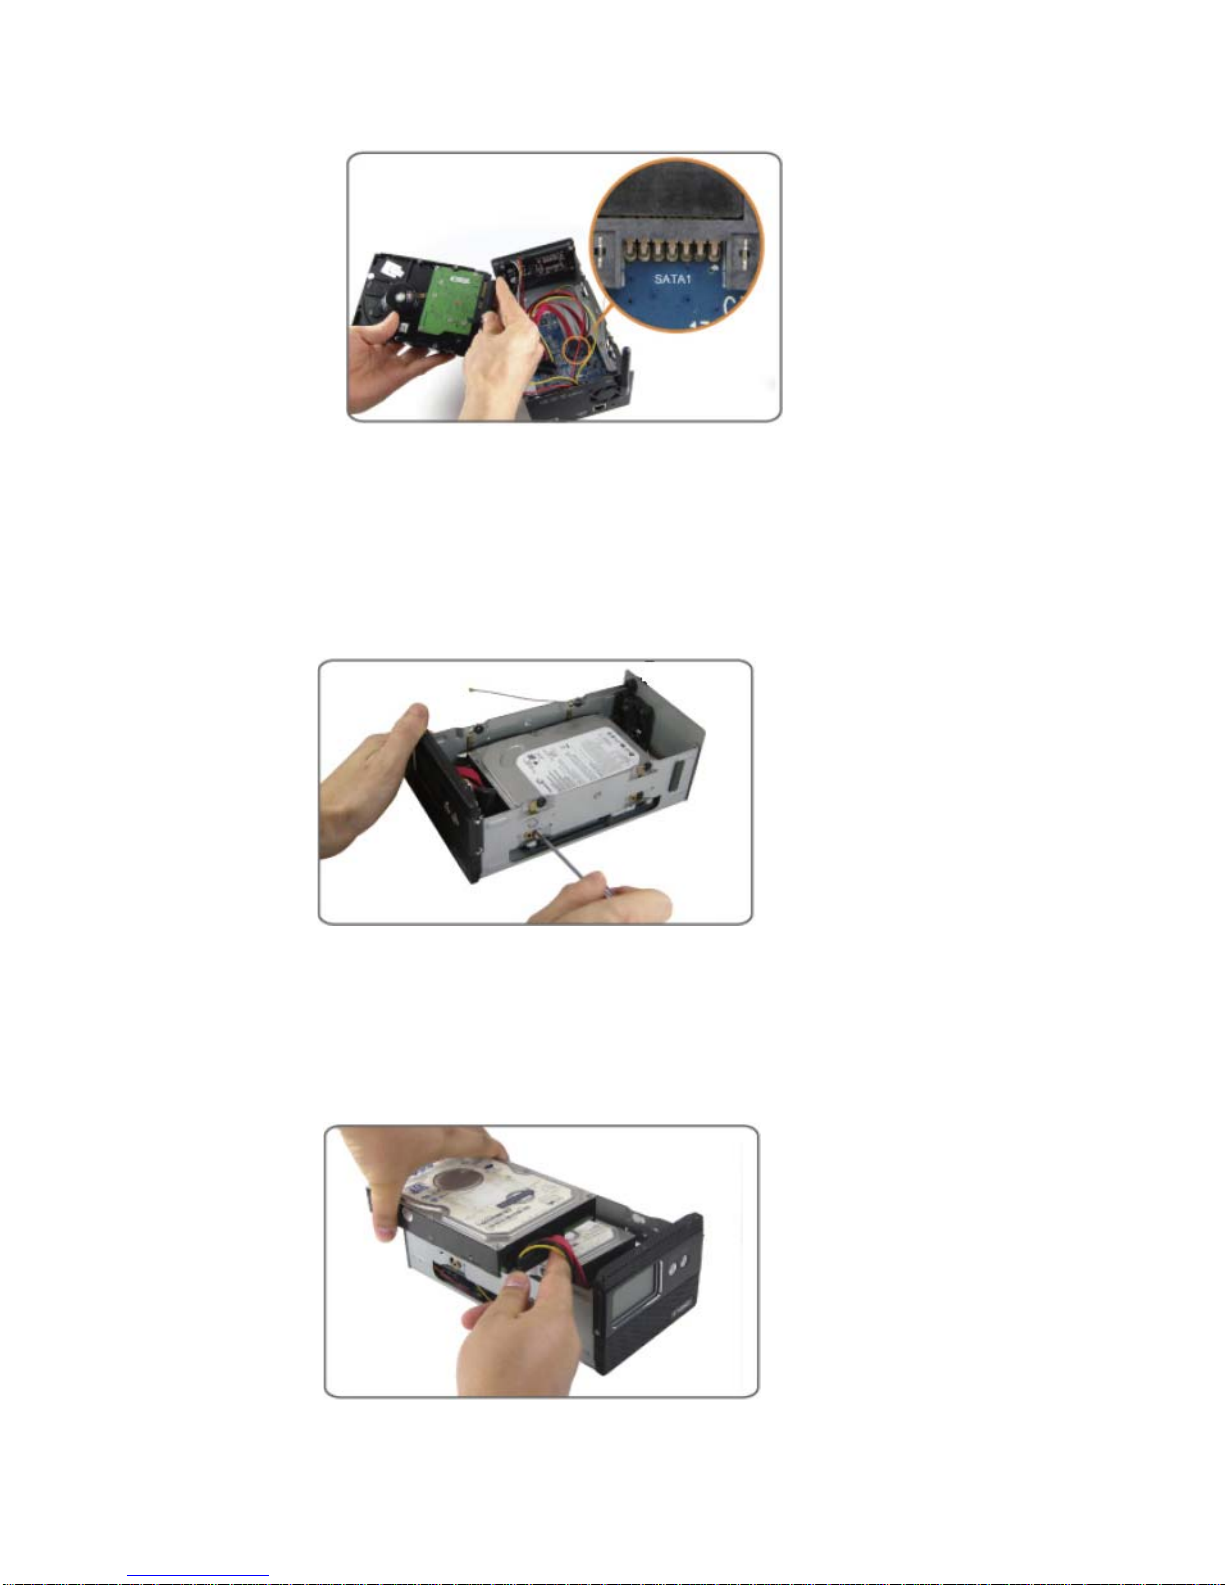
4. Please place the hard disk drive into disk mounting tray and tighten up four
screws from two sides
5. Please connect SATA2 cable to the connector of the hard disk drive
6. Please place the hard disk drive into disk mounting tray and tighten up
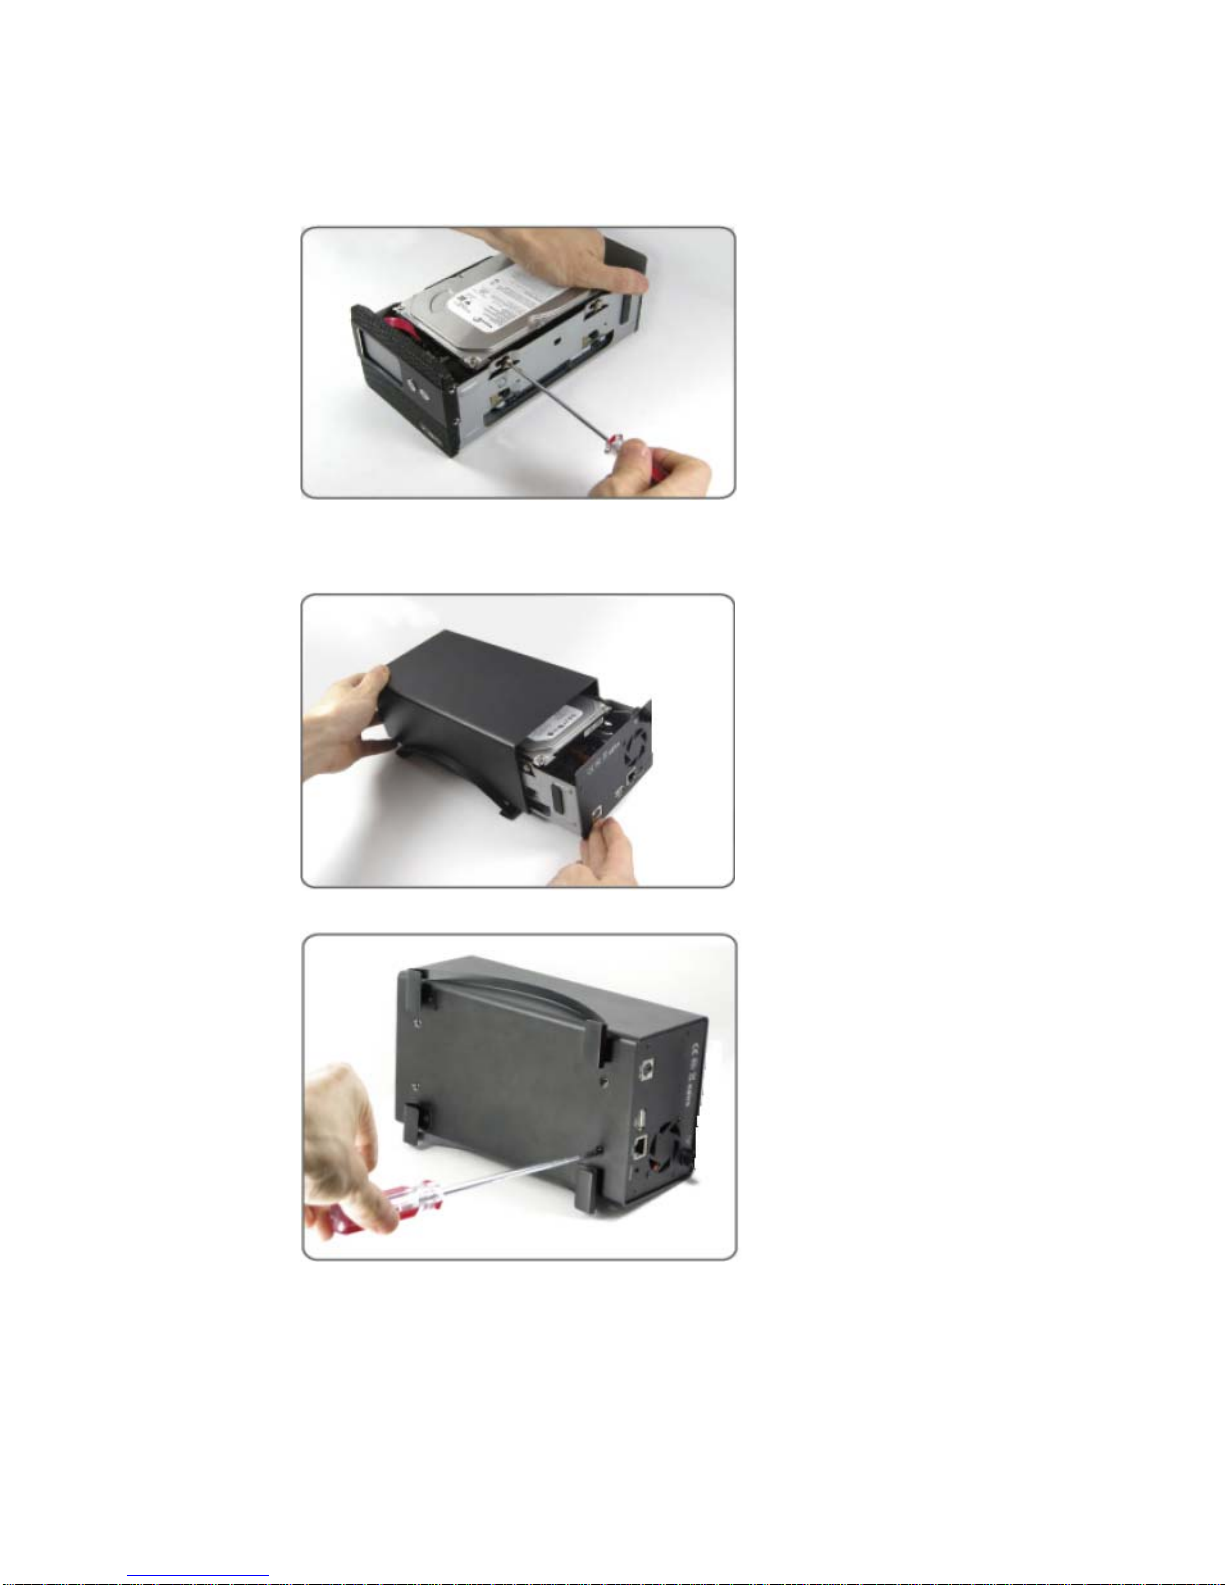
four screw from two sides
7. Please insert the disk mounting tray into the housing
8. Tighten up four screws at the bottom of the NAS
9. NAS installation complete
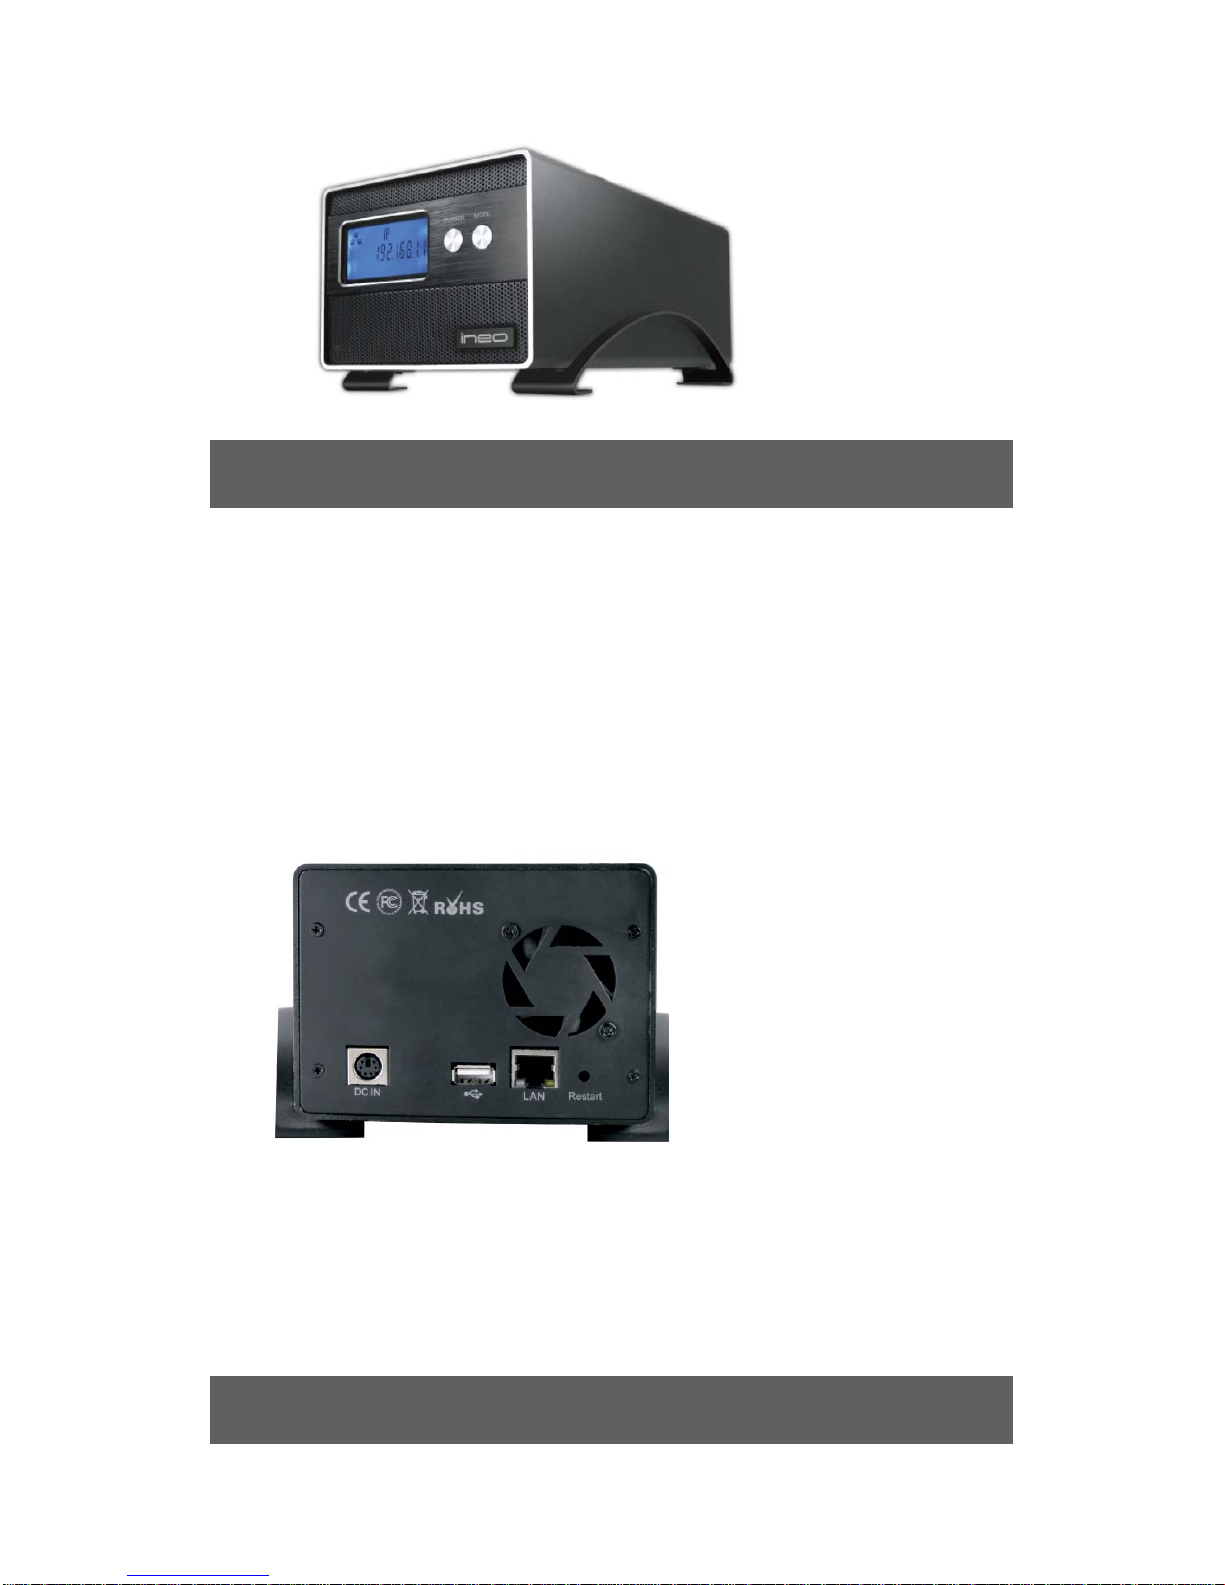
3. Connecting the NAS
Connecting the Cables
1. Connect the Power Adapter to DC IN.
2. Connect one end of the RJ-45 cable to the Ethernet port at the rear of the
NAS.
3. Connect the other end of the RJ-45 cable to an available Ethernet port on
your computer or router.
Powering Up the NAS
Press the power switch to turn on the unit. Wait 3 seconds after blue LCD
illuminates.
4. Configuring the NAS

Overview
All administrative tasks are performed through this web utility. The web utility
can be accessed by any PC on the network by entering http://192.168.1.1 or
http://stornas/ (stornas is the default hostname) in the PC’s web browser
Address window. If your NAS is behind a router, you can get the IP address
from the LCD panel onI-NA312N1-S.
First Time Login
1. Startup Browser and link to http://192.168.1.1
2. The default account is “admin” and password is “admin”.
3. After the login, please format hard disk drives first. (Please reference: Control
Panel > Maintenance > Disk Utility).
4. In order to setup the system, please restartI-NA312N1-S, and login to web
utility.
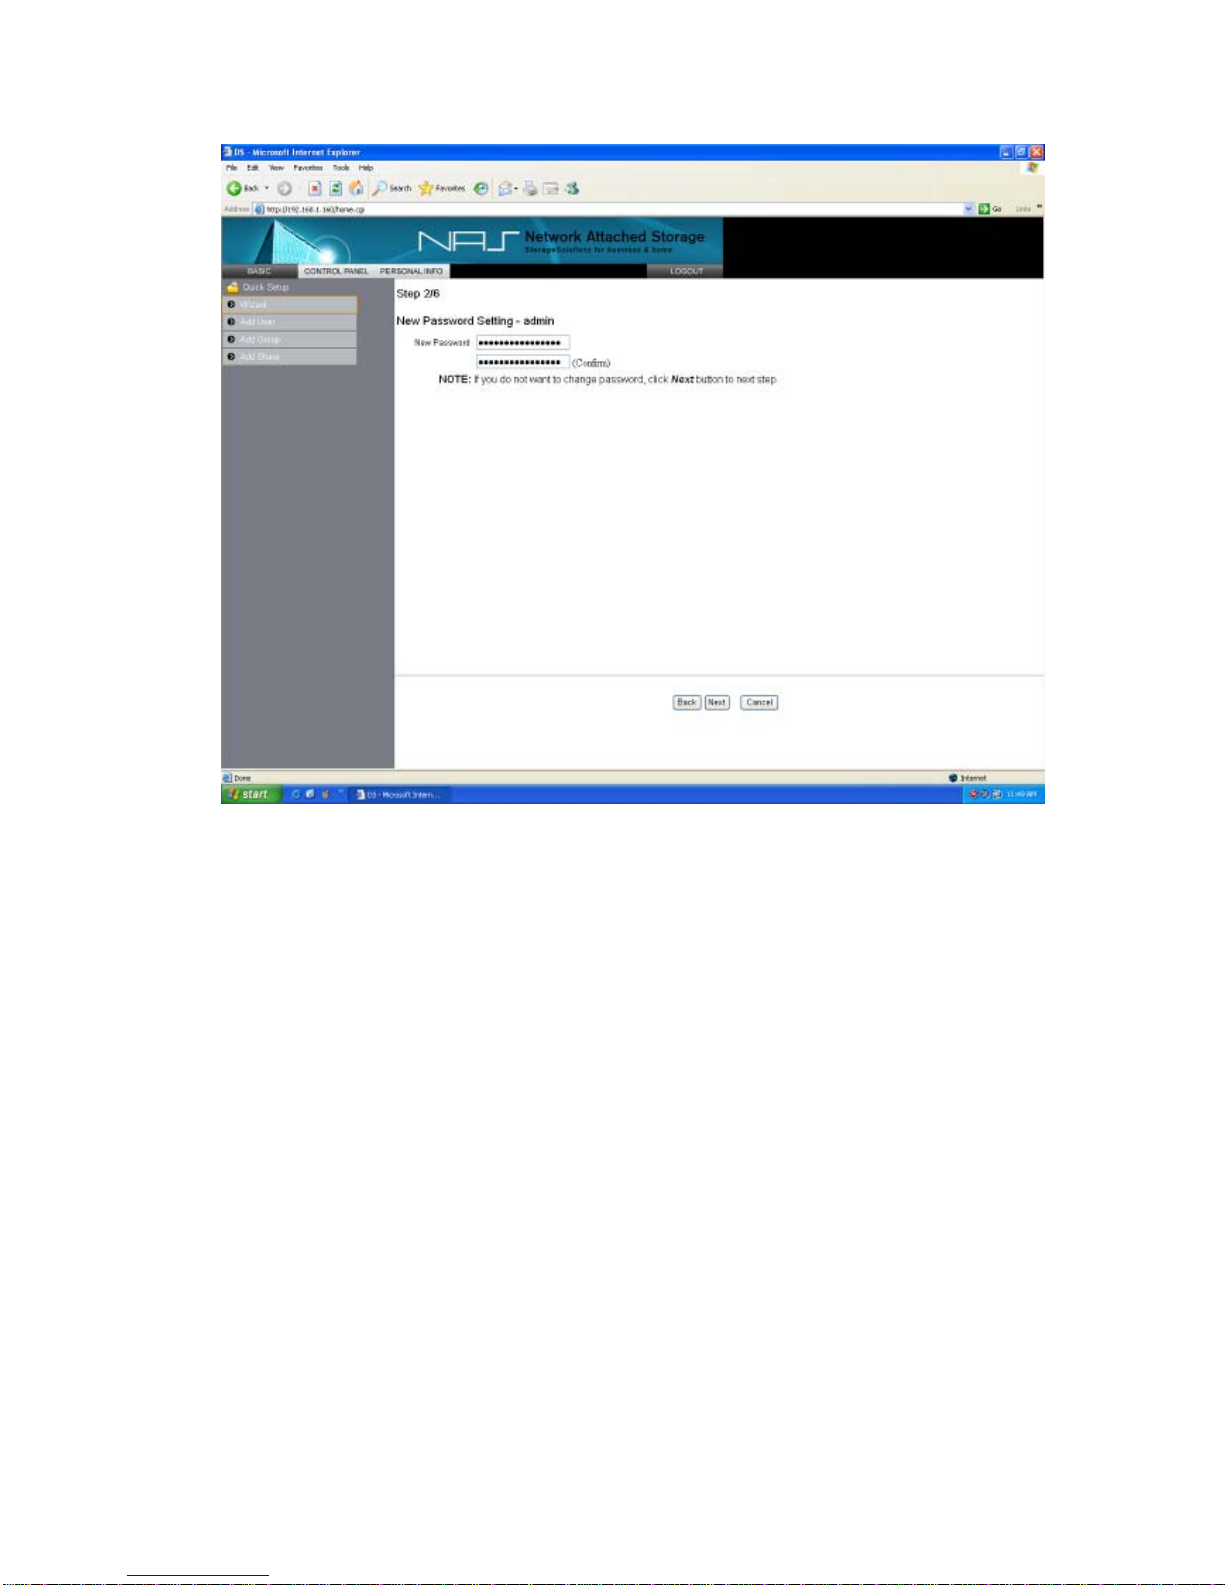
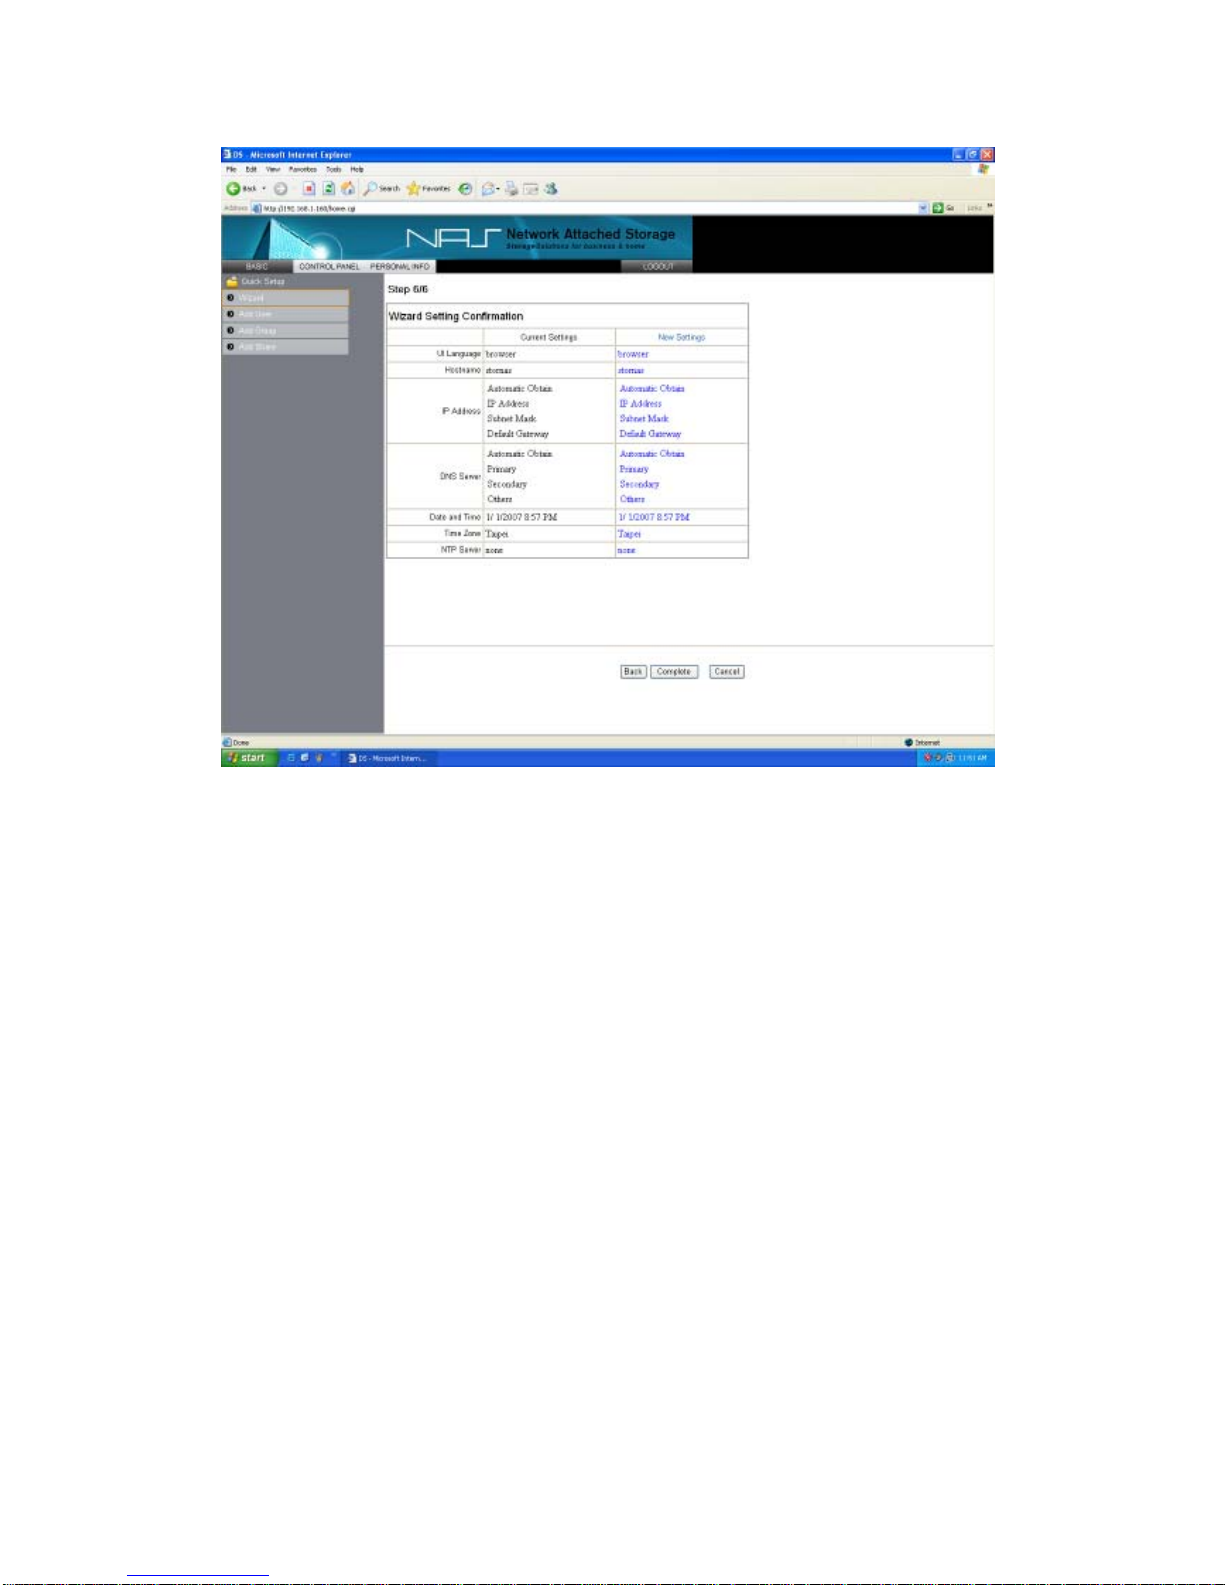
Basic Setup

-Quick Setup
1. Wizard:
a. Setup Language: Select the appropriate language for users on your network.
If multiple languages are used, select the most common.
b. Password
c. Hostname Setting: In this field, you can enter a new Hostname for the NAS Link.
Punctuation and some special characters can not be used in the
name.

d. Internet Protocol Setting

e. Time Settings
f. Wizard Setting Confirmation.
2. Add User
a. Step 1/3:
Attention: To be able to set a quote the EXT2 or EXT3 file system has to be
chosen for the data partition, because only the EXT2 or EXT3 file
system supports that feature. If the data partition is formatted with
FAT32, this option cannot be selected.

b. Step 2/3:
Table of contents


