manuals.online logo
Brands
  1. Home
  2. •
  3. Brands
  4. •
  5. Buffalo
  6. •
  7. Network Storage Server
  8. •
  9. Buffalo LS421DE User manual

Buffalo LS421DE User manual

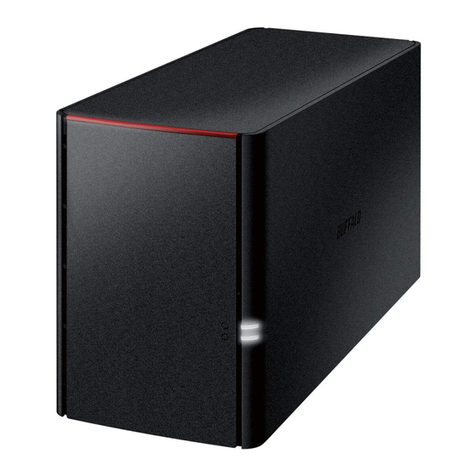
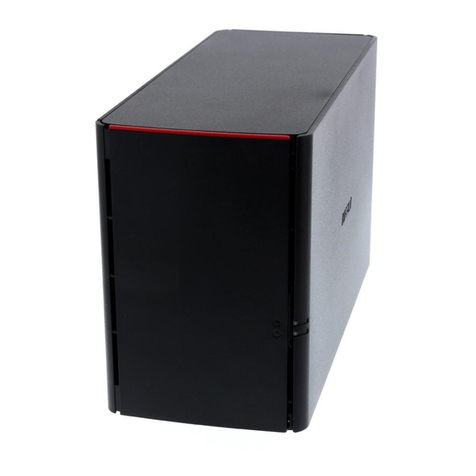
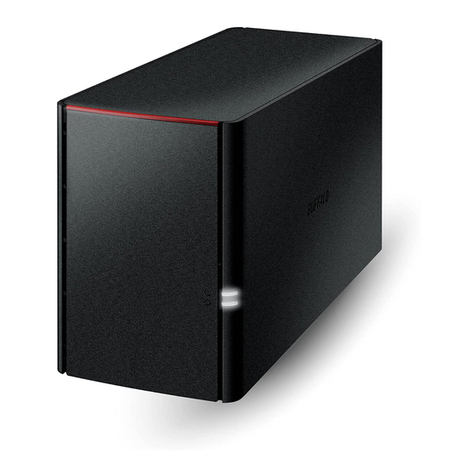
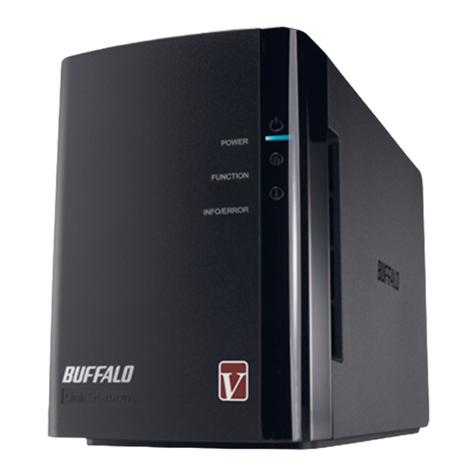
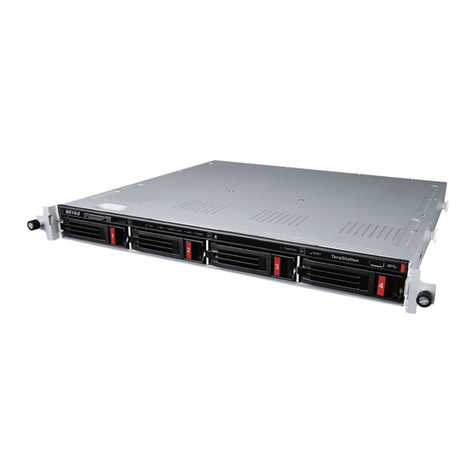
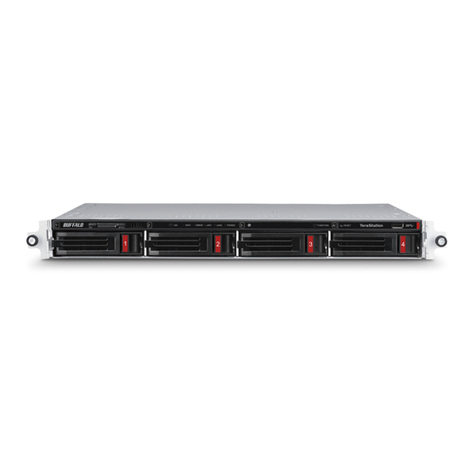
BUFFALO LS421DE NAS
OUR NAS HARDWARE CONFIGURATIONS
NAS1:
- 2 Crucial M500 960GB SATA III 2.5” SSD (new
- 2 Icy Dock EZConvert Pro MB982SP-1S 2.5” SSD to 3.5” SATA Adapter Case
RAID0 - DLNA Media Server
NAS2:
- 2 Seagate ST1000DM003 1TB HHD (pulled from computer
JBOD – Drive 1 – Church and home business
JBOD – Drive 2 – Personal file and software storage
NAS3:
- 1 Seagate ST2000DM001 2TB HHD (pulled from computer
- 1 Seagate ST1000DM003 1TB HHD (pulled from computer
JBOD – Drive 1 (2TB – NAS1 backup
JBOD – Drive 2 (1TB – NAS2 backup
GENERAL PREPARATION
1 Go to Buffalo web-site, buffalotech.com, download the following:
- firmware update, comes with LSupdater program
- unzip file
Note: At the time of this writing, our NAS came with firmware version 1.01. The
update is version 1.31. To the best of my understanding, the drive(s installed in
the NAS stores the firmware data, it is not written to the hardware. LSupdater
writes the firmware to the hardware and the drive. LSupdater also forces drive
initialization and formatting. There are options to turn on or off formatting.
2 Use a WIRED computer on your network, not wireless
3 Enable DHCP on Router, if disabled
3 Install Buffalo Navigator software from CD that came with NAS
PREPARING PREVIOUSLY USED DRIVE(S) – Windo s Environment
This process will destroy all data – make a backup if you need to retain data
1 Install drive on to a computer via SATA or USB, power up computer
2 Right click My Computer > Manage > Disk Management
- Note the drive disk number for the NAS disk drive you are preparing
(example, Disk 2
- Close Disk Management program
3 Start > Run > CMD > DISKPART [enter]
- Runs DISKPART program
- DISKPART program may be stopped at anytime by typing EXIT [enter]
4 type LIST DISK [enter] (space between LIST and DISK
- DISKPART creates a list of all drive disks on your computer
- Note the disk number under Disk ### header (example, Disk 2
5 type SELECT DISK 2 [enter] (space between each word and disk number
- Response: “Disk 2 is now the selected disk.”
6 type CLEAN [enter]
- This will un-allocate and “un-initialize” the disk
- Another command is “CLEAN ALL”:
- Will place “0”’s on entire disk space
- Clean All will take a lot of time and is not necessary for NAS drive prep
- Clean All is good to use if you are disposing or selling a drive
7 After CLEAN is completed, type EXIT [enter], to exit DISKPART
- Don’t leave DISKPART hanging operational, exit the program
8 Power down computer, remove drive
The above process of drive preparation is complete.
Repeat for any additional “used” drives you may have for the NAS.
Special Note: You can also perform this process on new drives if they will not
initialize in the NAS. Initialization process described later.
NAS HARDWARE PREPARATION
1 Mount drives on supplied NAS drive racks, install drives in NAS
2 Connect network cable
3 Connect power supply
4 Turn on NAS, rear switch above network connector. Fan turns on.
Wait, observe LED’s
5 Front panel LED sequence after power up
Wait a few seconds
- White LED flashing / Red LED off
Wait a few minutes, then
- White LED flashing / Red LED solid on
Wait a few seconds, then
- White LED solid on / Red LED solid on
6 Press the initialize button (front panel above USB for a few seconds, release
Wait, observe LED’s
7 Front panel LED sequence after initialize button is depressed and released
Wait a few seconds
- White LED solid on / Red LED flashing
Wait about 10 minutes – drive format and data writing from NAS hardware
- White LED solid on / Red LED off
8 NAS drives are prepared. NAS is ready for configuration.
If all goes well as mentioned above, go to step 9. Else go to RUNNING
LSUPDATER PROGRAM – NO DATA ON DRIVES to assist in NAS drive
formatting and initialization.
9 Run NAS Navigator program
- Navigator will display all Link/Tera-Stations on your network
- Upon first startup of NAS, the NAS IP Address will be DHCP assigned
- NOTE NAS FIRMWARE VERSION reporting in Navigator (bottom right
10 Right click on highlighted NAS in detail window. Select Properties
11 Change NAS to static IP Address if desired
Go to RUNNING LSUPDATER PROGRAM – NO DATA ON DRIVES
THIS PROCESS WILL RE-FORMAT DRIVES IN NAS
If you want to update firmware using LSUPDATER.EXE and have data on
working drives in NAS, go to EDITING AND RUNNING LSUPDATER PROGRAM
– WORKING DRIVES WITH DATA
EDITING AND RUNNING LSUPDATER PROGRAM
– NO DATA ON DRIVES
This program will force update the NAS with the firmware packed in the zip file,
initialize the NAS and drive(s , and force format drives.
Open LSUPDATER.INI file for editing.
Edit the [Flags] and [SpecialFlags] sections as follows with one space before and
after the equal sign (= :
[Flags]
VersionCheck = 0
[SpecialFlags]
NoFormatting = 0
Debug = 1
Save LSUPDATER.INI file
Do not change any items above [Flags] header
This edit will do the following:
- VersionCheck = 0 Will Not Check Version (0=false
- NoFormatting = 0 Will Format NAS Drives (0=false
- Debug = 1 Debug Enabled (1=true
1 It is strongly suggested to turn off all other Link/Tera-Stations on network
2 On computer, Run LSUPDATER.EXE
3 Choose Link/Tera-Station to update
4 Right click on Title Bar. Edit following options:
Update Config
[x] Update boot [x] Do not check version
[x] Update kernel [x] Rebuild partition table
[x] Update initrd [x] Delete user data partition
[x] Update root [x] Force update
Destination of Firmware
\boot
Change IP Address if required
CONFIRM PROPER OPTION SETTINGS BEFORE PROCEEDING
- All option boxes CHECKED
5 Click “OK”
CONFIRM PROPER NETWORK NAS TO UPDATE BEFORE PROCEEDING
7 Click “Update”
LSUPDATER will inform you when update process is complete.
When update is finished, you can now go to Navigator to program the NAS
options and applications.
THIS PROCESS WILL NOT RE-FORMAT DRIVES IN NAS
This process is for updating the firmware only on an operational NAS.
EDITING AND RUNNING LSUPDATER PROGRAM
– WORKING DRIVES WITH DATA
This program will force update the NAS with the firmware packed in the zip file
only. It will retain existing data on drives in NAS.
Open LSUPDATER.INI file for editing.
Edit the [Flags] and [SpecialFlags] sections as follows with one space before and
after the equal sign (= :
[Flags]
VersionCheck = 0
[SpecialFlags]
NoFormatting = 1
Debug = 1
Save LSUPDATER.INI file
Do not change any items above [Flags] header
This edit will do the following:
- VersionCheck = 0 Will Not Check Version (0=false
- NoFormatting = 1 Will Not Format NAS Drives (1=true
- Debug = 1 Debug Enabled (1=true
1 It is strongly suggested to turn off all other Link/Tera-Stations on network
2 On computer, Run LSUPDATER.EXE
3 Choose Link/Tera-Station to update
4 Right click on Title Bar. Edit following options:
Update Config
[x] Update boot [x] Do not check version
[x] Update kernel [ ] Rebuild partition table [BLANK]
[x] Update initrd [ ] Delete user data partition [BLANK]
[x] Update root [x] Force update
Destination of Firmware
\boot
Change IP Address if required
CONFIRM PROPER OPTION SETTINGS BEFORE PROCEEDING
- Config – Rebuild partition table MUST BE UNCHECKED
- Config – Delete user data partition MUST BE UNCHECKED
5 Click “OK”
CONFIRM PROPER NETWORK NAS TO UPDATE BEFORE PROCEEDING
7 Click “Update”
LSUPDATER will inform you when update process is complete.
When update is finished, you can now go to Navigator to program the NAS
options and applications.
IF THINGS DON’T WORK…
Cold Boot NAS: Turn OFF, LED’s and fan turn off, wait, Turn ON, what happens?
Can computer connect to NAS via Navigator program?
1 Confirm on Buffalo’s web-site the compatibility of drive(s you use
2 Confirm DHCP is enabled and active on router
3 Confirm network functions and wired connections
4 Turn off Anti-virus and firewalls
5 Did LSUPDATER program display the NAS IP Address?
- Best to use static IP Address on NAS
6 Confirm drives are seated all the way in to the NAS SATA connectors
- Hard Drive will have a spin noise and most have activity LED flashing
- SSD’s – most have activity LED in housing connector side, difficult to view
- Turn off room lighting and look in to NAS to see LED HDD / SSD activity
7 Attach drive to computer
- If you used USB connection to CLEAN before, connect via SATA this time
- Re-Run CLEAN using DISKPART
8 Attach drive to computer – start Disk Manager
- Drive should report as being “Online”
- Drive should be un-allocated – no partitions or formatting
- Drive should be reporting “not initialized”
9 Will computer initialize, partition and format drive. And, write/read data?
8 What is the NAS status using Navigator program?
- If EMERGENCY MODE is active there are two things to do, depending on:
1 What NAS Firmware version is Navigator reporting (bottom right
Did the Firmware update report original version number?
Check network communications
Re-run LSUPDATER
2 If Firmware update version is reporting in Navigator correctly,
communications work
Double check drive compatibility
I can’t think of much else that could cause install / update problems. Trouble
shooting is beyond the scope of this document and appears to be a hardware
issue. If you still have issues, call Buffalo Tech Support.
A NOTE ABOUT USING “BACKUP” FEATURE – NAS TO NAS
Folders in BACKUP NAS need to marked for “Backup” in folder creation screen
BACKUP process is initialized by the NAS storage station that has the data to go
to backup NAS.
In other words, example, NAS1 has data to backup to NAS3…
NAS3 – File Sharing – Folder Setup - create folder for NAS1 data to backup to.
Mark this folder as “Backup” in options screen
NAS1 – Backup – Backup – create a backup job – NAS1 to NAS3
Select other options to your needs
NAS1 MUST initiate the Backup sequence!!! Not NAS3
NAS3 is only “marked” as Backup available
When a backup process in running, the backup NAS3 folders will appear in the
network share on the computer when viewed… no file reading or writing is
allowed until the backup process is completed or canceled… NAS3 is locked
down until released by NAS1 when all data is transferred.
A NOTE ABOUT DATA TRANSFER RATES – NAS TO NAS
Data transfer from NAS to NAS can be done two ways:
- Using computer to initiate data transfer using network shares - SLOW!!!
- Using NAS Backup feature – FASTEST!!!
Computer to NAS is very fast also, to upload data to NAS.
I have noticed Computer to NAS and NAS to computer is faster than Computer to
Computer over all.
THINK IT THROUGH
Set up NAS network names, folder names and the such with a plan. Easy for a
single NAS. With multiple NAS’s, careful planning comes in to play. It is easy to
change things. Experiment and test first before placing cherished data on NAS’s.
Farewell and Good Fortunes!!!
PS: OUR NETWORK – NAS SYSTEM – AND SOLUTIONS
There were many problems we had before introducing NAS Stations to our
network. Data was everywhere on mainly four computers with large hard drives.
Accounting software data files were on one computer and accessible computer to
computer. Kidz didn’t have access to the media server. And it goes on and on.
These NAS Stations solved the issues we had. Pulled all the hard drives and
installed SSD’s in the computers. The 1TB and over hard drive were installed in
the NAS’s. There is no longer any need to hold huge amounts of data on the
computers any more. The accounting data files are on the NAS available to all
computers that have the software installed. We have 7TB of NAS storage space,
5TB was from used computer hard drives. These LS421’s can handle, to the best
of my knowledge and at this time, 4TB hard drives in each bay. I’m sure it is not
limited, good tech support question.
Organized and store all the software, drivers, computer drive C backups,
personal files, church files, home business files, pictures, audio and media files
easily in to the NAS network.
Set up a DLNA NAS for media server… everybody now can use media files
direct from the NAS. Computers don’t have to be on all the time anymore as a
server. Everyone in the household has their own private place on a NAS with
user name and password for their use.
The benefits are many and well worth the $150 each, with 3 year warranty.
The customizable automatic backup with differential from NAS to NAS is a real
nice feature. No more manual backups of important church, business or personal
files. The customizable immediate backup feature is great upon initial setup.
Going to test the NAS “sleep” mode shortly in the future.
The compliment of our intranet network and clients:
1 Gateway wireless router
2 Wireless AP’s
4 8 port switches
9 Computers
2 Network printers
1 Network plotter
3 PS3s
1 PS4
4 PSPs
2 Data mobile phones
1 Home theater AVR
1 DirecTV HD receiver
3 Flat screen TVs

Other Buffalo Network Storage Server manuals
Buffalo LS510D User manual

Buffalo

Buffalo LS510D User manual

Buffalo TS3210DN User manual

Buffalo

Buffalo TS3210DN User manual

Buffalo TeraStation WSS 5000 User manual

Buffalo

Buffalo TeraStation WSS 5000 User manual

Buffalo iSCSI Instructions for use

Buffalo

Buffalo iSCSI Instructions for use

Buffalo LinkStation 200 Series User manual

Buffalo

Buffalo LinkStation 200 Series User manual

Buffalo LinkStation LS220D Series User manual

Buffalo

Buffalo LinkStation LS220D Series User manual

Buffalo LinkStation LS-VL User manual

Buffalo

Buffalo LinkStation LS-VL User manual

Buffalo TeraStation 3010 User manual

Buffalo

Buffalo TeraStation 3010 User manual

Buffalo LINKSTATION HS-DGL User manual

Buffalo

Buffalo LINKSTATION HS-DGL User manual

Buffalo LS-WVL User manual

Buffalo

Buffalo LS-WVL User manual

Buffalo LinkStation Live User manual

Buffalo

Buffalo LinkStation Live User manual

Buffalo iSCSI Rackmount TeraStation Pro User manual

Buffalo

Buffalo iSCSI Rackmount TeraStation Pro User manual

Buffalo TeraStation III TS-IXL User manual

Buffalo

Buffalo TeraStation III TS-IXL User manual

Buffalo TeraStation User guide

Buffalo

Buffalo TeraStation User guide

Buffalo LinkStation LS210D0101 User manual

Buffalo

Buffalo LinkStation LS210D0101 User manual

Buffalo TeraStation 5010 TS5210DN User manual

Buffalo

Buffalo TeraStation 5010 TS5210DN User manual

Buffalo TeraStation WSS 5000 User manual

Buffalo

Buffalo TeraStation WSS 5000 User manual

Buffalo TeraStation WSS WS5020N6 User manual

Buffalo

Buffalo TeraStation WSS WS5020N6 User manual

Buffalo TeraStation HD-HTGL User manual

Buffalo

Buffalo TeraStation HD-HTGL User manual

Buffalo TERASTATION HS-D1.0TGL/R5 User manual

Buffalo

Buffalo TERASTATION HS-D1.0TGL/R5 User manual

Buffalo TeraStation WS User guide

Buffalo

Buffalo TeraStation WS User guide

Buffalo LinkStation Live User manual

Buffalo

Buffalo LinkStation Live User manual

Buffalo BS-GU2005P User manual

Buffalo

Buffalo BS-GU2005P User manual

Buffalo LinkStation 200B User manual

Buffalo

Buffalo LinkStation 200B User manual
Popular Network Storage Server manuals by other brands

HP StorageWorks NAS e7000 v2 Specifications

HP

HP StorageWorks NAS e7000 v2 Specifications

Lenovo PX12-450R Information

Lenovo

Lenovo PX12-450R Information

Synology RackStation RS3412RPxs Quick installation guide

Synology

Synology RackStation RS3412RPxs Quick installation guide

AIC SB302-LB user manual

AIC

AIC SB302-LB user manual

LG N1A1DD1 Specifications

LG

LG N1A1DD1 Specifications

Synology DiskStation DS111 user guide

Synology

Synology DiskStation DS111 user guide

TYAN GT93-B7106 Service engineer's manual

TYAN

TYAN GT93-B7106 Service engineer's manual

Plextor PX-EH Quick setup guide

Plextor

Plextor PX-EH Quick setup guide

HP StorageWorks P4000 Series Technical white paper

HP

HP StorageWorks P4000 Series Technical white paper

Uebo S400 user manual

Uebo

Uebo S400 user manual

QNAP TS-864eU-4G Quick installation guide

QNAP

QNAP TS-864eU-4G Quick installation guide

Dell PowerVault DX6104-CSN Getting started guide

Dell

Dell PowerVault DX6104-CSN Getting started guide

Western Digital WDXE1600JBN - NetCenter NAS Server Quick install guide

Western Digital

Western Digital WDXE1600JBN - NetCenter NAS Server Quick install guide

Bull 2104 DL1 Operator's guide

Bull

Bull 2104 DL1 Operator's guide

Promise E310f product manual

Promise

Promise E310f product manual

US Robotics USR8700 user guide

US Robotics

US Robotics USR8700 user guide

HP J3278B - SureStore CD-ROM Server/Tower 7 NAS... manual

HP

HP J3278B - SureStore CD-ROM Server/Tower 7 NAS... manual

Synology RS812RP+ Quick installation guide

Synology

Synology RS812RP+ Quick installation guide

manuals.online logo
manuals.online logoBrands
  • About & Mission
  • Contact us
  • Privacy Policy
  • Terms and Conditions

Copyright 2025 Manuals.Online. All Rights Reserved.