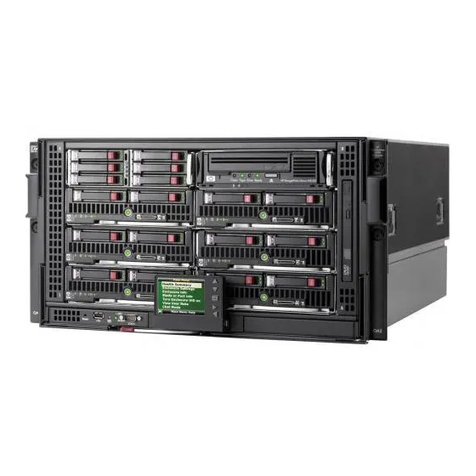
Infinite NavePoint 00406857 User manual

© 2022, NavePoint, LLC
MN_NP_VMRE_04/2022_R1.0
THIS MANUAL APPLIES TO THE FOLLOWING SKUs: 00406857 00406858 00406859 00406860 00406861
00406862 00406863 00406864 00406865 00406866 00406867 00406868 00406869 00406870 00406871
00406872 00406873 00406874 00406875 00406876 00406877 00406878 00406879 00406880 00406881
www.NavePoint.com
customerservice@navepoint.com
Owner’s Manual: Vertical Wall Mount Rack Enclosure
Keep this information for further reference.
Thank you for purchasing a NavePoint product. In case of any questions regarding the installation or use of
product, please call us at 888.505.1363.
Please examine the product for any damaged parts. If any part is damaged or missing, contact NavePoint for
further assistance. Do not attempt to install or use product if it has been damaged.
During installation, lay product contents on cardboard or other protective surface to avoid any damage.
Improper installation or use of this product can result in damage to the product, other equipment, or personal
injury. It is recommended that installation to be performed by a qualified installer. NavePoint cannot be held
responsible for damage to equipment or personal injury resulting from improper use or installation of product.
If product is intended to store/ mount equipment, please ensure the equipment stored/ mounted does not
exceed the specified weight capacity. Install the heaviest equipment first and install it at the bottom of the rack.
Install equipment starting from the bottom of the rack and move upward.
Limitations of Liability: In no event will NavePoint be liable for any damages, whether direct or indirect,
special, punitive, incidental or consequential damages (including, but not limited to, lost profits or revenue,
loss of use, lost business opportunities or loss of goodwill) or for thecosts of procuring substitute products,
arising out of or in connection with the use of the product, whether such liability arises from any claim based
upon contract, warranty, tort (including negligence), product liability or otherwise, whether or not seller has
been advised of the possibilityof such loss or damage. In no event will seller’s total cumulative liability, from
all causes of action and all theories of liability, exceed the total amounts actually paid to seller by customer
under the order that gives rise to any liability hereunder.

www.NavePoint.com
1
customerservice@navepoint.com
1. Feature Identification
Warning: Do not attempt to mount the rack on wall, when any equipment is mounted inside enclosure.
Enclosure can hold up to 150 pounds. Before installation, make sure wall surface can hold weight of
enclosure / equipment.
Features for all other models are similar except the 2U & 3U & 4U, it does not have a top panel door.
1.
Front Door
2.
Top Panel Door
3.
Vents
4.
Horizontal Mounting Bracket
5.
Vertical Mounting Bracket
6.
Patch Panel Mounting Bracket
7.
Cable Access Holes
8.
Wall Mounting Slots

www.NavePoint.com
2
customerservice@navepoint.com
2. Enclosure Configuration
Door Locks
2U, 3U, 4U
5U, 6U, 8U
The 2U series models have one lock on the side of the unit that can be secured with the included key. The
5U series models have locks on the front door and the top panel door that can be secured with the included
keys. All models have a front door latch that can be locked with a user-supplied padlock for extra security.

www.NavePoint.com
3
customerservice@navepoint.com
3. Cable Access and Management
Top View
Top View
Bottom View
Bottom View
2U, 3U, 4U
5U, 6U, 8U
The top and bottom panels of the enclosure both have circular cable access ports for convenient cable
management. The tops of all models have three 1.75” ports and two 1” ports. The bottoms of 2U series models
have two 1” and 1.75” ports, while the 5U series models have three 1” ports and two 1.75” ports.

www.NavePoint.com
4
customerservice@navepoint.com
Reversing The Front Door
In order to accommodate various rack installations, the front door can be reversed by switching the configuration of the
latch, lock and hinges. To reverse the door, simply remove the screws that secure the latch, lock and hinges to the
enclosure. Move each piece to the opposite side of the enclosure, so that there are two hinges on one side (one at the
top, one at the bottom) and install the latch and the lock on the other side.
Note: The unused screw holes are filled with rubber placeholders. To remove the placeholders, push them through with
a screwdriver. Keep the placeholders to refill unused screw holes.

www.NavePoint.com
5
customerservice@navepoint.com
Mounting Rails
The enclosure comes with reversible
horizontal mounting rails that have
threaded holes for mounting rack
equipment. The holes on one side of the
rail are threaded for M6 hardware, while the
holes on the other side are threaded for 12-
24 hardware.
Orient the rails so the hole type required is
on top. To install equipment, use the
included M6 or 12-24 hardware to secure
equipment to the rails. (See the following
page for equipment installation
instructions.)
Warning: Make sure the enclosure is
securely mounted to the wall, or in its final
position on the floor before mounting any
equipment inside. Additionally, make sure
to make all necessary adjustments to the
rails before mounting equipment inside.
(See below for Adjusting Mounting Rail
Depth.)
Adjusting Mounting Rail Depth
Do not adjust the mounting rails
unless the equipment requires a
different mounting depth.
The rails can be adjusted in 1-inch
increments to decrease themounting
depth from the maximum mounting
depth. The maximum adjustment is 3
inches.

www.NavePoint.com
6
customerservice@navepoint.com
Optional Patch Panel Installation
The unit comes with an integral, slide-out mounting bracket at the top of the enclosure. It can be used to secure a patch
panel to the enclosure, and it partially slides out for easier cabling access. To install a patch panel on the patch panel
mounting bracket, use the included mounting screws and washers to secure the equipment to the rack rail. Place the
washers between the screws and the patch panel mounting bracket.
This manual suits for next models
24
Table of contents
Other Infinite Enclosure manuals
Popular Enclosure manuals by other brands
VIPowER
VIPowER VPM-6248T user manual
Akasa
Akasa Integral LAN user manual

Altronix
Altronix Trove T1MK1F4V installation guide

PCB Piezotronics
PCB Piezotronics IMI SENSORS 691A50/06 Installation and operating manual
BAPI
BAPI BA/44208N1S Installation and operation instructions

ezsolar
ezsolar JB-3 quick start guide

