manuals.online logo
Brands
  1. Home
  2. •
  3. Brands
  4. •
  5. Infinitum
  6. •
  7. Engine
  8. •
  9. Infinitum Aircore EC User manual

Infinitum Aircore EC User manual

Infinitum 20230810
Aircore EC
Quick Start Guide
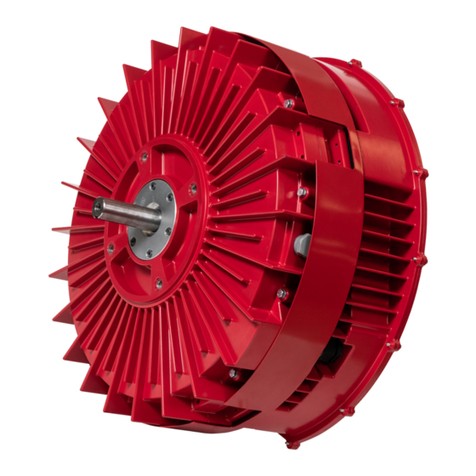
This guide contains general procedures for Infinitum EC Aircore motors
and is not intended to provide a full list of installation details, operation
and maintenance. These additional details can be found in the Infinitum
Aircore EC IOM Manual. Only qualified personnel should install and operate
Infinitum Aircore EC motors. All motors have default settings.
This document includes Cautions and Warnings that should be read
in advance of installation or operation.
Unpacking and inspection
Motors are tested and packed individual crates or 4 motors per crate.
1. Inspect the motor packing for damages during shipping. If the package is
damaged, remove the packing and inspect the motor for damage. Motor
damage from shipping must be reported to the shipper.
2. Review the data on the nameplate with your purchase order to verify that you
have received the correct motor. Compare data on name plate for desired
power supply and control equipment requirements.
3. The motor is provided with two lifting eyebolts to remove the motor from its
packing crate.
Warning: To reduce the possibility of personal injury or death these eyebolts
are intended to lift the motor and drive assembly only. Attaching the
component it drives (i.e. fan, pump, etc.) may exceed the design weight
limits of the eyebolts. Make sure the eyebolts are threaded completely into
the motor housing to ensure they do not rotate out during lifting. Use an
approved lifting device (crane) and sling to remove the motor from the
packing crate.
Electrical supply and control wiring
Infinitum Aircore EC motors are pre-programmed to run utilizing remote inputs
wired to the Control & Communication PCB connections once the appropriate
power connections are provided. The default configuration for all motors is
Modbus. Analog/Digital control is also available (user configurable).
Warning: The rotor in this motor incorporates a Permanent Magnet (PM)
design. When the rotor is rotated a voltage is produced in the stator even
when the motor is disconnected from a power source. Do not open electrical
compartments or touch unprotected terminals while the rotor is turning.
Disconnect motor supply power and allow one minute for capacitors to
discharge before servicing or replacing. Failure to comply with rotor safety
procedures can cause serious injury or death and equipment damage.
Safety
Infinitum Aircore EC motors
operate with high voltages and
can cause serious or fatal injuries.
Only qualified personnel should
attempt installation, operation
and maintenance of electrical
equipment. Unsafe installation or
use can cause conditions that lead
to serious or fatal injury.
Mounting
C-face
Star mounts
Infinitum 20230810
Default control configuration and wiring requirements
Infinitum Aircore EC motors are pre-programmed. See the IOM Manual for user selectable values.
Control connections
Remove the VFD cover for access to Analog/Digital and
Modbus connections.
1. Relay (1) – NO / NC (COM must be used)
• Max voltage: 125 VAC / 30 VDC
• Max current: NO-10A VAC, 5 A
• VDC: NC – 3A VAC or VDC
2. Digital input (4) – DIN1, DIN2, DIN3, DIN4
3. Digital output (2) – DO1 & DO2
• Open drain output
• Max switching voltage: 40 VDC
• Max switching current: 350 mA
4. Auxiliary voltage (1) – +24V (GND must be used)
5. Analog output (1) – A_OUT (GND must be used)
6. Analog input (1) – A_IN (GND must be used)
7. EIA-485 interface (1) – 485_P & 495_N (GND must be used)
Note: Use wirenut to connect shield wires. Do not tie to GND.
8. Modbus termination switch. (Default is Off)
9. RJ45 for I-con (motor control software) connection
Analog control wire guidelines
To control the unit using Analog control please utilize the wiring
guidelines on the CIO board (Figure 1).
Caution: DIN1-DIN4 are limited to 24VDC input. AI1 is
rated 0-10V @ 100mA max. Exceeding these voltages will
permanently damage the communication board. Do not
insert external wiring larger than 16 AWG (0.05” or 1.3mm)
into control terminals.
Modbus RTU wiring guidelines
To control the motor with Modbus RTU please utilize the wiring
guidelines to connect to the Communication I/O (Figure 1).
• The last unit on a daisy-chain configuration should have the
Modbus Termination DIP switch “ON”.
• All other units must have the DIP switch in the “OFF” position.
• Modbus RTU operation requires changes to the motor
configuration parameters.
• See the IOM for further instructions.
AC input power
• Remove the VFD cover for access.
• 460V, 3-Phase, 60Hz power shall be provided to unit utilizing
the connection points on the AC main input (Figure 2).
• L1, L2, L3 are the AC main connections.
We reserve the right to make technical changes or modify the contents of this document
without prior notice. Copyright© 2023 Infinitum Electric, Inc. All rights reserved.
106 Old Settlers Blvd
Suite D106
Round Rock, TX 78664
info@goinfinitum.com
goinfinitum.com
support.goinfinitum.com
Office Contact
Reconfiguring motor
To reconfigure your Aircore EC motor from its default configuration,
consult the IOM Manual and Motor Control Software (new I-con
software coming soon).
Figure 2: AC main input
Figure 1: CIO board
Start/Stop
switch
Modbus RTU
Wiring
Analog control
Modbus RTU
1
3
4
5
6
7
9
8
NC
NO
COM
DIN4
DIN3
DIN2
DIN1
DO2
DO1
GND
+24V
GND
A_OUT
GND
A_IN
GND
485_P
485_N
GND
0-10V Speed
Signal
L1 L2 L3
Grounding post
Power board

Other manuals for Aircore EC

2

Other Infinitum Engine manuals

Infinitum Aircore EC Instruction manual

Infinitum

Infinitum Aircore EC Instruction manual

Infinitum Aircore EC Instruction manual

Infinitum

Infinitum Aircore EC Instruction manual

Popular Engine manuals by other brands

Yamaha EH63 Service manual

Yamaha

Yamaha EH63 Service manual

Kohler Command PRO CH260 Service manual

Kohler

Kohler Command PRO CH260 Service manual

REXROTH HyQuip 63 Series instruction manual

REXROTH

REXROTH HyQuip 63 Series instruction manual

Daewoo G424 Gasoline Service manual

Daewoo

Daewoo G424 Gasoline Service manual

Wren Turbines MW54 Mk2 Kit assembly and instruction manual

Wren Turbines

Wren Turbines MW54 Mk2 Kit assembly and instruction manual

Multiplex PERMAX BL-O 3720-0630 operating instructions

Multiplex

Multiplex PERMAX BL-O 3720-0630 operating instructions

Mercury Racing 1100 STERNDRIVE OPERATION, MAINTENANCE & WARRANTY

Mercury

Mercury Racing 1100 STERNDRIVE OPERATION, MAINTENANCE & WARRANTY

GMC 305C V6 Overhaul manual

GMC

GMC 305C V6 Overhaul manual

Beckhoff AS1000 operating instructions

Beckhoff

Beckhoff AS1000 operating instructions

Daedong 3C093 Operator's manual

Daedong

Daedong 3C093 Operator's manual

Westerbeke W-13 Information sheet

Westerbeke

Westerbeke W-13 Information sheet

Uniblitz VCM-D1 user manual

Uniblitz

Uniblitz VCM-D1 user manual

Kubota D1005-E3BG Operator's manual

Kubota

Kubota D1005-E3BG Operator's manual

Shengyi CMT03E Technical Instruction

Shengyi

Shengyi CMT03E Technical Instruction

Yanmar 6CX530 Operation manual

Yanmar

Yanmar 6CX530 Operation manual

Tecumseh HM80-155267G parts list

Tecumseh

Tecumseh HM80-155267G parts list

Briggs & Stratton 20G400 Series Illustrated parts list

Briggs & Stratton

Briggs & Stratton 20G400 Series Illustrated parts list

Yamaha F100C Service manual

Yamaha

Yamaha F100C Service manual

manuals.online logo
manuals.online logoBrands
  • About & Mission
  • Contact us
  • Privacy Policy
  • Terms and Conditions

Copyright 2025 Manuals.Online. All Rights Reserved.