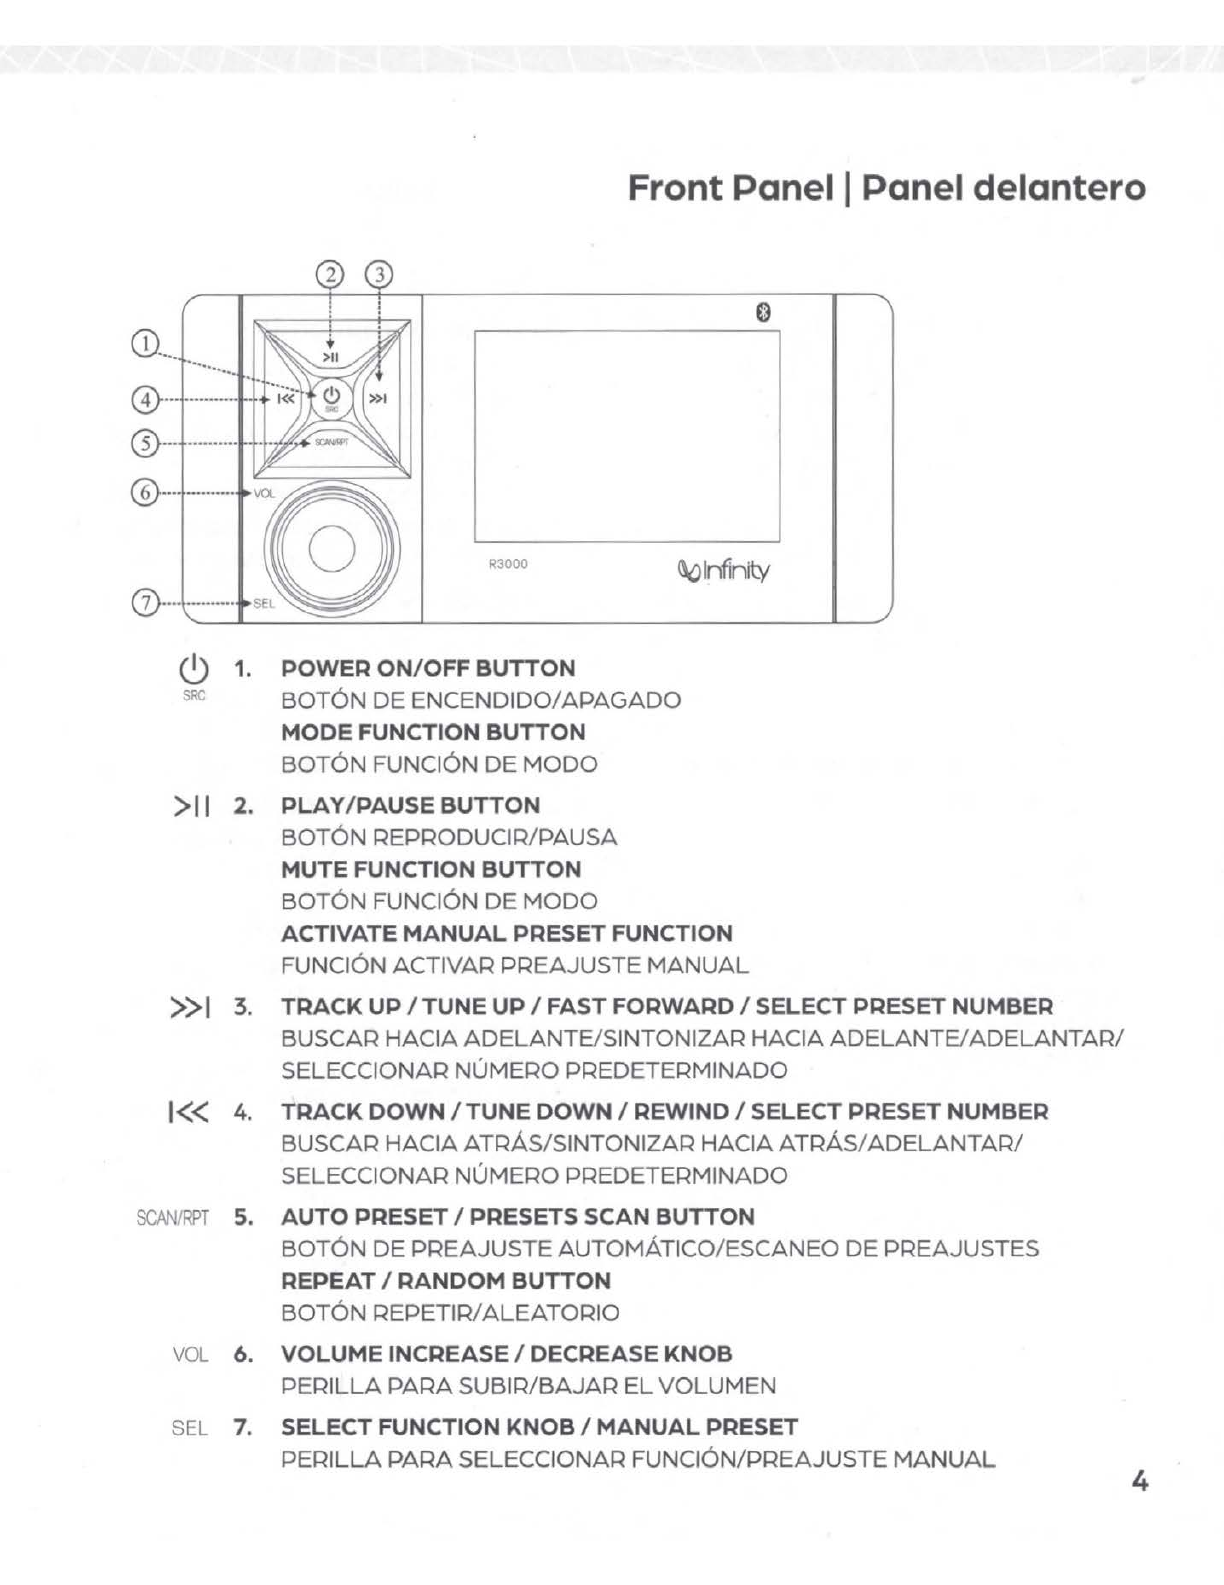
General Operation IFuncionamiento general
3
>>I
Track
Up/ Tune Up / Fast
Forward / Select
Preset
Number
4
• In
Radio
mode,
press
it
to
work
as
Au
to
Tune. Press
and
hold it
to
activate
ManualTune,
th
en press
repeated
ly
to
tune
by
step. (It will
reve
rt
to
auto
tune
status
if
you
do
not
press
this
butto
n
wit
hin 5s a
fter
Manual tune is
activ
ated.)
After
the
Ma
nual
Preset
fu
nction
is
activated,
press thisb
ut
t
on
to
select
the
Preset
Num
b
er
from
1
to
6.
•
In
BT MUSIC
or
USB
mode,
press
it
to
select
the
next
track.
•
In
USB
mode
, press
and
hold
it
to
fast
forward
.
1
<<
Track
Down / Tune
Down/
Rewind / Select
Preset
Number
• In
Radio
mode
,press
it
to
work
as
Auto
Tune. Press
and
hold
it
to
activate
ManualTune,
then
press
it
repeatedly
to
tune
by
step. (Itwill
revert
to
auto
tune
stat
us
if
you
do
not
press this
button
within 5s
after
Manual
tune
is
act
i
vated.)
After
the
Manual
Preset
functio
n is
activate
d,pressthis
bu
tton
to
select
the
Pr
eset
Number
from
1
to
6.
•
In
USB
mode
, press
and
hold
it
to
rewind.
>>
I Buscar hacia adelante/Sintonizar
hacia adelante/Adelantar/Seleccionar
numero predeterminado
•
En
el
modoRadio,presi6nelo parasintonizar
autom6ticamente. Mantengalopresionado
paraactivar
lo.
Sintonizaci6nmanual,luego
presione repetidamentepara
si
n
to
nizar
aintervalos.
(Se
revertir6
al
estadode
sintonizaci6n autom6tica
si
no
presiona este
bot6
ndentrodelos 5sdespues
de
que
se
activelasintonizaci6n manual). Despues
deactivarla funci6n depreajustemanual,
presioneeste bot6nparaseleccionarel
numeropredeterminadodel 1al6.
•
En
el
modo
BT
MUSIC
o
USB,
presi6nelo para
seleccion
ar
la siguien
te
pista.
•
En
modo
USB
,mantengalopresionado para
avanzarr6pidamente.
I
<<
Buscar hacia atras/Sintonizarhacia
atras/Retroceder/Seleccionar
numero predeterminado
•
En
el modo Radio,presi6nelo para sintonizar
autom6ticamente. Mantengalopresionado
para activarlo.Sintonizaci6n manual, luego
presi6nelo
repet
idamente para sintonizar
a intervalos. (Se revertir6 al estado de
si
ntonizaci6n automatica
si
no
presiona este
bot6n
en los pr6ximos 5 sdespuesde que
se active la sintonizaci6n manual
).
Despues
de
activar la funci6n de preajuste manual,
presione este
bot6n
paraseleccionar el
numero predeterminado del 1al6.
•
En
modo
USB
,mantengalo presionado
para retroceder. 6