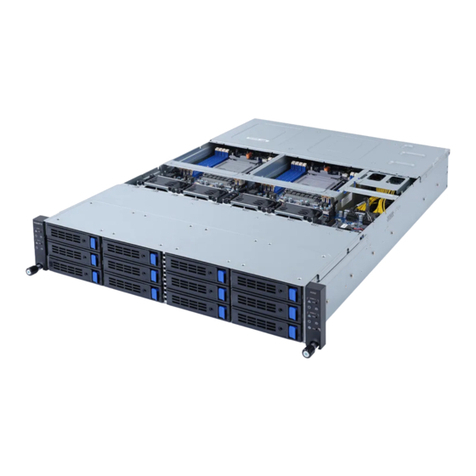
Infoblox 4010 User manual

Infoblox Installation Guide for Infoblox IB-4010
Platforms
Network Insight ND-4000 Platform

1. Introduction . . . . . . . . . . . . . . . . . . . . . . . . . . . . . . . . . . . . . . . . . . . . . . . . . . . . . . . . . . . . . . . . . . . . . . . . . . . . . . . . . . . . . . . . . 3
1.1 Product Overview . . . . . . . . . . . . . . . . . . . . . . . . . . . . . . . . . . . . . . . . . . . . . . . . . . . . . . . . . . . . . . . . . . . . . . . . . . . . . . . . 3
1.2 Infoblox-4010 Rev-1 . . . . . . . . . . . . . . . . . . . . . . . . . . . . . . . . . . . . . . . . . . . . . . . . . . . . . . . . . . . . . . . . . . . . . . . . . . . . . . 3
1.3 Infoblox-4010 Rev-2 . . . . . . . . . . . . . . . . . . . . . . . . . . . . . . . . . . . . . . . . . . . . . . . . . . . . . . . . . . . . . . . . . . . . . . . . . . . . . . 9
1.4 Network Insight ND-4000 Product Overview . . . . . . . . . . . . . . . . . . . . . . . . . . . . . . . . . . . . . . . . . . . . . . . . . . . . . . . . . . . 13
1.5 Network Insight ND-4000 Hardware Components . . . . . . . . . . . . . . . . . . . . . . . . . . . . . . . . . . . . . . . . . . . . . . . . . . . . . . . 13
2. Installing the Infoblox-4010/Network Insight ND-4000 . . . . . . . . . . . . . . . . . . . . . . . . . . . . . . . . . . . . . . . . . . . . . . . . . . . . . . . . 16
2.1 Rack Mounting Safety Requirements . . . . . . . . . . . . . . . . . . . . . . . . . . . . . . . . . . . . . . . . . . . . . . . . . . . . . . . . . . . . . . . . . 16
2.2 Ground Lug Installation (for DC Power Supply only) . . . . . . . . . . . . . . . . . . . . . . . . . . . . . . . . . . . . . . . . . . . . . . . . . . . . . 18
2.3 Cabling the Appliance to a Network . . . . . . . . . . . . . . . . . . . . . . . . . . . . . . . . . . . . . . . . . . . . . . . . . . . . . . . . . . . . . . . . . . 18
3. Accessing the Appliance . . . . . . . . . . . . . . . . . . . . . . . . . . . . . . . . . . . . . . . . . . . . . . . . . . . . . . . . . . . . . . . . . . . . . . . . . . . . . . . 19
3.1 Connecting to the Appliance . . . . . . . . . . . . . . . . . . . . . . . . . . . . . . . . . . . . . . . . . . . . . . . . . . . . . . . . . . . . . . . . . . . . . . . . 19
3.2 Auto Provisioning NIOS Appliances . . . . . . . . . . . . . . . . . . . . . . . . . . . . . . . . . . . . . . . . . . . . . . . . . . . . . . . . . . . . . . . . . . 20
3.3 Specifying Appliance Settings . . . . . . . . . . . . . . . . . . . . . . . . . . . . . . . . . . . . . . . . . . . . . . . . . . . . . . . . . . . . . . . . . . . . . . 21
3.4 Infoblox GUI . . . . . . . . . . . . . . . . . . . . . . . . . . . . . . . . . . . . . . . . . . . . . . . . . . . . . . . . . . . . . . . . . . . . . . . . . . . . . . . . . . . . 22
3.5 Infoblox CLI . . . . . . . . . . . . . . . . . . . . . . . . . . . . . . . . . . . . . . . . . . . . . . . . . . . . . . . . . . . . . . . . . . . . . . . . . . . . . . . . . . . . . 23
4. Field Replaceable Units . . . . . . . . . . . . . . . . . . . . . . . . . . . . . . . . . . . . . . . . . . . . . . . . . . . . . . . . . . . . . . . . . . . . . . . . . . . . . . . . 24
4.1 Managing the Disk Subsystem . . . . . . . . . . . . . . . . . . . . . . . . . . . . . . . . . . . . . . . . . . . . . . . . . . . . . . . . . . . . . . . . . . . . . . 24
4.2 Hard Disk Replacement . . . . . . . . . . . . . . . . . . . . . . . . . . . . . . . . . . . . . . . . . . . . . . . . . . . . . . . . . . . . . . . . . . . . . . . . . . . 26
4.3 Changing AC Power Supplies . . . . . . . . . . . . . . . . . . . . . . . . . . . . . . . . . . . . . . . . . . . . . . . . . . . . . . . . . . . . . . . . . . . . . . 27
4.4 Changing DC Power Supplies . . . . . . . . . . . . . . . . . . . . . . . . . . . . . . . . . . . . . . . . . . . . . . . . . . . . . . . . . . . . . . . . . . . . . . 28
4.5 Internal System Fan Replacement . . . . . . . . . . . . . . . . . . . . . . . . . . . . . . . . . . . . . . . . . . . . . . . . . . . . . . . . . . . . . . . . . . . 29
4.6 IB-4000/ND-4000 Series Replaceable Units . . . . . . . . . . . . . . . . . . . . . . . . . . . . . . . . . . . . . . . . . . . . . . . . . . . . . . . . . . . 32
4.7 IB-4000/ND-4000 Series SFP/SFP+ Transceivers . . . . . . . . . . . . . . . . . . . . . . . . . . . . . . . . . . . . . . . . . . . . . . . . . . . . . . . 33

Copyright ©2018, Infoblox, Inc.All right reserved.
Introduction
This guide provides an overview of the Infoblox-4010 Rev-1 and Infoblox-4010 Rev-2 network service appliances and explains how to install and
configure them. For information about which NIOS versions the Infoblox-4010 Rev-1 and Rev-2 support, refer to the documentsRead Me First
and release notes.
Product Overview
The Infoblox-4010 Rev-1 and Rev-2 are high performance network appliances that provide reliable, scalable, and secure core network services,
including DNS (Domain Name System), DHCP (Dynamic Host Configuration Protocol), IPAM (IP Address Management), IF-MAP, and more. The
integrated Infoblox approach combines the simplicity of appliances with the power of advanced distributed database technology to control and
automate network services, while achieving availability, manageability, visibility, and control unmatched by conventional solutions based on
legacy technologies. You configure and manage Infoblox-4010 Rev-1 and Rev-2 through an easy-to-use Infoblox GUI that works seamlessly in
Windows, Linux, and Mac environments using standard web browsers.
Both Infoblox-4010 Rev-1 and Rev-2 appliances support the same NIOS features. They are different in physical appearances and CPU speeds.
You can identify the Infoblox-4010 version by looking at its physical appearance and the serial number in which Rev-1 starts with a 40 prefix and
Rev-2 with a 4835 prefix.
Infoblox-4010 Rev-1 and Rev-2 appliances comprise hot-swappable power supplies, fan modules, hard disk drives and network interfaces. They
are Class A and Class B (with limits) digital appliances per FCC regulations. The Infoblox-4010 Rev-2 appliance is NEBS Level 3 compliant. For
the appliance to be NEBS Level 3 compliant, ensure that you do not install the optional front cover that ships with the Rev-2 appliance. For
information about the front cover, see .Infoblox-4010 Rev-2
Note: Infoblox-4010 Rev-1 hardware and FRUs (field replaceable units), such as power supplies and fan units, are not compatible with
Infoblox-4010 Rev-2 hardware and FRUs, and vice versa. Ensure that you use the correct FRUs for your Infoblox-4010 version. For information
about FRUs, see .Field Replaceable Units
Infoblox-4010 Rev-1
The Infoblox-4010 Rev-1 is a 2-U platform that is installed in a seismic equipment rack using mounting rails and materials that ship with each
appliance. For information about rack mounting, see Installing the
. The front panel comes with a removable front cover.Infoblox-4010/Network Insight ND-4000
Infoblox-4010 Rev-1Figure 1 , Front View
Infoblox-4010 Rev-1 Front Panel
After you remove the front panel cover, front panel components include the hard disk drives and indicator lights. Front panel components are
illustrated in .Figure 2
Figure 2 Infoblox-4010 Rev-1 with Front Panel Cover Removed

Copyright ©2018, Infoblox, Inc.All right reserved.
The front panel components are described in .Table 1
Table 1 Front Panel Components for Infoblox-4010 Rev-1
Component Description
UID LED and
Button
The unit identification button and LED.
Note: Pressing the UID button illuminates the blue UID LEDs on the front and rear panels. In a rack environment, the
UID feature enables easier location of a server when moving between the front and rear of the rack.
Blue = UID is activated
Dark = UID is deactivated
System Health LED This LED identifies the overall health of the system.
Green = Normal
Amber = System is degraded
Red = System is in critical condition
Power On/ Standby
Button and Power
LED
This LED indicates whether the power is on.
Green = System is on
Amber = System is in standby mode
Dark = System has no power supply
Disk Drives Four (4) hot-swappable hard disk drives configured in a RAID (Redundant Array of Independent Disks) 10 array.
Drive LEDs Each disk drive has two LEDs that indicate the connection and activity status of the disk drive. The upper LED is the
Fault/UID LED and the lower one is the Online/Activity LED. For information about drive LED combinations, see Table
2.
USB Ports Reserved for future use.
Infoblox-4010 Rev-1 Disk Drive Front Panel LEDs
The disk drives are located on the appliance front panel. To the right of each drive, two LEDs display connection and activity status. listsTable 2
the disk drive LED combinations and the states they represent.
Table 2 Disk Drive LED Combinations

Copyright ©2018, Infoblox, Inc.All right reserved.
Online/Activity
LED (Green)
Fault/UID LED
(Amber/Blue)
Description
On, off, or
blinking Alternating amber and
blue The drive has failed, or it has received a predictive failure alert; it also has been selected by a
management application.
On, off, or
blinking Steadily blue The drive is operating normally.
On Amber, blinking
regularly (1 Hz) The drive has received a predictive failure alert. Replace the drive as soon as possible.
On Off The drive is online but it is not currently active.
Blinking
regularly (1Hz) Off Do not remove the drive. The drive is rebuilding. Removing the drive may terminate the current
operation and cause data loss.
Blinking
irregularly Amber, blinking
regularly (1 Hz) The drive is active, but it has received a predictive failure alert. Replace the drive as soon as
possible.
Blinking
irregularly Off The drive is active and operating normally.
Off Steadily amber A critical fault condition has been identified for this drive, and the controller has placed it offline.
Replace the drive as soon as possible.
Off Amber, blinking
regularly (1 Hz) The drive has received a predictive failure alert. Replace the drive as soon as possible.
Off Off The drive is offline, a spare, or not configured as part of an array.
Infoblox-4010 Rev-1 Rear Panel
The Infoblox-4010 Rev-1 offers a choice of dual AC power supplies, or dual DC power supplies with or without NEBS-3 compliance. In all cases,
power supplies are hot swappable; any single power supply can be replaced without disrupting the operations of the appliance.
The Infoblox-4010 Rev-1 provides four (4) RJ-45 Gigabit Ethernet interfaces that operate as Infoblox MGMT port, LAN1 port, High Availability
(HA) port and LAN2 port in the Infoblox system. It also provides an option for four (4) SFP ports. With the SFP ports installed, the RJ-45 ports on
the rear of the Infoblox-4010 chassis will be deactivated. The four port assignments are from left to right and reflect standard Infoblox port
assignments as shown in and listed in .Figure 3 Table 3
Figure 3 Infoblox-4010 Rev-1, Rear View with RJ-45 Gigabit Ethernet Ports
Infoblox-4010 Rev-1 Optical Interfaces
Note: The Finisar SFP transceiver Model #FTL8519P2BCL is qualified for use with this product.

Copyright ©2018, Infoblox, Inc.All right reserved.
Infoblox-4010 SFP Gigabit Ethernet specifications are the following:
4x 1000Base-LX Fiber Gigabit Ethernet with 1000Base-LX SFP transceiver
Small Form Factor Pluggable (SFP) cage for SFP LC connectors
2PortLink synchronization
LED indicators for link/Activity Mode status
IEEE Standard/Network topology: with 1000Base-LX SFP Fiber Gigabit Ethernet, 1000Base-LX (1310nM)
Cables and Operating Distance Multimode fiber: 550m at 50 um; 550m at 62.5 um
Optical Output Power Minimum: -3 dBm
Optical Receive Sensitivity Maximum: -20 dBm
See for optical port assignments in the Infoblox-4010 system. Port assignments are Infoblox-specific and are also described in bFigure 4 Table 3
elow.
Figure4 Infoblox-4010 Rev-1,RearViewwithSFP1GbE Interfaces
SFP LAN1, LAN2, HA and MGMT ports operate as described in . With the SFP ports installed, the RJ-45 ports on the rear of theTable 3
Infoblox-4010 chassis will be deactivated.
Table 3 Rear Panel Components
Component Description
iLO/IPMI Port Dedicated Ethernet port used for LOM (integrated Lights Out Management) with specific releases of NIOS. Ensure that the
IPMI port is properly connected to the network before you configure LOM through the Infoblox GUI for remote
management.
Console Port A male DB-9 serial port for a console connection to change basic configuration settings and view basic system functions
through the CLI (command line interface).
Only a properly grounded USB-to-Serial dongle is allowed to connect to the serial console port. If the dongle is connected
to a laptop, this laptop must be grounded properly as well. Failure to do so may result in damage to the serial console port
of the Infoblox appliance. Infoblox is not responsible for such damage.
MGMT Port An RJ-45 or SFP Gigabit Ethernet port used for appliance management or for DNS service. You can enable the MGMT port
and define its use through the Infoblox GUI.
LAN1 Port An RJ-45 or SFP Gigabit Ethernet port that connects a NIOS appliance to the network. You must use the LAN1 port to set
up the appliance initially. It handles all traffic if you do not enable the MGMT and LAN2 ports. The passive node in an HA
pair uses this port to synchronize the database with the active node.

Copyright ©2018, Infoblox, Inc.All right reserved.
HA Port An RJ-45 or SFP Gigabit Ethernet port through which the active node in an HA (high availability) pair connects to the
network using a VIP (virtual IP) address. HA pair nodes also use their HA ports for VRRP (Virtual Router Redundancy
Protocol) advertisements.
LAN2 Port An RJ-45 or SFP Gigabit Ethernet port that connects a NIOS appliance to the network. The LAN2G port is not enabled by
default. You can enable the LAN2 port and define its use through the Infoblox GUI after initial setup.
Console Port A male DB-9 serial port for a console connection to change basic configuration settings and view basic system functions
through the CLI (command line interface). Use the serial cable and connection adapters that ship with the appliance to
make a console connection to this port.
Only a properly grounded USB-to-Serial dongle is allowed to connect to the serial console port. If the dongle is connected
to a laptop, this laptop must be grounded properly as well. Failure to do so may result in damage to the serial console port
of the Infoblox appliance. Infoblox is not responsible for such damage.
USB Ports Reserved for future use.
Power Supplies Each of the two redundant power supplies has a power outlet for connecting the appliance to a standard DC (Direct
Current) or AC power source.
Power Supply
LEDs Green = Normal
Off = System is off or power supply has failed.
UID LED Turns on blue to indicate device that is currently being interacted with in the rack. Turned on by pressing the UID button on
the front panel. See .Table 1
Connector Pin Assignments
Note: All RJ-45 Ethernet interfaces are disabled in the Infoblox-4010.
As noted, the Infoblox-4010 Rev-1 appliance has the following types of ports on its rear panel:
Male DB-9 console port
Four (4) RJ-45 10Base-T/100Base-T/1000Base-T auto-sensing fast Ethernet ports
Four (4) SFP Gigabit Ethernet interfaces (optional)
The DB-9 and RJ-45 Ethernet connector pin assignments are described in . DB-9 pin assignments follow the EIA232 standard. RJ-45Figure 5
Ethernet pin assignments follow IEEE 802.3 specifications. All Infoblox Ethernet ports are auto-sensing and automatically adjust to standard
straight-through and cross-over Ethernet cables.
Figure 5 Pin Assignments and RJ-45 Port Labeling

Copyright ©2018, Infoblox, Inc.All right reserved.
Infoblox-4010 Rev-1 System, Environmental, and Power Specifications
System specifications describe the physical characteristics of each appliance. Environmental specifications describe the temperature and
moisture limits it can withstand. Power specifications describe the electrical range within which the appliance circuitry can operate.
System Specifications
Form Factor: 2-U rack-mountable appliance
Dimensions: 3.38" H x 17.54" W x 26.01" D (8.59 cm H x 44.54 cm W x 66.07 cm D)
Weight: Approximately 60 pounds (27.2 kg)
Ethernet : MGMT, HA, LAN1, LAN2 – auto-sensing 10Base-T/100Base-T/1000Base-TPorts
Serial : DB-9 (9600/8n1, Xon/Xoff)Port
USB : Two USB 2.0/1.1 compliantPorts
Environmental Specifications
Operating Temperature: 50 to 95 degrees F (10 to 35 degrees C)
Storage Temperature: -22 to 140 degrees F (-30 to 60 degrees C)
Operating relative Humidity: 10% to 90% (non-condensing)
Average Heat Dissipation: 1400 BTU (British Thermal Units)/hour
Electrical Power Specifications
DC Power Supply: 48v 1200W GRND TERM, RING, VIN 12-10 AWG #10

Copyright ©2018, Infoblox, Inc.All right reserved.
Nominal Input Voltage: 48
Nominal Input Current: 28
Maximum Rated Input Wattage Rating (Watts): 1350 Maximum
Maximum Rated Volt-Amp: 1350
Heat Output (BTU/hour): 4610 Maximum
AC Power Supply: 100 to 120V AC, 200 to 240 V AC 1200W
Rated Input Frequency: 50 Hz to 60 Hz
Rated Input Current: 10A at 100V AC, 4.9A at 200V AC
Rated Input Power: 930W at 100V AC input, 1348W at 240V AC input
Heat Output (BTU/hour): 3530 at 120V AC input; 4600 at 200V to 240V AC input
Maximum Peak Power: 800 W at 100V AC input; 900 W at 120V AC input; 1200 W at 200V to 240V AC input
Infoblox-4010 Rev-2
The Infoblox-4010 Rev-2 is a 2-U platform that is installed in a seismic equipment rack using mounting rails and materials that ship with each
appliance. For information about rack mounting, see Installing the
.Infoblox-4010/Network Insight ND-4000
The Infoblox-4010 Rev-2 front panel comes with an optional front cover that you can install when you first set up the appliance. Refer to the
installation instructions that ship with each system for information about how to install the front cover.
Note: If you want your Infoblox-4010 Rev-2 appliance to be NEBS Level 3 compliant, do not install the front cover.
Infoblox-4010 Rev-2Figure 6 , Front View
Infoblox-4010 Rev-2 Front Panel
After you remove the front panel cover, front panel components include the hard disk drives and indicator lights.
illustrates front panel components.Figure 7
Figure 7 Infoblox-4010 Rev-2 with Front Panel Cover Removed
describes front panel components for the Infoblox-4010 Rev-2 system.Table 4Table 4 Front Panel Components for Infoblox-4010 Rev-2
Component Description

Copyright ©2018, Infoblox, Inc.All right reserved.
UID LED and Button The unit identification button and LED.
In a rack environment, the UID feature enables easier location of a server when moving between the front and rear of
the rack.
Blue = UID is activated
Dark = UID is deactivated
System Health LED This LED identifies the overall health of the system.
Green = Normal
Amber = System is degraded
Red = System is in critical condition
Power On/ Standby
Button and Power
LED
This LED indicates whether the power is on. Green = System is on
Amber = System is in standby mode
Dark = System has no power supply
Disk Drives Four (4) hot-swappable hard disk drives configured in a RAID (Redundant Array of Independent Disks) 10 array.
Drive LEDs Each disk drive has one Fault/UID LED (green/amber) that indicates the connection of the disk drive, and a circular
Online/Activity LED (green) that goes around the Fault/UID LED to indicate read/write activity status of the disk drive.
VGA Port This port is not supported. Use the console port or LAN1 port for initial setup.
Infoblox-4010 Rev-2 Ethernet Port LEDs
View the Activity and Link LEDs to see link activity and connection speeds on Ethernet ports. describes the status conveyed by EthernetFigure 8
port LEDs through their color and illumination (steady glow or blinking).
Figure 8 Ethernet Port LEDs (inc. SFP+ interfaces where noted)
Infoblox-4010 Rev-2 Disk Drive Front Panel LEDs
Disk drives are located on the appliance front panel. To the right of each drive, two LEDs display connection and activity status. lists theTable 5
disk drive LED combinations and the states they represent.
Table 5 Disk Drive LED Combinations

Copyright ©2018, Infoblox, Inc.All right reserved.
Online/Activity LED (Green) Fault/UID LED (Amber/Blue) Description
Off or circulating green Steady green The drive is operating normally.
Off or circulating green Steady amber The drive has failed, or it has received a predictive failure alert.
Infoblox-4010 Rev-2 Rear Panel
The Infoblox-4010 Rev-2 appliance offers a choice of dual AC power supplies, or dual DC power supplies with or without NEBS-3 compliance. In
all cases, power supplies are hot swappable; any single power supply can be replaced without disrupting the operations of the appliance.
The Infoblox-4010 Rev-2 provides four (4) RJ-45 Gigabit Ethernet interfaces that operate as the MGMT port, LAN1 port, High Availability (HA)
port and LAN2 port in the Infoblox system. The four port assignments are from left to right and reflect standard Infoblox port assignments as
shown in and listed in . Optional system configuration with SFP+ ports is illustrated in .Figure 9 Table 6 Figure 10
Figure 9 Infoblox-4010 Rev-2, Rear View with RJ-45 Gigabit Ethernet Ports
Figure 10 Infoblox-4010 Rev-2, Rear View with Four SFP+ Interfaces
See the following section, for more details on optical interface configuration.Infoblox-4010 Rev-2 Optical Interfaces
Infoblox-4010 Rev-2 Optical Interfaces

Copyright ©2018, Infoblox, Inc.All right reserved.
Infoblox offers a version of the Infoblox-4010 that provides four 1-Gigabit Ethernet (1GbE) interfaces that accept SFP transceiver modules, for
1GbE optical connectivity. Another offered version of the Infoblox-4010 supports four 10-Gigabit Ethernet (10GbE) interfaces that accept SFP+
transceiver modules, for 10GbE optical or copper connectivity.
In select configurations, Infoblox 1GbE SFP or 10GbE SFP+ ports replace the functionality in the original system MGMT, LAN1, HA and LAN2
ports, thereby disabling the original system MGMT, LAN1, HA and LAN2 ports.
10GbE interfaces accept Infoblox-provided SFP+ 10GbE Short Range and Long Range transceivers, Cisco SFP+ Direct Attach 10GSFP+Cu, or
HP HPJ9283B SFP+ Direct Attach 10GSFP+Cu transceivers.
You may mix media types in the set of ports (e.g., two copper interfaces and two fiber interfaces).
SFP and SFP+ transceivers may be used in a mixed configuration in the offered 4-Port 10GbE configuration. One possible use case involves
installing 10GbE SR SFP+ transceivers in the LAN1 and LAN2 ports for the Infoblox-4010 appliance, and installing 1GbE SFP copper
transceivers in the MGMT and HA interfaces.
See the section , for specific information on part numbers, availability, and device compatibility.IB-4000/ND-4000 Series Replaceable Units
Table 6 provides more-specific information on each interface on the rear panel of the Infoblox-4010 Rev-2.
Table 6 Rear Panel Components for Infoblox-4010 Rev-2
Component Description
MGMT Port A port for use with appliance management or DNS service. You can enable the MGMT port and define its use through the
Infoblox GUI.
LAN1 Port A port that connects a NIOS appliance to the network. You must use the LAN1 port to set up the appliance initially. It
handles all traffic if you do not enable the MGMT and LAN2 ports.
HA Port A port through which the active node in an HA (high availability) pair connects to the network using a VIP (virtual IP)
address. HA pair nodes also use their HA ports for VRRP (Virtual Router Redundancy Protocol) advertisements.
LAN2 Port A port that connects a NIOS appliance to the network. The LAN2 port is not enabled by default. You can enable the LAN2
port and define its use through the Infoblox GUI after the initial setup.
Console Port A male DB-9 serial port for a console connection to change basic configuration settings and view basic system functions
through the CLI (command line interface).
Only a properly grounded USB-to-Serial dongle is allowed to connect to the serial console port. If the dongle is connected
to a laptop, this laptop must be grounded properly as well. Failure to do so may result in damage to the serial console port
of the Infoblox appliance. Infoblox is not responsible for such damage. For DB-9 pin assignments, see .Figure 5
iLO/IPMI Port Dedicated Ethernet port used for LOM (integrated Lights Out Management) with specific releases of NIOS. Ensure that the
IPMI port is properly connected to the network before you configure LOM through the Infoblox GUI for remote management.
VGA Port This port is not supported. Use the console port or LAN1 port for initial setup. USB Ports Reserved for future use.
Power Supplies Each of the two redundant power supplies has a power outlet for connecting the appliance to a standard DC (Direct
Current) or AC power source.
Power Supply
LEDs Green = Normal
Off = System is off or power supply has failed.
UID LED Turns on blue to indicate device that is currently being interacted with in the rack. Turned on by pressing the UID button on
the front panel. See .Table 1
Note: All Infoblox Ethernet ports are auto-sensing and automatically adjust to standard straight-through and cross-over Ethernet cables.
Infoblox-4010 Rev-2 Disk Drive Front Panel LEDs
Disk drives are located on the appliance front panel. To the right of each drive, two LEDs display connection and activity status. lists theTable 5
disk drive LED combinations and the states they represent.
Table 7 Disk Drive LED Combinations
Online/Activity LED (Green) Fault/UID LED (Amber/Blue) Description

Copyright ©2018, Infoblox, Inc.All right reserved.
Off or circulating green Steady green The drive is operating normally.
Off or circulating green Steady amber The drive has failed, or it has received a predictive failure alert.
Network Insight ND-4000 Product Overview
The Network Insight ND-4000 is a high performance network appliance that provides an extended device and network discovery feature set, using
SNMP and other protocols to discover, query, and catalogue network devices such as enterprise Ethernet switches, routers, firewalls and other
security devices, VoIP softswitches, load balancers, end host devices and more. For more information about Discovery features and licensing,
refer to the for your product.Infoblox NIOS Administrator Guide
Key features of the Network Insight ND-4000 appliance include the following:
Three (3) active 1GbE Ethernet interfaces: two (2) active interfaces to support Device Discovery features, and one interface (MGMT)
designated for device management. (The HA port is inactive and reserved for future use.)
Management through the Infoblox Grid.
Lights Out Management support.
Replaceable hard disk drives in a RAID-10 array.
Hot-swappable AC or DC power supplies in a redundant 1+1 configuration.
Alternative system configurations for the support of copper or fiber SFP/SFP+ 1GbE and 10GbE interfaces, with support for mixed
copper/fiber configurations.
The Network Insight ND-4000 appliance is a Class A digital appliance per FCC regulations, and is RoHS and WEEE compliant.
Network Insight ND-4000 Hardware Components
The Network Insight ND-4000 is a 2-U device discovery platform that you can mount in a standard equipment rack. For information, see Installing
.the Infoblox-4010/Network Insight ND-4000
Network Insight ND-4000 Front Panel
Front panel components are the same as for the Infoblox-4010 Rev-2 platform. It includes the LCD (liquid crystal display) panel and navigation
buttons, communication ports, and LEDs, as shown in .Figure 6
For Network Insight ND-4000 port configuration, see .Table 8
For explanations of the Ethernet port LEDs, and console and Ethernet port connector pin assignments, see Infoblox-4010 Rev-2 Ethernet Port LE
and .Ds Connector Pin Assignments
Network Insight ND-4000 Rear Panel
The Network Insight ND-4000 appliance offers a choice of dual AC power supplies, or dual DC power supplies with or without NEBS-3
compliance. In all cases, power supplies are hot swappable; any single power supply can be replaced without disrupting the operations of the
appliance.
The Network Insight ND-4000 provides three (3) RJ-45 Gigabit Ethernet interfaces that operate as the MGMT port, LAN1 port and LAN2 port in
the Infoblox system. (The HA port is inactive and cannot be used for networking applications.) The three port assignments are from left to right
and reflect standard Infoblox port assignments as shown in and listed in . illustrates the optional ND-4000 systemFigure 9 Table 6 Figure 12
configuration with SFP ports.
Figure 11 Network Insight ND-4000, Rear View with RJ-45 Gigabit Ethernet Ports

Copyright ©2018, Infoblox, Inc.All right reserved.
Figure 12 Network Insight ND-4000, Rear View with SFP Interfaces
See the following section for more details on optical interface configuration.Network Insight ND-4000 Optical Interfaces
Network Insight ND-4000 Optical Interfaces
Infoblox offers a version of the Network Insight ND-4000 that provides three 1-Gigabit Ethernet (1GbE) interfaces that accept SFP transceiver
modules, for 1GbE optical connectivity. Another offered version of the Network Insight ND-4000 supports three 10-Gigabit Ethernet (10GbE)
interfaces that accept SFP+ transceiver modules, for 10GbE optical or copper connectivity.
In all cases, Network Insight appliances use the LAN1 and LAN2 ports for connectivity to networks for device discovery, and the MGMT port is
reserved for appliance management.
In select configurations, Infoblox 1GbE SFP or 10GbE SFP+ ports replace the functionality in the original system MGMT, LAN1, HA and LAN2
ports, thereby disabling the original system MGMT, LAN1, HA and LAN2 ports.
10GbE interfaces accept Infoblox-provided SFP+ 10GbE Short Range and Long Range transceivers, Cisco SFP+ Direct Attach 10GSFP+Cu, or
HP HPJ9283B SFP+ Direct Attach 10GSFP+Cu transceivers.
You may mix media types in the set of ports (e.g., two copper interfaces and two fiber interfaces).
SFP and SFP+ transceivers also may be used in a mixed configuration in the offered 3-Port 10GbE configuration. One possible use case involves
installing 10GbE SR SFP+ transceivers in the LAN1 and LAN2 ports for the Infoblox-4010 appliance, and installing 1GbE SFP copper
transceivers in the MGMT interface.

Copyright ©2018, Infoblox, Inc.All right reserved.
See the section , for specific information on part numbers, availability, and device compatibility.IB-4000/ND-4000 Series Replaceable Units
provides more-specific information on each interface on the rear panel of the Network Insight ND-4000.Table 8Table 8 Rear Panel Components for the Network Insight ND-4000
Component Description
MGMT Port A port for use with appliance management or DNS service. You can enable the MGMT port and define its use through the
Infoblox GUI.
LAN1 Port A port that connects a NIOS appliance to the network. You must use the LAN1 port to set up the appliance initially. It handles all
traffic if you do not enable the MGMT and LAN2 ports.
HA Port Inactive for Network Insight ND-4000 appliances.
LAN2 Port A port that connects a NIOS appliance to the network. The LAN2 port is not enabled by default. You can enable the LAN2 port
and define its use through the Infoblox GUI after the initial setup.
Console Port A male DB-9 serial port for a console connection to change basic configuration settings and view basic system functions
through the CLI (command line interface).
Only a properly grounded USB-to-Serial dongle is allowed to connect to the serial console port. If the dongle is connected to a
laptop, this laptop must be grounded properly as well. Failure to do so may result in damage to the serial console port of the
Infoblox appliance. Infoblox is not responsible for such damage. For DB-9 pin assignments, see .Figure 5
iLO/IPMI
Port Dedicated Ethernet port used for LOM (integrated Lights Out Management) with specific releases of NIOS. Ensure that the IPMI
port is properly connected to the network before you configure LOM through the Infoblox GUI for remote management.
VGA Port This port is not supported. Use the console port or LAN1 port for initial setup.
USB Ports Reserved for future use.
Power
Supplies Each of the two redundant power supplies has a power outlet for connecting the appliance to a standard DC (Direct Current) or
AC power source.
Power
Supply LEDs Green = Normal
Off = System is off or power supply has failed.
UID LED Turns on blue to indicate device that is currently being interacted with in the rack. Turned on by pressing the UID button on the
front panel. See .Table 1
Note: All Infoblox Ethernet ports are auto-sensing and automatically adjust to standard straight-through and cross-over Ethernet cables.
Infoblox-4010 Rev-2/Network Insight ND-4000 System, Environmental, and Power
Specifications
System specifications describe the physical characteristics of each appliance. Environmental specifications describe the temperature and
moisture limits it can withstand. Power specifications describe the electrical range within which the appliance circuitry can operate.
System Specifications
Form : 2-U rack-mountable applianceFactor
Dimensions: 3.44" H x 17.54" W x 27.5" D (8.75 cm H x 44.55 cm W x 69.85 cm D)
Weight: Approximately 61.00 pounds (27.66 kg)
Ethernet Ports: MGMT, HA, LAN1, LAN2 – auto-sensing 10Base-T/100Base-TX/1000Base-TX
Environmental Specifications
Operating Temperature: 50 to 95 degrees F (10 to 35 degrees C)
Storage Temperature: -22 to 140 degrees F (-30 to 60 degrees C)
Operating relative Humidity: 10% to 90% (non-condensing)
Electrical Power Specifications
DC Power Supply: 48v 750W GRND TERM, RING, VIN 12-10 AWG #10

Copyright ©2018, Infoblox, Inc.All right reserved.
1.
2.
Nominal Input Voltage: 48
Nominal Input Current: 28
Maximum Rated Input Wattage Rating (Watts): 1350 Maximum
Maximum Rated Volt-Amp: 1350
Heat Output (BTU/hour): 4610 Maximum
AC Power Supply: 100 to 120V AC, 200 to 240 V AC 750W
Rated Input Frequency: 50 Hz to 60 Hz
Rated Input Current: 10A at 100V AC, 4.9A at 200V AC
Rated Input Power: 930W at 100V AC input, 1348W at 240V AC input
Heat Output (BTU/hour): 3530 at 100V AC input; 4600 at 200V
Maximum Peak Power: 800 W at 100V AC input; 900 W at 120V AC input; 750 W at 200V to 240V AC input
Installing the Infoblox-4010/Network Insight ND-4000
Note: The Infoblox system must be installed in a four-post seismic rack.
Infoblox appliances ship with mounting rails, side rails, and an accessory kit that contains mounting hardware. To mount the appliance to a
seismic rack, you also need the following:
M5 rack screws that fit the seismic rack
Round-hole M5 cage nuts for use with the seismic rack
A screwdriver
Rack Mounting Safety Requirements
The following space and airflow requirements are required for Infoblox-4010 and Network Insight ND-4000 system operation:
Minimum clearance of 63.5 cm (25 in) in front of the rack
Minimum clearance of 76.2cm (30 in) in the rear of the rack
Minimum clearance of 121.9 cm (48 in) from the back of the rack to the back of another rack or row of racks
The Infoblox appliance draws air in through the front of the chassis and expels air through the rear. Adequate ventilation is required to allow
ambient room air to enter the system chassis and to be expelled from the rear of the chassis.
To mount the appliance to a seismic rack, do the following:
Unscrew the snap-in screws from the mounting rails and discard.
Install the round-hole M5 cage nuts in the appropriate rack hole positions where you want to install the appliance. Ensure that you install
two cage nuts on the front and two on the back of each rail, as shown in . Note that the square-hole cage nuts that ship with theFigure 13
accessory kit do not fit in the seismic rack.
Figure 13 Installing the Round-Hole M5 Cage Nuts
3. Line up a mounting rail with the cage nuts, and attach the mounting rail to the rack with the M5 screws, ensuring that the front end of
each mounting rail connects to the front of the rack.
Note: Ensure that both rail assemblies are correctly level!
4. Repeat steps 1 to 3 for the other mounting rail.

Copyright ©2018, Infoblox, Inc.All right reserved.
5. Slide out the side rails from each mounting rail and press the flange that holds each side rail in place. Then pull out each of the side rails
from the assembly.
Make sure to keep track of the front end of each rail.
6. Align each side rail to the appliance and snap them in place, as shown in .Figure 14
Figure 14 Side Rail Placement
7. With one person on each side, lift the appliance and position it in front of the rack.
8. Align the side rails on each side of the appliance with the mounting rails on the seismic rack.
9. Slide the appliance onto the mounting rails and into the rack. As you slide it into place, the catch mechanisms will click, indicating that
you can safely withdraw the system from the rack without accidentally pulling it free.
10. Snap the Infoblox-4010 appliance into place, and fasten it to the rack using the retainer screws provided in the accessory kit. (For
further information, refer to the instructions shipped with the accessory kit.)
11. Pull down the retention levers on both sides of the appliance, and insert the retainer screws on both sides, as shown in .Figure 15
Figure 15 Pulling Down the Retention Levers on Front Panel for Retainer Screw Installation (Infoblox-4010 Rev-1)
Figure 16 Retention Levers on Front Panel for Retainer Screw Installation (Infoblox-4010 Rev-2/Network Insight ND-4000)

Copyright ©2018, Infoblox, Inc.All right reserved.
1.
2.
3.
4.
5.
1.
2.
Ground Lug Installation (for DC Power Supply only)
To meet grounding and bonding requirements for NEBS compliance, you must install a ground lug on the rear of the chassis. A ground lug nut is
located on the chassis rear of the Rev-1 appliance, as labeled in and on the DC power supply as labeled in of this Guide. TheFigure 3 Figure 25
ground lug, with two star washers, is provided in the accessory kit bundled with the Infoblox appliance. The star washers are used with the ground
lug to ensure a snug fit. To install the ground lug, do the following:
Remove the ground lug nut from the rear of the chassis.
Place one star washer on the lug nut screw, which is part of the chassis.
Place the ground lug on the lug nut screw, followed by the second star washer.
Replace the lug nut screw. Ensure that it is snug.
Plug a (properly grounded) ground cable into the ground lug.
Powering On the Appliance
The Infoblox-4010 and Network Insight ND-4000 ship with two (2) hot-swappable redundant AC power supply modules or two DC power supply
modules. Infoblox recommends using the power cables shipped with the appliance to connect each power supply to separate power circuits. In
the event of a power failure on one circuit, the appliance can then operate on the other.
To power the appliance:
For each power supply, connect a power cable between the power connector on the back of the appliance and a properly grounded and
rated power circuit that meets the provisions of the current edition of the National Electrical Code, or other wiring rules that apply to your
location. Make sure that the outlet is near the appliance and is easily accessible.
Cabling the Appliance to a Network
Use one or more Category 5/6 Ethernet cables to connect the Infoblox-4010 appliance to the network.
Connect an Ethernet cable from the LAN1 port on the Infoblox-4010 to the network switch or router, as indicated in .Figure 17
To connect the Infoblox-4010 appliance for HA (high availability, available only when you have two
Infoblox-4010 appliances for redundant operation), connect the HA ports on both appliances to a switch on your network. The VIP (Virtual IP),
LAN1, and HA port addresses must be on the same subnet and must be unique for that subnet.
Figure 17 Cabling a Single Appliance and an HA Pair to a Network
Note: By default, an Infoblox appliance automatically negotiates the optimal connection speed and transmission type (full or half duplex) on the
physical links between its LAN1, LAN2, HA, and MGMT ports and the Ethernet ports on a connecting switch. If the two appliances fail to
auto-negotiate the optimal settings, see the for steps to resolve the problem.Infoblox NIOS Administrator Guide
The Network Insight ND-4000 appliance does not support HA (high availability).
3. ( ) To ensure that VRRP (Virtual Router Redundancy Protocol) works properly, configure the following settings at theInfoblox-4010 only
port level for all the connecting switch ports (LAN1, LAN2 and HA where applicable):
Spanning Tree Protocol: Disable. For vendor specific information, search for "HA" in the Infoblox Knowledge Base system at http

Copyright ©2018, Infoblox, Inc.All right reserved.
s://support.infoblox.com/
Trunking: Disable
EtherChannel: Disable
IGMP Snooping: Disable
Port Channeling: Disable
Speed and Duplex settings: Match these settings on both the Infoblox appliance and switch
Disable other dynamic and proprietary protocols that might interrupt the forwarding of packets
4. Use the Infoblox GUI to access the Infoblox appliance from a management system. Through the Infoblox GUI, you can set up and
administer the appliance. For management system requirements and access instructions, see .Accessing the Appliance
Accessing the Appliance
The management system is a computer from which you configure and monitor the Infoblox appliance. You can remotely access the appliance
from the management system across an Ethernet network, or directly through a serial cable. After completing the steps in Cabling the Appliance t
start an HTTPS connection to the appliance and access the Infoblox GUI using one of the supported browsers.,o a Network
Alternatively, start an SSHv2 connection and access the CLI through an SSHv2 client. You can also access the CLI by connecting a serial cable
directly from the console port of a management system to the console port on the appliance, and then using a terminal emulation program. The
management system must meet the following requirements to operate an Infoblox appliance.
Table 9 Software and Hardware Requirements for the Management System
Management System Software Requirements Management System Hardware Requirements
Infoblox GUI Access
Microsoft Windows 8®: Microsoft Internet Explorer® 10.x*; Mozilla
Firefox 21.x, 16.x, and 10.x; Google Chrome 27.x, 22.x, and 16.x
Microsoft Windows 7®: Microsoft® Internet Explorer® 8.x and 9.x,
Mozilla Firefox 7.x, 8.x and 16.x or Google Chrome 10.x, 16.x and 22.x
Microsoft Windows XP® (SP2+): Microsoft Internet Explorer® 7.x and
8.x, Mozilla Firefox 3.6.x, 7.x, 10.x and 16.x, or Google Chrome 10.x,
16.x and 22.x
Red Hat® Enterprise Linux® 6.x: Mozilla Firefox 7.x, 10.x and 16.x or
Google Chrome 10.x, 16.x and 22.x
Red Hat® Enterprise Linux® 5.x: Mozilla Firefox 7.x, 10.x and 16.x or
Google Chrome 10.x, 16.x and 22.x
Apple Mac OS® X 10.7.x: Safari 5.x, Mozilla Firefox 7.x, 10.x and 16.x or
Google Chrome 10.x, 16.x and 22.x
Apple Mac OS® X 10.6.x: Safari 5.x, Mozilla Firefox 7.x, 10.x and 16.x or
Google Chrome 10.x, 16.x and 22.x
CLI Access
Secure Socket Shell (SSH) client that supports SSHv2
Terminal emulation program.
Minimum System:
500 MHz CPU with 256 MB RAM
available to the Infoblox GUI, and 256 Kbps connectivity
to an Infoblox appliance
Recommended System:
1 GHz (or higher) CPU with 512 MB RAM available for
the Infoblox GUI, and network connectivity to an Infoblox
appliance
Monitor Resolution: Minimum: 1024 x 768
Recommended: 1280 x 800 or better
Connecting to the Appliance
Configuration of the Infoblox-4010 appliance, through the Infoblox GUI, requires a network connection. Use the LAN1 port to connect to the
appliance. For all Infoblox-4010 systems, the default network settings of the LAN1 port are 192.168.1.2/24 with a gateway at 192.168.1.1 (the HA,
MGMT, and LAN2 ports do not have default network settings). To change these settings to suit your network, use the console port.
Console Port
The Infoblox appliance has a male DB-9 console port on the rear panel. You can log in to the appliance through this port and specify initial
network settings using the Infoblox CLI.
Note: Only a properly grounded USB-to-Serial dongle is allowed to connect to the serial console port. If the dongle is connected to a laptop, this

Copyright ©2018, Infoblox, Inc.All right reserved.
1.
2.
3.
4.
1.
2.
3.
laptop must be grounded properly as well. Failure to do so may result in damage to the serial console port of the Infoblox appliance. Infoblox is
not responsible for such damage.
Connect a console cable from the console port of the management system to the console port of the Infoblox appliance.
Using a serial terminal emulation program such as Hilgraeve Hyperterminal® (provided with Windows® operating systems), launch a
session. The connection settings are:
Bits per second: 9600
Stop bits: 1
Data bits: 8
Flow control: Xon/Xoff
Parity: None
Log in using the default user name and password and . User names and passwords are case-sensitive.admin infoblox
To change the network settings from the default, enter the command. Then enter information as prompted to change the IPset network
address, netmask, and gateway for the LAN1 port.
Infoblox > set network
NOTICE: All HA configuration is performed from the GUI. This interface is used only to
configure a standalone node or to join a grid.
Enter IP address: IP addressLAN1 port
Enter netmask: [Default: 255.255.255.0]: netmask
Enter gateway address [Default: n.n.n.1]: gateway IP address
Become grid member? (y or n): n
After you confirm your network settings, the appliance automatically restarts.
Auto Provisioning NIOS Appliances
In addition to using the Grid Setup Wizard or access the Join Grid dialog box to join appliances to a Grid, you can set up a NIOS appliance using
the auto provision feature, which allows a DHCP server to automatically assign an IP address to the appliance. You can then join the
auto-provisioned appliance to a Grid.
Auto-provisioning is enabled by default for physical appliances, but it is not supported for vNIOS appliances. When you connect the appliance to
the network, a lease request is automatically sent to the DHCP server. The DHCP server fingerprints the client as "Infoblox Appliance", as the
DHCP client provides the unique option sequence (1,28,2,2,3,3,15,6,12) and vendor ID (INFOBLOX). The DHCP server assigns a DHCP lease
and a dynamic IP address to the appliance. If the DHCP lease request fails, the default IP address is assigned to the appliance. The DHCP client
tries to send the lease request for a duration of one minute when the appliance is either in the factory default state or in the auto-configured
default IP address state after a reboot. If you do not use auto-provisioning to set up the appliance, then you can wait one minute before
connecting the appliance to the network. Otherwise, the DHCP server will assign a dynamic IP address to the appliance. Note that if you have
already set the IP address for the appliance through the Infoblox CLI, GUI, or API, then auto-provisioning is disabled for the appliance and the
lease address is not requested. When auto-provisioning is enabled for an appliance, the DNS, DHCP, FTP, TFTP, HTTP, NTP, bloxTools,
Captive Portal, Reporting services, as well as backup and restore are disabled for the member until a static IP address is set for the appliance.
You can join a single appliance or HA pair to the Grid. After the appliance joins the Grid, the static IP address is set for the appliance.
Complete the following to set up an appliance using auto-provisioning and to join the auto-provisioned appliance to the Grid Master:
Connect the appliance to a network by using an Ethernet cable. For information about cabling the appliance to a network, refer Cabling th
.e Appliance to a Network
Connect the appliance to a power source and turn on the power. For information about powering the appliance, refer Powering On the
.Appliance
A lease request is automatically sent to the DHCP server, and it assigns a DHCP lease and a dynamic IP address to the appliance. The
DHCP client tries to send the lease request for a duration of one minute and if the request fails, the default IP address (192.168.1.2) is
assigned to the appliance.
Join the appliance to the Grid Master. For information about joining an appliance to the Grid Master, refer to the NIOS Administrator Guid
.e
A static IP address is set and auto-provisioning is automatically disabled for the appliance after it joins the Grid. If the Grid member fails to
join the Grid, then the remote console is enabled for the appliance and you can join the appliance to the Grid through the remote console.
You can login to the remote console using the user name, and the Grid shared secret as the password.admin
Note: When auto-provisioning is disabled for an appliance and the network address is not preserved, auto-provisioning will be re-enabled and a
DHCP lease request is sent to the DHCP server if you reset the appliance using the CLI command or reset the database using thereset all
CLI command . However, if the static IP address for an appliance is set and network settings are preserved, auto-provisioningreset database
will be re-enabled for the appliance but the lease address will not be requested if you reset the database using the CLI command reset
.database
This manual suits for next models
1
Table of contents
Other Infoblox Server manuals
Popular Server manuals by other brands
Supero
Supero SUPERSERVER 1026T-URF user manual
Lenovo
Lenovo ThinkServer TD230 warranty and support information
Asus
Asus TS300-E3 PS4 user manual
HP
HP NetServer E60 Installation road map
Dell
Dell EMC ScaleIO Ready Node 14G Inspection Guide
Moxa Technologies
Moxa Technologies NPort IA5150 series Quick installation guide
