manuals.online logo
Brands
  1. Home
  2. •
  3. Brands
  4. •
  5. InFocus
  6. •
  7. Projector
  8. •
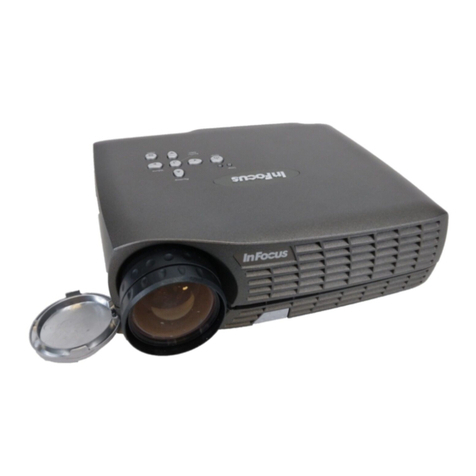
  9. InFocus LP755 Operating instructions

InFocus LP755 Operating instructions

37
MAINTENANCE & TROUBLESHOOTING
This section describes how to:
•clean the lens
•clean the fan intake filter
•replace the projection lamp
•replace the batteries in the remote control
•use the Kensington lock feature
•troubleshoot the projector
Cleaning the Lens
Follow these steps to clean the projection lens:
1Apply a non-abrasive camera lens cleaner to a soft, dry cloth.
•Avoid using an excessive amount of cleaner and applying
the cleaner directly to the lens.
•Abrasive cleaners, solvents or other harsh chemicals might
scratch the lens.
2Lightly wipe the cleaning cloth over the lens.
3If you don’t intend to use the projector immediately, replace
the lens cap.
Cleaning the Fan Intake Filter
The fan intake filter on the bottom of the projector catches dust
and particles in the air. If the filter becomes clogged, the projector
does not cool properly and may malfunction. To prevent this,
clean the filter after every 100 hours of use.
1Turn off the projector and unplug the power cord.
2Remove the lamp door.
•Remove the screw on the outside of the lamp door
(Figure 27).
•Pull the lamp door up and remove it.
38
Maintenance & Troubleshooting
F
IGURE 27
Removing the lamp and filter doors
3Using a screwdriver or your hand, push the tab on the filter
door forward and lift the door out.
4Clean the filter.
•Use a vacuum cleaner set on low power to remove the dust
and dirt.
FIGURE 28
Cleaning the air filter
5Replace the filter.
•First, insert the side with the tabs, then press the other end
in place.
39
Replacing the Projection Lamp
WARNING: To avoid burns,
allow the projector to cool for at
least 30 minutes before you open
the lamp module door. Never
extract the lamp module while the
lamp is operating.
The lamp hour counter in the Status menu counts the number of
hours the lamp has been in use. After 3000 hours of use, the lamp
monitor LED, marked on the top of the projector near the
keypad, lights yellow. For optimum results, the lamp should be
replaced at this time. You can order new lamp modules from your
InFocus dealer. See “Accessories” on page 51 for information.
Follow these steps to replace the projection lamp:
1Turn off the projector and unplug the power cord.
2Wait 30 minutes to allow it to cool thoroughly.
3Using a small, flat-blade screwdriver, loosen the screw on the
outside of the lamp door (Figure 29).
4Pull the lamp door up and remove it.
FIGURE 29
Removing the lamp module door
5Loosen the two non-removable screws on the outside of the
module (Figure 30).
6Remove the module by grasping its handle and pulling it out
of the projector (Figure 30).
40
Maintenance & Troubleshooting
F
IGURE 30
Removing the lamp module
WARNING: Do not drop the
lamp module or touch the glass
bulb! The glass may shatter and
cause injury.
7Align the new lamp module in the correct direction.
8Gently push the module in as far as it goes.
9Tighten the screws on the outside of the module.
10 Reposition the lamp door.
11 Tighten the lamp door screw.
12 Plug in the power cord and turn the projector back on. The
lamp monitor light and lamp hour counter in the Status menu
are automatically reset.
41
Replacing the Batteries in the Remote Control
The life of the batteries depends on how often and how long you
use the remote. Symptoms of low battery charge include erratic
responses when using the remote and a reduced range of opera-
tion.
Follow these steps to replace the batteries:
1Turn the remote face down in your hand.
2Slide the battery cover off the end of the remote by pressing
on it with the heel of your hand.
3Remove the old batteries.
4Install two new AA alkaline batteries. Make sure you install
each in the correct direction.
5Slide the battery cover back on the remote.
Using the Kensington Lock
The projector has a Kensington Security Standard connector for
use with a Kensington MicroSaver Security System (Figure 31).
Refer to the information that came with the Kensington System
for instructions on how to use it to secure the projector.
FIGURE 31
Installing the Kensington lock
42
Maintenance & Troubleshooting
Troubleshooting
If you’re experiencing trouble with the projector, follow these
steps to make sure everything is properly connected before you
call Technical Support for assistance.
1Check cable connections. Verify that all computer, CableWiz-
ard and power cables are properly connected.
2Verify that all power is switched on.
3Verify that the projector is not in standby (the Standby LED on
the keypad is lit when the projector is in standby).
4If the projector still doesn’t display an image, restart the com-
puter.
NOTE: Macintosh computers
require a specific power-up
sequence: the projector must be
turned on before you turn on the
computer.
5If the problem still exists, unplug the cable from the computer
and check the computer monitor’s display. The maximum res-
olution that the projector can display is 1280x1024 pixels, pref-
erably 1024x768. The problem might be with the graphics
controller in your computer rather than with the projector.
When you reconnect the projector, remember to turn the com-
puter and monitor off before you power up the projector.
Power the equipment back up in this order: projector, monitor,
computer.
6If you’re using a laptop computer and it is not displaying your
presentation, make sure you have activated the computer’s
external video output. Most laptop computers do not auto-
matically turn on their external video port when a secondary
display device such as a projector is connected. Refer to
page 53 for more information.
7If the problem still exists, read through the problems and solu-
tions in this chapter.
43
Solutions to Common Problems
Problem: Nothing on projection screen
•Make sure that the power cord is properly connected to a func-
tional AC electrical outlet. Make sure that the power cord is
also properly connected to the projector and the green Power
LED is lit.
•If the projector is plugged into a power strip, make sure the
power strip is turned on.
•Make sure you have removed the lens cap from the projection
lens at the front of the projector.
•Make sure the projector is turned on.
•Check the projector’s lamp to ensure that it is securely con-
nected in the lamp module. See “Replacing the Projection
Lamp” on page 39.
•Make sure that the CableWizard and the cables do not have any
bent pins. Check the power cord for bent pins also.
Problem: Color or text not being projected
•You might need to adjust the brightness up or down until the
text is visible. Refer to “Brightness + or -” on page 22 for more
information.
•Verify that the appropriate input source is selected. See “Com-
puter” on page 22 or “Video” on page 23.
Problem: The screen resolution is not right
•Make sure the computer’s graphics card is set for a resolution
of no greater than 1280x1024.
Problem: Image isn’t centered on the screen
•Reposition the image. Refer to “Horizontal position” on
page 30 and “Vertical position” on page 30.
•If you’re using an extension cable between the CableWizard
and the projector, make sure it’s InFocus-approved.
44
Maintenance & Troubleshooting
Problem: Only the start-up screen displays
•Verify that the cables are connected correctly. Check to see that
the CableWizard computer cable is correctly connected to the
monitor connector on the computer (this is the connector
where your monitor cable usually goes.) See page 6 for connec-
tion procedures.
•Verify that the proper input source is connected. See “Com-
puter” on page 22 or “Video” on page 23.
•You might need to turn everything off and power up the equip-
ment again. Make sure you power up in this order: projector,
computer monitor, computer. It is especially important that
you follow this sequence for Macintosh computers.
•Make sure your computer’s graphics board is installed and
configured correctly.
If you’re using Windows 3.x:
1In the Windows Program Manager, double-click the Win-
dows Setup icon in the Main program group.
2Verify that the Display setting is 1280x1024 or less.
If you’re using Windows 95 or Windows 98:
1Open “My Computer” icon, the Control Panel folder and
then the Display icon.
2Click the Settings tab.
3Verify that the Desktop area is set to 1280x1024 or less.
Also check the following:
•Does your computer have a compatible graphics board? The
projector isn’t CGA or EGA compatible.
•Is your computer’s graphics board turned on? This is espe-
cially true for laptop computers. See “Portable and Laptop
Activation Chart” on page 53.
45
Problem: Image is too wide or narrow for screen
•You might need to manually adjust the tracking to reduce or
enlarge the projected image. Refer to “Manual Tracking” on
page 30.
•Adjust the resolution of your monitor if it’s greater than
1280x1024. Only this resolution at 75 Hz or less will display on
the projector.
Problem: Image is out of focus
•Turn the projection lens to focus the image.
•Make sure the projection screen is at least 4 feet (1.2m) from the
projector.
•Make sure the projector is turned off, then check the projection
lens to see if it needs cleaning.
Problem: Image and menus are reversed left to right
•Rear projection mode is probably turned on. Switch back to for-
ward projection from the Controls menu. The image should
immediately return to forward projection. See “Rear Projec-
tion” on page 32.
Problem: Image and menus are upside down
•Ceiling mode is probably turned on. Turn off the mode from
the Controls menu. The image should immediately return to
forward projection. See “Ceiling Projection” on page 32.
Problem: the projector displays vertical lines, “bleeding” or spots
•Adjust the brightness. See “Brightness + or -” on page 22.
•Make sure the projector is turned off, then check the projection
lens to see if it needs cleaning.
Problem: no sound
•Press the mute button.
•Adjust volume.
•Verify audio/input connections.
•Adjust audio source.
46
Maintenance & Troubleshooting
Problem: Image is “noisy” or streaked
Try these steps in this order.
1Deactivate the screen saver on your computer.
2Turn Auto Image off and then back on again. See “Auto
Image” on page 29.
3Adjust the synchronization and tracking manually to find an
optimal setting. See “Manual Sync” on page 29 and “Manual
Tracking” on page 30.
•If you’re using an extension cable between the CableWizard
and the projector, make sure it’s InFocus-approved.
•The problem could be with your computer’s graphics board. If
possible, connect a different computer.
Problem: Projected colors don’t match the computer or video
player’s colors
•Adjust the brightness, tint and/or contrast from the Display
menu. Just as there are differences in the displays of different
monitors, there are often differences between the computer
image and the projected image. See “Brightness + or -” on
page 22, “Tint” on page 25, and “Contrast” on page 25.
Problem: Lamp seems to be getting dimmer
•The lamp begins to lose brightness when it has been in use for a
long time. Replace the lamp as described in “Replacing the Pro-
jection Lamp” on page 39.
Problem: Lamp shuts off
•A minor power surge may cause the lamp to shut off. Turn the
projector off, wait at least 30 seconds, then turn it back on.
Problem: Remote not operating correctly
•You might need to replace the batteries. See “Replacing the Bat-
teries in the Remote Control” on page 41.
•Make sure you’re pointing the remote at the top of the projec-
tor, or at the projection screen.
•Make sure the remote is within its operating range of 25 feet.
47
Before calling your dealer or InFocus Technical Support for assis-
tance, please have the following information available:
•the projector’s serial number (located on the bottom label)
•the resolution of your computer.
Call InFocus Technical Support at 1-800-799-9911.Support is free
between 6 a.m. and 6 p.m. PST, Monday through Friday. Support
is available in North America after hours and on weekends for a
fee at 1-888-592-6800.
Or, send us an e-mail at [email protected]
In Europe, call InFocus in The Netherlands at (31) 35-6474010.
In Asia, call (65) 332-0659.

Other manuals for LP755

3

Other InFocus Projector manuals

InFocus IN126x User manual

InFocus

InFocus IN126x User manual

InFocus IN5533 User manual

InFocus

InFocus IN5533 User manual

InFocus SP777 Use and care manual

InFocus

InFocus SP777 Use and care manual

InFocus IN2136 User manual

InFocus

InFocus IN2136 User manual

InFocus LP 240 User manual

InFocus

InFocus LP 240 User manual

InFocus IN5314 User manual

InFocus

InFocus IN5314 User manual

InFocus IN42 Guide

InFocus

InFocus IN42 Guide

InFocus LP 750 LiteMount Operating instructions

InFocus

InFocus LP 750 LiteMount Operating instructions

InFocus Quantum Laser Superior Series User manual

InFocus

InFocus Quantum Laser Superior Series User manual

InFocus Work Big IN1100 User manual

InFocus

InFocus Work Big IN1100 User manual

InFocus X16 User manual

InFocus

InFocus X16 User manual

InFocus LP330 User manual

InFocus

InFocus LP330 User manual

InFocus IN5542 User manual

InFocus

InFocus IN5542 User manual

InFocus LP 850 User manual

InFocus

InFocus LP 850 User manual

InFocus A4 User manual

InFocus

InFocus A4 User manual

InFocus SP4805 Specification sheet

InFocus

InFocus SP4805 Specification sheet

InFocus LP 850 User manual

InFocus

InFocus LP 850 User manual

InFocus in2100 Series User manual

InFocus

InFocus in2100 Series User manual

InFocus LP 120 User manual

InFocus

InFocus LP 120 User manual

InFocus CEILING MOUNT LP 1000 SERIES User manual

InFocus

InFocus CEILING MOUNT LP 1000 SERIES User manual

InFocus X1 Configuration guide

InFocus

InFocus X1 Configuration guide

InFocus IN5124 User manual

InFocus

InFocus IN5124 User manual

InFocus Learn Big XS1 User manual

InFocus

InFocus Learn Big XS1 User manual

InFocus LP260 User manual

InFocus

InFocus LP260 User manual

Popular Projector manuals by other brands

Dukane 8933WC user manual

Dukane

Dukane 8933WC user manual

Acer SL 700S user guide

Acer

Acer SL 700S user guide

Hitachi CP-EX400 user manual

Hitachi

Hitachi CP-EX400 user manual

Sanyo PLC-XU305A - 3000 manual

Sanyo

Sanyo PLC-XU305A - 3000 manual

Optoma PRO160S Specifications

Optoma

Optoma PRO160S Specifications

Sony VPL-SX536 Service parts

Sony

Sony VPL-SX536 Service parts

Optoma TW695UT-3D datasheet

Optoma

Optoma TW695UT-3D datasheet

Acer H9500 Series user guide

Acer

Acer H9500 Series user guide

Hitachi MC-CW301 user manual

Hitachi

Hitachi MC-CW301 user manual

Digital Projection E-Vision Laser 7500 Series user manual

Digital Projection

Digital Projection E-Vision Laser 7500 Series user manual

Vivitek DU6871 user manual

Vivitek

Vivitek DU6871 user manual

Panasonic DLP PT-FRZ60 Operating instructions (functional manual)

Panasonic

Panasonic DLP PT-FRZ60 Operating instructions (functional manual)

Mitsubishi Electric UD8400U specification

Mitsubishi Electric

Mitsubishi Electric UD8400U specification

RCA RPJ300 COMBO-BLK instruction manual

RCA

RCA RPJ300 COMBO-BLK instruction manual

Optoma DX606i Specifications

Optoma

Optoma DX606i Specifications

Salora BEAMER 51BFM3850 instruction manual

Salora

Salora BEAMER 51BFM3850 instruction manual

Optoma DX626 Specifications

Optoma

Optoma DX626 Specifications

Sony VPL-VW760ES operating instructions

Sony

Sony VPL-VW760ES operating instructions

manuals.online logo
manuals.online logoBrands
  • About & Mission
  • Contact us
  • Privacy Policy
  • Terms and Conditions

Copyright 2025 Manuals.Online. All Rights Reserved.